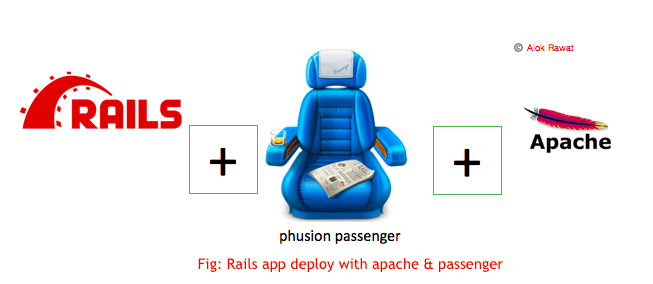
As the title describes that we are going to learn, how to configure our RubyOn Rails app with Apache & Passenger on centOS.
I have spent a lot of time to read many articles but I was not satisfied. So, I decided to share my experience with you and I hope it will help you.
If you are a beginner and do not know how to configure apache and passenger, then you are a right place. I am also doing this configuration very first time. So do not need to worry, after reading this article you can be able to configure your application.
You all are master's in RubyOnRails, so let's start with the basic understanding of Apache and passenger.
If any information is incorrect or not suitable then please share correct information with me.
What is Apache:
Apache Web Server is an open-source web server creation, deployment, and management software. Initially developed by a group of software programmers, it is now maintained by the Apache Software Foundation.

What is Passenger:
Phusion Passenger is an open source web application server. It handles HTTP requests, manages processes and resources, and enables administration, monitoring, and problem diagnosis.
A passenger is very easy to use, makes deploying in production much easier and is scalable.

Before beginning, let’s check the hostname:
run the below command
hostname
hostname -f
(The first command should show your short hostname, and the second should show your Fully Qualified Domain Name (FQDN)).
Step 1— Install Ruby with RVM
NOTE: Do not install by the root user, better to install other users and that user should have a sudo rights
Before we do anything else, we should run a quick update to make sure that all of the packages we download are up to date:
sudo yum update
There may be possibilities that yum not install i your PC then follow the below steps:
Step 1
sudo apt-get update -y
Step 2
sudo apt-get install -y yum
If you encountered with below error,
your_userName is not in the sudoers file. This event will be recorded and reported.
Below is the solution.
login by the root user, then open the /etc/sudoers file,
Uncomment to allow members of group wheel to execute any command
%wheel ALL=(ALL) ALL
it’s done.
then exit from the root user, now again try to update.
sudo yum update
Once that's done, we can start installing RVM, Ruby Version Manager.
If you do not have curl on your system, you can start by installing it:
sudo yum install curl
To install RVM, open terminal and type this command:
curl -sSL https://get.rvm.io | sudo bash -s stable
If an error stating "GPG signature verification failed" appears, the on-screen instructions should describe retrieving and installing the RVM signature key. For example:
gpg --keyserver hkp://keys.gnupg.net --recv-keys 409B6B1796C275462A1703113804BB82D39DC0E3
RVM can be started by loading the RVM environment for the current session.
source /etc/profile.d/rvm.sh
Step 2—Install Ruby
Once you are using RVM, installing Ruby is easy.
rvm install 2.4.1
Ruby is now installed. However, since we accessed it through a program that has a variety of Ruby versions, we need to tell the system to use 2.4.1 by default.
rvm use 2.4.1 --default
To view which versions of Ruby are currently installed through RVM.
rvm list
Install Bundler
A bundler is a popular tool for managing application gem dependencies. We will use Bundler in this tutorial, so let's install it:
$ gem install bundler --no-rdoc --no-ri
Optional: install Node.js if you're using Rails
sudo yum install -y epel-release
sudo yum install -y --enablerepo=epel nodejs npm
Step 3—Install RubyGems
The next step makes sure that we have all the required components of Ruby on Rails. We can continue to use RVM to install gems; type this line into terminal.
rvm rubygems current
Step 4—Install Rails
Once everything is set up, it is time to install Rails. To start, open terminal and type in:
gem install rails
Step 5—Install apache
You have to log in with root user.
Installation instructions for required software
- To install Apache 2:
yum install httpd
- To install Apache 2 development headers:
yum install httpd-devel
- To install Apache Portable Runtime (APR) development headers:
yum install apr-devel
- To install Apache Portable Runtime Utility (APU) development headers:
yum install apr-util-devel
now apache installed successfully.
Step 6—Install passenger
NOTE: DO NOT INSTALL WITH root user.
Install the Passenger gem with:
gem install passenger --no-rdoc --no-ri
The --no-rdoc --no-ri argument isn't really necessary, but it makes installation faster by skipping a generation of API documentation.
Run the Passenger Apache module installer and follow the on-screen instructions:
passenger-install-apache2-module
At the end of the installation process, you will be asked to copy and paste a configuration snippet (containing LoadModule, PassengerRoot, etc.) into your Apache configuration file.
LoadModule passenger_module /home/myuser/.rvm/gems/ruby-2.4.1/gems/passenger-5.3.1/buildout/apache2/mod_passenger.so
  <IfModule mod_passenger.c>
    PassengerRoot /home/myuser/.rvm/gems/ruby-2.4.1/gems/passenger-5.3.1
    PassengerDefaultRuby /home/myuser/.rvm/gems/ruby-2.4.1/wrappers/ruby
  </IfModule>
Step 7—enable and start the httpd
Enable Apache to start at boot, and restart the service for the above changes to take effect:
sudo systemctl enable httpd.service
sudo systemctl restart httpd.service
Step 8—configure the app on httpd.conf
to edit the httpd.conf file, you have to log in with root user.
your httpd file will be on below path.
/etc/httpd/conf
now open,
vi httpd.conf
do below some changes in this file.
user <your_username>
ServerName <your_id>:80

<VirtualHost *:80>
ServerName http://aws.amazon.com/amazon-linux-ami/
# !!! Be sure to point DocumentRoot to 'public'!
    RackEnv development
    RailsEnv development
    DocumentRoot /var/www/yourapp/current/public
    <Directory /var/www/yourapp/current/public>
        # This relaxes Apache security settings.
        AllowOverride all
        # MultiViews must be turned off.
        Options -MultiViews
        Order allow,deny
        Allow from all
        #Require all granted
        Options Indexes ExecCGI FollowSymLinks
       </Directory>
#    ServerAdmin webmaster@dummy-host.example.com
#    DocumentRoot /www/docs/dummy-host.example.com
#    ServerName dummy-host.example.com
#    ErrorLog logs/dummy-host.example.com-error_log
#    CustomLog logs/dummy-host.example.com-access_log common
</VirtualHost>
save this file. (press esc -> : -> wq -> enter.)
NOTE: Here I assumed that you already deployed your app by using Capistrano.
Step 9—restart the httpd service
sudo systemctl restart httpd.service
or
service httpd start
Step 10—add port in firewall

Configure firewalld to Allow Web Traffic
sudo firewall-cmd --add-service=http --permanent && sudo firewall-cmd --add-service=https --permanent
sudo systemctl restart firewalld
(it will work only for port 80)
if you are going to setup your app on a different port then use below command.
firewall-cmd --permanent --zone=public --add-port=<your_port>/tcp
firewall-cmd --reload
It is done. Now go to your browser and open your app.

Troubleshooting


1. If you encountered an error then please check the error log on below path.
/etc/httpd/logs
run below command, to check the error:
tail -f error_log
2. if there is a bundler error, then try this one.
go to your deployed directory(on centOS) and run below command:
  gem list
  gem install bundler
  bundle install
It should be work.

Have a good day!
Enjoy coding.![]()
![]()
Thanks,