Before you proceed...
We want to start writing code and deploying our Microservices to Amazon Web Services. So you will need to have a few things prepared.
Step1: Have a Source Control system ready. The easiest way of having a source control system is to sign up with GitHub at https://github.com with a free account.
Step2: Install .NET Core SDK. It can be any .NET Core SDK as long as it is not .Net Core 3.0 or 3.1
Install Visual Studio 2017 or higher
Step3: Create a free account at AWS ( https://aws.amazon.com/free ). You will need this account to deploy your Microservices.
If you did not reach out Part-1 then please go through the below link.
(Introduction about the Microservices architecture and Monolithic application/architecture and problems.)
An Introduction of a Microservices with ASP.net core 3x(Part-1)
https://qiita.com/alokrawat050/items/66a512dc840827107260
In this part, we will do the sign-up, confirm the email, and will play with AWS settings.
Let's Create a project file and will do AWS Cognito setting part:
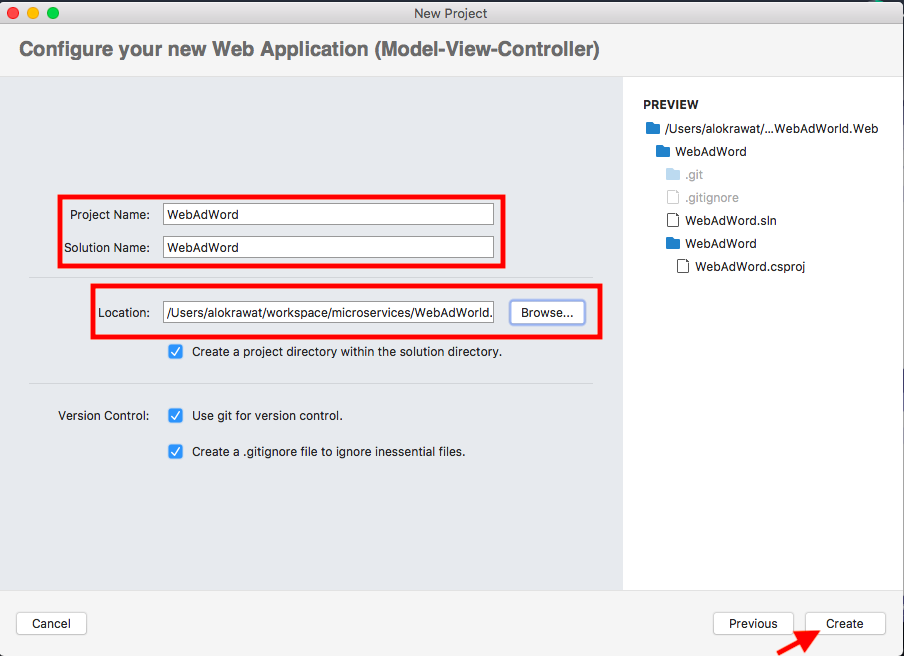
Step 1: Open you vs code and create a .net core application.

<:-------------------------------------------**1**-----------------------------------------:>
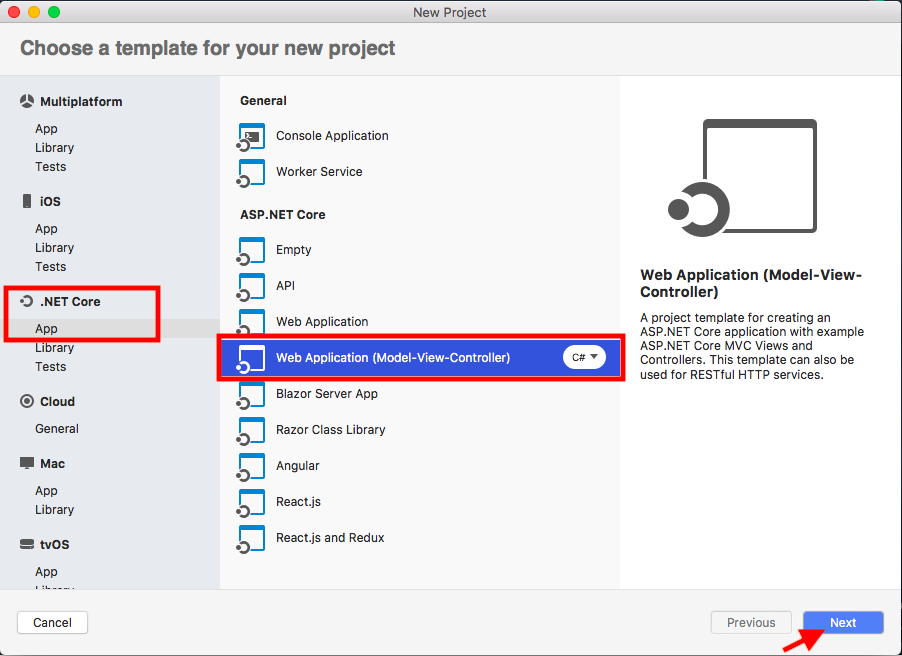
<:-------------------------------------------**2**-----------------------------------------:>
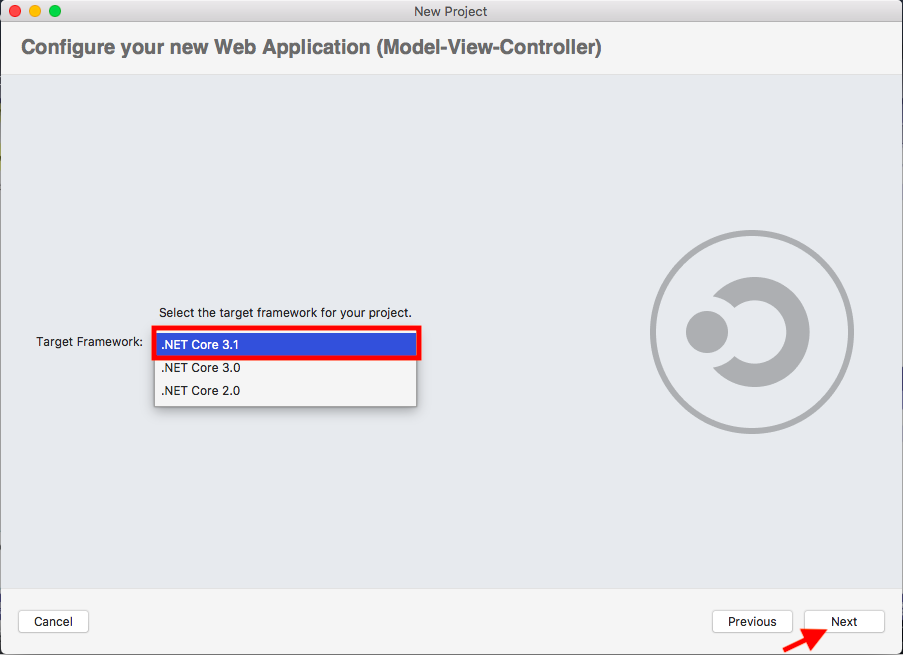
<:-------------------------------------------**3**-----------------------------------------:>
Step 2: Add a few AWS Packages in the project
Go to the "Project" -> "Manage NuGet Pacakges..."

then search "Amazon.AspNetCore.Identity.Cognito"
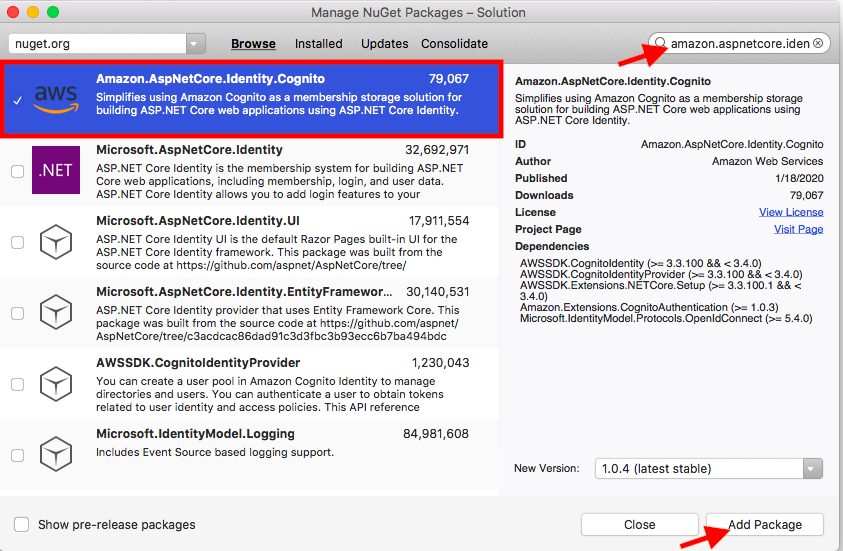
then search "Amazon.Extensions.CognitoAuthentication"

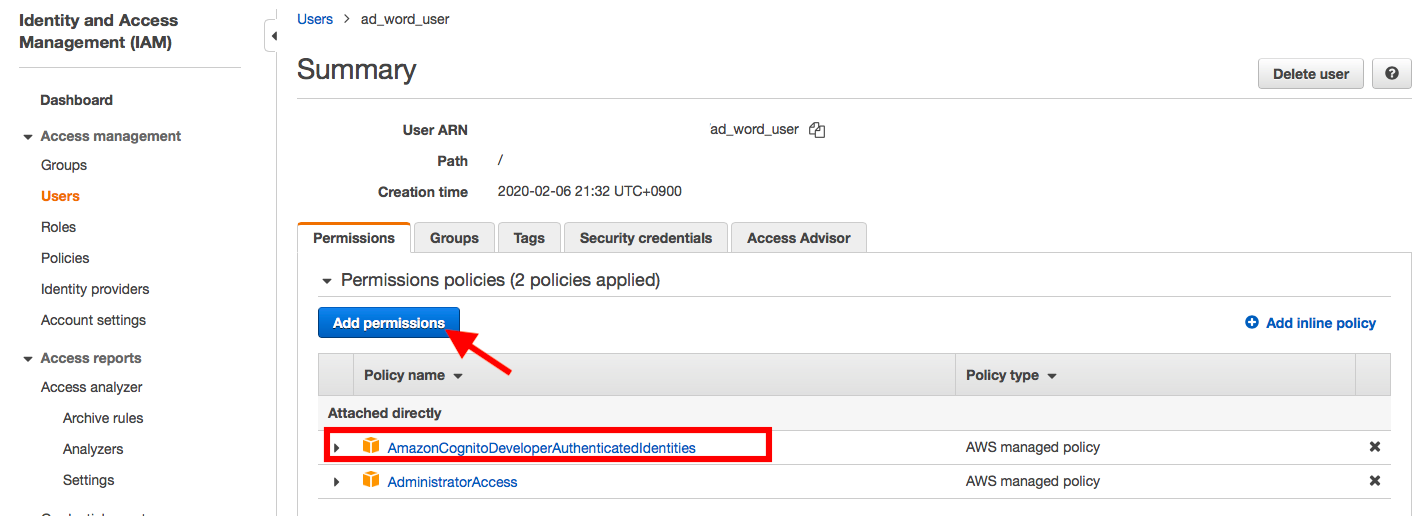
Step 3: Create a new User in AWS
here I already created a new user called "ad_word_user"

<:-------------------------------------------**1**-----------------------------------------:>

<:-------------------------------------------**2**-----------------------------------------:>

now set a new permission, AmazonCognitoDeveloperAuthenticatedIdentities
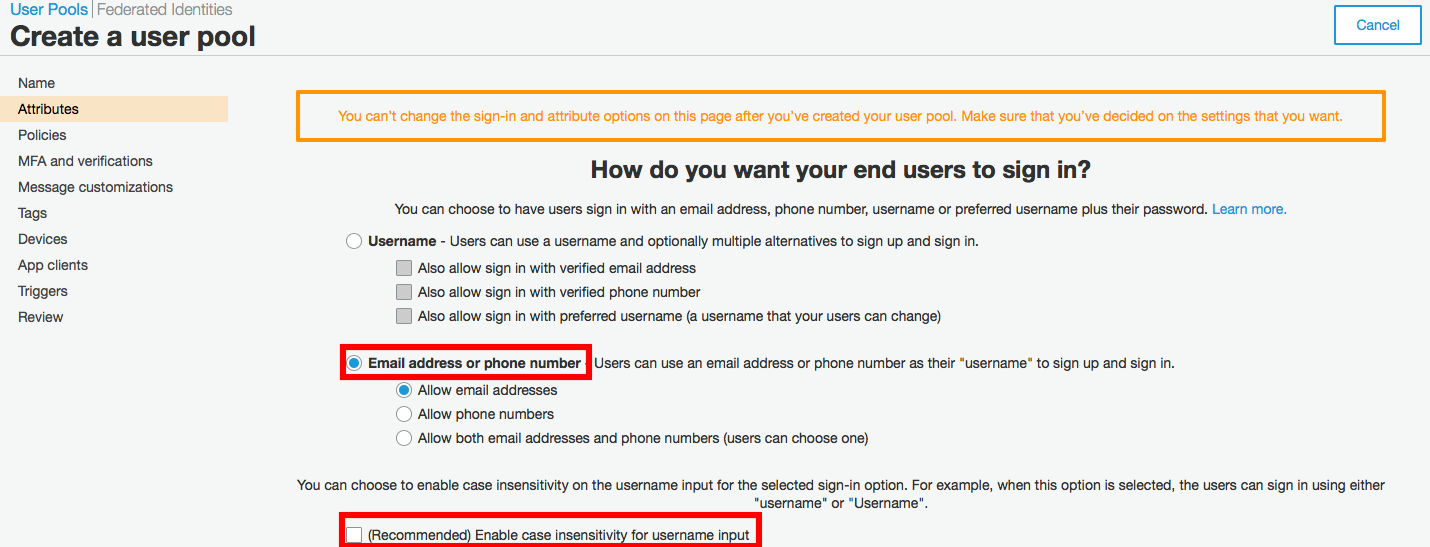
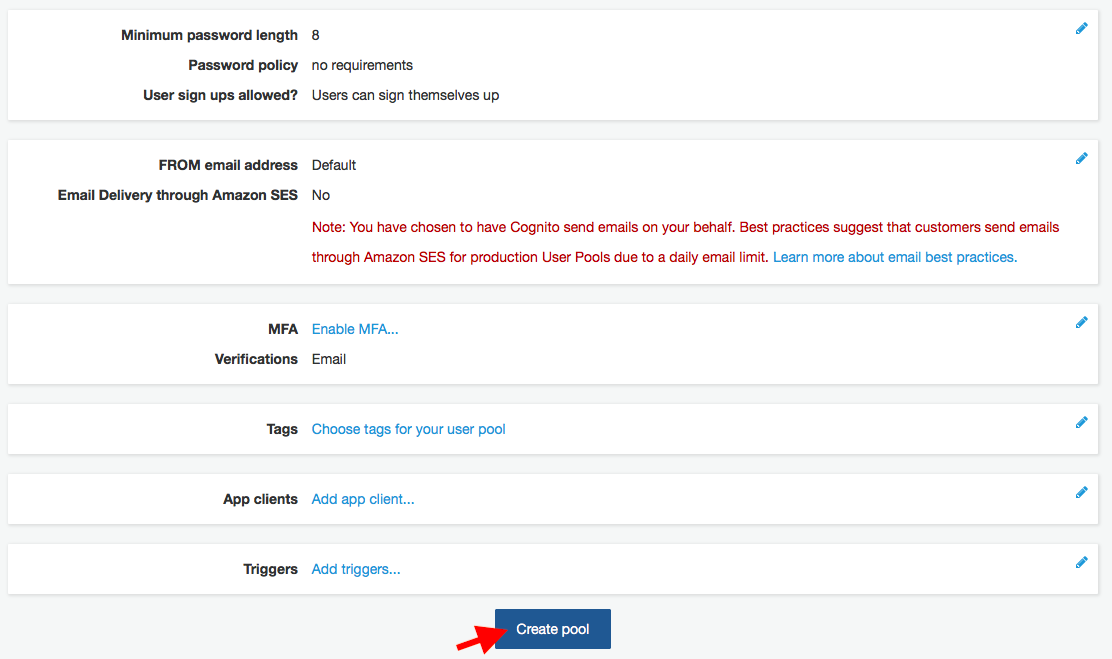
Step 4: Setup AWS Cognito
Search Cognito from your dashboard.

<:-------------------------------------------**3**-----------------------------------------:>

<:-------------------------------------------**4**-----------------------------------------:>

<:-------------------------------------------**5**-----------------------------------------:>

<:-------------------------------------------**6**-----------------------------------------:>
<:-------------------------------------------**7**-----------------------------------------:>

<:-------------------------------------------**8**-----------------------------------------:>

<:-------------------------------------------**9**-----------------------------------------:>

<:-------------------------------------------**10**-----------------------------------------:>

<:-------------------------------------------**11**-----------------------------------------:>

<:-------------------------------------------**12**-----------------------------------------:>
<:-------------------------------------------**13**-----------------------------------------:>

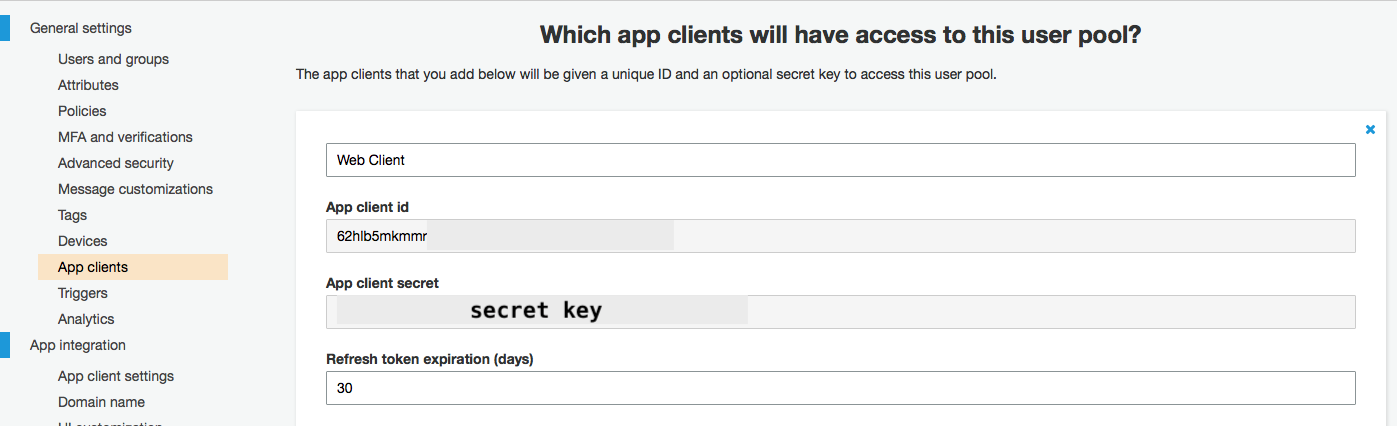
Step 5: Create a New App Client
Create a new app client and copy the app_client_id and app_client_secret

<:-------------------------------------------**1**-----------------------------------------:>

<:-------------------------------------------**2**-----------------------------------------:>
Step 6: SetUp app client ID and client secret
Open the file appsettings.json and copy the below code and paste in your file.
{
  "Logging": {
    "LogLevel": {
      "Default": "Information",
      "Microsoft": "Warning",
      "Microsoft.Hosting.Lifetime": "Information"
    }
  },
  "AllowedHosts": "*",
  "AWS": {
    "Region": "<YOUR_REGION>",
    "UserPoolClientId": "<YOUR_CLIENT_ID>",
    "UserPoolClientSecret": "<YOUR_CLIENT_SECRET>",
    "UserPoolId": "<YOUR_POOL_ID>"
  }
}
UserPoolId,

Step 7: Create Below files in the following directories:
■. in the Controllers directory, create a Accounts.cs controller.
   right-click on Controllers directory
   add -> new file
   ASP.NET Core -> MVC Controller Class
■. in the Models directory, create a new directory, called Accounts and inside the newly created directory, create two model files, ConfirmModel.cs and SignupModel.cs
   right-click on Models directory
   add -> new folder -> [Accounts]

   then right-click on the newly created directory, called Accounts
   add -> new class
   General -> Empty Class
■. in the Views directory, create a new directory, called Accounts and inside the newly created directory, create two model files, Confirm.cshtml and Signup.cshtml
   right-click on Views directory
   add -> new folder -> [Accounts]

   then right-click on newly created directory, called Accounts
   add -> new file
   ASP.NET Core -> Razor Page
Step 8: Code:
in the Accounts.cs file,
using System.Threading.Tasks;
using Amazon.AspNetCore.Identity.Cognito;
using Amazon.Extensions.CognitoAuthentication;
using Microsoft.AspNetCore.Identity;
using Microsoft.AspNetCore.Mvc;
using WebAdWord.Models.Accounts;
public class Accounts : Controller
    {
        private readonly SignInManager<CognitoUser> _signInManager;
        private readonly UserManager<CognitoUser> _userManager;
        private readonly CognitoUserPool _pool;

        public Accounts(SignInManager<CognitoUser> signInManager, UserManager<CognitoUser> userManager, CognitoUserPool pool)
        {
            _signInManager = signInManager;
            _userManager = userManager;
            _pool = pool;
        }
    }
public async Task<IActionResult> Signup()
        {
            var model = new SignupModel();
            return View(model);
        }

[HttpPost]
        public async Task<IActionResult> Signup(SignupModel model)
        {
            if (ModelState.IsValid)
            {
                var user = _pool.GetUser(model.Email);
                if (user.Status != null)
                {
                    ModelState.AddModelError("UserExists", "User with this email alred exits");
                    return View(model);
                }

                user.Attributes.Add(CognitoAttribute.Name.AttributeName, model.Email);
                var createdUser = await _userManager.CreateAsync(user, model.Password).ConfigureAwait(false);

                if (createdUser.Succeeded)
                {
                    RedirectToAction("Confirm");
                }
            }
            return View();
        }
[HttpGet]
        public async Task<IActionResult> Confirm(ConfirmModel model)
        {
            return View(model);
        }

        [HttpPost]
        [ActionName("Confirm")]
        public async Task<IActionResult> Confirm_Post(ConfirmModel model)
        {
            if (ModelState.IsValid)
            {
                var user = await _userManager.FindByEmailAsync(model.Email).ConfigureAwait(false);
                if (user == null)
                {
                    ModelState.AddModelError("NotFound", "A user with the given email address was not found.");
                    return View(model);
                }

                var result = await (_userManager as CognitoUserManager<CognitoUser>).ConfirmSignUpAsync(user, model.Code, true).ConfigureAwait(false);
                if (result.Succeeded)
                {
                    return RedirectToAction("Index", "Home");
                }
                else
                {
                    foreach(var item in result.Errors)
                    {
                        ModelState.AddModelError(item.Code, item.Description);
                    }

                    return View(model);
                }
            }

            return View(model);
        }
the above all codes belongs to the ⬇︎
public class Accounts : Controller {
--here--
}
in the Models/Accounts/SignupModel.cs file,
using System.ComponentModel.DataAnnotations;

namespace WebAdWord.Models.Accounts
{
    public class SignupModel
    {
        [Required]
        [EmailAddress]
        [Display(Name ="Email")]
        public string Email{ get; set; }

        [Required]
        [DataType(DataType.Password)]
        [StringLength(8, ErrorMessage ="Password must be at least six characters long!")]
        [Display(Name ="Password")]
        public string Password { get; set; }

        [Required]
        [DataType(DataType.Password)]
        [Compare("Password", ErrorMessage ="Password and its confirmation do not match")]
        public string ConfirmPassword { get; set; }

        public SignupModel()
        {
        }
    }
}
in the Models/Accounts/ConfirmModel.cs file,
using System.ComponentModel.DataAnnotations;

namespace WebAdWord.Models.Accounts
{
    public class ConfirmModel
    {
        [Required(ErrorMessage = "Email is required.")]
        [Display(Name ="Email")]
        [EmailAddress]
        public string Email { get; set; }

        [Required(ErrorMessage ="Code is required.")]
        public string Code { get; set; }
    }
}
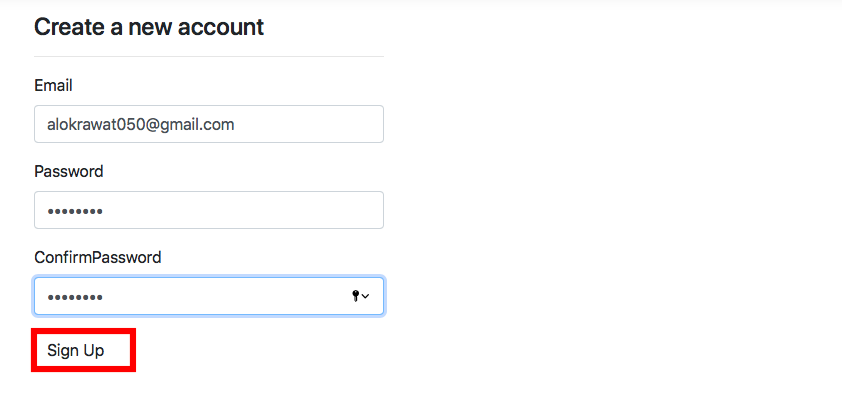
in the Views/Accounts/Signup.cshtml file,
@{
    ViewData["Title"] = "SignUp Page";
}

@model WebAdWord.Models.Accounts.SignupModel;

<div class="row">
    <div class="col-md-4">
        <form method="post" asp-controller="Accounts" asp-action="Signup">
            <h4>Create a new account</h4>
            <hr />
            <div asp-validation-summary="All" class="text-danger">

            </div>

            <div class="form-group">
                <label asp-for="Email"></label>
                <input asp-for="Email" class="form-control" />
                <span asp-validation-for="Email" class="text-danger"></span>
            </div>

            <div class="form-group">
                <label asp-for="Password"></label>
                <input asp-for="Password" class="form-control" />
                <span asp-validation-for="Password" class="text-danger"></span>
            </div>

            <div class="form-group">
                <label asp-for="ConfirmPassword"></label>
                <input asp-for="ConfirmPassword" class="form-control" />
                <span asp-validation-for="ConfirmPassword" class="text-danger"></span>
            </div>

            <button type="submit" class="btn btn-default">Sign Up</button>
        </form>
    </div>
</div>
in the Views/Accounts/Confirm.cshtml file,
@{
    ViewData["Title"] = "Confirm Page";
}

@model WebAdWord.Models.Accounts.ConfirmModel;

<div class="row">
    <div class="col-md-4">
        <form method="post" asp-controller="Accounts" asp-action="Confirm">
            <h4>Confirm the new account</h4>
            <hr />
            <div asp-validation-summary="All" class="text-danger"></div>

            <div class="form-group">
                <label asp-for="Email"></label>
                <input asp-for="Email" />
                <span asp-validation-for="Email" class="text-danger"></span>
            </div>

            <div class="form-group">
                <label asp-for="Code"></label>
                <input asp-for="Code" />
                <span asp-validation-for="Code" class="text-danger"></span>
            </div>

            <button type="submit">Confirm</button>
        </form>
    </div>
</div>
Step 9: Debug the Code:
After sign-up you will get a mail.

Copy the verification code and then access the below URL:
https://localhost:5001/Accounts/Confirm

After Successfully confirming you will redirect to the Home Page.

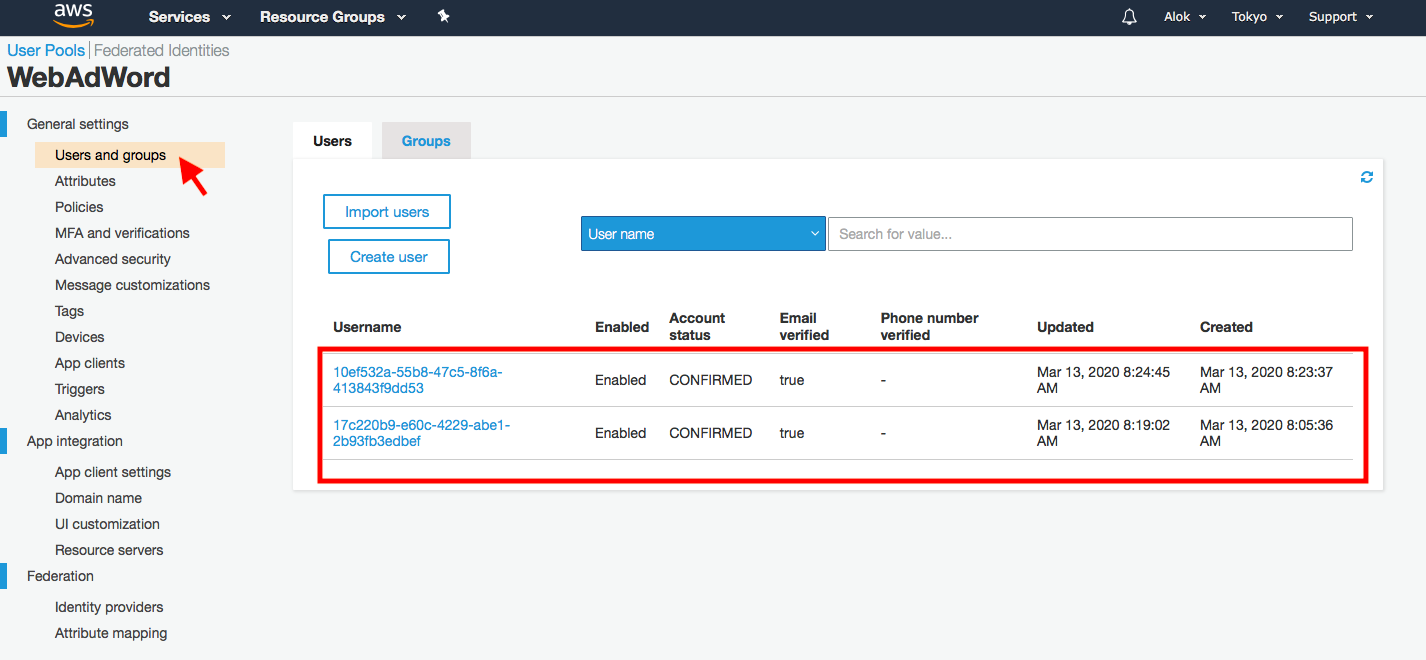
Step 10: AWS Cognito Dashboard
Here you can see that newly created user's display in the dashboard.
In the next part, we will implement login, forgot password, and reset password functionality.
If you encountered any error then please share it with me.
If this guide has been helpful for you and your team please share it with others!
Thanks & Best Regards,
Alok Rawat