GraphQLサーバーに対して外形監視を実施するために Amazon CloudWatch Synthetics というサービスを使ったので紹介します。
AWS CDKを使ってコード化して実装しました。
簡単に実装できるので、監視ってめんどくさいなーと思っている人も是非トライしてみてほしいです。
外形監視とは?
外形監視とは、APIサーバーやWebサイトなどにユーザーと同じ方法で定期的にアクセスを実施し、アプリケーションが正常に動作しているかを行う監視方法のことです。
簡単に言うと以下のようなイメージです。
監視者「やってる?」
サーバー「やってるよ!」
1分後...
監視者「やってる?」
サーバー「やってるよ!」
数時間後...
監視者「やってる?」
サーバー「...」
監視者「サーバが死んでる!アラートだ!」
Amazon CloudWatch Syntheticsとは?
Amazon CloudWatch Syntheticsとは、外形監視に使えるサービスです。
WebサイトやAPIが稼働しているかを監視する事ができます。
Canaryと呼ばれるスクリプトを実装して監視を実施します。
Node.js または Pythonでスクリプトを実装でき、HTTP と HTTPSに対応しています。
今回は利用しませんが、ヘッドレスブラウザで表示したWebサイトのスクリーンショットを取ることもできます。
実装
以下の構成を目指して実装します。
環境
Amazon CloudWatch Syntheticsで実行するスクリプトはNode.jsで実装しました。
監視対象のサーバーは スターウォーズ GraphQL API としました。
ライブラリ
{
  "dependencies": {
    "@aws-cdk/aws-apigatewayv2-alpha": "^2.65.0-alpha.0",
    "@aws-cdk/aws-redshift-alpha": "^2.65.0-alpha.0",
    "@aws-cdk/aws-synthetics-alpha": "^2.65.0-alpha.0",
    "aws-cdk-lib": "2.92.0",
    "cdk-monitoring-constructs": "^5.10.4",
    "constructs": "^10.0.0"
  }
}
CDK の準備
公式のREADMEを参考にAWS CDKをインストールしてください。
インストール後、以下のコマンドを実行してください。cloud-watch-syntheticsは任意のものに変えていただいて問題ないです。
mkdir cloud-watch-synthetics
cd cloud-watch-synthetics
cdk init sample-app --app=cloud-watch-synthetics --language=typescript
Chatbotの設定
ChatbotとSlackを紐づけます。以下のURLが参考になると思います。
SNSトピックの作成などは後で実施するので、Slackとの紐づけだけ実施できれば大丈夫です。
Amazon CloudWatch Syntheticsの定義
lib/cloud-watch-synthetics-stack.ts を以下のコードに書き換えてください。
import { Duration, Stack, StackProps } from "aws-cdk-lib";
import * as synthetics from "@aws-cdk/aws-synthetics-alpha";
import * as chatbot from "aws-cdk-lib/aws-chatbot";
import * as iam from "aws-cdk-lib/aws-iam";
import * as sns from "aws-cdk-lib/aws-sns";
import * as path from "path";
import { Construct } from "constructs";
import { MonitoringFacade, SnsAlarmActionStrategy } from "cdk-monitoring-constructs";
import {
  ComparisonOperator,
  TreatMissingData,
} from "aws-cdk-lib/aws-cloudwatch";

export class CloudWatchSyntheticsStack extends Stack {
  constructor(scope: Construct, id: string, props?: StackProps) {
    super(scope, id, props);

    // ① Slackチャンネルの設定
    const slackChannel = new chatbot.SlackChannelConfiguration(
      this,
      "MonitorChannel",
      {
        slackChannelConfigurationName: "MyPlayground",
        slackWorkspaceId: "***",
        slackChannelId: "***",
      },
    );

    const chatbotRole = new iam.Role(this, "MonitorChatbotRole", {
      roleName: "monitor-chatbot-role",
      assumedBy: new iam.ServicePrincipal("sns.amazonaws.com"),
    });

    chatbotRole.addToPolicy(
      new iam.PolicyStatement({
        resources: ["*"],
        actions: ["cloudwatch:Describe*", "cloudwatch:Get*", "cloudwatch:List*"],
      }),
    );

    const topic = new sns.Topic(this, "MonitorChatbotTopic", {
      displayName: "monitor-chatbot-topic",
      topicName: "monitor-chatbot-topic",
    });
    slackChannel.addNotificationTopic(topic);

    // ② MonitoringFacadeの作成
    const monitoring = new MonitoringFacade(this, "MonitoringFacade", {
      alarmFactoryDefaults: {
        actionsEnabled: true,
        alarmNamePrefix: "Monitor",
        action: new SnsAlarmActionStrategy({ onAlarmTopic: topic }),
      },
    });

    // ③ CloudWatch SyntheticsのCanary定義
    const canary = new synthetics.Canary(this, "SyntheticsCanary", {
      canaryName: "synthetics-canary",
      schedule: synthetics.Schedule.rate(Duration.minutes(1)),
      test: synthetics.Test.custom({
        code: synthetics.Code.fromAsset(path.join(__dirname, "canary")),
        handler: "index.handler",
      }),
      runtime: new synthetics.Runtime(
        "syn-nodejs-puppeteer-6.0",
        synthetics.RuntimeFamily.NODEJS
      ),
      enableAutoDeleteLambdas: true,
    });

    // ④ Alarmの設定
    monitoring
      .createAlarmFactory("SyntheticsCanary")
      .addAlarm(canary.metricFailed(), {
        datapointsToAlarm: 1,
        alarmNameSuffix: "Failed",
        alarmDescription: "Canary Failed count is too high.",
        threshold: 1,
        evaluationPeriods: 1,
        comparisonOperator:
          ComparisonOperator.GREATER_THAN_OR_EQUAL_TO_THRESHOLD,
        treatMissingData: TreatMissingData.NOT_BREACHING,
      });

  }
}
① Slackチャンネルの設定
slackChannelConfigurationNameはChatbotの設定名、slackWorkspaceIdにはChatbotの画面に表示されているワークスペースIDを設定します。
slackChannelIdにはチャンネルを右クリックし、「リンクをコピー」で取得できるURLの末尾のIDを入力します。
https://example.slack.com/archives/***の***の部分です。
② MonitoringFacadeの作成
SNS Topicへメッセージを送信するアクションを持ったMonitoringFacadeの作成を定義します。
このMonitoringFacadeを使って様々なアラームを追加できます。
対応しているリソースは↓を見てください。
③ CloudWatch SyntheticsのCanary定義
実際に実行されるCanaryスクリプトは別ファイル(後述)に記述します。
runtimeには任意のバージョンのものを指定してください。
④ Alarmの設定
canary.metricFailed()(Canary実行エラー)の場合に発火するアラームを定義しています。
5分間で合計1以上のエラーが発生した場合にアラームが発火されます。
また、Canaryには以下のようにLatencyや4xxエラー、5xxエラーのメトリクスも存在します。
これらのメトリクスを監視する場合には以下のように記述できます。
monitoring.monitorSyntheticsCanary({
  canary: canary,
  add4xxErrorCountAlarm: {
    "4xxError": { maxErrorCount: 1 }
  }
});
Canaryスクリプトの実装
const synthetics = require('Synthetics');
const log = require('SyntheticsLogger');
const syntheticsConfiguration = synthetics.getConfiguration();

const apiCanaryBlueprint = async function () {
  syntheticsConfiguration.setConfig({
    restrictedHeaders: [], // Value of these headers will be redacted from logs and reports
    restrictedUrlParameters: [] // Values of these url parameters will be redacted from logs and reports
  });

  // Handle validation for positive scenario
  const validateSuccessful = async function (res) {
    return new Promise((resolve, reject) => {
      if (res.statusCode < 200 || res.statusCode > 299) {
        throw new Error(res.statusCode + ' ' + res.statusMessage);
      }

      let responseBody = '';
      res.on('data', (d) => {
        responseBody += d;
      });

      res.on('end', () => {
        // Add validation on 'responseBody' here if required.
        resolve();
      });
    });
  };


  // Set request option for SWAPI allFilms
  let requestOptionsStep1 = {
    hostname: 'swapi-graphql.netlify.app',
    method: 'POST',
    path: '/.netlify/functions/index',
    port: '443',
    protocol: 'https:',
    body: '{"query":"query allFilms {\\n  allFilms{\\n    films{\\n      id\\n      title\\n    }\\n  }\\n}","operationName":"allFilms"}',
    headers: { "Content-Type": "application/json" }
  };
  requestOptionsStep1['headers']['User-Agent'] = [synthetics.getCanaryUserAgentString(), requestOptionsStep1['headers']['User-Agent']].join(' ');

  // Set step config option for SWAPI allFilms
  let stepConfig1 = {
    includeRequestHeaders: true,
    includeResponseHeaders: true,
    includeRequestBody: true,
    includeResponseBody: true,
    continueOnHttpStepFailure: true
  };

  await synthetics.executeHttpStep('SWAPI allFilms', requestOptionsStep1, validateSuccessful, stepConfig1);
};

exports.handler = async () => {
  return await apiCanaryBlueprint();
};
公式から提供されているテンプレートファイルを参考にスターウォーズ GraphQL API に対して allFilms を実行するスクリプトを実装しました。
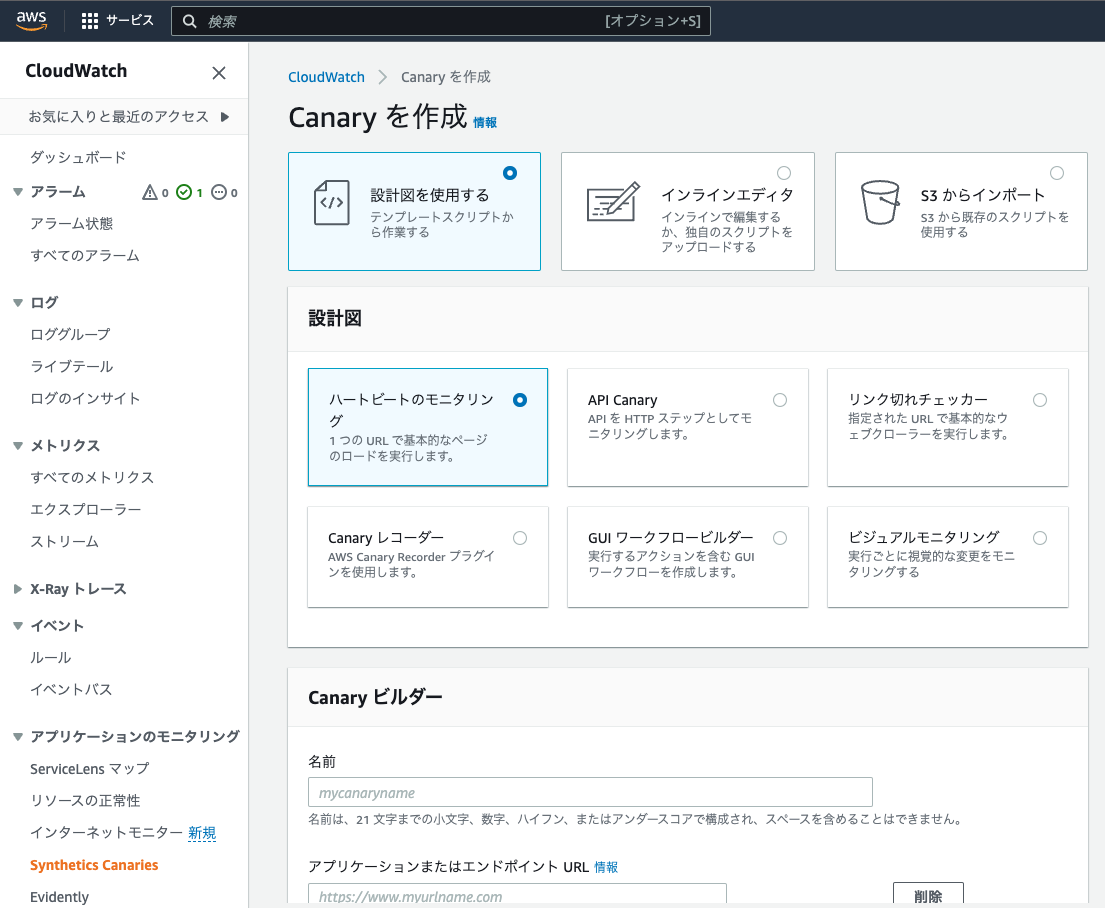
テンプレートファイルはSynthtics Canariesの作成画面で確認することができます。
画像では見えていませんが、設計図を選択すると下の方にあるスクリプトエディタにテンプレートスクリプトが表示されます。
stepConfig1のincludeRequestHeadersなどをtrueにすることでマネジメントコンソールで実際に送受信したヘッダーやボディを見ることができます。見えてはいけない場合はfalseにしてください。
注意点ですが、スクリプトの配置場所は決まっています。
例えば、今回のようにCDKファイルで synthetics.Code.fromAsset(path.join(__dirname, "canary"))のように定義している場合はcanaryフォルダ以下は必ずnodejs/node_modules/index.jsとならなければいけません。
今回では、以下のようなフォルダ構成となります。
- lib
    - canary
        - nodejs
            - node_modules
                - index.js(スクリプトファイル)
    - cloud-watch-synthetics-stack.ts(CDKの定義)
配置場所が決まっている理由としては、スクリプトはLambda Layerにデプロイされ、予め用意されたLambdaがLambda Layerのスクリプトを実行しているからだと思います。
デプロイ
npx cdk deploy
でデプロイできます。これまでCDKを利用したことがない場合はnpx cdk bootstrapを事前に実行する必要があります。
デプロイが完了するとCanary、Alarm、Chatbotなどが作成されます。
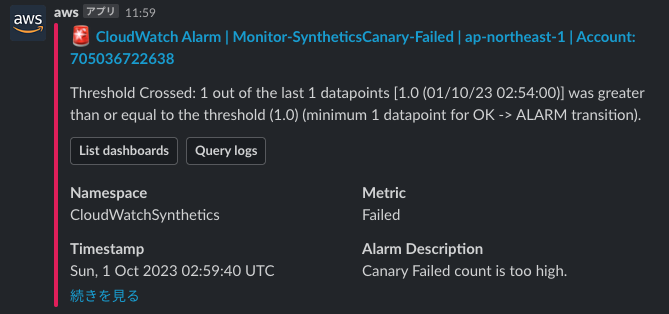
Canaryの実行が失敗したときにSlackへ通知がされるか確認しましょう。
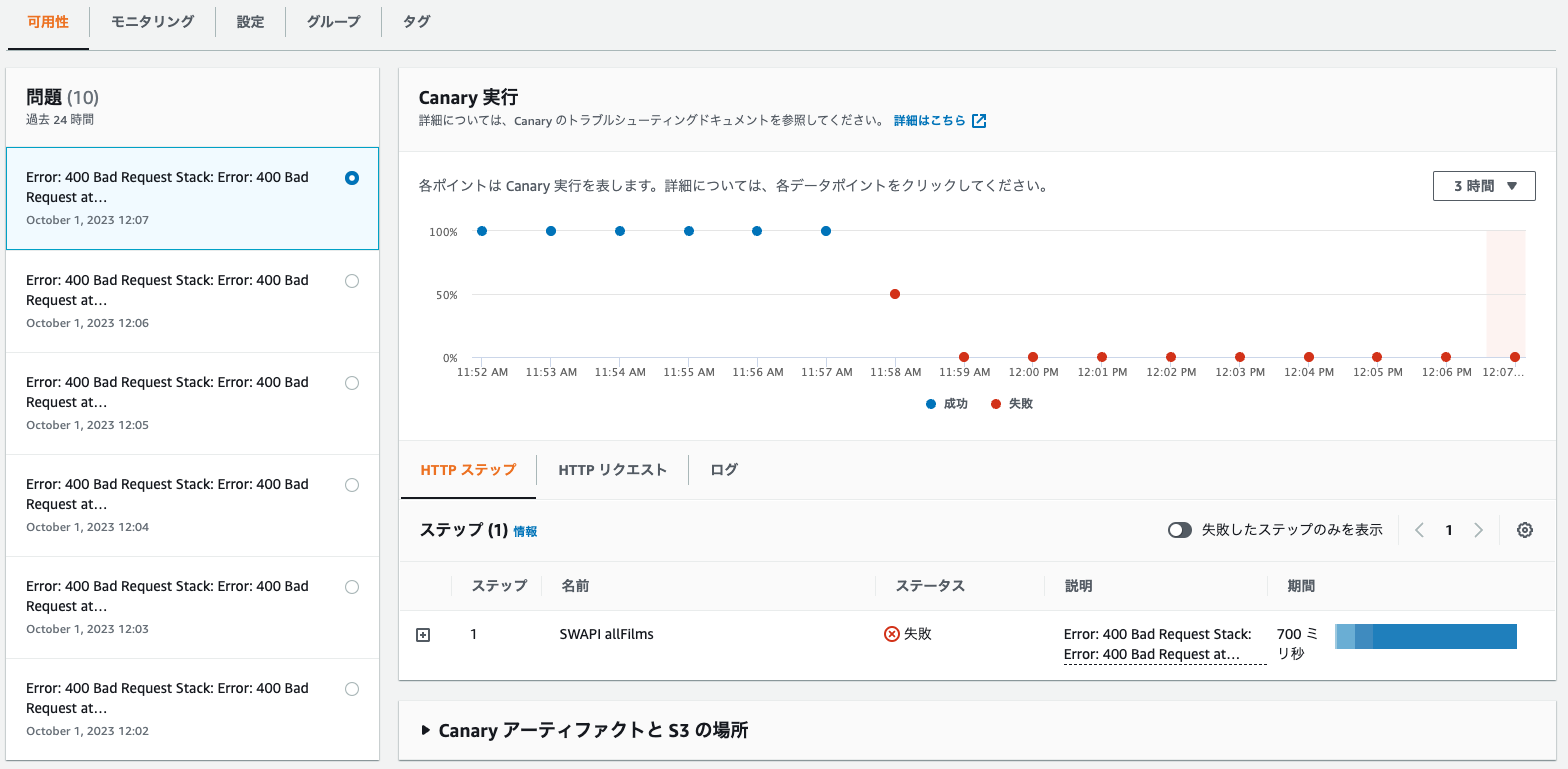
エラーが出るようにスクリプトを適当に変更してデプロイするとCanaryでエラーが発生しました。
Slackを確認するとCloudWatchからメッセージが送信されていました。
まとめ
Amazon CloudWatch SyntheticsとChatbotを活用して外形監視を実装しました。
今回は使用していませんが、スクリーンショットを取る、Pythonのコードを実行するなどもできるので、いろいろ試してみてください。
また、今回利用した cdk-monitoring-constructs は手軽にいろいろなサービスの実装を実施できるのでオススメです。


