完成したWebサイトはこちら
今回は前回作成したサーバーにWordPressを導入することとキーワード抽出の実装を行います。
目次
概要
今回は前回作成したサーバーにWordPressを導入することとキーワード抽出の実装を行います。
利用しているサービス
Webサイト
キーワード抽出
- API
- フロントエンド
- Javascript
- HTML5
- CSS
WordPress導入
WordPressは簡単にサイト構築ができる無料サービスです。今回は簡単にフロントエンドや編集が行いたいと考えていたので導入しました(ただ、今後の拡張性を考えると普通に作ったほうが融通がききます(後述))。
基本的な流れ
- 前回作成したDBサーバーでWordPress用のDBを作成
- DB作成
- ユーザー作成
- WordPressインストール
- 各種設定
詳細はこの記事を参考にしてください。
懸念点
- 拡張性が低い
- JSなどは埋め込めるが、少しめんどくさい
- 埋め込み方も様々あるが、WordPressの仕様を理解しないといけない
- 他の言語が使用できるかわからない
- DBとの通信はデフォルトでWordPressがになっているが、拡張したい場合にどのようにすればいいか調べるのが大変
- JSなどは埋め込めるが、少しめんどくさい
- やはり、ブログなどのサイトであればかなり構築しやすいがバックエンドやフロントエンドも実装したいとなるとかなりめんどくさい
キーワード抽出
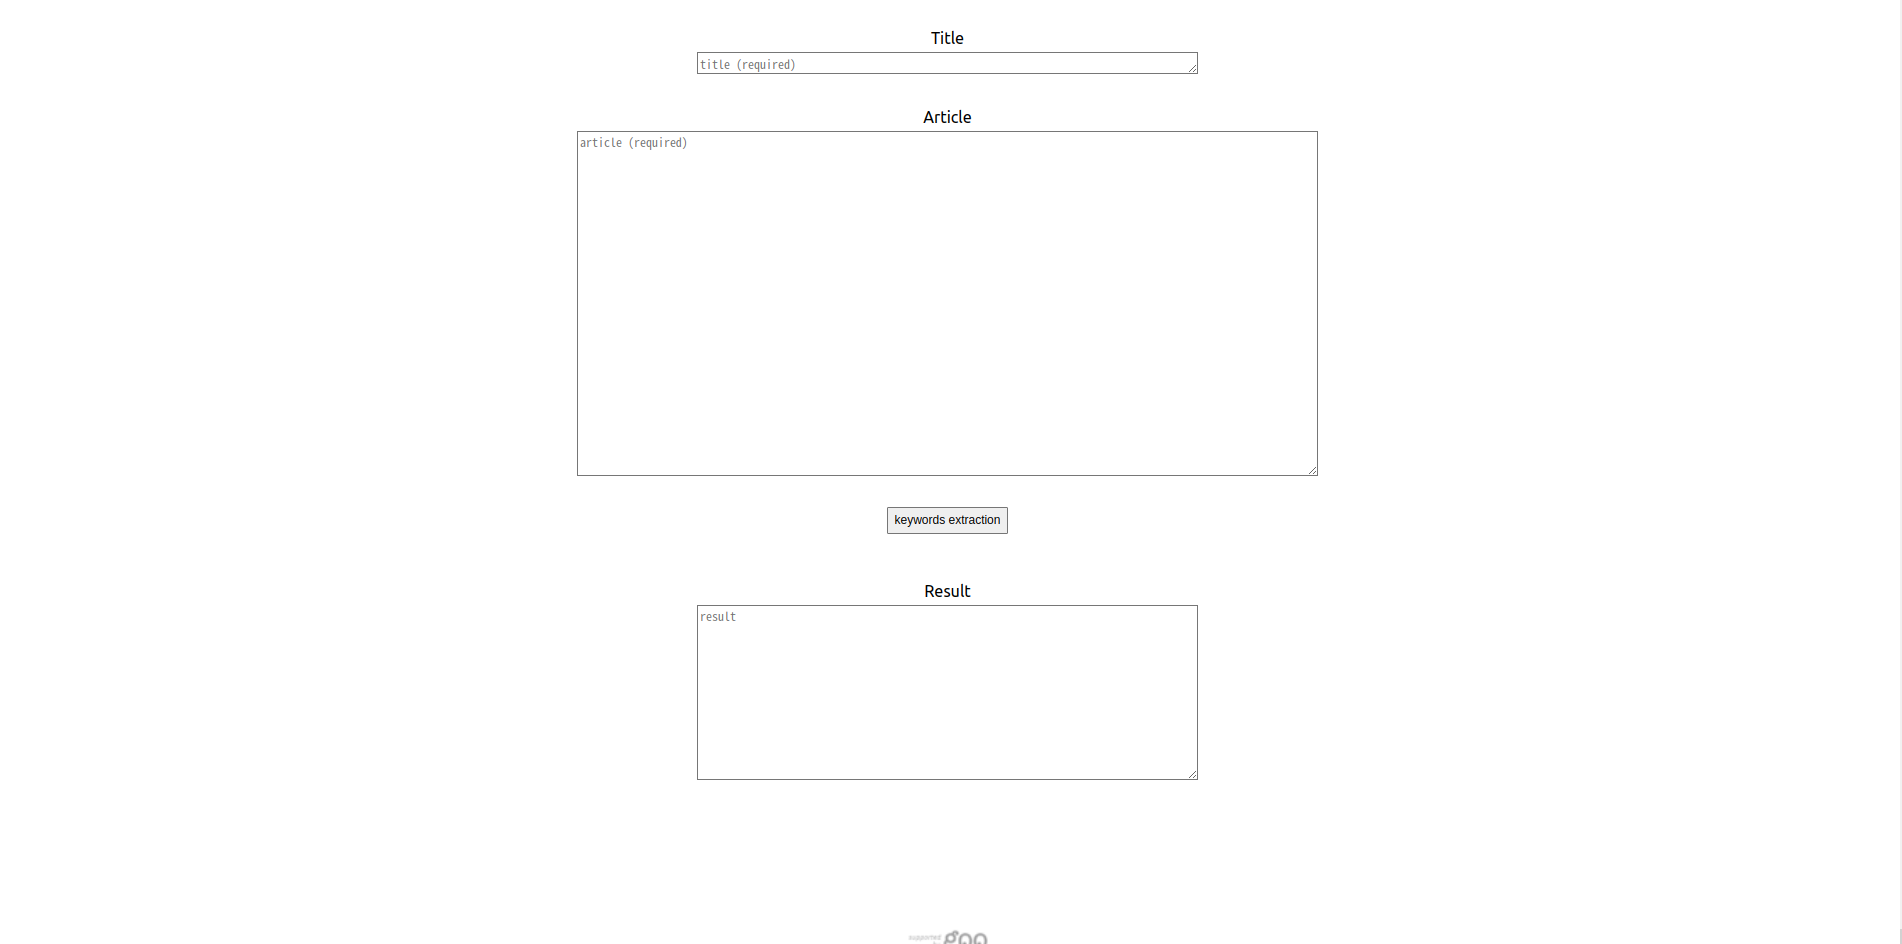
gooAPIを用いてキーワード抽出ができるWebサイトを作成しました。
個人的にキーワード抽出を一時期勉強していたということやキーワード抽出のWebサイトが少ないかなと感じ作成しました。
完成したWebサイトはこちら
基本的には以下の形式で機能を実装しています。
- jQuery内のAjaxを用いてAPIにJSON形式でPOST形式で投げる
- レスポンスからキーワードを抽出して表示
また、WordPress上でJSやHTML,CSSを管理編集することが大変なのでプラグインを使用しました。
プラグイン
今回使用したプラグインはWP Coderです。
これは、JS,HTML,CSSがタイトルごとに管理でき、挿入方法も簡単に行えるプラグインです。
API
今回はgooAPIのキーワード抽出を使用しました。
キーワード抽出のAPIはCOTOHA APIなどがありますが、gooAPIはアクセストークンの有効期限が基本的に無いのでいちいちアクセストークンの再発行をする必要がありません。
ソースコード
jQuery(document).ready(function( $ ){
  var inputTitle = $('#inputTitle');
  var inputText = $('#inputTextarea');
  var button = $('#button');

  var outputText = $('#outputTextarea');
	const uniqueID = "得られたアクセストークン";


	button.on('click', function(){
		// inputTitle,inputTextのどちらかが空だったらrequiredの注意書きが発生
		if(!inputTitle[0].reportValidity()){
			return false;
		}
		if(!inputText[0].reportValidity()){
			return false;
		}

		// 多重送信を防ぐためにボタンをdisable
		button.attr("disable",true);

		// JSONデータ作成
		// 例外処理の場合はどれか一つを欠損させるとbad error 400がでる
		var data = JSON.stringify({
			app_id: uniqueID,
			title: inputTitle.val(),
			body: inputText.val(),
		});


		// 通信実行
    $.ajax({
        type:"post",																		// method = "POST"
        url:"https://labs.goo.ne.jp/api/keyword",				// POST送信先のURL
        contentType: 'application/json',								// リクエストの Content-Type
        dataType: "json",           										// レスポンスをJSONとしてパースする
				data:data																				// JSONデータ本体
		}).done(function(response) {

			// outputText初期化
			outputText.val("");

			// responseはJSONなのでキーでアクセス
			var result_array = response.keywords;

			// 出力のindex_num
			var output_index_num = 1;

			// outputTextを書き換え
			Object.keys(result_array).forEach(function (key){

				// objectなのでJSON.stringifyでstringに
				var output_result_string = JSON.stringify(result_array[key]);


				// resultに出力
				outputText.val(outputText.val() + String(output_index_num)+ ":" + output_result_string +"\n");
				output_index_num++;
			});


		}).fail(function(xhr){

			// もしJSONのエラーを表示させたい時(objectからstringに直し済み)
// 			var error_result = JSON.stringify(xhr.responseJSON);

			outputText.val("error");

		}).always(function(xhr,msg){

			// ボタンを再び enableにする
			button.attr("disabled", false);

		});

	});
});
<div style="text-align: center;">

	<div class="inputTitle">
		<label for="inputTitle">Title<br></label>
		<textarea id="inputTitle" rows="1" cols="80" placeholder="title (required)" required></textarea>
	</div>

	<div class="inputText">
		<label for="inputTextarea">Article<br></label>
		<textarea id="inputTextarea" rows="20" cols="120" placeholder="article (required)" required></textarea>
	</div>

	<div>
		<button id="button" type="button">keywords extraction</button>
	</div>

	<div class="outputResult">
		<label for="outputTextarea">Result<br></label>
		<textarea id="outputTextarea" rows="10" cols="80" placeholder="result" readonly></textarea>
	</div>

	<a href="http://www.goo.ne.jp/">
		<img src="//u.xgoo.jp/img/sgoo.png" alt="supported by goo" title="supported by goo" width="100">
	</a>

</div>
.inputTitle{
	width: auto;
	height: auto;
	margin-left: auto;
	margin-right: auto;
	margin-bottom: 25px;
}

.inputTextarea{
	width: auto;
	height: auto;
	margin-left: auto;
	margin-right: auto;
}

#button{
	width: auto;
	height: 30px;
	margin-top: 25px
}

.outputResult{
	width: auto;
	height: auto;
	margin-top: 50px;
	margin-bottom: 150px;
	margin-left: auto;
	margin-right: auto;
}
完成品
終わりに
AWSを用いてサーバーを立てて、キーワード抽出のWebサイトを作成しました。個人的にはまだまだ、改修したい部分だらけですが、機能する作品を作れてとても感激です。
今後としては
- WordPressを廃止
- DBサーバーとの通信をPythonで行う
- フロントエンドをReactやVueを使って書く
- 自作のテキスト解析APIを作成
- AWSを用いてAPIサーバーを運用できればさらに吉
- 機能追加
- URLを入れることでキーワード抽出
- キーワード抽出結果から似たような記事を推薦
- サイト利用者のキーワード抽出結果を用いて注目されているキーワードを表示
していきたいと考えています。
まだまだ、足りない情報が多いので随時追加していきたいと思います。
ここまでご覧いただきありがとうございました!
