概要
- dagger2入門 - 導入の仕方に、gradleよりdagger2の導入方法を紹介しました
- 今回はdagger2の基本的な使い方を紹介します - @Inject と @Component
- 概念などをここに紹介しなくて、使い方を中心として話します
簡単な使い方
注入できるクラスを作成して、コンストラクタ前に@Injectを追記
class People @Inject constructor() {
    fun doWhat(): String {
        return "eat dinner"
    }
}
Componentを作成して注入先を指定
@Component
interface PComponent {
    fun into(home: Home)
}
インスタンス変数を用意
- DaggerPComponentを生成されるクラス
class Home {
    @Inject lateinit var people: People

    fun doDinner() {
        DaggerPComponent.create().into(this)
        println(people.doWhat())
    }
}
結果
eat dinner

Process finished with exit code 0
もし注入用クラスにも引数必要場合
class Tool @Inject constructor() {
    fun withFork(): String {
        return "eat with fork"
    }
}

class People @Inject constructor(val tool: Tool) {
    fun doWhat(): String {
        return tool.withFork()
    }
}
結果
eat with fork

Process finished with exit code 0
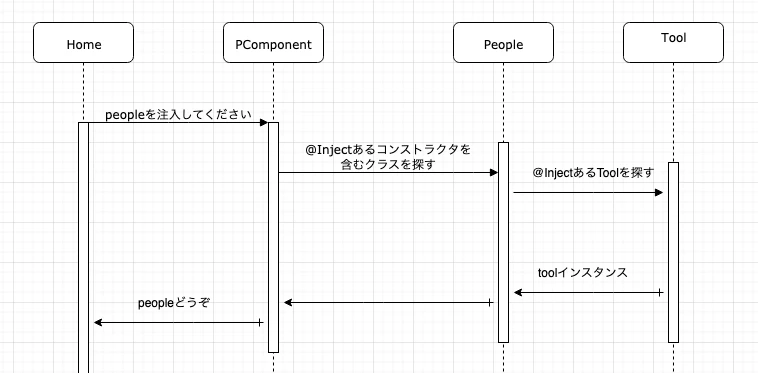
遷移図
サンプルコード
ひとつの問題
- 導入したpackageのクラスに、コストラクタに@Injectを追記できません