はじめに
下記のようなCloudFront=>ALB=>EC2な構成で、CloudFrontのLambda@EdgeにてCORS対応をする方法について説明します。

CORSについては、こちらをご覧ください。
Lambda@Edgeについてはこちらをご覧ください。
事前準備
まずEC2インスタンスを作ってREST APIのサンプルを入れます。
私は、Tonyさんの素晴らしいLaravel製のRest API Sampleを使わせてもらいました。
こちらのソースはCORS対応されているため、下記の方法でCORS対応をOFFにします。
mv config/cors.php{,.bk}
そして、ALBを作成して、EC2インスタンスを紐づけます。
手順
CloudFront Distributionを作成する。
-
CloudFront Distributions画面で、Create Distributionボタンをクリック -
Select a delivery method for your content.画面で、WebのGet Startedボタンをクリック -
Create Distributionで下記のように設定
| 項目名 | 設定値 |
|---|---|
| Origin Domain Name | ALBのDNS 名 |
| Allowed HTTP Methods | GET, HEAD, OPTIONS, PUT, POST, PATCH, DELETE |
| Cache Based on Selected Request Headers | Whitelist |
| Whitelist Headers 1 | Access-Control-Request-Headers Access-Control-Request-Method Authorization Origin |
| Query String Forwarding and Caching | Forward all,cache based on all |
-
CloudFront Distributions画面で、作成されたDistributionのIDをクリックする。 -
GeneralタブのARN(arn:aws:cloudfront::0000000...)をコピーしておく。
(後程使います)
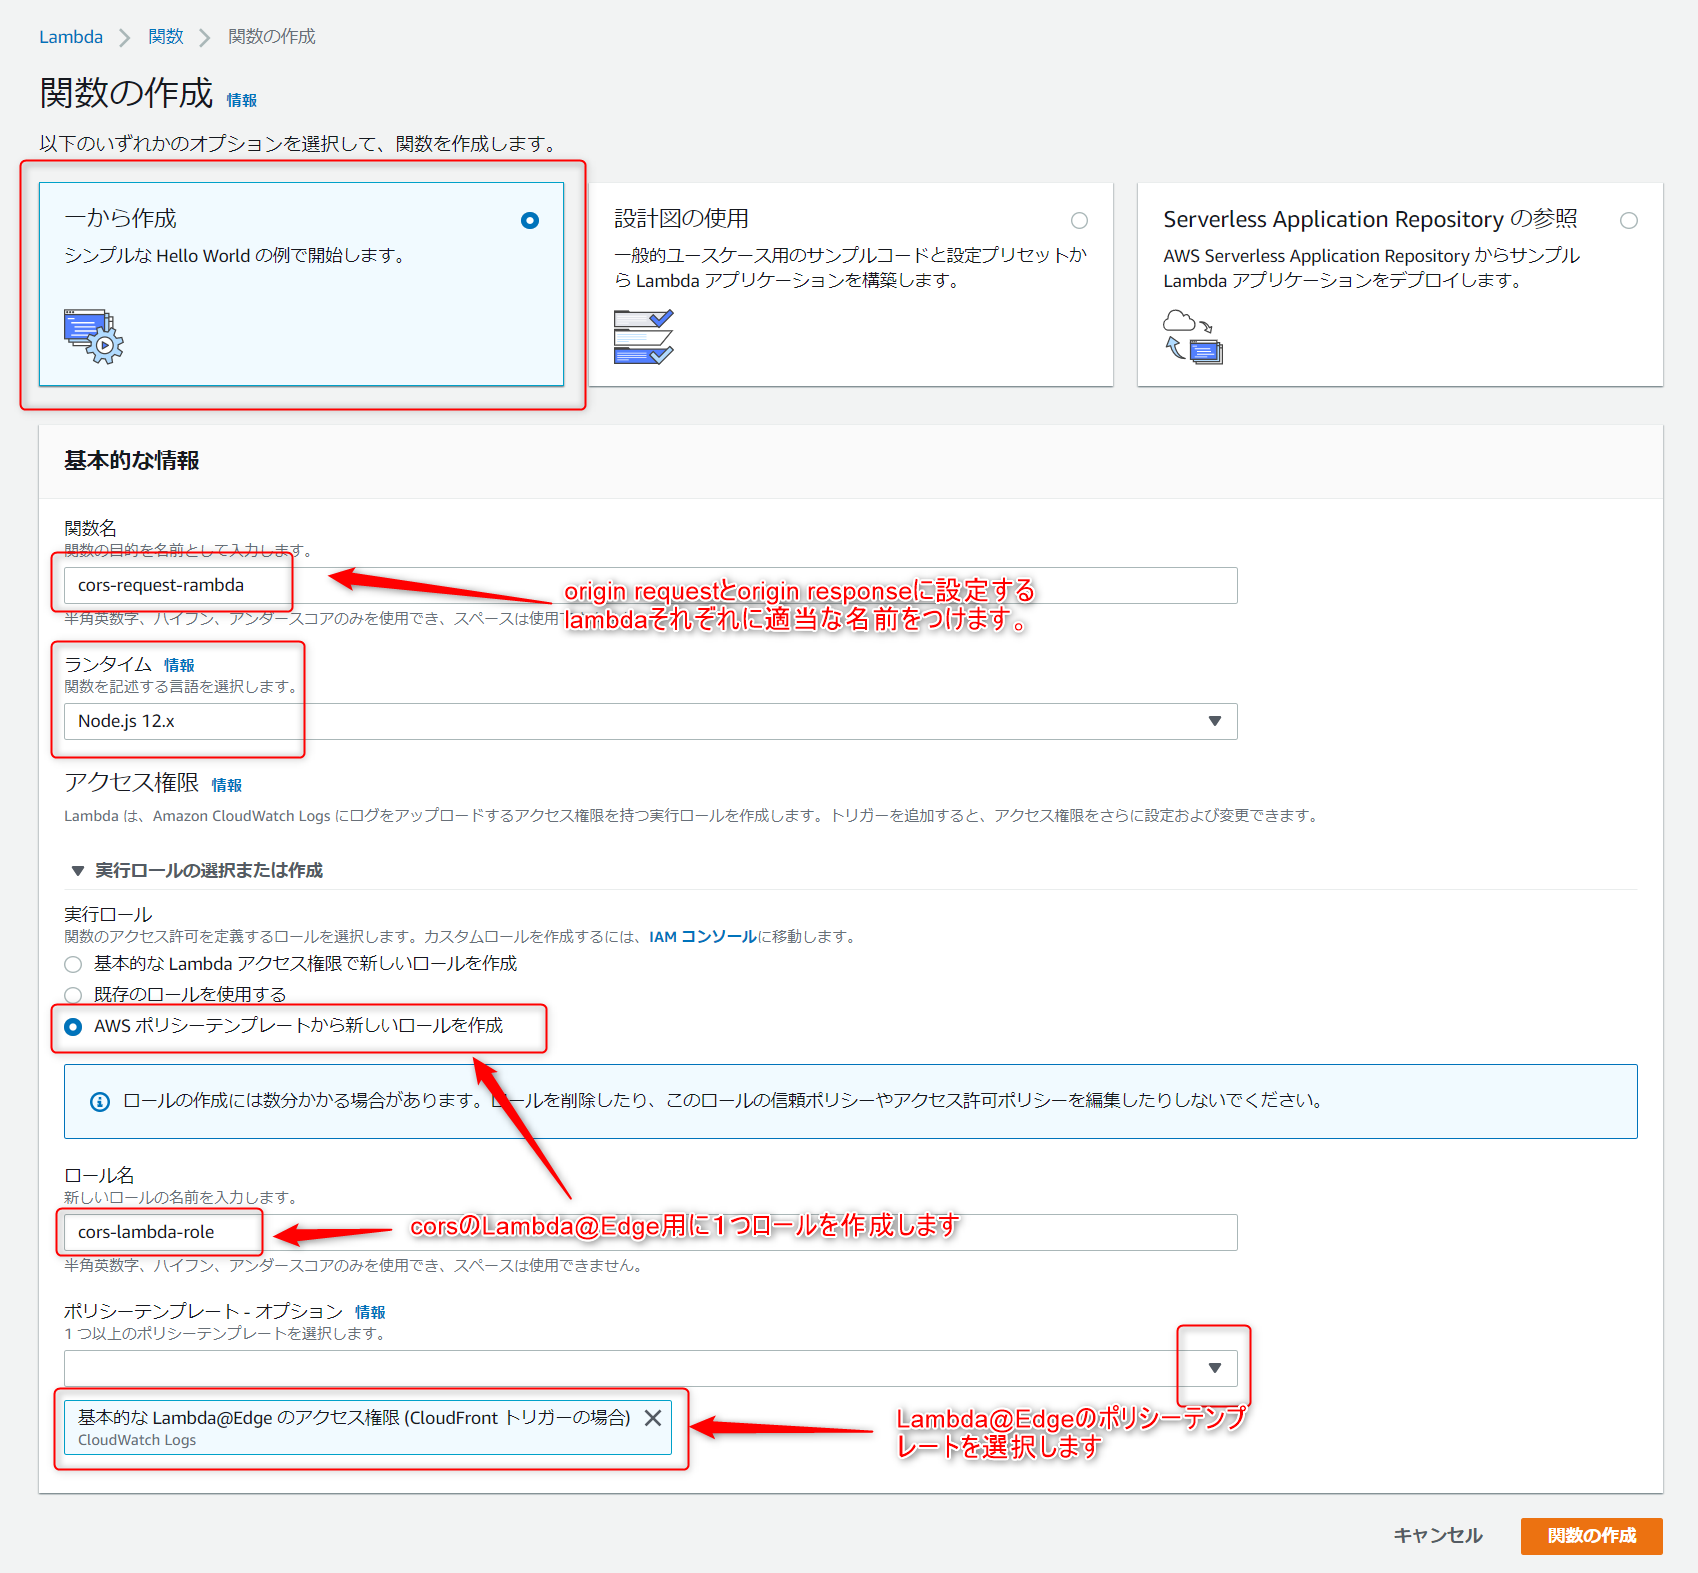
us-east-1でlambdaを作成する。
origin request用関数作成
-
関数コードの部分に下記を入力して、
保存ボタンをクリックします。 -
originでの制限は入れてますが、メソッドとヘッダーはザルなので、必要な場合はソースを直してください。
'use strict';

const allowMethods = "GET, HEAD, OPTIONS, PUT, POST, PATCH, DELETE";
// const originRegex = /^.+/; //すべてのoriginを許可する場合はこちら
const originRegex = /aaaaaaaa\.cloudfront\.net/; //originで制限する場合はこちら

exports.handler = (event, context, callback) => {
    const request = event.Records[0].cf.request;
    if (request.headers['origin'] && request.method == 'OPTIONS') {
        const origin = request.headers['origin'][0]['value'];
        if (origin.match(originRegex)) {
            const allowHeaders =
                request.headers.hasOwnProperty('access-control-request-headers') ?
                    request.headers['access-control-request-headers'][0]['value'] : "*";
            const response = {
                status: '200',
                headers: {
                    'access-control-allow-origin': [{
                        key: 'access-control-allow-origin',
                        value: origin
                    }],
                    'access-control-allow-methods': [{
                        key: 'access-control-allow-methods',
                        value: allowMethods
                    }],
                    'access-control-allow-headers': [{
                        key: 'access-control-allow-headers',
                        value: allowHeaders
                    }],
                },
                body: '',
            };
            callback(null, response);
            return;
        }
    }
    callback(null, request);
}
{
  "Records": [
    {
      "cf": {
        "config": {
          "distributionId": "EXAMPLE"
        },
        "request": {
          "headers": {
            "host": [
              {
                "key": "Host",
                "value": "d123.cf.net"
              }
            ],
            "user-name": [
              {
                "key": "User-Name",
                "value": "CloudFront"
              }
            ],
            "origin": [
              {
                "key": "origin",
                "value": "https://aaaaaaaa.cloudfront.net"
              }
            ],
            "access-control-request-methods": [
              {
                "key": "access-control-request-methods",
                "value": "POST"
              }
            ],
            "access-control-request-headers": [
              {
                "key": "access-control-request-headers",
                "value": "Authentication"
              }
            ]
          },
          "clientIp": "0000:aaaa::0000:0000",
          "uri": "/test",
          "method": "OPTIONS"
        },
        "response": {
          "status": "200",
          "statusDescription": "OK",
          "headers": {
            "x-cache": [
              {
                "key": "X-Cache",
                "value": "Hello from Cloudfront"
              }
            ]
          }
        }
      }
    }
  ]
}
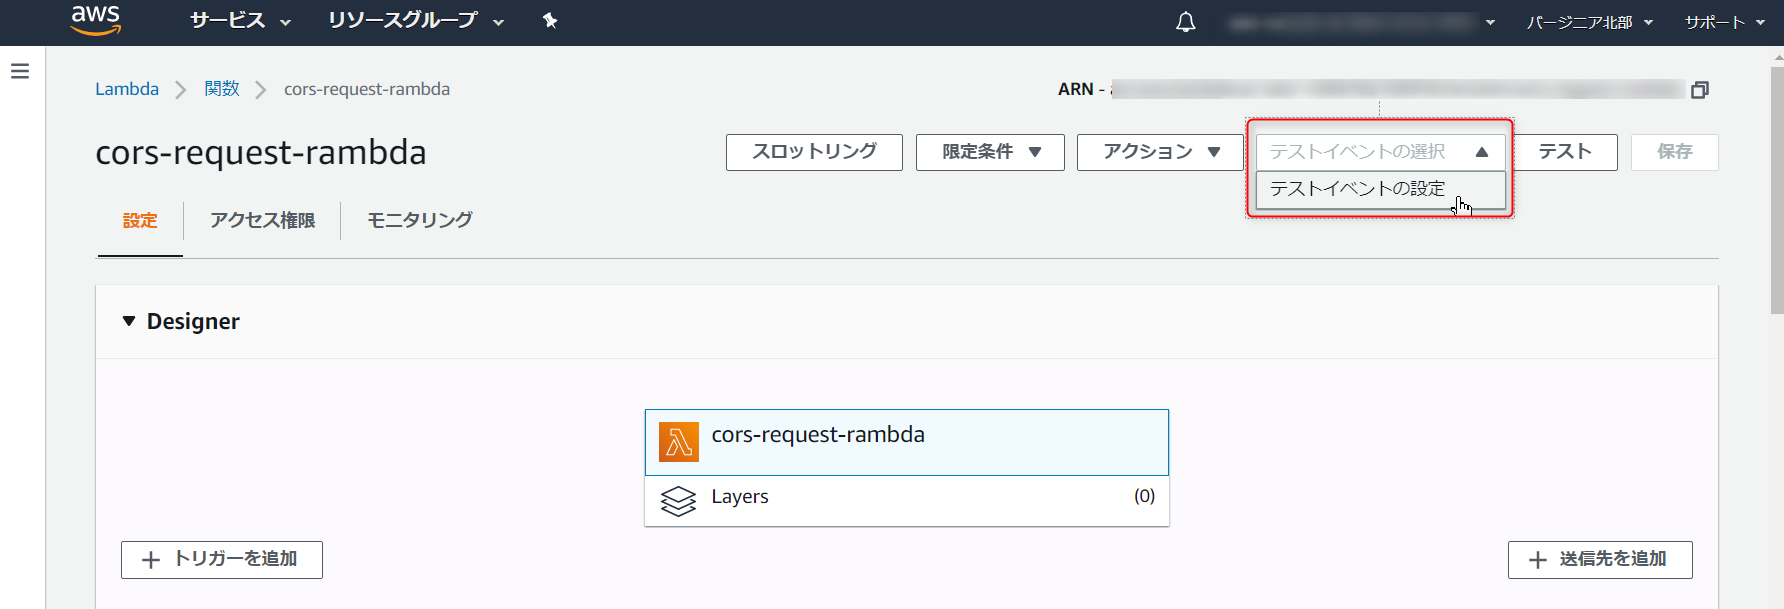
-
作成したテストイベントを選択し、
テストボタンをクリック。 -
実行結果が
成功になって、Execution Resultにaccess-control-allow-*が出力されていることを確認。
origin response用関数作成
- つぎにorigin responseの関数の作成とテストとデプロイをorigin requestを参考に行います。
- コード
'use strict';

// const originRegex = /^.+/; //すべてのoriginを許可する場合はこちら
const originRegex = /aaaaaaaa\.cloudfront\.net/; //originで制限する場合はこちら

exports.handler = (event, context, callback) => {
    const request = event.Records[0].cf.request;
    const response = event.Records[0].cf.response;
    if (response.status.match(/^20/) && request.headers['origin']) {
        const origin = request.headers['origin'][0]['value'];
        if (origin.match(originRegex)) {
            response.headers['access-control-allow-origin'] = [{
                key: 'access-control-allow-origin',
                value: origin
            }];
            response.headers['access-control-allow-credentials'] = [{
                key: 'access-control-allow-credentials',
                value: 'true'
            }];
        }
    }
    callback(null, response);
}
- テストイベントのJSON
{
  "Records": [
    {
      "cf": {
        "config": {
          "distributionId": "EXAMPLE"
        },
        "request": {
          "headers": {
            "host": [
              {
                "key": "Host",
                "value": "d123.cf.net"
              }
            ],
            "user-name": [
              {
                "key": "User-Name",
                "value": "CloudFront"
              }
            ],
            "origin": [
              {
                "key": "origin",
                "value": "https://aaaaaaaaa.cloudfront.net/"
              }
            ]
          },
          "clientIp": "0000:aaaa::0000:0000",
          "uri": "/test",
          "method": "GET"
        },
        "response": {
          "status": "200",
          "statusDescription": "OK",
          "headers": {
            "x-cache": [
              {
                "key": "X-Cache",
                "value": "Hello from Cloudfront"
              }
            ]
          }
        }
      }
    }
  ]
}
動作確認
- CORSの動作確認をします。
curlで確認
# preflight request
curl -s -D - 'https://bbbbbbb.cloudfront.net/lambda/api/books/1' \
  -H 'authorization: Basic '`echo -n 'tony_admin@laravel.com:admin'|base64` \
  -H 'origin: https://aaaaaaa.cloudfront.net' \
  -X OPTIONS

HTTP/2 200
content-length: 0
server: CloudFront
date: Sun, 26 Apr 2020 14:48:16 GMT
access-control-allow-origin: https://aaaaaaa.cloudfront.net
access-control-allow-methods: GET, HEAD, OPTIONS, PUT, POST, PATCH, DELETE
access-control-allow-headers: *

# actual request
curl -s -D - 'https://bbbbbbb.cloudfront.net/lambda/api/books/1' \
  -H 'authorization: Basic '`echo -n 'tony_admin@laravel.com:admin'|base64` \
  -H 'origin: https://aaaaaaa.cloudfront.net'

HTTP/2 200
content-type: application/json
content-length: 198
date: Sun, 26 Apr 2020 14:48:01 GMT
server: Apache/2.4.41 () PHP/7.2.24
x-powered-by: PHP/7.2.24
cache-control: no-cache, private
x-ratelimit-limit: 60
x-ratelimit-remaining: 59
access-control-allow-origin: https://aaaaaaa.cloudfront.net
access-control-allow-credentials: true
vary: Authorization

{"book":{"id":1,"title":"test 2020-04-26 18:02:22","price":"02.22","author":"Foo author","editor":"Foo editor","created_at":"2020-04-23T14:35:32.000000Z","updated_at":"2020-04-26T09:02:23.000000Z"}}
javascriptで確認
$.ajax({
    url: "https://bbbbbb.cloudfront.net/lambda/api/books/1",
    dataType: 'json',
    headers: { "Authorization": "Basic " + btoa("tony_admin@laravel.com:admin") },
    success: function (data) {
        console.log('[ok]');
        console.log(data);
    },
    error: function (xhr, status, error) {
        console.log(`[ng] ${error}`);
    }
});
注意点
- Lambda@Edgeを複数のBehaviorに割り当てた場合、デプロイ時に一つのBehaviorしか指定できないため、もう一方のBehaviorは手動でCloudFrontのBehaviorタブからバージョンを上げる必要があり、とても面倒です。
arn:aws:lambda:us-east-1:000000000000:function:lambda-no-onamae:2 <-- この2を最新の番号に変える
おわりに
こんなことするくらいなら、素直にEC2側でCORS対応したほうがいいです。Frameworkを使ってるならCORS用のライブラリは通常あります。
もしくはAPI Gatewayを加えて、そこのCORS設定を使いましょう。


