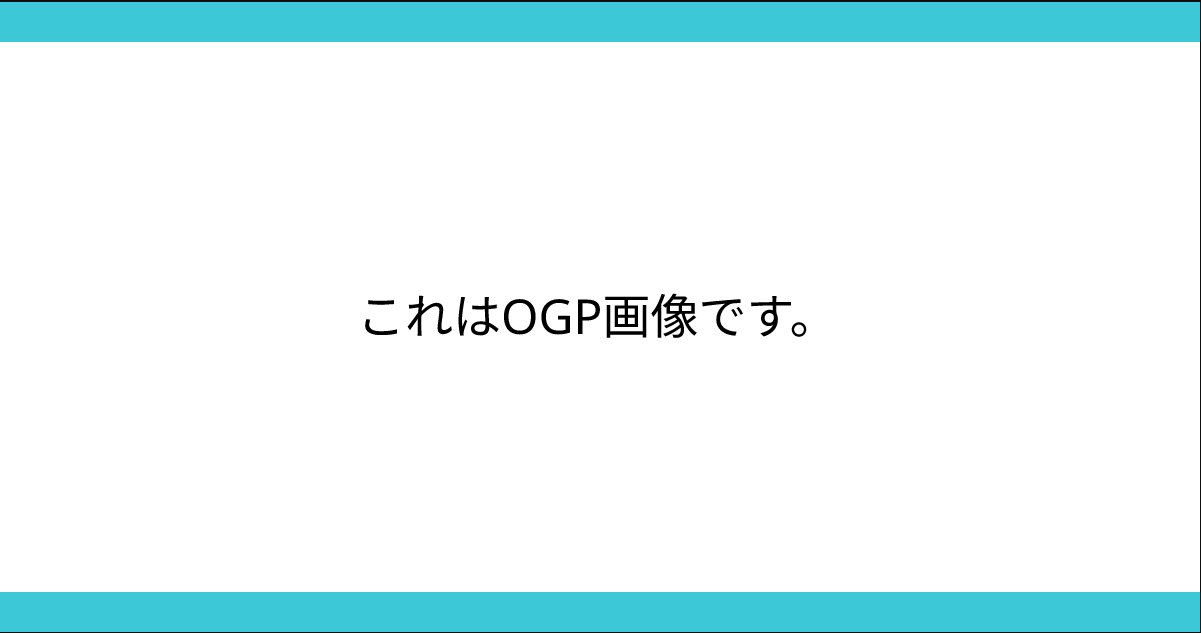
Webサイトを運用する上で必須のOGP画像をいちいち自分で生成するのは面倒なので、Next.jsでいい感じに作成することができたので解説します。
OGP画像とは
OGP画像の「OGP」とは「Open Graph Protcol」の略で、FacebookやTwitterなどのSNSでホームページのURLをシェアした際に表示される情報のことです。 ホームページのタイトルやURL、概要に加えて、OGP画像として設定されている画像を表示させる仕組みです。
当ブログをSlackで共有すると、以下のように表示されます。
こちらの画像の部分が、OGP画像になります。
Next.js13.4でOGP画像を生成する
そして、そのコードは以下のようになります。
import { ImageResponse } from "next/server";

export const revalidate = "force-cache";
export const runtime = "nodejs";

export const alt = "OGP画像";
export const size = {
  width: 1200,
  height: 630,
};
export const contentType = "image/png";

export default async function Image() {
  return new ImageResponse(
    (
      <div
        style={{
          fontSize: 48,
          background: "white",
          display: "flex",
          flexDirection: "column",
          alignItems: "center",
          justifyContent: "center",
          width: "100%",
          height: "100%",
        }}
      >
        <div
          style={{ height: 40, backgroundColor: "#5AC8D8", width: "100%" }}
        />
        <h1
          style={{
            flex: 1,
            maxWidth: "80%",
            display: "flex",
            alignItems: "center",
            justifyContent: "center",
          }}
        >
          これはOGP画像です。
        </h1>
        <div
          style={{ height: 40, backgroundColor: "#5AC8D8", width: "100%" }}
        />
      </div>
    ),
    {
      ...size,
    }
  );
}
では、要点を確認していきましょう。
まずは前提として、/app/**/opengraph-image.tsxにファイルを配置することで生成することができます。また生成した画像は、ファイルパスでマッピングされているとおりに配置され、そのURLにアクセスすることで確認できます。
例:/app/hoge/opengraph-image.tsx→/hoge/opengraph-image
export const revalidate = "force-cache";
export const runtime = "nodejs";

export const alt = "OGP画像";
export const size = {
  width: 1200,
  height: 630,
};
export const contentType = "image/png";
revalidateやruntimeはNext.jsのRoute Segment Config ( https://nextjs.org/docs/app/api-reference/file-conventions/route-segment-config )のオプションと同じものになります。
altはimgタグなどにつけるalt属性と同じものになります。
このOGP画像を設定したページのHeadを見てみると、以下のようにog:image:altに設定されます。

sizeは画像のサイズになります。ここで設定した値の比率が維持されます。
contentTypeは画像の種類を設定できます。(https://developer.mozilla.org/en-US/docs/Web/HTTP/Basics_of_HTTP/MIME_types#image_types)
そして、この機能の主となるのはImageResponseです。
new ImageResponse(
    (
      <div
        style={{
          fontSize: 48,
          background: "white",
          display: "flex",
          flexDirection: "column",
          alignItems: "center",
          justifyContent: "center",
          width: "100%",
          height: "100%",
        }}
      >
        <div
          style={{ height: 40, backgroundColor: "#5AC8D8", width: "100%" }}
        />
        <h1
          style={{
            flex: 1,
            maxWidth: "80%",
            display: "flex",
            alignItems: "center",
            justifyContent: "center",
          }}
        >
          これはOGP画像です。
        </h1>
        <div
          style={{ height: 40, backgroundColor: "#5AC8D8", width: "100%" }}
        />
      </div>
    ),
    {
      ...size,
    }
  );
ImageResponseはnext/serverからインポートするクラスで、第一引数がelement: ReactElement<any, string | JSXElementConstructor<any>>で、例にもあるとおり表示したいレイアウトを入れます。ここでの注意点がdisplay: gridは使用できないようです。
また第二引数はoptions?: (ImageOptions & ResponseInit) | undefined)で詳細には以下のようなものが入ります。
options: {
    width?: number = 1200
    height?: number = 630
    emoji?: 'twemoji' | 'blobmoji' | 'noto' | 'openmoji' = 'twemoji',
    fonts?: {
      name: string,
      data: ArrayBuffer,
      weight: number,
      style: 'normal' | 'italic'
    }[]
    debug?: boolean = false

    // Options that will be passed to the HTTP response
    status?: number = 200
    statusText?: string
    headers?: Record<string, string>
  },
)
参照:https://nextjs.org/docs/app/api-reference/file-conventions/metadata/opengraph-image
OGP画像を動的に生成する
記事などのOGP画像のタイトルをAPIから取得したい場合は、以下のように記述できます。
import { ImageResponse } from "next/server";
import { getArticleDetail } from "src/app/articles/[id]/requests";

export const revalidate = "force-cache";
export const runtime = "nodejs";

export const alt = "Article Detail";
export const size = {
  width: 1200,
  height: 630,
};
export const contentType = "image/png";

export default async function Image({ params }: { params: { id: string } }) {
  const article = await getArticleDetail(params.id);

  return new ImageResponse(
    (
      <div
        style={{
          fontSize: 48,
          background: "white",
          display: "flex",
          flexDirection: "column",
          alignItems: "center",
          justifyContent: "center",
          width: "100%",
          height: "100%",
        }}
      >
        <div
          style={{ height: 40, backgroundColor: "#5AC8D8", width: "100%" }}
        />
        <h1
          style={{
            flex: 1,
            maxWidth: "80%",
            display: "flex",
            alignItems: "center",
            justifyContent: "center",
          }}
        >
          {article.title}
        </h1>
        <div
          style={{ height: 40, backgroundColor: "#5AC8D8", width: "100%" }}
        />
      </div>
    ),
    {
      ...size,
    }
  );
}
ほぼそのままなのですが、取得したタイトルを以下のように生成することができます。

ちなみに、ファイル名をtwitter-image.tsxにすることでTwitter用の画像を作成できます。
詰まったポイント
Slackでの表示がうまくいかなかった
Slackで記事のリンクを共有した場合に、OGP画像がうまく表示されない現象が起きました。
調べたところ、og:descriptionをmetaタグに設定すればうまくいくとのことだったのですが、それだけではうまくいきませんでした。そこでog:urlも追加してみたところ、うまく表示させることができました。
Twitter用のOGP画像がうまく表示されなかった
TwitterのOGP画像も、twitter-image.tsxがうまく生成されていることを確認した上で、twitterに記事のリンクを入りつけて確認してみてもうまく表示されませんでした。
これに関しても、twitter:title、twitter:descriptionをmetaタグに追加することで、うまく表示されました。
ちなみに、デフォルトだとtwitter:cardがsummaryになっているので、summary_large_imageに変えておくと、大きく表示されるようになるのでおすすめです。
補足
Next.jsでmetaタグを設定するには、以下のように記述することができます。
↓静的
export const metadata: Metadata = {
  title: '...',
  description: '...',
};
↓動的
export async function generateMetadata(
  { params, searchParams }: Props,
  parent?: ResolvingMetadata,
): Promise<Metadata> {
  // read route params
  const id = params.id;

  // fetch data
  const product = await fetch(`https://.../${id}`).then((res) => res.json());

  // optionally access and extend (rather than replace) parent metadata
  const previousImages = (await parent).openGraph?.images || [];

  return {
    title: product.title,
    openGraph: {
      images: ['/some-specific-page-image.jpg', ...previousImages],
    },
  };
}
今回の場合は以下のように設定してます。
export const generateMetadata = async ({ params }: PageProps) => {
  const article = await getArticleDetail(params.id);

  return {
    title: `${article.title} - Coopello Blog`,
    description: article.description,
    openGraph: {
      title: article.title,
      description: article.description,
      url: `https://coopello-blog.vercel.app/articles/${params.id}`,
    },
    twitter: {
      title: article.title,
      card: "summary_large_image",
      description: article.description,
    },
  };
};
最後に
ブログ始めました!
まだまだ記事は増えていくので、ぜひブックマークを!!
勉強会主催始めました!
渋谷を中心に開催していこうと思うので、情報交換、仲間探しにぜひ!

