概要
前回作成した画像にモザイクをかける処理を、DrawModifierを使って実装していきます。
仮実装
Modifier.drawWithContentでgraphicsLayerを使って画面をImageBitmapとして取得することができるので、そちらにモザイク処理を行って描画します。ImageBitmapにモザイクを行う処理自体は前回とほぼ変わっていません。
※下記のコードはパフォーマンス面でいくつかの問題があります。実際のアプリにはそのまま組み込まないでください。
fun Modifier.mosaic(
    blockSize: Int = 100,
    minBlockSize: Int = 5): Modifier = composed(
    inspectorInfo = debugInspectorInfo {
        name = "mosaic"
        properties["blockSize"] = blockSize
    }) {

    val coroutineScope = rememberCoroutineScope()
    val graphicsLayer = rememberGraphicsLayer()
    var image by remember { mutableStateOf<ImageBitmap?>(null) }

    drawWithContent {
        // 画面の内容をgraphicsLayerに保存
        graphicsLayer.record {
            this@drawWithContent.drawContent()
        }

        coroutineScope.launch(Dispatchers.IO) {
            // graphicsLayerの内容をImageBitmapで取得
            image = graphicsLayer.toImageBitmap()
        }

        // 画面の内容が保存されていて、ある程度ブロックサイズが大きい場合にモザイク処理を行う
        if (image != null && blockSize >= minBlockSize) {

            val width = image?.width ?: 0
            val height = image?.height ?: 0

            for (x in 0 until width step blockSize) {
                for (y in 0 until height step blockSize) {

                    // 読み込む範囲を画像サイズ内に収める
                    val blockWidth = if (x + blockSize < width) {
                        blockSize
                    } else {
                        width - x
                    }
                    val blockHeight = if (y + blockSize < height) {
                        blockSize
                    } else {
                        height - y
                    }

                    // BitmapImageから指定範囲を読み込み
                    val buffer = IntArray(blockWidth * blockHeight)
                    image?.readPixels(
                        buffer = buffer,
                        startX = x,
                        startY = y,
                        width = blockWidth,
                        height = blockHeight
                    )

                    // 範囲内の色を平均化しブロックを描画
                    drawRect(
                        averagingColor(buffer),
                        Offset(x.toFloat(), y.toFloat()),
                        Size(blockWidth.toFloat(), blockHeight.toFloat())
                    )
                }
            }
        } else {
            // それ以外の場合は、元の画面を描画
            drawLayer(graphicsLayer)
        }
    }
}

/**
 * 平均化したColorを返す
 */
private fun averagingColor(
    buffer: IntArray
): Color {
    var r = 0L
    var g = 0L
    var b = 0L
    buffer.forEach {
        r += (it shr 16) and 0xff
        g += (it shr 8) and 0xff
        b += it and 0xff
    }
    return Color(
        (r / buffer.size).toInt(),
        (g / buffer.size).toInt(),
        (b / buffer.size).toInt()
    )
}
呼び出し方
@Composable
fun MainContent() {
var blockSize by remember { mutableIntStateOf(0) }
Box() {
Image(
modifier = Modifier.align(Alignment.Center).mosaic(blockSize, 10),
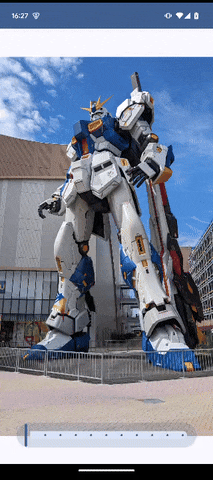
painter = painterResource(id = R.drawable.gundam),
contentDescription = null
)
Box(
modifier = Modifier
.wrapContentSize()
.align(Alignment.BottomCenter)
.padding(all = 32.dp)
.clip(shape = RoundedCornerShape(50))
.background(color = MaterialTheme.colorScheme.primary.copy(alpha = 0.2f))
) {
Slider(
modifier = Modifier
.align(Alignment.Center)
.padding(horizontal = 16.dp),
value = blockSize.toFloat(),
valueRange = 0f..100f,
steps = 9,
onValueChange = { blockSize = it.roundToInt() }
)
}
}
}
問題点1
モザイク化の処理は前回と同じなのに、実際に使ってみると数十秒かかってしまいます。
原因
graphicsLayer.toImageBitmap()で作成されるImageBitmapの実体はAndroidImageBitmapです。AndroidImageBitmapのreadPixelsを見ると以下のコメントがあります。
// Pixels of a hardware bitmap cannot be queried directly so make a copy
// of it into a configuration that can be queried
ConfigがBitmap.Config.HARDWAREの場合、コピーを作成し、そちらからピクセルを読み込むようになっており、readPixelsを呼び出すたびにImageBitmapのコピーが作成されているため、処理に時間がかかっているようです。
修正
readPixelsの処理を参考に、ピクセル情報にアクセス可能な形式でコピーを作成し保持するようにします。
-            image = graphicsLayer.toImageBitmap()
+            image =
+                graphicsLayer.toImageBitmap().asAndroidBitmap()
+                    .copy(Bitmap.Config.ARGB_8888, false).asImageBitmap()
問題点2
問題点1の修正で、見た目上の動作は前回作った物と変わらなくなったのですが、ログを出力し確認すると、drawWithContentが繰り返し呼び出されています。
原因
drawWithContentでimageを更新しているため、毎回再コンポーズが発生しています。
修正
BitmapのsameAsで、保持しているImageBimatpから変更があったか判定して、imageを更新するようにします。
-            image =
-                graphicsLayer.toImageBitmap().asAndroidBitmap()
-                    .copy(Bitmap.Config.ARGB_8888, false).asImageBitmap()
+            val bitmap =
+                graphicsLayer.toImageBitmap().asAndroidBitmap()
+                    .copy(Bitmap.Config.ARGB_8888, false).asImageBitmap()
+            if (!bitmap.asAndroidBitmap().sameAs(image?.asAndroidBitmap())) {
+                image = bitmap
+            }
問題点3
drawWithContentでモザイク化の処理を行っていますが、drawWithContentはUIスレッドで実行されているため、時間のかかる処理を行うのは好ましくありません。ですので、launch内でモザイク化の処理まで行うようにします。
- var image by remember { mutableStateOf<ImageBitmap?>(null) }
+ var image by remember(blockSize) { mutableStateOf<ImageBitmap?>(null) }
+ var mosaic by remember { mutableStateOf<ImageBitmap?>(null) }

        //...

        coroutineScope.launch(Dispatchers.IO) {
            // graphicsLayerの内容をImageBitmapで取得
            val targetBitmap =
                graphicsLayer.toImageBitmap().asAndroidBitmap()
                    .copy(Bitmap.Config.ARGB_8888, false).asImageBitmap()
            if (!targetBitmap.asAndroidBitmap().sameAs(image?.asAndroidBitmap())) {
                image = targetBitmap

+                if (blockSize >= minBlockSize) {
+
+                    val newBitmap = Bitmap.createBitmap(targetBitmap.width, targetBitmap.height, Bitmap.Config.ARGB_8888)
+                    val canvas = Canvas(newBitmap)
+                    val paint = Paint()
+
+                    val width = targetBitmap.width
+                    val height = targetBitmap.height
+
+                    for (x in 0 until width step blockSize) {
+                        for (y in 0 until height step blockSize) {
+
+                            // 読み込む範囲を画像サイズ内に収める
+                            val blockWidth = if (x + blockSize < width) {
+                                blockSize
+                            } else {
+                                width - x
+                            }
+                            val blockHeight = if (y + blockSize < height) {
+                                blockSize
+                            } else {
+                                height - y
+                            }
+
+                            // BitmapImageから指定範囲を読み込み
+                            val buffer = IntArray(blockWidth * blockHeight)
+                            targetBitmap.readPixels(
+                                buffer = buffer,
+                                startX = x,
+                                startY = y,
+                                width = blockWidth,
+                                height = blockHeight
+                            )
+
+                            // 範囲内の色を平均化しブロックを描画
+                            canvas.drawRect(
+                                x.toFloat(),
+                                y.toFloat(),
+                                (x + blockWidth).toFloat(),
+                                (y + blockHeight).toFloat(),
+                                paint.apply {
+                                    color = averagingColor(buffer).toArgb()
+                                }
+                            )
+                        }
+                    }
+                    mosaic = newBitmap.asImageBitmap()
+                } else {
+                    mosaic = targetBitmap
+                }
            }
        }
-        // ...
-        // 古い処理を大きく削除
-        // ...
+        if (mosaic != null) {
+            drawImage(mosaic!!)
+        } else {
+            drawLayer(graphicsLayer)
+        }
問題点4
ブロックサイズを素早く変更すると真っ白な画面が描画されることがある。
原因
1回のgraphicsLayer.record呼び出しに対して、複数回graphicsLayer.toImageBitmap()を呼び出すと、2回目以降の呼び出しで作成されるImageBitmapは透明になるようです。
修正
graphicsLayer.recordとgraphicsLayer.toImageBitmap()の呼び出しタイミングは制御しきれないので、作成されたのが透明なImageBitmapだった場合、直前に保存された透明でないImageBitmapを使用するようにします。
-            val targetBitmap =
-                graphicsLayer.toImageBitmap().asAndroidBitmap()
-                    .copy(Bitmap.Config.ARGB_8888, false).asImageBitmap()
-            if (!targetBitmap.asAndroidBitmap().sameAs(image?.asAndroidBitmap())) {
-                image = targetBitmap

+            var targetBitmap =
+                graphicsLayer.toImageBitmap().asAndroidBitmap()
+                    .copy(Bitmap.Config.ARGB_8888, false).asImageBitmap()
+            var isSameBitmap = targetBitmap.asAndroidBitmap().sameAs(image?.asAndroidBitmap())
+
+            val isTransparent = isTransparent(targetBitmap)
+            if (isTransparent) {
+                if (image != null) {
+                    targetBitmap = image!!
+                } else {
+                    isSameBitmap = true
+                }
+            }
+
+            if (!isSameBitmap) {
+                image = targetBitmap

+ private fun isTransparent(bitmap: ImageBitmap): Boolean {
+     val buffer = IntArray(bitmap.width * bitmap.height)
+     bitmap.readPixels(
+         buffer,
+         0,
+         0,
+         bitmap.width,
+         bitmap.height
+     )
+     val color = averagingColor(buffer)
+     return color == Color.Transparent
+ }
問題点5
ブロックサイズを0にして、モザイク化処理を行わなかった場合、モザイクがかかったままになることがあります。
原因
モザイク化の有無によって処理にかかる時間が異なるため、モザイク無しの画像が設定された後にモザイク有りの画像が設定されています。
修正
launchに渡すDispatchersをシングルスレッドで動作するようにします。
launchが返す以前のモザイク化処理を行っているJobをキャンセルするようにします。(処理内容は最後のソースを参照)
+ val dispatcher = Dispatchers.IO.limitedParallelism(1)

        // ...

-        coroutineScope.launch(Dispatchers.IO) {
+        coroutineScope.launch(dispatcher) {
課題
graphicsLayer.toImageBitmap()の想定された使い方ではないのか、保存されたImageBitmapを編集して画面を描画しようとすると色々と問題点が見つかり、現時点では場当たり的な対応でとりあえず動く状態になっています。もっと上手いやり方があれば教えていただけると嬉しいです。
おまけ
カスタム修飾子として作成したことにより、画像以外にもモザイクをかけることが可能になっています。ImageではなくSliderを含む親要素のBoxに適用してみます。

画面下部にあるSliderにもモザイクがかかるようになっています。しかし、モザイク化の処理で、アルファ値を考慮していないため、透明(argb=x000000000)な部分が黒(rgb=0x000000)になっているので、そちらを修正します。
private fun averagingColor(
    buffer: IntArray
): Color {
+    var a = 0L
    var r = 0L
    var g = 0L
    var b = 0L
    buffer.forEach {
+        a += (it shr 24) and 0xff
        r += (it shr 16) and 0xff
        g += (it shr 8) and 0xff
        b += it and 0xff
    }
    return Color(
        (r / buffer.size).toInt(),
        (g / buffer.size).toInt(),
-        (b / buffer.size).toInt()
+        (b / buffer.size).toInt(),
+        (a / buffer.size).toInt()
    )
}
背景部分も含め、意図した通りにモザイク処理が行われるようになりました。
参考
グラフィック修飾子 | Jetpack Compose | Android Developers
カスタム修飾子を作成する | Jetpack Compose | Android Developers
最後に
現時点でのソースを下記に貼り付けておきます。※2025/01/06 修正
private var job: Job? = null

fun Modifier.mosaic(
    blockSize: Int = 100,
    minBlockSize: Int = 5
): Modifier = composed(
    inspectorInfo = debugInspectorInfo {
        name = "mosaic"
        properties["blockSize"] = blockSize
    }) {

    val coroutineScope = rememberCoroutineScope()
    val graphicsLayer = rememberGraphicsLayer()

    var image by remember { mutableStateOf<ImageBitmap?>(null) }
    var mosaic by remember { mutableStateOf<ImageBitmap?>(null) }

    drawWithContent {

        // 画面の内容をgraphicsLayerに保存
        graphicsLayer.record {
            this@drawWithContent.drawContent()
        }

        coroutineScope.launch(Dispatchers.IO) {
            // graphicsLayerの内容をImageBitmapで取得
            val bitmap = graphicsLayer.toImageBitmap().asAndroidBitmap()
                .copy(Bitmap.Config.ARGB_8888, false).asImageBitmap()

            if (!bitmap.asAndroidBitmap().sameAs(image?.asAndroidBitmap())) {
                image = if (isTransparent(bitmap)) {
                    // 透明な場合は以前のコピーを保存
                    image?.asAndroidBitmap()?.copy(Bitmap.Config.ARGB_8888, false)?.asImageBitmap()
                } else {
                    bitmap
                }
            }
        }

        // 以前のモザイク化処理が実行中の場合キャンセルする
        job?.run {
            if (isActive) {
                cancel()
            }
        }

        if (image != null) {
            job = coroutineScope.launch(Dispatchers.IO) {

                val bitmap = image!!
                if (blockSize >= minBlockSize) {

                    val newBitmap =
                        Bitmap.createBitmap(bitmap.width, bitmap.height, Bitmap.Config.ARGB_8888)
                    val canvas = Canvas(newBitmap)
                    val paint = Paint()

                    val width = bitmap.width
                    val height = bitmap.height

                    for (x in 0 until width step blockSize) {
                        for (y in 0 until height step blockSize) {

                            // 読み込む範囲を画像サイズ内に収める
                            val blockWidth = if (x + blockSize < width) {
                                blockSize
                            } else {
                                width - x
                            }
                            val blockHeight = if (y + blockSize < height) {
                                blockSize
                            } else {
                                height - y
                            }

                            // BitmapImageから指定範囲を読み込み
                            val buffer = IntArray(blockWidth * blockHeight)
                            bitmap.readPixels(
                                buffer = buffer,
                                startX = x,
                                startY = y,
                                width = blockWidth,
                                height = blockHeight
                            )

                            // 範囲内の色を平均化しブロックを描画
                            canvas.drawRect(
                                x.toFloat(),
                                y.toFloat(),
                                (x + blockWidth).toFloat(),
                                (y + blockHeight).toFloat(),
                                paint.apply {
                                    color = averagingColor(buffer).toArgb()
                                }
                            )
                        }
                    }
                    if (!newBitmap.sameAs(mosaic?.asAndroidBitmap())) {
                        yield()
                        mosaic = newBitmap.asImageBitmap()
                    }
                } else {
                    if (!bitmap.asAndroidBitmap().sameAs(mosaic?.asAndroidBitmap())) {
                        yield()
                        mosaic = bitmap
                    }
                }
            }
        }

        if (mosaic != null) {
            drawImage(mosaic!!)
        } else {
            drawLayer(graphicsLayer)
        }
    }
}

/**
 * 平均化したColorを返す
 */
private fun averagingColor(
    buffer: IntArray
): Color {
    var a = 0L
    var r = 0L
    var g = 0L
    var b = 0L
    buffer.forEach {
        a += (it shr 24) and 0xff
        r += (it shr 16) and 0xff
        g += (it shr 8) and 0xff
        b += it and 0xff
    }
    return Color(
        (r / buffer.size).toInt(),
        (g / buffer.size).toInt(),
        (b / buffer.size).toInt(),
        (a / buffer.size).toInt()
    )
}

/**
 * bitmapが透明かどうかを返す
 */
private fun isTransparent(bitmap: ImageBitmap): Boolean {
    val buffer = IntArray(bitmap.width * bitmap.height)
    bitmap.readPixels(
        buffer,
        0,
        0,
        bitmap.width,
        bitmap.height
    )
    val color = averagingColor(buffer)
    return color == Color.Transparent
}