はじめに
この記事では**DjangoでwebAPIを作成しよう!**という記事です。
RDSのMySQLを使用しています。
前回の記事
[AWS]EC2,RDS,Djangoを使ってみた。1から環境構築
$             <- 自分のPCターミナルでのコマンド
[ec2-user] $  <- EC2にログイン中でのコマンド
MySQL >       <- MySQLにログイン中でのコマンド
#             <- 私のコメント
>>>           <- 実行結果(出力値)
前提条件
Djangoのプロジェクト作成
# testDjangoというプロジェクトを作成する
[ec2-user] $ django-admin startproject testDjango

[ec2-user] $ cd
[ec2-user] $ cd testDjango
FileZillaを使ってsettings.pyを編集
# IPアドレスをグーグルなどで検索した時エラー内容を返してくれる
DEBUG = True

# 変更
ALLOWED_HOSTS = ['(EC2のオープンIPアドレス)','localhost']

...
(略)
...

# デフォルトの設定をリマーク
# DATABASES = {
#     'default': {
#         'ENGINE': 'django.db.backends.sqlite3',
#         'NAME': BASE_DIR / 'db.sqlite3',
#     }
# }

# 新しく記入
# [NAME]はRDS内のテーブル名、後に作成します。
# [USER,PASSWORD,HOST]はそれぞれ入力
DATABASES = {
    'default': {
        'ENGINE': 'django.db.backends.mysql',
        'NAME': 'dbtest',
        'USER': '(DBマスターユーザー)',
        'PASSWORD': '(DBマスターユーザーパスワード)',
        'HOST': '(DBエンドポイント)',
        'PORT': '3306',
    }
}

...
(略)
...

# 日本語に変更
# LANGUAGE_CODE = 'en-us'
LANGUAGE_CODE = 'ja'

# 日本時間に変更
# TIME_ZONE = 'UTC'
TIME_ZONE = 'Asia/Tokyo'

USE_I18N = True

USE_L10N = True

USE_TZ = True


# Static files (CSS, JavaScript, Images)
# https://docs.djangoproject.com/en/3.1/howto/static-files/

STATIC_URL = '/static/'
# pollsと言う名前のアプリを作成する
[ec2-user] $ python manage.py startapp polls
[ec2-user] $ pip install djangorestframework
順番大切
...
(略)
...

# 変更
INSTALLED_APPS = [
    'django.contrib.admin',
    'django.contrib.auth',
    'django.contrib.contenttypes',
    'django.contrib.sessions',
    'django.contrib.messages',
    'django.contrib.staticfiles',
    'rest_framework',
    'polls.apps.PollsConfig',
]
# (アプリ名).apps.(先頭大文字アプリ名)Config

...
(略)
...
RDSのMySQLにログイン
[ec2-user] $ mysql -h (DBエンドポイント) -u (DBマスターユーザー名) -p
# パスワードを要求されるので入力(文字は表示されないが打ち込めています)(コピペ可)

>>> Welcome to the MariaDB monitor.
# が表示されればRDSのMySQLに接続ができた

# データベース内一覧を表示(小文字でも可 show database;)
MySQL > SHOW databases;

# 「dbtest」という名前のテーブルを作成
MySQL > CREATE DATABASE dbtest;

# 終了
MySQL > exit
Djangoの設定
モデルの作成
from django.db import models

class User(models.Model):
    #作成時刻を記録
    created = models.DateTimeField(auto_now_add=True)
    #Userの名前を記録
    name = models.CharField(max_length=100, blank=True, default='')
    #Userのemail
    mail = models.TextField()

    class Meta:
        ordering = ('created',)
データベースのマイグレーションを行う
[ec2-user] $ python manage.py makemigrations polls
[ec2-user] $ python manage.py migrate
確認してみます
MySQL > show databases;
MySQL > use dbtest;
MySQL > show tables;
>>>
+----------------------------+
| Tables_in_dbtest           |
+----------------------------+
| auth_group                 |
| auth_group_permissions     |
| auth_permission            |
| auth_user                  |
| auth_user_groups           |
| auth_user_user_permissions |
| django_admin_log           |
| django_content_type        |
| django_migrations          |
| django_session             |
| example_table              |
| polls_user                 | <--生成されている
+----------------------------+   (アプリ名)_user

MySQL > exit
以下の記事が参考になります
【学習メモ】MakemigrationsとMigrateについて
serializers.pyの作成
デフォルトでは生成されていないため、メモ帳か何かで作成しFileZillaで転送してください
- シリアライズとは、ソフトウェア内部で扱っているデータをそのまま、保存したり送受信することができるように変換することです。
from rest_framework import serializers
from polls.models import User


class UserSerializer(serializers.ModelSerializer):
    class Meta:
        model = User
        fields = ('id', 'name', 'mail')
views.pyを実装
from django.http import HttpResponse, JsonResponse
from django.views.decorators.csrf import csrf_exempt
from rest_framework.parsers import JSONParser
from polls.models import User
from polls.serializers import UserSerializer


@csrf_exempt
def user_list(request):

    if request.method == 'GET':
        #UserをMySQLから全件取得
        polls = User.objects.all()
        serializer = UserSerializer(polls, many=True)
        #Jsonで返してくる
        return JsonResponse(serializer.data, safe=False)

    elif request.method == 'POST':
        data = JSONParser().parse(request)
        serializer = UserSerializer(data=data)
        if serializer.is_valid():
            serializer.save()
            #登録成功するとJsonデータが帰ってくる  ##status 200番台は処理が成功した
            return JsonResponse(serializer.data, status=201)
        return JsonResponse(serializer.errors, status=400)
polls/urls.pyを作成する
これも新規作成してください
from django.urls import path
from polls import views

urlpatterns = [
    path('user/', views.user_list),
]
大元のurls.pyに接続します
from django.contrib import admin
from django.urls import path, include

urlpatterns = [
    path('admin/', admin.site.urls),
    path('', include('polls.urls')),
]
これで設定は終了です。
テストする
ローカルのサーバーを立てます
ローカルとはなんぞ?と言う方は以下の記事がわかりやすかったです
djangoは誰が動かしているのか?(デプロイのための俯瞰)
[ec2-user] $ cd
[ec2-user] $ cd testDjango

[ec2-user] $ python manage.py runserver
このあとGoogleChromeなどで
http://(EC2のオープンIPアドレス)/user/
と検索すると
[]
と空の括弧が返ってきたと思います。
データを入れる
このままだと不便なので
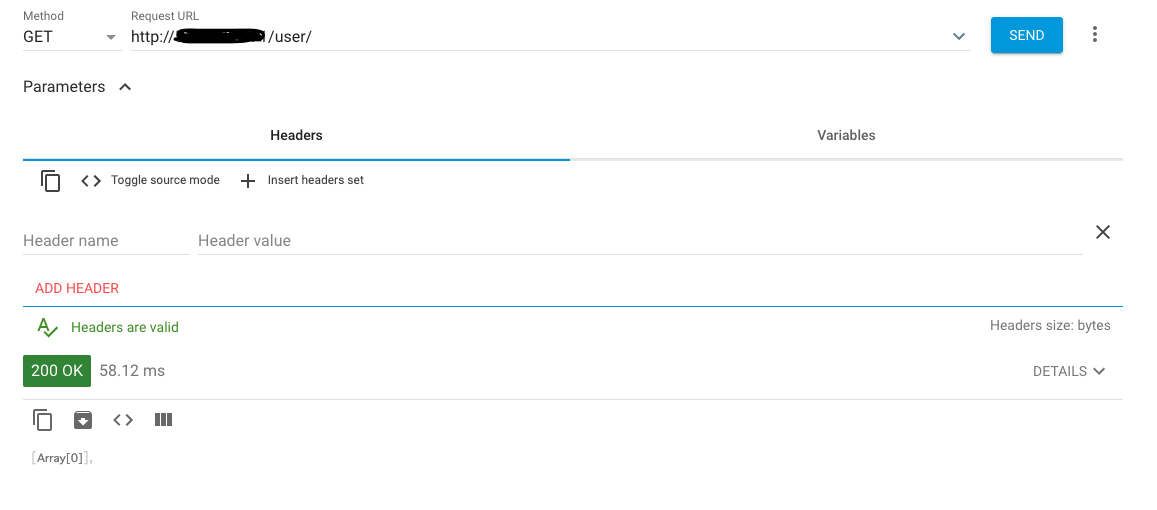
GoogleChromeの拡張機能のARCをダウンロードしましょう
GETで通信してみると空の括弧が返ってきます
POSTで通信してみます。その際に
{"name":"tanaka","mail":"T@gmail.com"}
この情報を追加します。
SENDを押すとレスポンスが返ってきます
またGETできちんと登録できたか確認してみるといいでしょう。
またデータベースは
MySQL > use dbtest;
MySQL > SELECT * FROM polls_user;
>>>
+----+----------------------------+--------+-------------+
| id | created                    | name   | mail        |
+----+----------------------------+--------+-------------+
|  1 | 2020-10-21 05:10:23.730602 | tanaka | T@gmail.com |
+----+----------------------------+--------+-------------+
これで登録に成功しました。
おわりに
この記事で誰かの役に立っていただければ幸いです。
参考サイト
以下と本記事の途中に非常に参考にさせていただいたサイトを紹介しています。
ありがとうございました。
[1].Django REST frameworkチュートリアル その1
[2].djangoは誰が動かしているのか?(デプロイのための俯瞰)
[3].【学習メモ】MakemigrationsとMigrateについて
[4].よく使うMySQLコマンド集


