きっかけ(読み飛ばし可)
Angularで、とりあえずhtmlだけ作ってみました。
ログイン画面だけ作って、ふと「認証どうしよう?」って考えたときに、Google技術を扱う会社としてはとりあえずGoogle認証やな、ってなりました。
でも、いざ調べてみるとOAuthとか使おうとしたらAPIだったり、有料のサービスだったり、、、、
で、行き着いたのがFirebaseでした。
(もっと早くに気づくべきだったんでしょうけど![]() )
)
ところが。いざ調査を始めると、Firebaseでも「メールアドレス&パスワード」の認証はけっこうあったのですけど、「Google認証」となると意外と日本語の記述でやってる方が少なくて。。。
(調べ方が悪い?!)
というわけで書いてみました。
環境
macOS Mojave 10.14.6
※Angularは実際はdocker上で動かしてますが、今回のエントリには関係ないかな、と思ったので記載していません。
(Firebaseってバージョンどこで見るのかな。。。)
$ ng version
@angular-devkit/architect         0.803.19
@angular-devkit/build-angular     0.803.19
@angular-devkit/build-optimizer   0.803.19
@angular-devkit/build-webpack     0.803.19
@angular-devkit/core              8.3.19
@angular-devkit/schematics        8.3.19
@angular/cdk                      8.2.3
@angular/cli                      8.3.19
@angular/fire                     5.2.3
@angular/material                 8.2.3
@ngtools/webpack                  8.3.19
@schematics/angular               8.3.19
@schematics/update                0.803.19
rxjs                              6.4.0
typescript                        3.5.3
webpack                           4.39.2
必要なもの
- Google アカウント(必須)
- GCPアカウント(任意。なくても全然余裕)
- ちょっと作りかけのAngularアプリ、もしくはAngularの簡単な知識(これはなくてもいけます。でも、あるとうれしい)
手順
ざっと手順はこんな感じです。
1. Firebaseの準備
2. Firebase Authentication の設定
3. Angular アプリの改修
では、順番にやっていきます。
1.Firebaseの準備
Firebase プロジェクトの作成
まず、Firebase のプロジェクトを作成します。
Firebaseはこちらから。
「使ってみる」ボタンをポチするとGoogleアカウント認証画面に移動します。
そこで、用意していただいたGoogleアカウントでログインします。
すると、こんな画面になります。

今回は、新しくプロジェクトを作成します。
GCPプロジェクトと連携されているアカウントの場合、既存のGCPプロジェクト名が選択肢として表示されます。
※※ 注意 ※※
紐付けたGCPプロジェクトが課金対象の場合は自動的に「従量課金」プランが選択されます。
(無料は選べない。GCPが課金なんだからFirebaseも課金するよ、ってことですかね![]() )
)
ただし、従量課金コースでも、一部無料枠があるようです。詳しくは以下参照ください。
Firebase料金
あずきの使っているGCPプロジェクトは会社から支給されている課金対象のsandboxだったため、ちょっとビビって無料コースにしたかったのです。。。
それはさておき、早速作成します。
プロジェクト名は基本的になんでもよさげなので、適当に付けます任意の名前を付けておきます。
※後で気づきましたが、これ、認証時のURLになります。
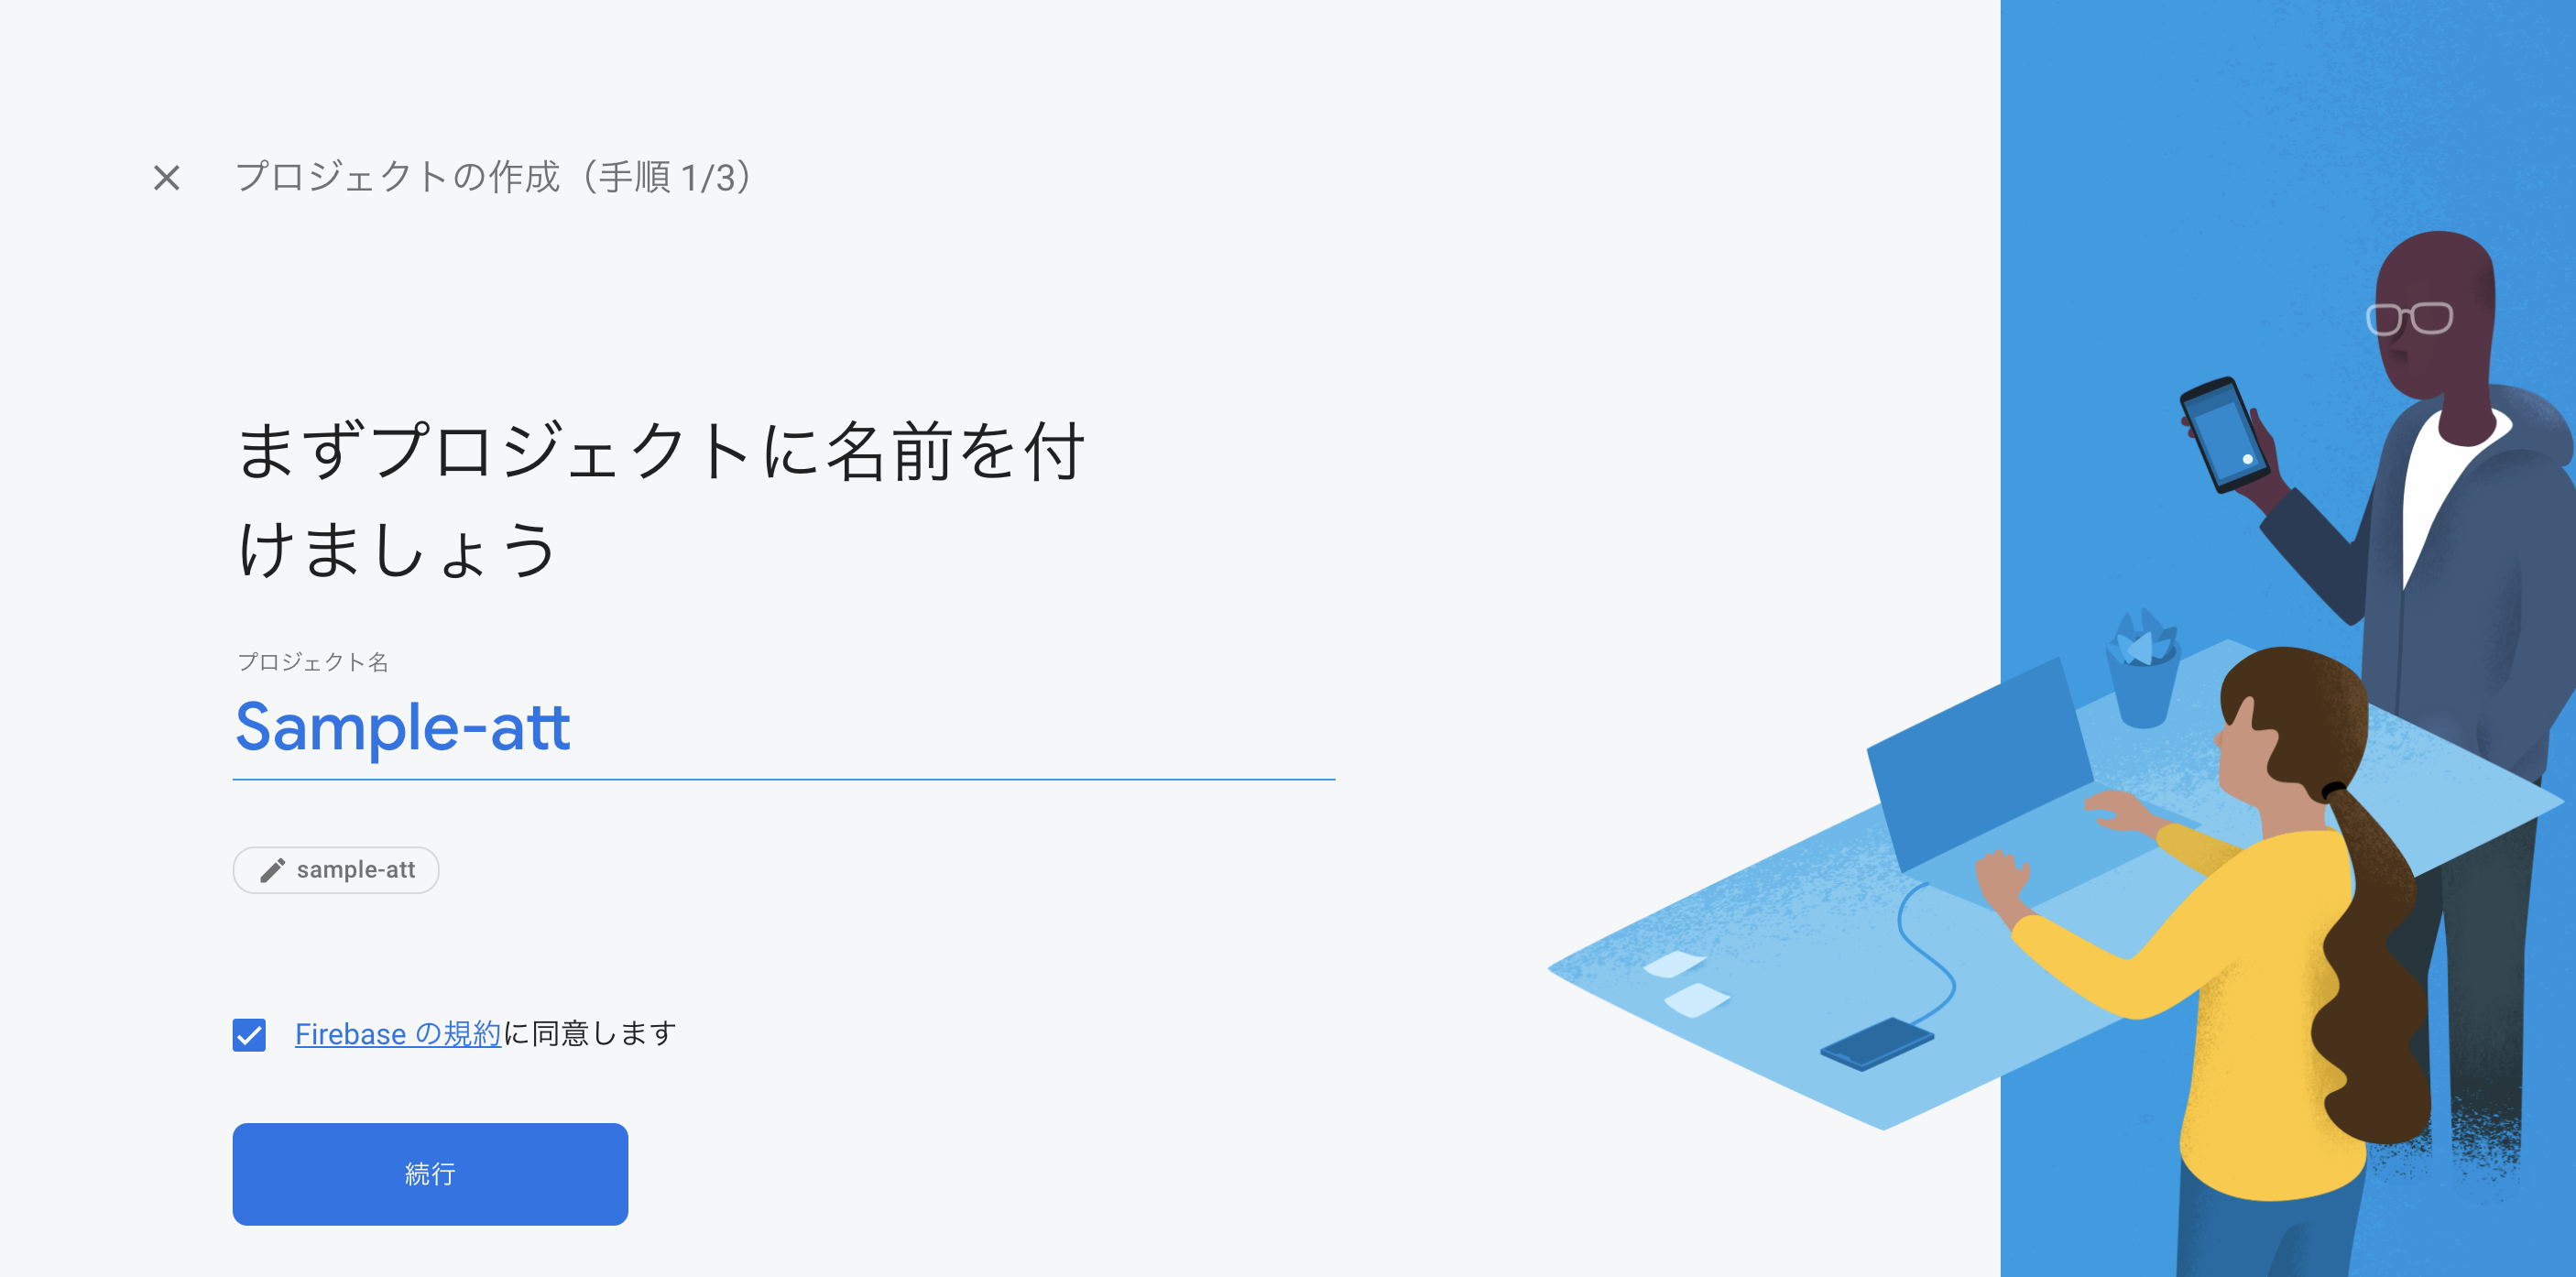
次の画面でGoogleアナリティクスを選択する画面があります。
推奨通り、設定をONにして続行すると、プロジェクトが作成されます。
こんな画面になりました。
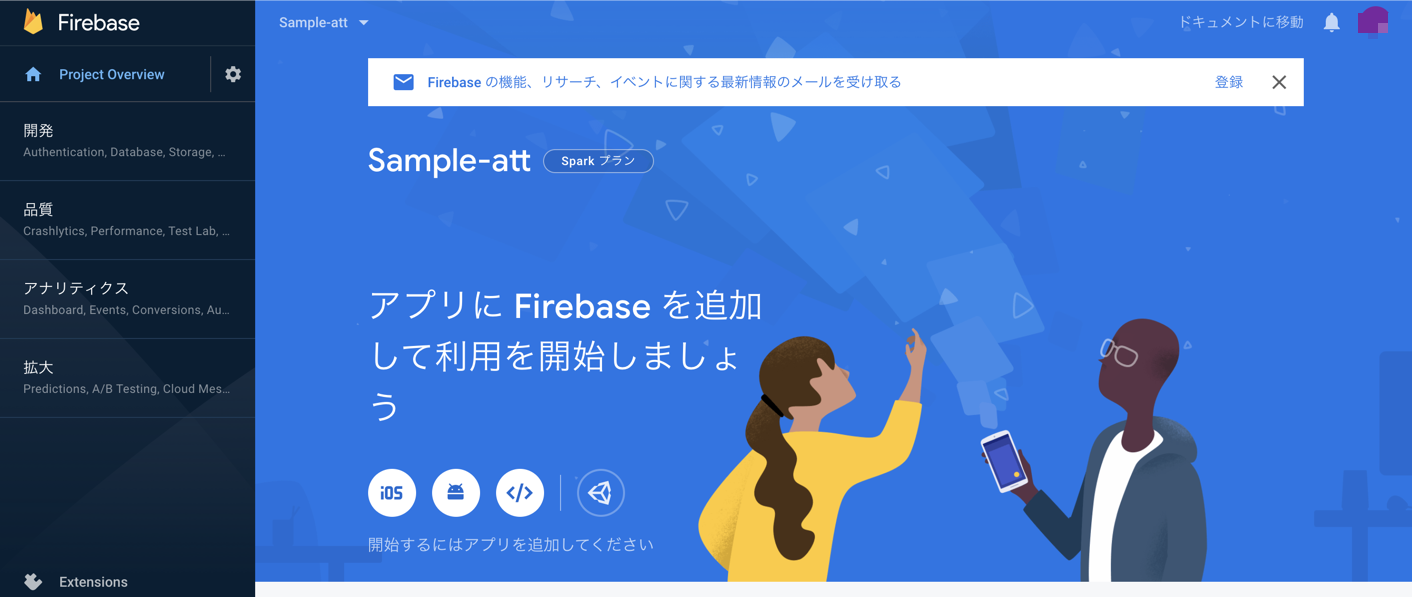
2.Authentication の設定
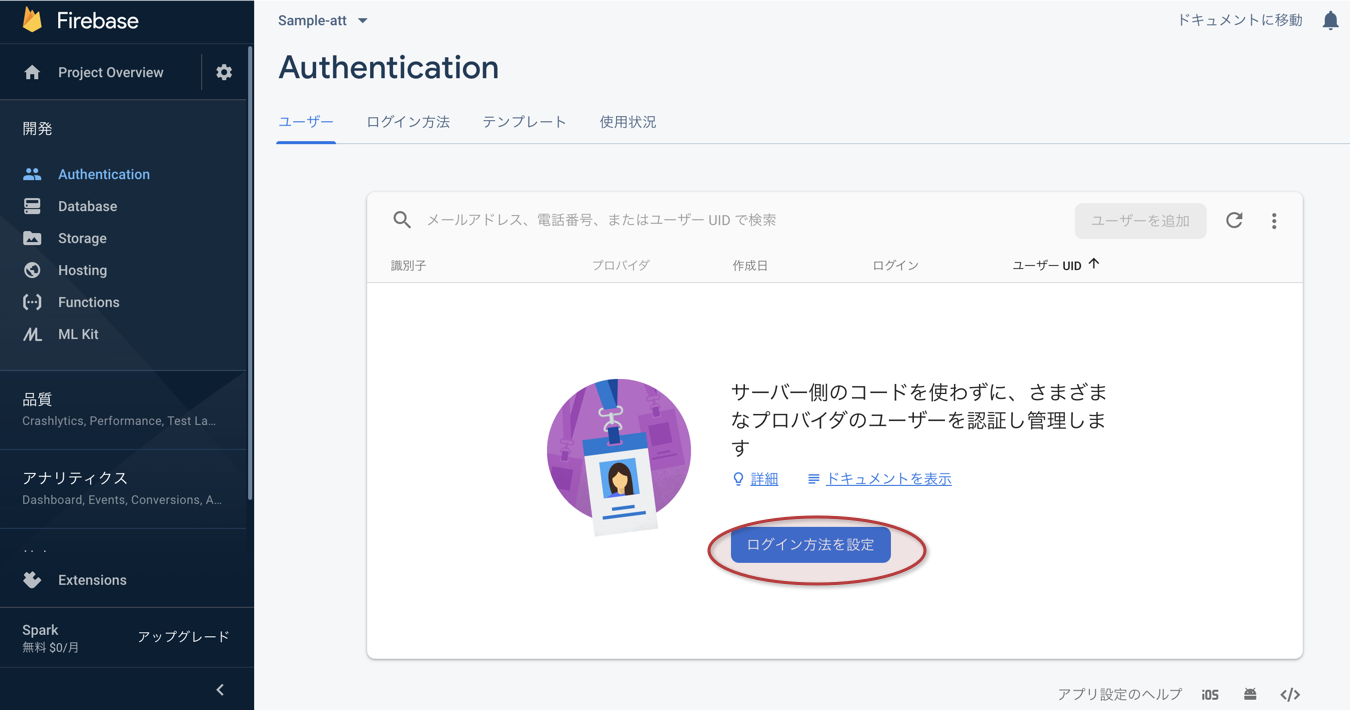
今回は Authentication 機能を使いたいので、スススッと下にいった、ここをポチします。

Google認証の有効化
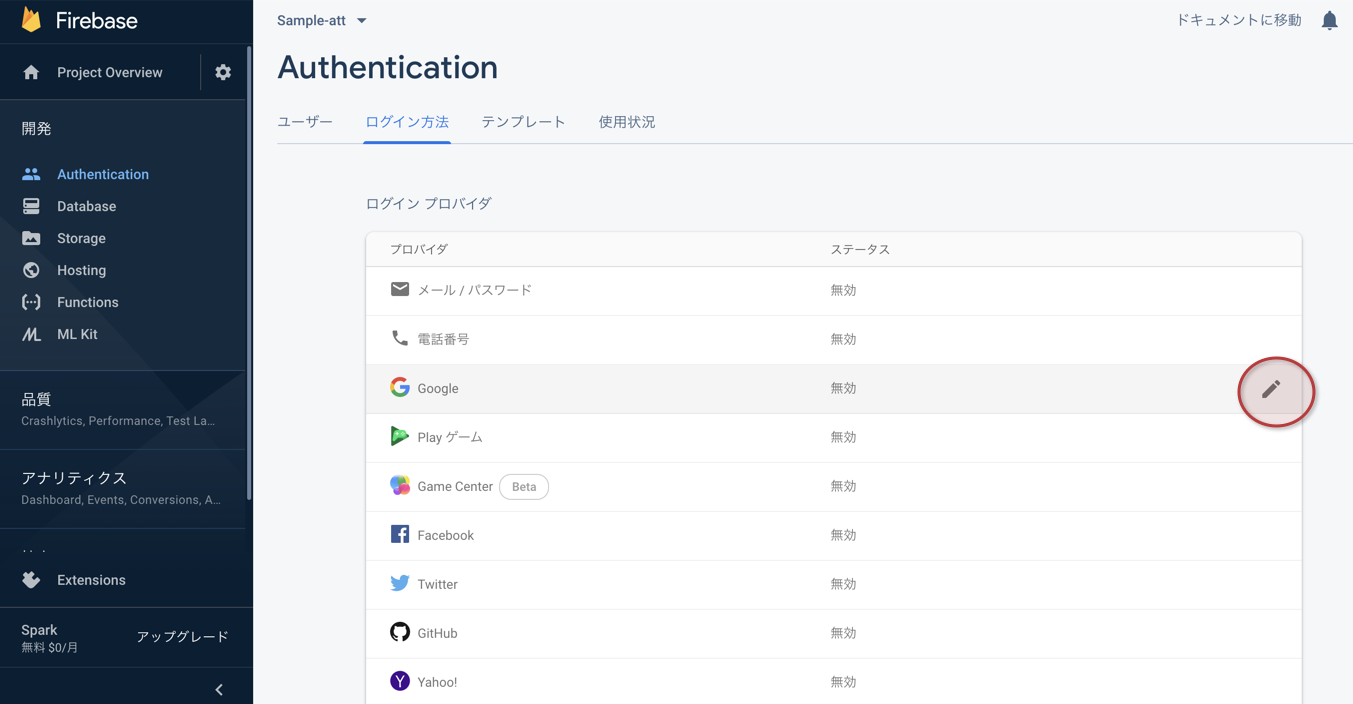
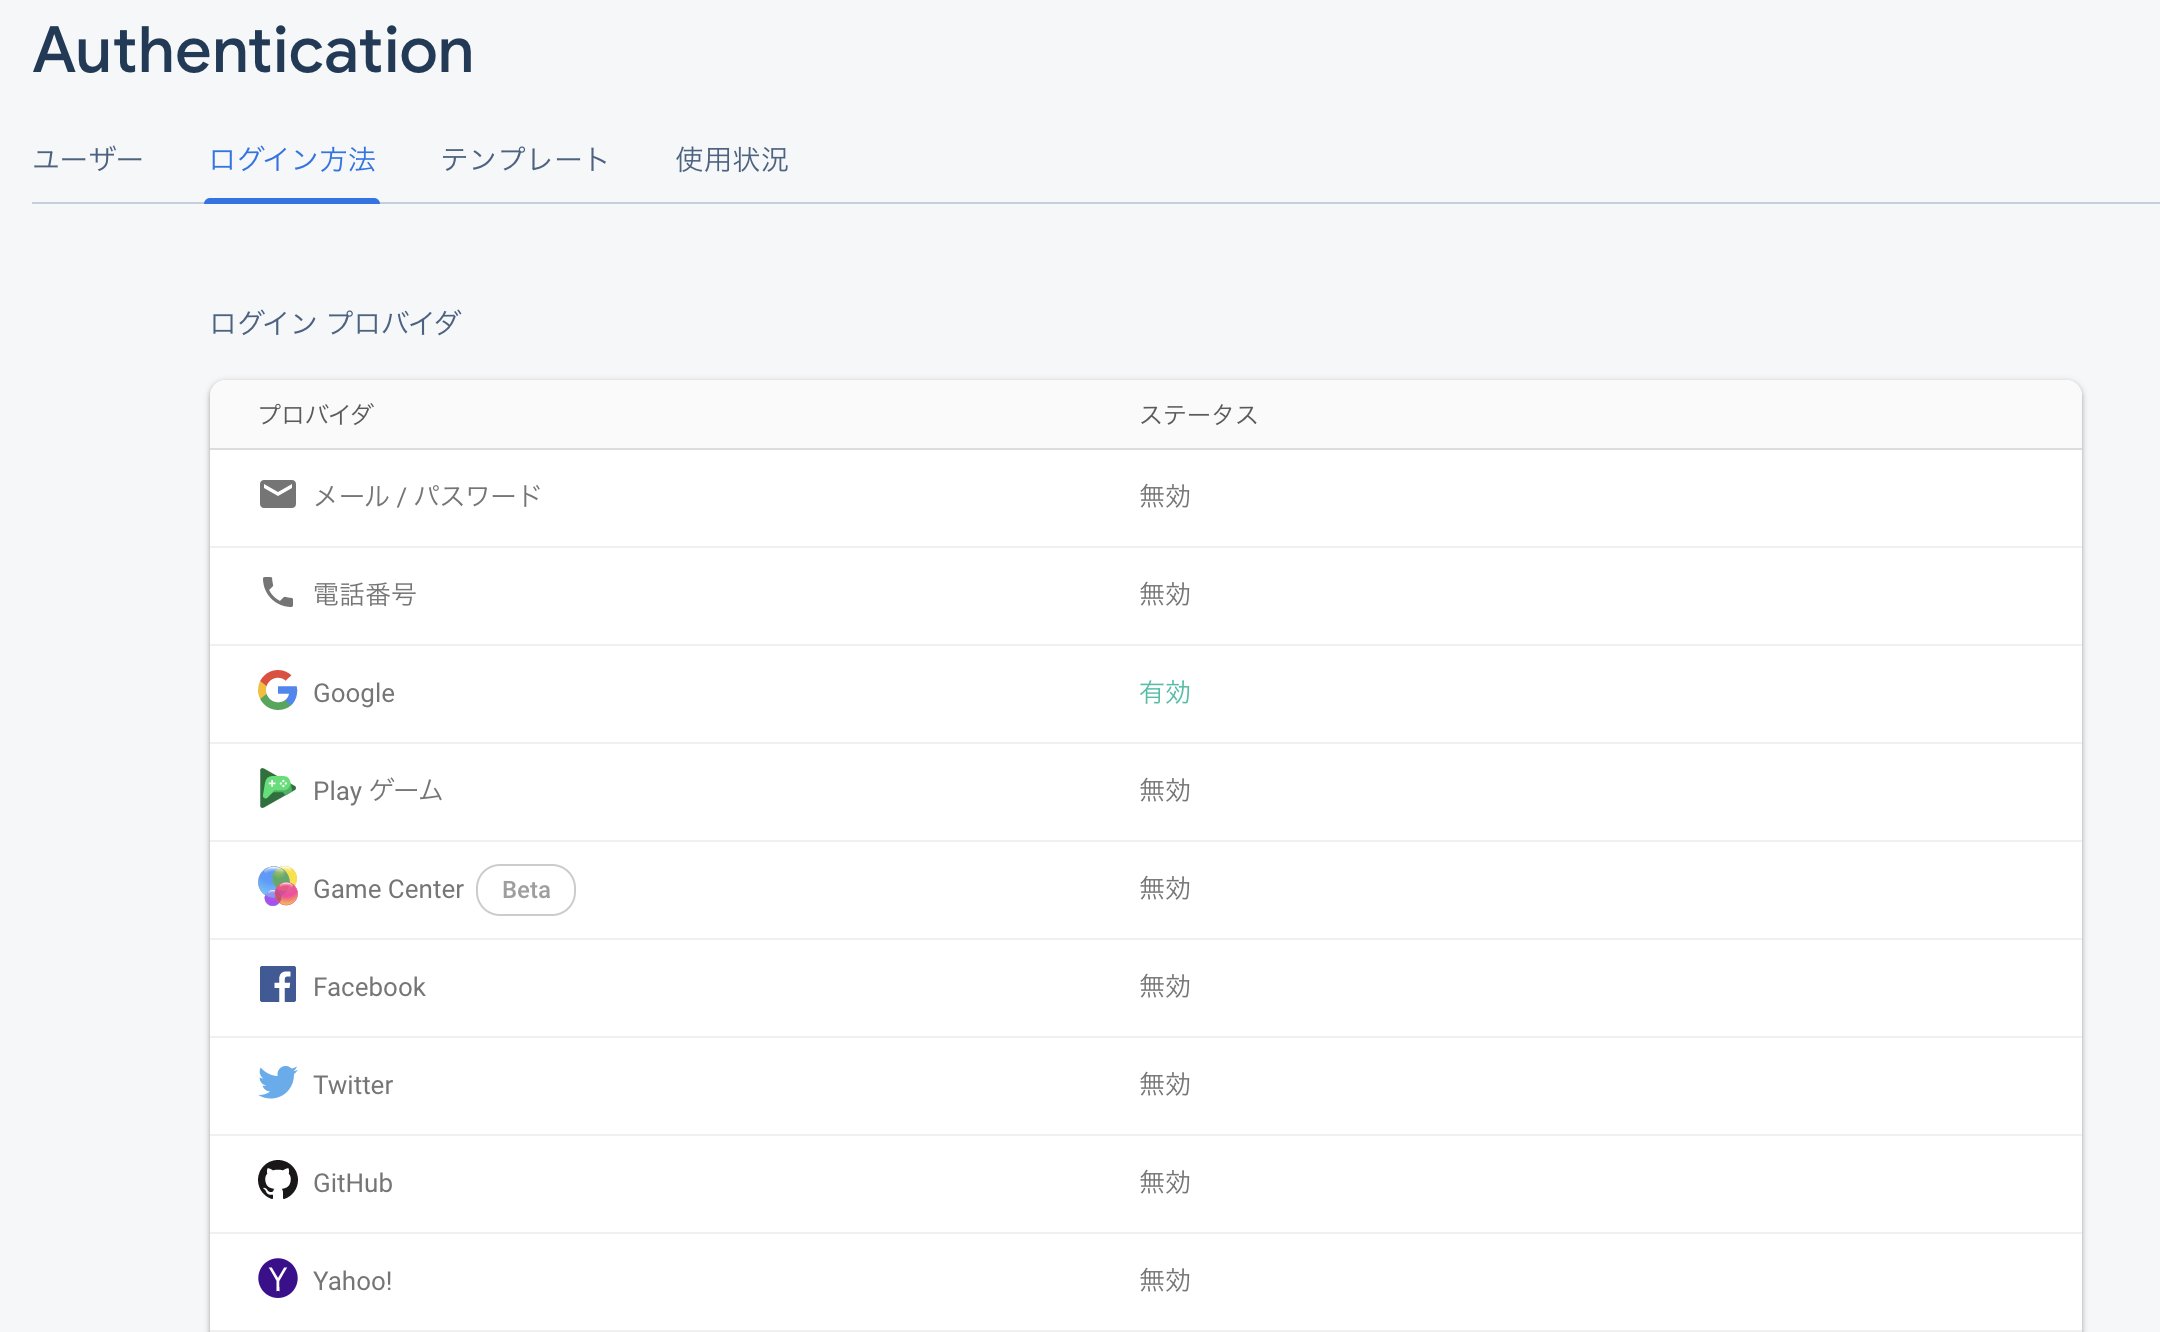
ログイン方法を選択ボタンをポチ。
Googleアカウントで認証したいので、Googleの右側にある編集ボタン(えんぴつマーク)を選択。
Googleアカウント以外でも、いろんなアカウントで認証できるのですね。
Firebaseすごー
右上の有効にするをONにして、プロジェクトのサポートメールに自分のアドレスだけ設定しておきます。
(何に使われるのか、見るの忘れましたが・・・)
その後、保存ボタンを押下して保存しておきます。
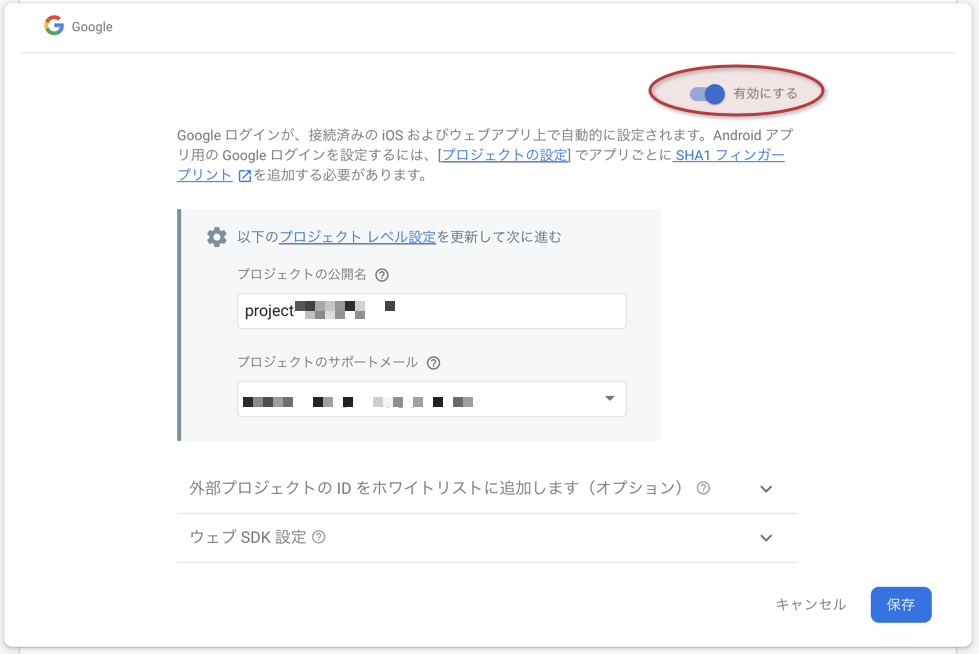
Googleが有効になりました。
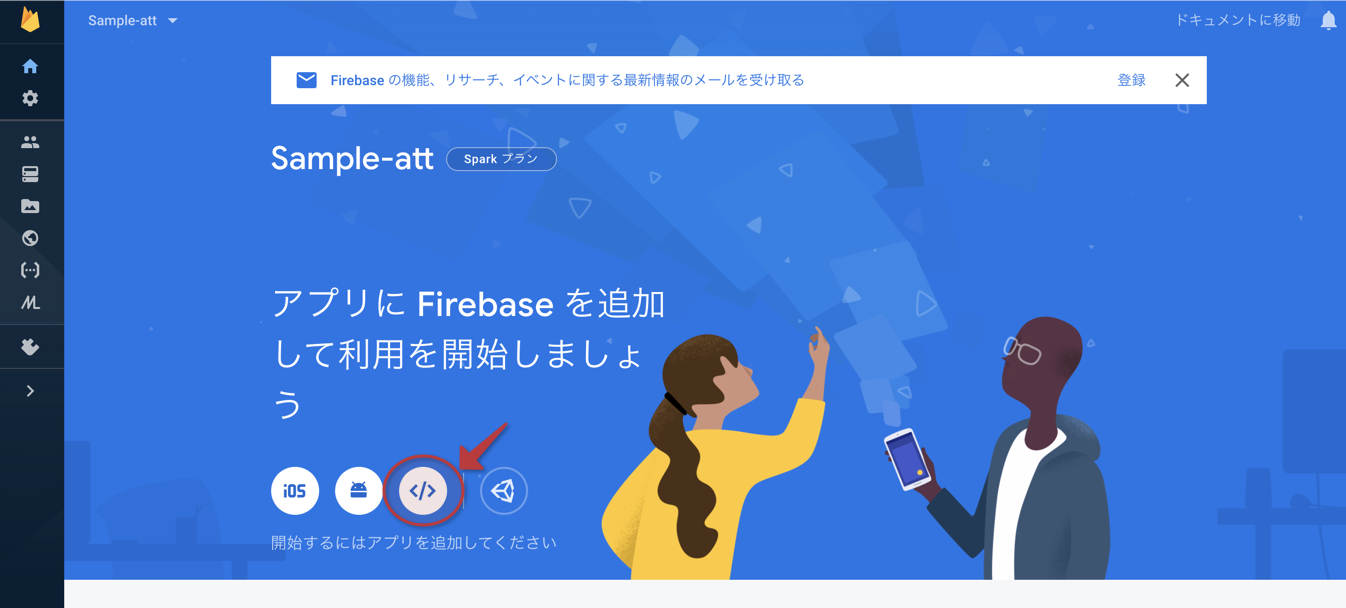
アプリの登録(認証情報の取得)
認証機能をアプリで使用するためには、アプリに認証情報の設定が必要です。
ここで、認証情報を取得します。
今回はただのwebアプリなので、赤い枠の付いたマークをポチします。
アプリのニックネームはなんでも良さげです。
自分が他のアプリと区別できるような名前を付けておくといいかと思います。
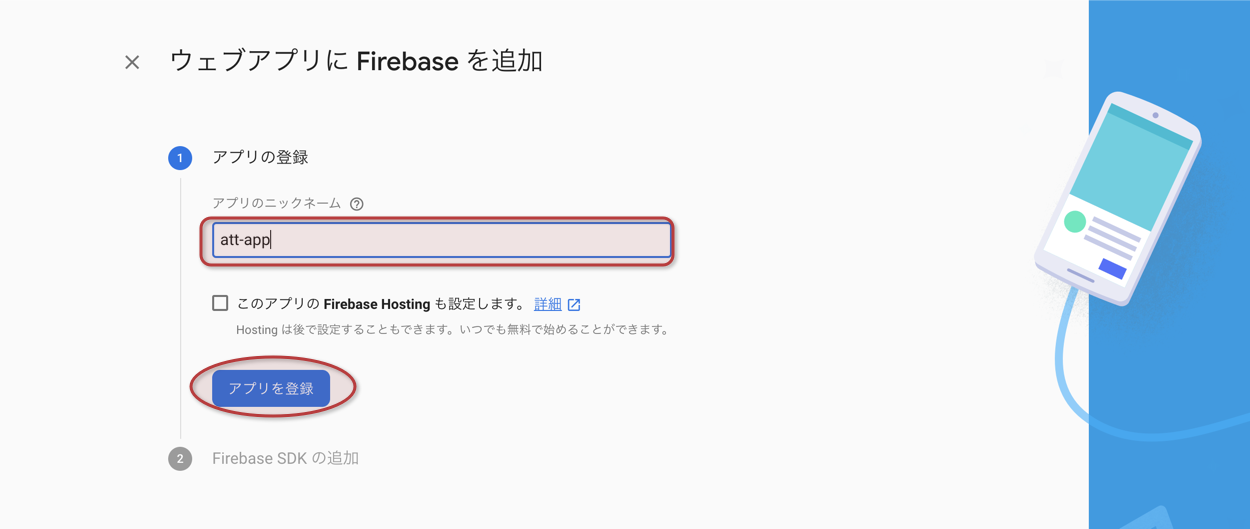
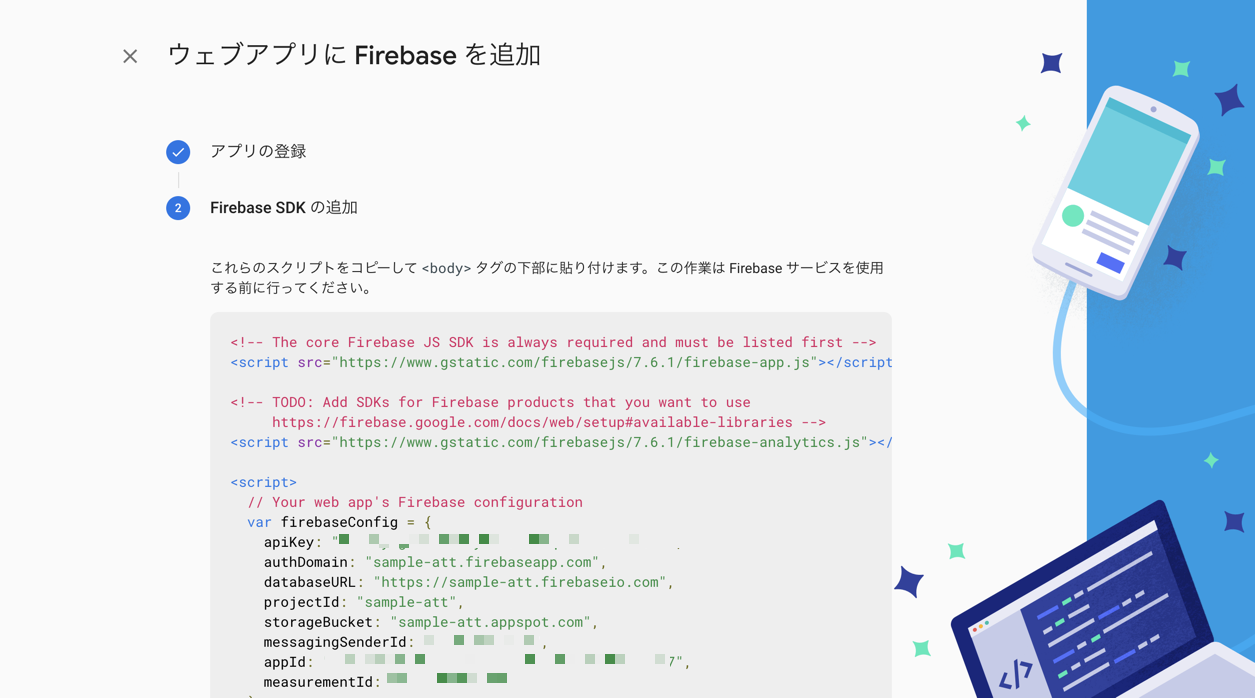
アプリを登録ボタンをポチると、接続するためのキーが表示されます。
ここには、「<body>タグの下部に貼り付け〜」と書かれていますが、実際は後で設定しますので、そっとしておきます。
3.Angularアプリの修正
いよいよここからアプリの修正に入ります。
必要なもの、でも記載しましたが、前提として既に存在するAngularアプリに対して、Firebase Authentication の設定を行います。
新規で作成する場合は、このあたりのチュートリアルを参考にしてみてください。
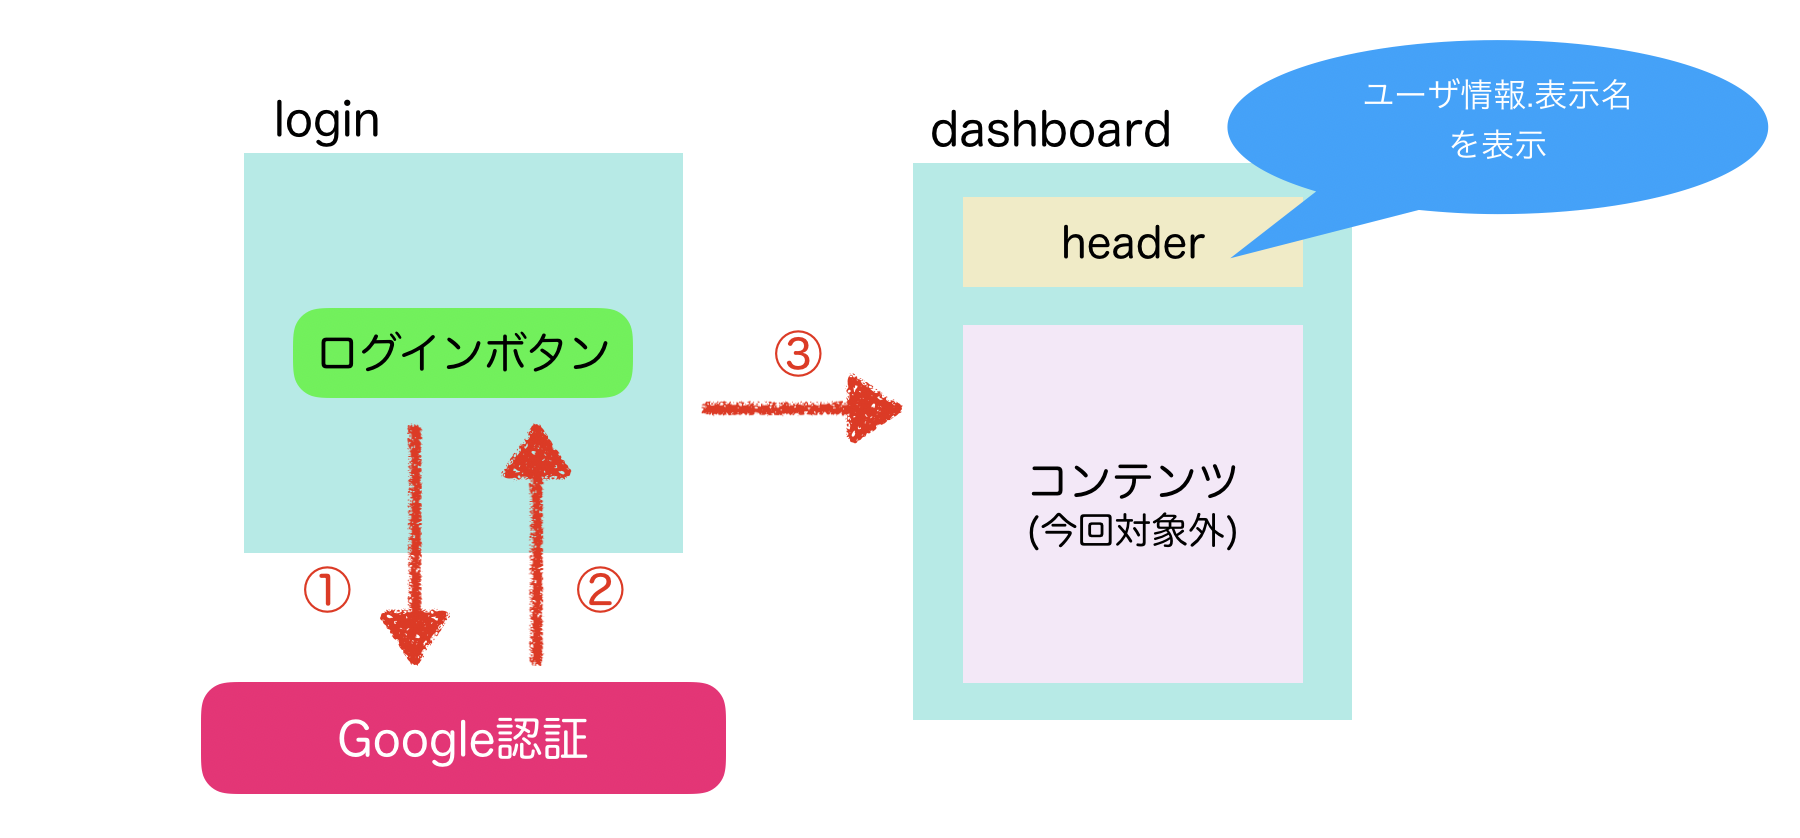
ちなみに、作成するイメージはこんな感じです。
login画面からGoogle認証を行い、dashboardに遷移します。
dashboardではheaderコンポーネントを読み込んでおり、headerコンポーネント内ではGoogle認証で取得したユーザ情報のうち、「表示名」項目を表示したいと思います。
firebase ライブラリのインストール
以下のコマンドを実行します。
$ npm install firebase @angular/fire --save
environment.ts
インストールが完了したら、以下のファイルを修正していきます。
src > environments > environment.ts
export const environment = {
  production: false,
  firebaseConfig: {
    apiKey: "xxxxxxxxxxxxxxxxxxxxxxxxxxxxxxx",
    authDomain: "xxxxxxxxxxxxxxxxxxxxxxxxxxxxxxx",
    databaseURL: "xxxxxxxxxxxxxxxxxxxxxxxxxxxxxxx",
    projectId: "xxxxxxxxxxxxx",
    storageBucket: "xxxxxxxxxxxxxxx",
    messagingSenderId: "xxxxxxxxxxxxxx",
    appId: "xxxxxxxxxxxxxxxxxxxxxxxxxxxxxxx"
  }
};
※ ここはアプリの登録にて取得した認証情報をコピペします。
※ 認証情報消しちゃったよー!という場合は、以下の「プロジェクトの設定」からでも確認することができます。

app.module.ts
こちらに記載の内容を追記してください。
(全コピペしちゃいけませんよ!!)
※ AuthService は後で作成しますので、今はエラーになっても大丈夫です。
src > app > app.module.ts
/* Firebase services */
import { AngularFireModule } from "@angular/fire";
import { AngularFireAuthModule } from "@angular/fire/auth";
import { environment } from '../environments/environment';

/* Auth service */
import { AuthenticationService } from './shared/authentication.service';

@NgModule({
  declarations: [...],
  imports: [
    AngularFireAuthModule,
    AngularFireModule.initializeApp(environment.firebaseConfig),
  ],
  providers: [AuthenticationService],
  bootstrap: [...],
  schemas: [...]
})

export class AppModule { }
auth.service.ts
まずは認証を行うソース。
デフォルトでは存在しないファイルのため、以下のコマンドを実行して作成します。
$ ng g s shared/auth
作成できたら、以下の内容に置き換えます。
ログインできたらdashboardコンポーネントに遷移します。
src > app > share > auth.service.ts
import { Injectable, NgZone } from '@angular/core';
import { auth } from 'firebase/app';
import { User } from "./user";
import { Router } from "@angular/router";
import { AngularFireAuth } from "@angular/fire/auth";

@Injectable({
    providedIn: 'root'
})

export class AuthService {
    user: User;

    constructor(
        public router: Router,
        public ngZone: NgZone,
        public afAuth: AngularFireAuth,
        private angularFireAuth: AngularFireAuth
    ) {
        this.afAuth.authState.subscribe(user => {
            this.user = user;
        })
    }

    // Firebase SignInWithPopup
    OAuthProvider(provider) {
        return this.afAuth.auth.signInWithPopup(provider)
            .then((res) => {
                this.ngZone.run(() => {
                    this.router.navigate(['dashboard']);
                })
            }).catch((error) => {
                window.alert(error)
            })
    }

    // Firebase Google Sign-in
    SigninWithGoogle() {
        return this.OAuthProvider(new auth.GoogleAuthProvider())
            .then(res => {
                console.log('Successfully logged in!')
            }).catch(error => {
                console.log(error)
            });
    }

    // Firebase Logout
    SignOut() {
        return this.afAuth.auth.signOut().then(() => {
            this.router.navigate(['login']);
        })
    }

}
login.component.ts
こちらも、デフォルトでは存在しないソース。
確か、以下のコマンドで作れたはず。
$ ng g c login
デフォルトから追記したのは、constructorにAuthServiceの紐付けを行うだけです。
src > app > login > login.component.ts
import { Component, OnInit } from '@angular/core';
// Add
import { AuthService } from 'src/app/shared/auth.service';

@Component({
  selector: 'app-login',
  templateUrl: './login.component.html',
  styleUrls: ['./login.component.css']
})

export class LoginComponent implements OnInit {

  // 引数を追加
  constructor(private authService: AuthService) { }

  ngOnInit() { }

}
login.component.html
htmlは簡単に。cssはちょっとここでは割愛します。
ポイントは<button>タグに(click)="authService.SigninWithGoogle()"を付けることくらい。
src > app > login > login.component.html
<form class="sign-up">
    <h1 class="sign-up-title">Sign in</h1>
    <button (click)="authService.SigninWithGoogle()" class="sign-up-button">
      Sign in with Google
    </button>
</form>
dashboard.component.ts
遷移先のdashboardコンポーネントを作成していきます。
以下のコマンドでワンセット作成されます。
$ ng gc dashboard
tsファイルはデフォルトから変更なし。
src > app > dashboard > dashboard.component.ts
import { Component, OnInit } from '@angular/core';

@Component({
  selector: 'app-dashboard',
  templateUrl: './dashboard.component.html',
  styleUrls: ['./dashboard.component.css']
})
export class DashboardComponent implements OnInit {

  constructor() { }

  ngOnInit() {
  }

}
dashboard.component.html
こちらもheaderコンポーネント化を表示するだけ。
src > app > dashboard > dashboard.component.html
<app-header></app-header>
header.component.ts
headerは部品として使いたかったので、ちょっとだけ階層深くなってます。
なので、最初にimportするときの相対パスが一層深くなっています。
AuthServiceをimportしているのは、ヘッダーでログインユーザ名を表示させたいのと、ログアウトボタンを制御するため。
こちらもconstructorの引数を追加するだけです。
src > app > common-cmp > header > header.component.ts
import { Component, OnInit } from '@angular/core';
import { AuthService } from '../../shared/auth.service';

@Component({
  selector: 'app-header',
  templateUrl: './header.component.html',
  styleUrls: ['./header.component.css']
})
export class HeaderComponent implements OnInit {

  // 引数追加
  constructor(public authService: AuthService) { }
  ngOnInit() {
  }
}
header.component.html
authService.user.emailVerifiedで、認証できているどうかの状態を取得できます。
認証できていたら、{{authService.user.displayName}}で表示名を表示します。
src > app > common-cmp > header > header.component.html
<div class="header">
  <span class="header_title">Title</span>
  <span *ngIf="authService.user.emailVerified" class="header_user_name">Hi!  {{authService.user.displayName}}</span>
  <button (click)="authService.SignOut()" *ngIf="authService.user.emailVerified" class="logout-button">Logout</button>
</div>
app-routing.module.ts
最後にroutingの制御を追記します。
こちらのソースは標準で用意されている物なので、自分の環境に合わせて変更してください。
src > app > app-routing.module.ts
import { NgModule } from '@angular/core';
import { ReactiveFormsModule } from '@angular/forms';
import { Routes, RouterModule } from '@angular/router';
import { LoginComponent } from './login/login.component';
import { DashboardComponent } from './dashboard/dashboard.component';

/*
 ここに追記。pathに合わせて、紐付けるコンポーネントを設定します。
*/
const routes: Routes = [
  {path: '', redirectTo: '/login', pathMatch: 'full' },
  {path: 'login', component: LoginComponent },
  {path: 'dashboard', component: DashboardComponent }
];

@NgModule({
  imports: [
    RouterModule.forRoot(routes),
    ReactiveFormsModule,
  ],
  exports: [RouterModule]
})
export class AppRoutingModule { }
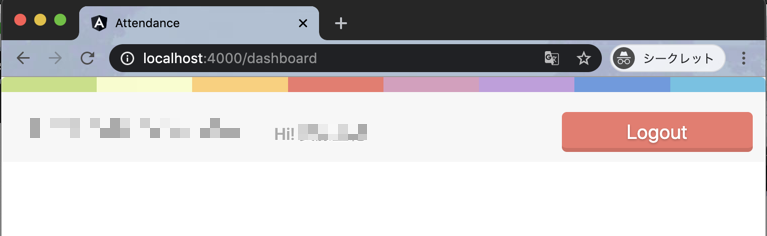
で、どうなった?
これで、ログインからやってみます。
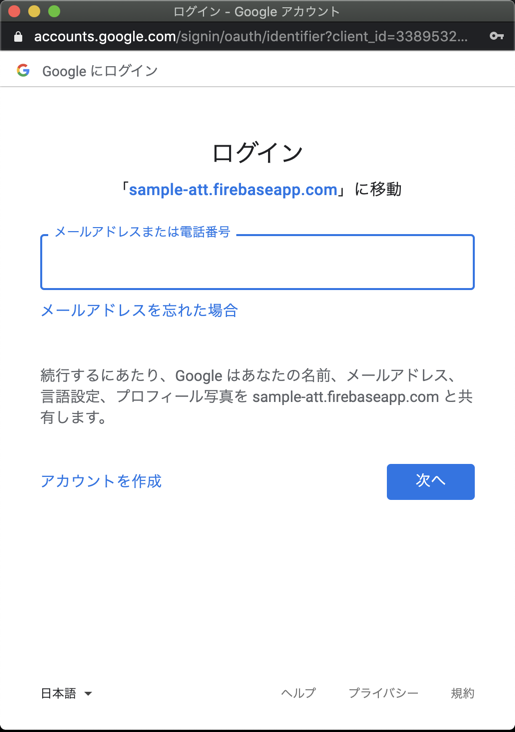
Sign in with Googleボタンをぽち。
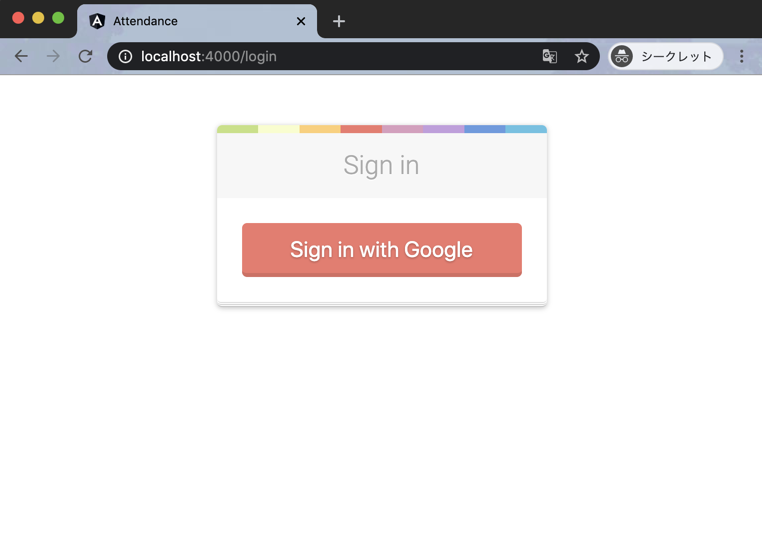
見慣れたログイン画面がポップアップで表示されました。
こんな感じでログインできました。
ちょっとモザイク多めですが。。。
認証されたら表示されるログアウトボタンも無事表示されております。
最後に
色々とあっちこっち行ったりしましたが、おかげさまでなんとかできました。
ただ、これまた課題は残ります。
- Googleアカウントを持っている人なら誰でもいける(でいいのか?)
- 認証はできたものの、そこからのセキュリティも考えなきゃ
とはいえ、思ったよりは簡単に認証機能が作れました。
他のSNSアカウントでも同じようにできそうです。
便利になりましたねー。
参考
※メールアドレス、パスワードでの認証を日本語で丁寧に教えてくれる(日本語)
https://webbibouroku.com/Blog/Article/firebase-auth
※Firebaseの設定ならこちら(英語)
https://www.positronx.io/setup-angularfire2-library-in-angular-7-project/
※メールアドレスとパスワードの認証をするならここが参考になるかと(英語)
https://www.positronx.io/firebase-authentication-in-angular-8-with-angularfire2/
※これが一番近かったかも(英語)
https://www.positronx.io/angular-8-firebase-google-sign-in-tutorial/