はじめに
TwitterのAccount Activity APIを使うためにしたことを書いていきます。
少し時間が経ってから書いているので忘れていたり、間違っているところがあるかもしれません。
環境
Debian9
apache2.4
python3.5
アプリケーション作成
こちらから作成しましょう。
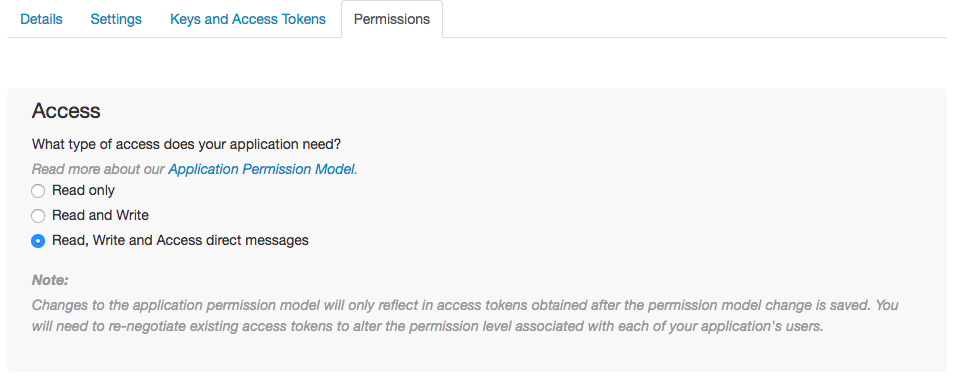
権限はRead, write, and direct messagesにしてください。

アクセスのための申請と環境名の設定
こちらから申請しましょう。
このAPIを使って何をするのか300文字以上の英文で説明しなければいけません。
無事申請が通れば、ツイッターからメールが届きます。
Dev Environmentsのページで環境名を設定しましょう。この環境名はWebhook URLを登録するときに使います。

サーバーの用意
好きな方法でサーバーを用意しましょう。筆者は、ConoHaのVPSを使いました。
以下のコマンドを実行して必要なものを揃えましょう。
sudo apt update
sudo apt upgrade

sudo apt install python3 python3-pip
sudo pip3 install requests requests_oauthlib flask

sudo apt install apache2 libapache2-mod-wsgi-py3
sudo apt install certbot python-certbot-apache
ドメインの用意
好きな方法でドメインを用意しましょう。筆者はお名前.comで "6~9桁数字.xyz" の激安ドメインを取得しました。
DNSレコード設定も忘れずにしておきましょう。
Webサーバーの準備
apacheの基本的な設定は済んでいることとします。
/etc/apache/envvars の LANG=C になっているところを LANG=en_US.UTF-8 または LANG=ja_JP.UTF-8 に変更しましょう。
次に、certbotでHTTPS化します。
次のコマンドを実行して手順通りに作業すればHTTPS化できるはずだったんですが・・・
sudo certbot --apache
こんなエラーが出ます。
"Client with the currently selected authenticator does not support any combination of challenges that will satisfy the CA."
TLS-SNI検証を無効化したからだそうですが、正直よくわかりません。
代わりに次のコマンドでHTTPS化できます。
sudo certbot --authenticator webroot -w <path> -d <domain> --installer apache
ドキュメントルートが /var/www/html で、ドメインが hogehoge.com の場合はこんな感じです。
sudo certbot --authenticator webroot -w /var/www/html -d hogehoge.com --installer apache
次に、推奨されるサーバー構成にするため、/etc/letsencrypt/options-ssl-apache.conf の一部を次のように変更します。
SSLProtocol             all -SSLv2 -SSLv3 -TLSV1
SSLCipherSuite          ECDHE-RSA-AES128-GCM-SHA256:ECDHE-RSA-AES128-SHA256:ECDHE-RSA-AES128-SHA:ECDHE-RSA-AES256-GCM-SHA384:ECDHE-RSA-AES256-SHA384:ECDHE-RSA-AES256-SHA:AES128-GCM-SHA256:AES128-SHA256:AES128-SHA:AES256-GCM-SHA384:AES256-SHA256:AES256-SHA:ECDHE-RSA-DES-CBC3-SHA:DES-CBC3-SHA
SSLHonorCipherOrder     on
SSLCompression          off
設定を反映させましょう
sudo systemctl restart apache2
これでHTTPS化が完了しました。
wsgiを使えるようにする
Python3 & Flaskを使うためです。
次のコマンドで有効化しましょう
sudo a2enmod wsgi
sudo systemctl reload apache2
次にapacheの設定ファイルを作ります。
プログラムを /home/user/twitter の下に置く場合、このようになります。
<Directory "/home/user/twitter">
    Require all granted
</Directory>

WSGIPythonPath /home/user/twitter
WSGIScriptAlias / /home/user/twitter/app.py
こちらも有効化しましょう。
sudo a2enconf twitter
sudo systemctl reload apache2
CRCに対するレスポンス
Webhook URLの登録時にCRCが送信されるので、先にCRCに応答するプログラムを作っておきます。
from flask import Flask, request
import base64
import hashlib
import hmac
import json

application = Flask("application-name")
consumer_secret = 'xxxxx'

@application.route('/webhooks/twitter', methods = ['GET'])
def get():
    if 'crc_token' in request.args and len(request.args.get('crc_token')) == 48:
        crc_token = request.args.get('crc_token')
        sha256_hash_digest = hmac.new(consumer_secret.encode(), msg = crc_token.encode(), digestmod = hashlib.sha256).digest()

        response_token = 'sha256=' + base64.b64encode(sha256_hash_digest).decode()
        response = {'response_token': response_token}

        return json.dumps(response), 200, {'Content-Type': 'application/json'}

    return 'No Content', 204, {'Content-Type': 'text/plain'}
これを保存し、適切な権限をつけておきます。
sudo chmod 755 /home/user/twitter/app.py
念のためapacheの再起動もやっときましょう。
sudo systemctl restart apache2
Webhook URLの登録とWebhookでイベントを受け取るアプリケーションの追加
登録するURLは、CRCに対するレスポンスで作ったプログラムの次の部分で決まってます。
@application.route('/webhooks/twitter', method = [GET])
これはツイッターのガイドと同じように作っています。
この場合URLは https://hogehoge.com/webhooks/twitter になります。
では、python3の対話モードでやっていきます。
consumer_key, consumer_secret, access_token, access_token_secretには、作成したアプリケーションのものを入れてください。
urlの:env_nameの部分は環境名の設定で設定したものを入れてください。
>>> from requests_oauthlib import OAuth1Sesstion
>>> twitter = OAuth1Sesstion(consumer_key, consumer_secret, access_token, access_token_secret)
>>>
>>> url = 'https://api.twitter.com/1.1/account_activity/all/:env_name/webhooks.json'
>>> response = twitter.post(url, params = {'url': 'https://hogehoge.com/webhooks/twitter'})
>>> # 成功すれば response == <Response [200]>
>>> # response.textでwebhook_idが確認できる
>>>
>>> url = 'https://api.twitter.com/1.1/account_activity/all/:env_name/subscriptions.json'
>>> response = twitter.post(url)
>>> # 成功すれば response == <Response [204]>
お疲れ様でした
これでようやくAccount Activity APIが使えるようになりました。