はじめに
興味があって触ってみたが、Terraformを使ってGitHubから直接サーバへ反映するものための文献が少なかったので備忘録として残しておく
App Runnerとは
フルマネージド型のコンテナアプリケーションを提供してくれるサービス。
- メリット
- コンソール操作の場合構築まで10分
- GitHubで管理されているソースコードから自動でアプリケーションに反映させることが可能。
- ECRと連携してコンテナイメージからサービスを起動してくれるなどパイプライン機能もある。
- ロードバランシングやスケーリング、ログ管理なども自動で行ってくれる。
- デメリット
- CPUやメモリ割当の上限がECSなどと比べると小さい
- WAF非対応
- GitHubから直接反映させる場合の対応ランタイムはPython、Java、Node.jsのみ
上記デメリットを踏まえると実証実験や期間限定の特設サイトなどを建てるときなどスモールかつ素早さが求められるようなシステムの構築を行いたい際に最適なサービスだと感じる。
Terraformコード
-
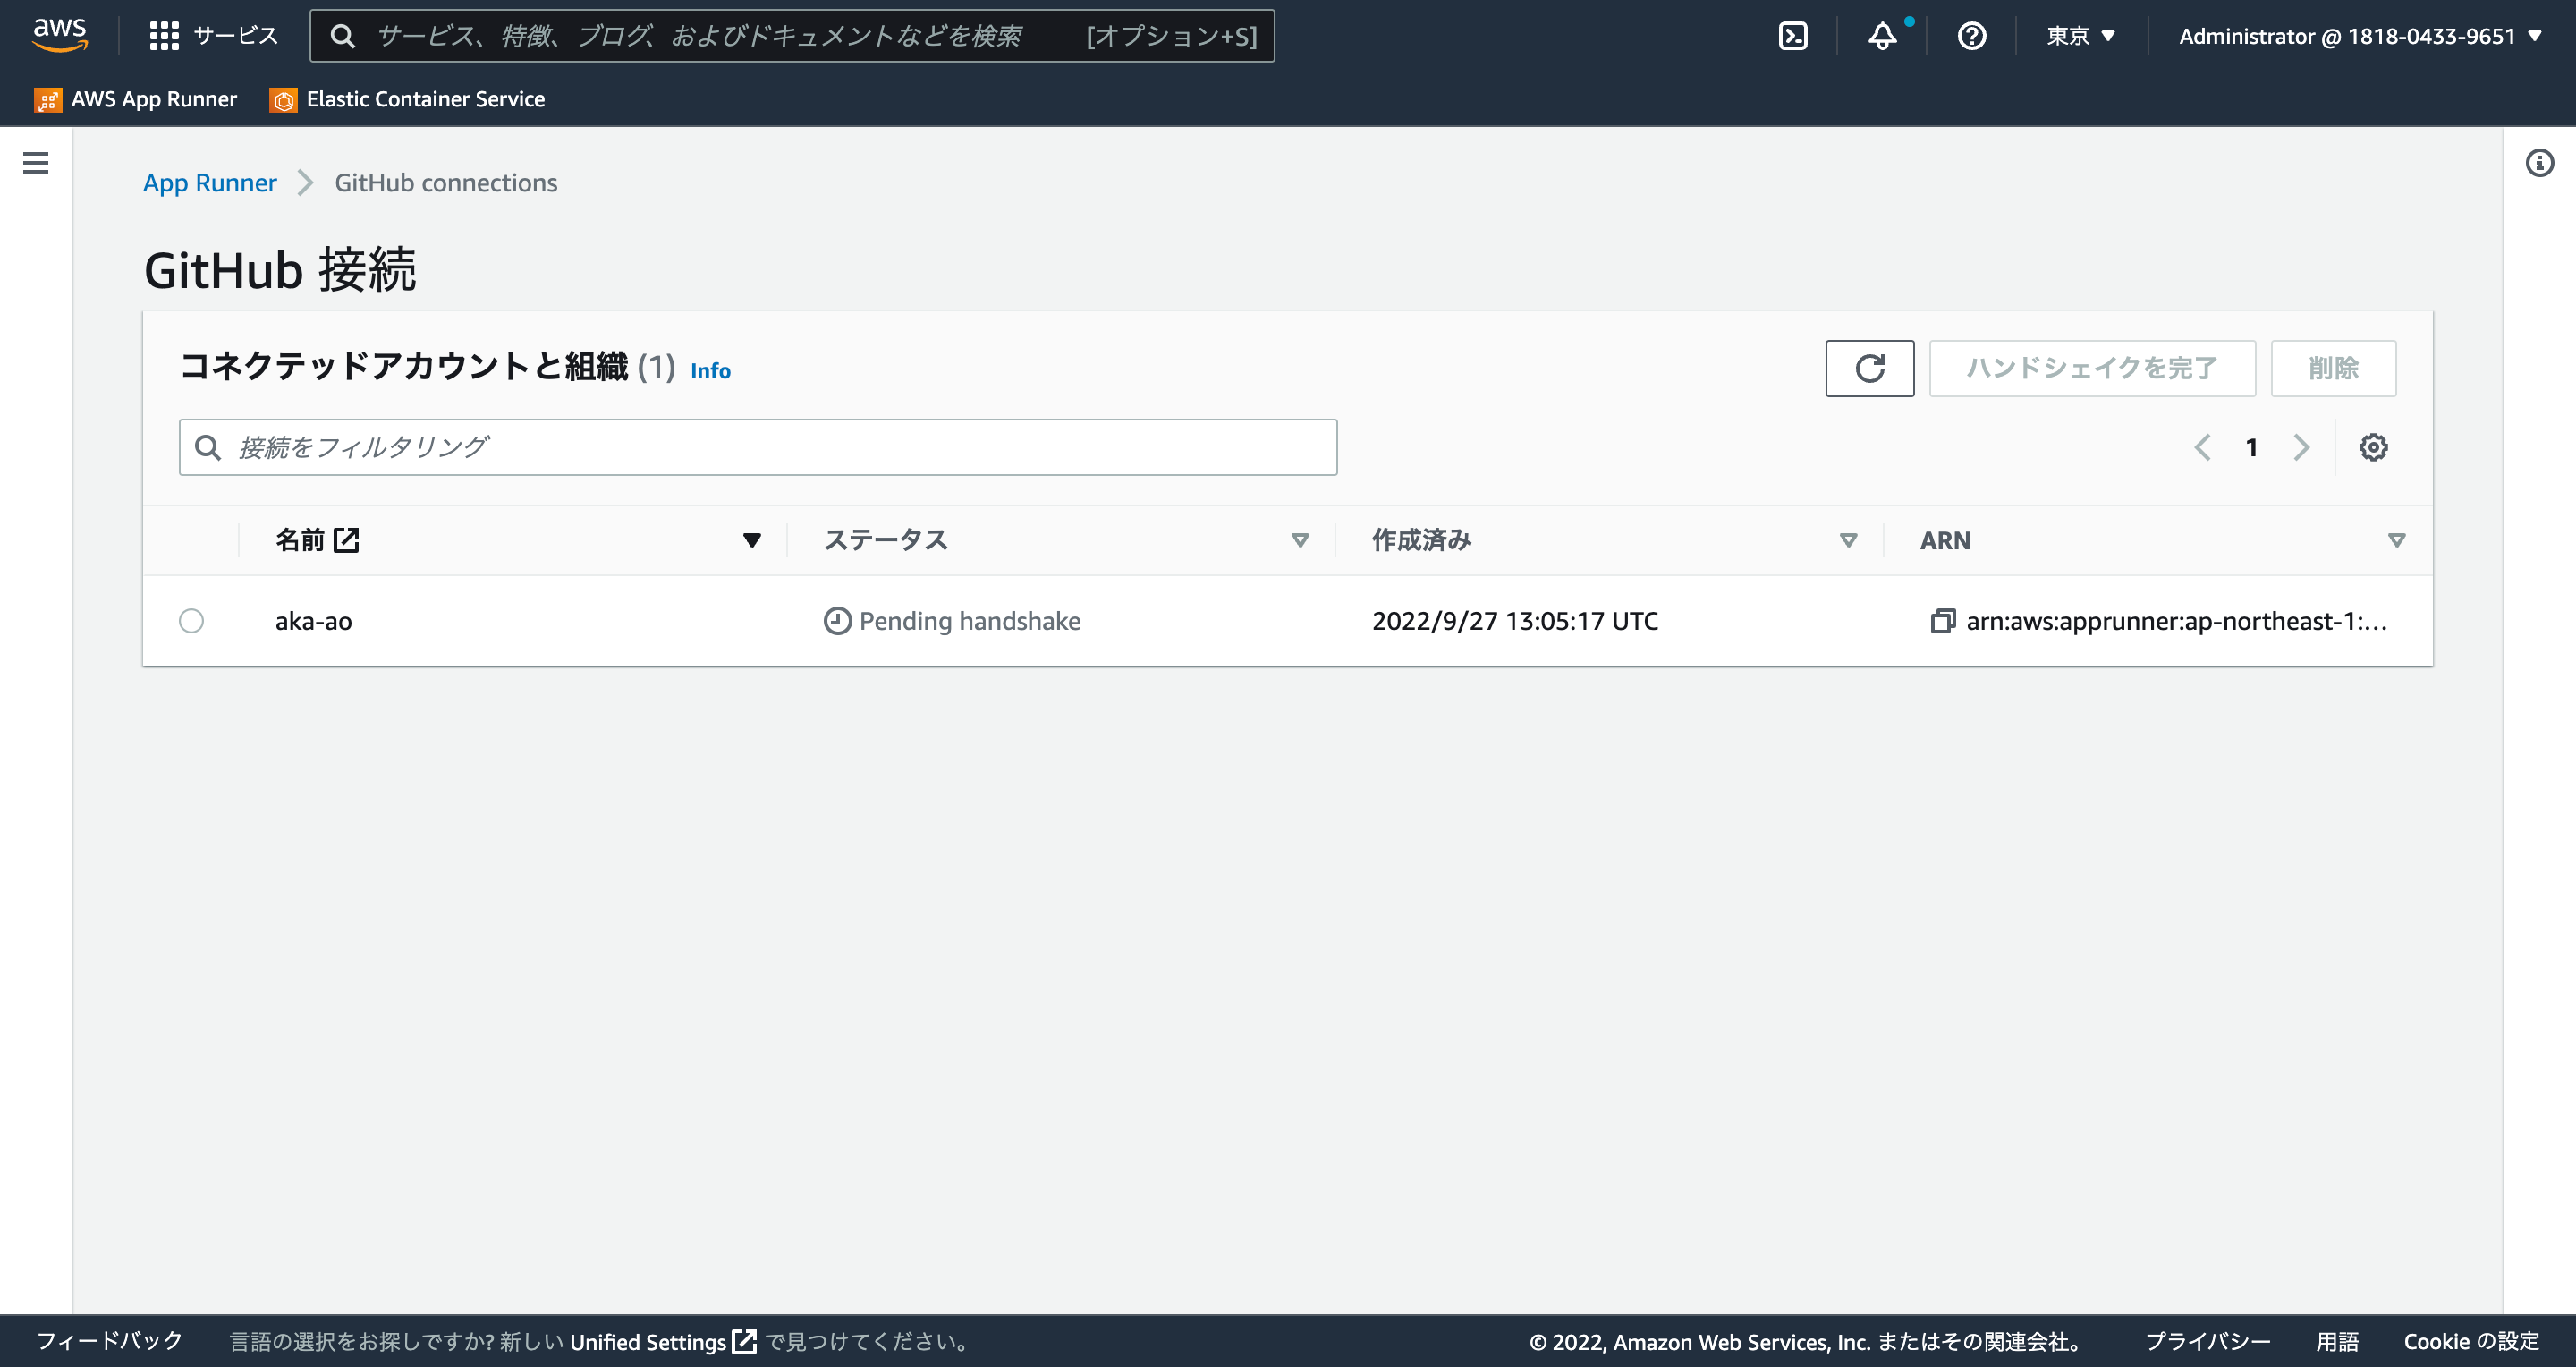
aws_apprunner_connection- 連携するGitHubを設定する。ここに関してはコンソール上で操作が必要(後述)
-
aws_apprunner_auto_scaling_configuration_version- AutoScalingの設定を行う。(デフォルトだとすごい数のコンテナが実行される)
-
aws_apprunner_service- App Runnerを構築する。
-
code_configuration_values-
build_command- ビルドコマンドを設定
-
port- 公開ポート番号を指定
-
runtime- ランタイムを指定
- 下記コードの他に
CORRETTO_8PYTHON_3NODEJS_12などが指定可能
-
start_command- 起動コマンドを指定
-
-
repository_url- 連携するGitHubレポジトリを指定する。
resource "aws_apprunner_connection" "example" {
  connection_name = "aka-ao"
  provider_type   = "GITHUB"
}

resource "aws_apprunner_auto_scaling_configuration_version" "example" {
  auto_scaling_configuration_name = "example"

  max_concurrency = 2
  max_size        = 2
  min_size        = 1

  tags = {
    Name = "example-apprunner-autoscaling"
  }
}

resource "aws_apprunner_service" "example" {
  service_name = "example"
  auto_scaling_configuration_arn = aws_apprunner_auto_scaling_configuration_version.example.arn

  source_configuration {
    authentication_configuration {
      connection_arn = aws_apprunner_connection.example.arn
    }
    auto_deployments_enabled = false
    code_repository {
      code_configuration {
        code_configuration_values {
          build_command = "./mvnw clean package -DskipTests=true"
          port = "8080"
          runtime = "CORRETTO_11"
          start_command = "java -jar target/demo-0.0.1-SNAPSHOT.jar"
        }
        configuration_source = "API"
      }
      repository_url = "https://github.com/aka-ao/cicd-demo-app"
      source_code_version {
        type  = "BRANCH"
        value = "main"
      }
    }
  }

  tags = {
    Name = "example-apprunner-service"
  }
}
Terraform実行
- Terraformの実行
$ terraform apply
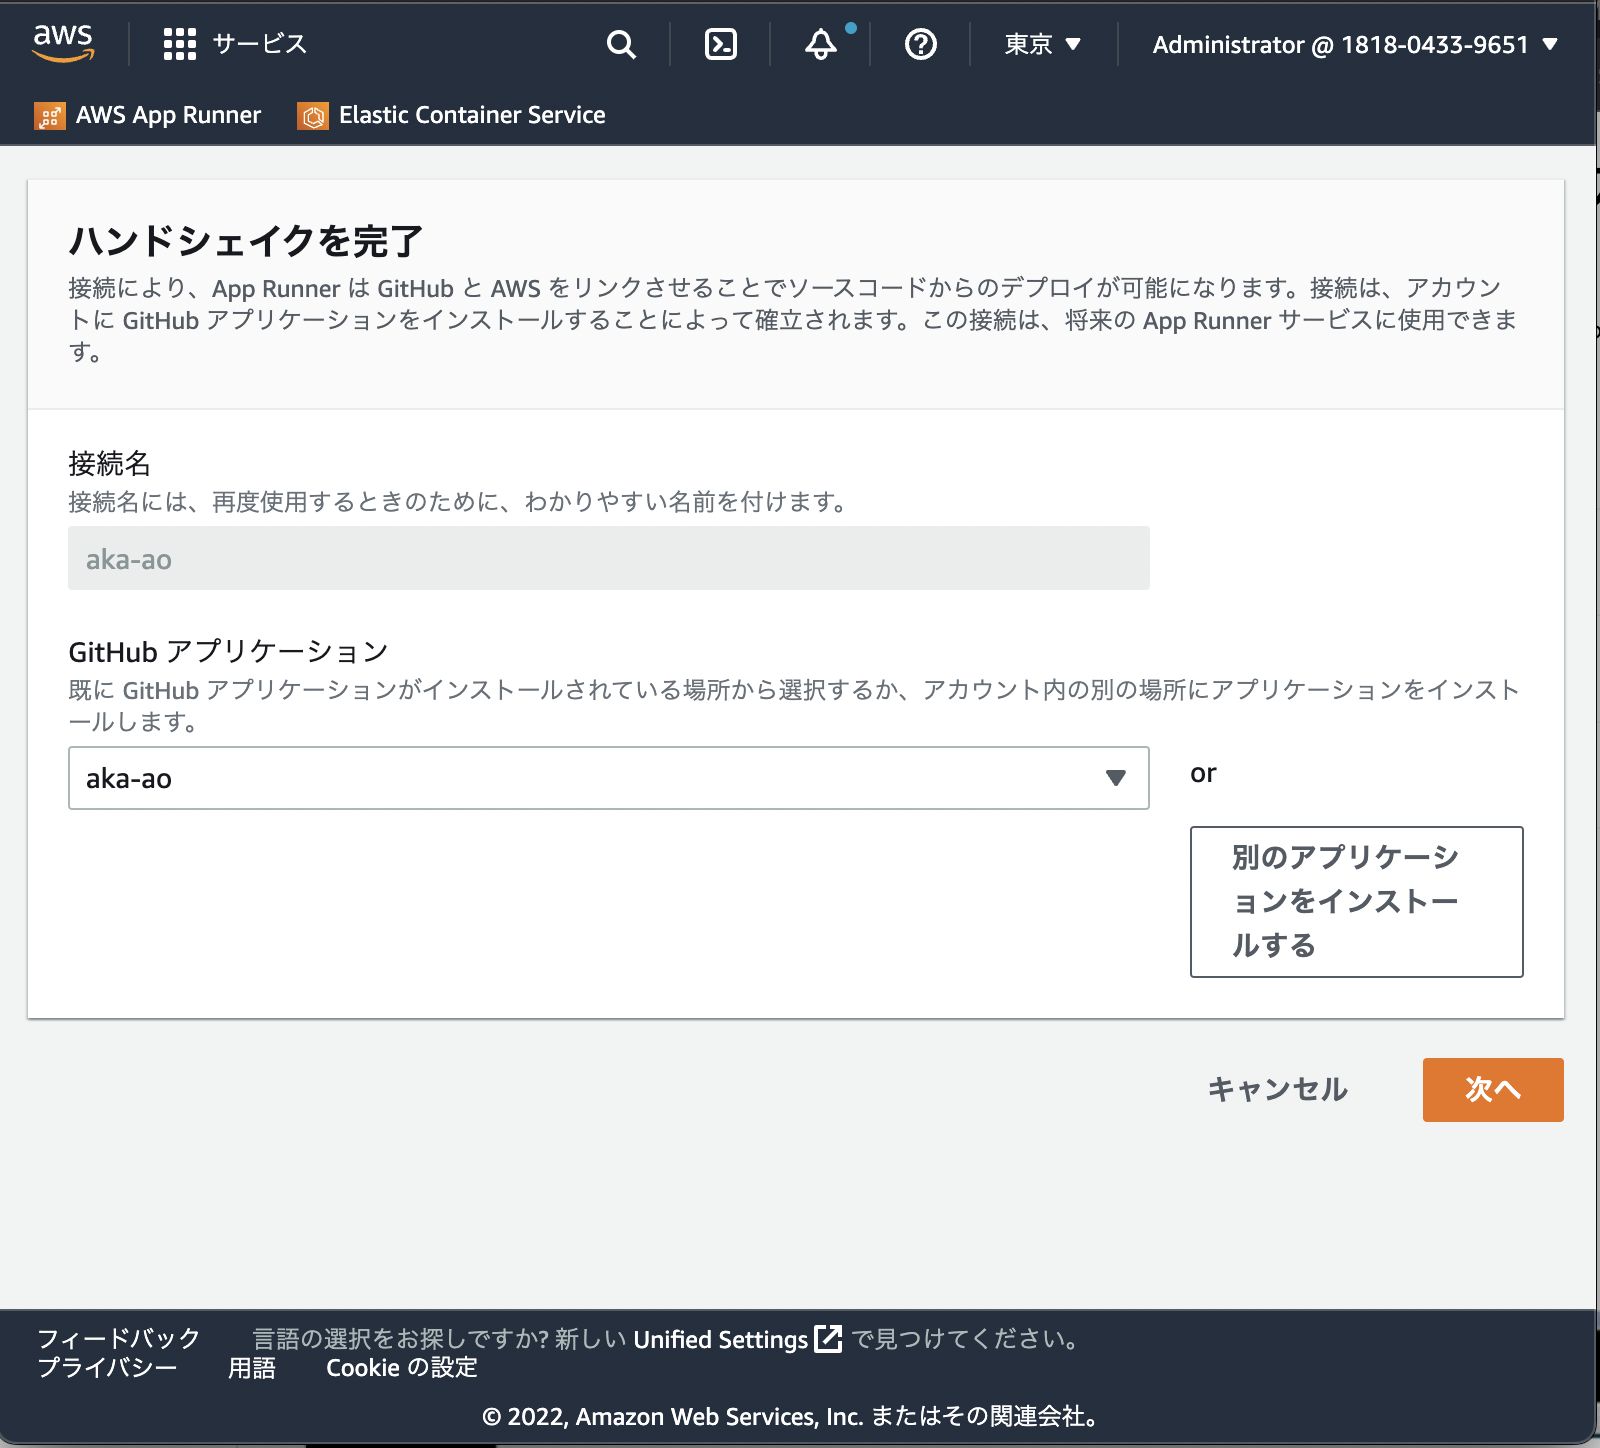
- GitHub連携は手動で行う必要がある
- 1枚目の画像の作成したリソースのラジオボタンを選択し、右上の「ハンドシェイクを完了」を押すと2枚目の画像の画面が表示されるためGithub連携を行う。
- 連携までに時間がかかるとAppRunnerの実行でエラーになるので、その場合はもう一度Applyを行う。
アプリの更新
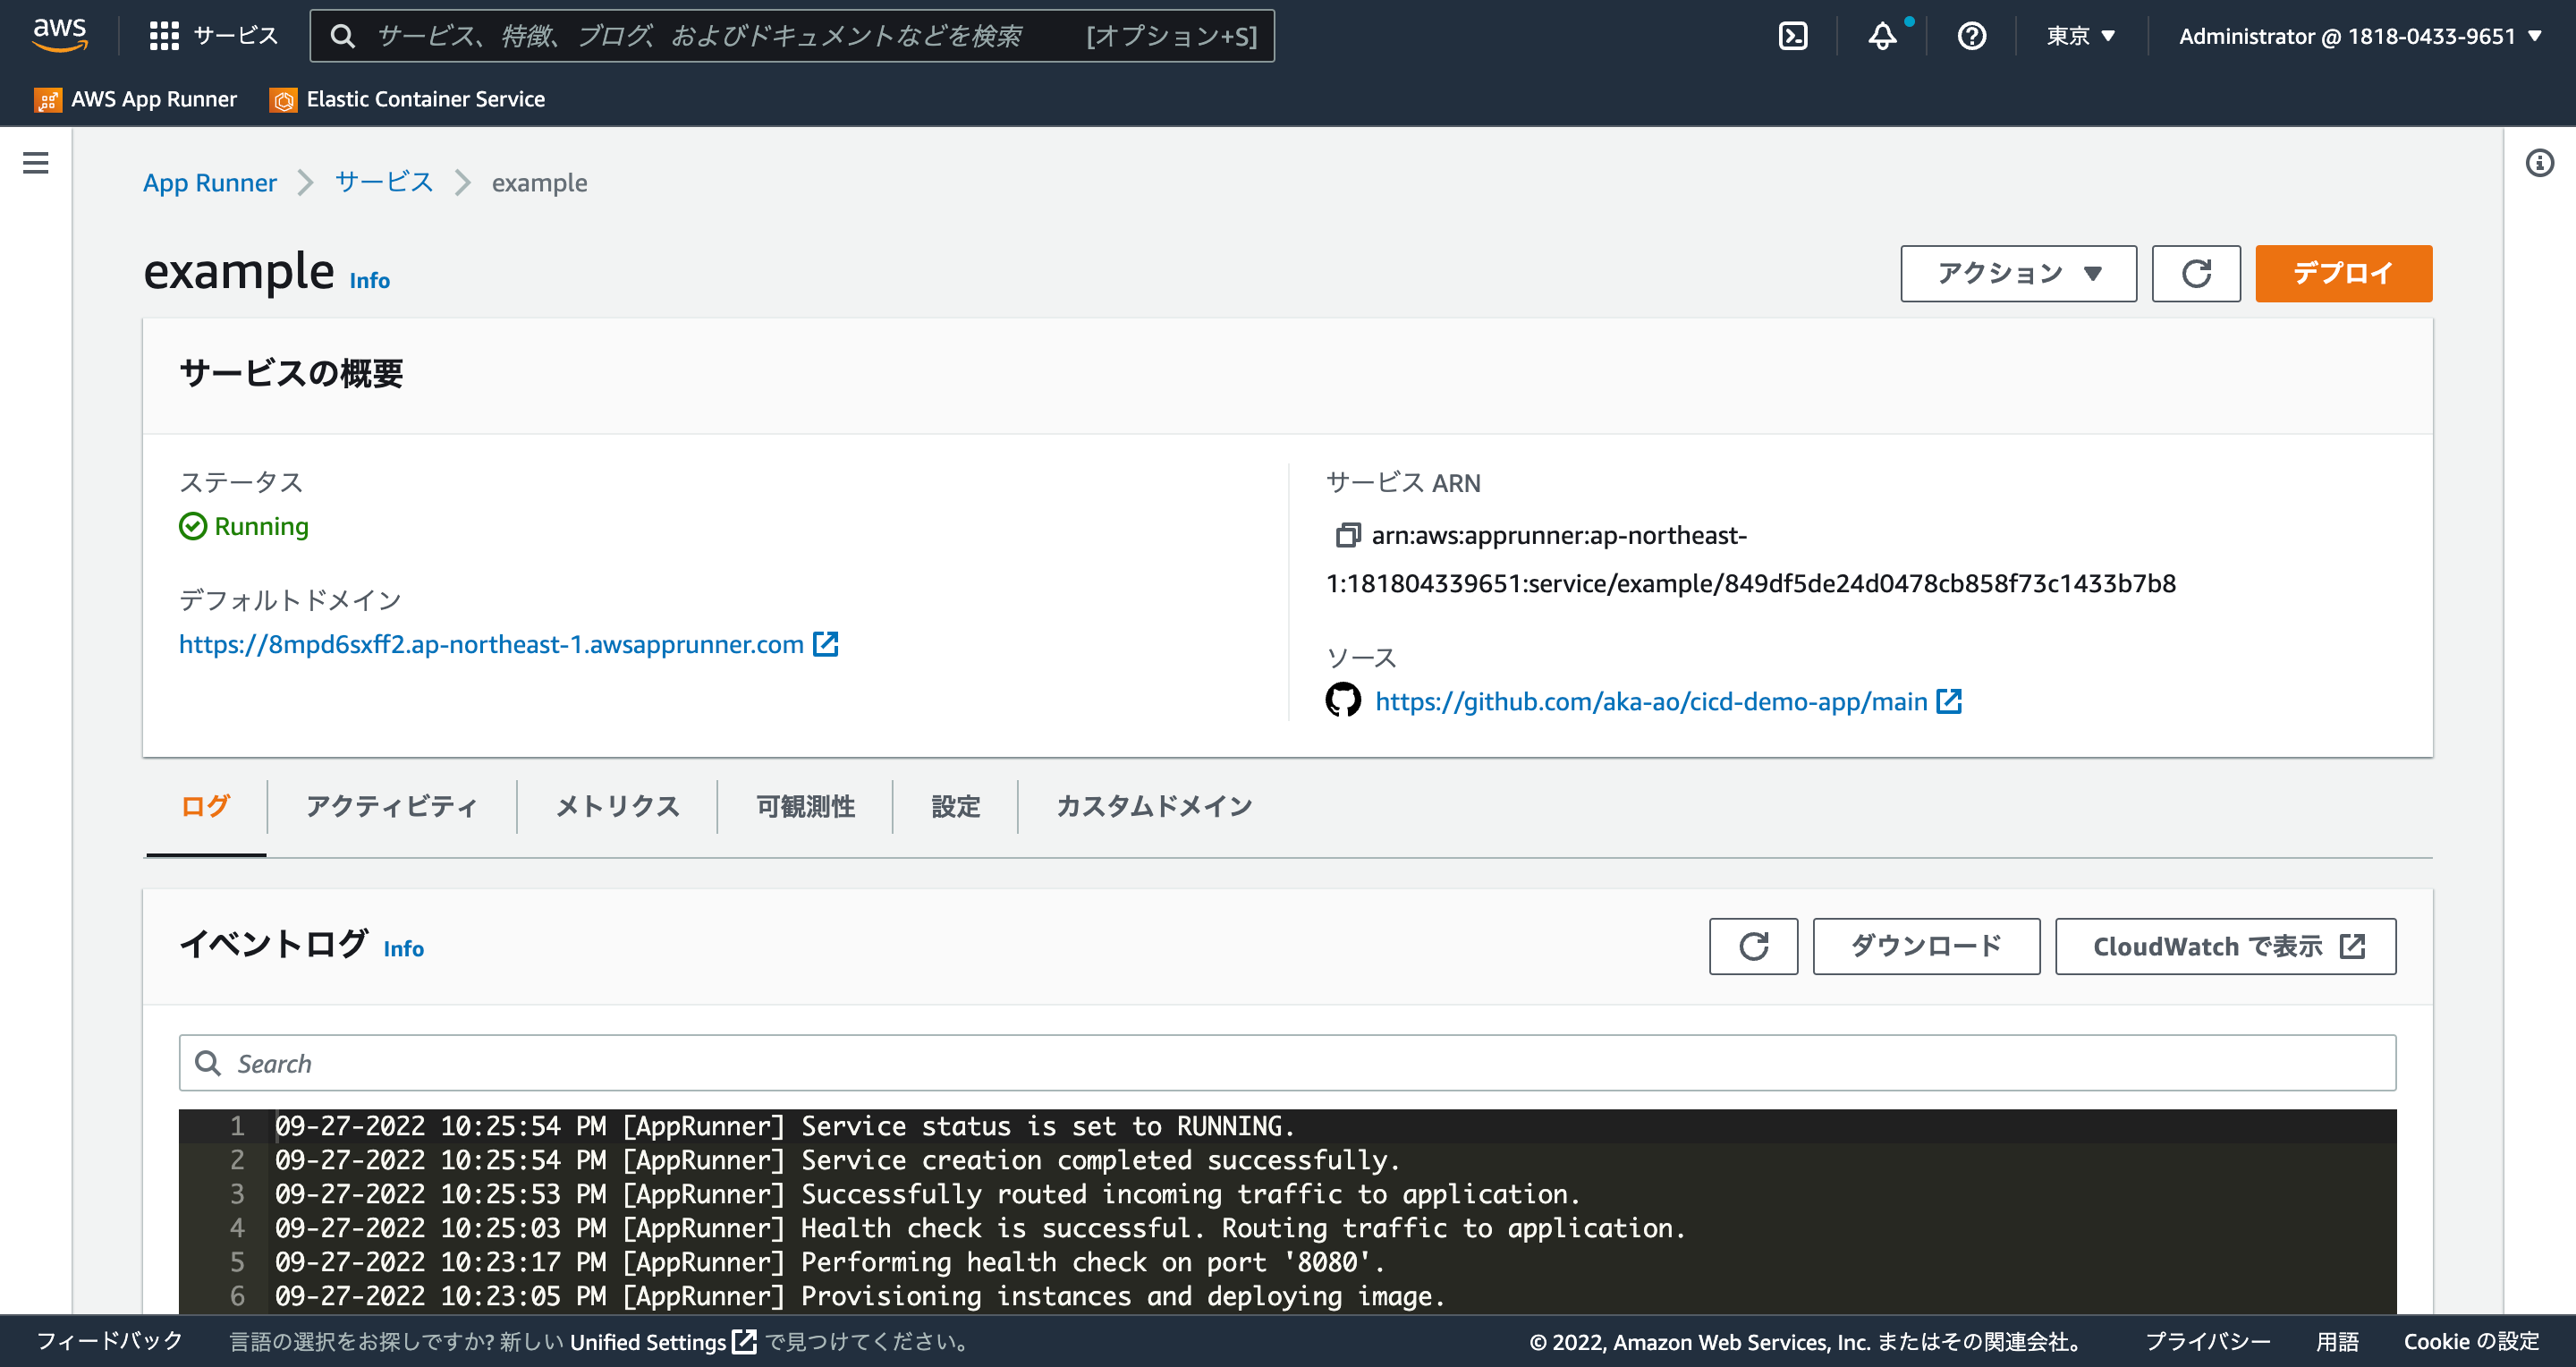
自動デプロイはオフにしているので上記画像の「デプロイ」ボタンを押すと設定しているブランチの最新のものを取得してアプリケーションの更新を行ってくれる。
最後に
Qiitaを探したところ、ECRと連携してTerradformでApp Runnerを起動する記事はいくつか出てきたのですが今回のように直接GitHubからコードを取得する設定のものはなかったため記事を書きました。
今回は設定がかなりシンプルなサービスになるので、DBなどを利用しないサービスであればコンソールから利用したほうが楽です。
DBやその他VPCアタッチを行うサービスの利用を行う場合は是非参考にしてください。
今回作成したコード


