概要
Laravelのpaginate()メソッド使用し、簡単にX(旧Twitter)のような無限スクロールが実装できるのでメモ書き程度に綴ってみます。
使うライブラリ
- axios (api通信)
- IntersectionObserver (スクロール検知)
前準備(必要な人だけ)
マイグレーション
マイグレーションファイルとモデルファイルを作成します。
php artisan make:model Post -m
    public function up(): void
    {
        Schema::create('posts', function (Blueprint $table) {
            $table->id();
            $table->string('title');
            $table->text('comment');
            $table->timestamps();
        });
    }
ダミーデータの挿入
今回はLaravelのseederを使い、仮のレコードを100件挿入します。
php arisan make:seeder PostsTableSeeder
use App\Models\Post;
use Faker\Factory;
use Illuminate\Database\Seeder;

class PostsTableSeeder extends Seeder
{
    public function run(): void
    {
        $faker = Factory::create();

        foreach (range(1, 100) as $index) {
            Post::create([
                'title' => $faker->sentence,
                'comment' => $faker->paragraph,
            ]);
        }
    }
}
作成したSeederを呼び出す
class DatabaseSeeder extends Seeder
{
    public function run(): void
    {
        $this->call(PostsTableSeeder::class);
    }
}
php artisan db:seed
これでテスト用のデータが100件挿入されたはずです。
ここから本題の無限スクロールを実装していきます。
無限スクロールの実装
ルーティング
Laravel 11では、デフォルトで存在していたapi.phpが無くなってしまったので復活させます。
php artisan install:api
use App\Http\Controllers\PostController;
Route::get('/posts', PostController::class);
コントローラー
リクエストを受けた際に、postsテーブルのレコードをpaginate()を使い12件だけ取得し、json形式でレスポンスを返す簡単なプログラムを書きます。
php artisan make:controller PostController
namespace App\Http\Controllers;

use App\Models\Post;

class PostController extends Controller
{
    public function __invoke()
    {
        $posts = Post::paginate(12); // 今回は12件ずつ表示
        return response()->json($posts);
    }
}
ここまででバックエンドの実装は完成です。paginate()メソッドを使って取得処理を書いただけですね。
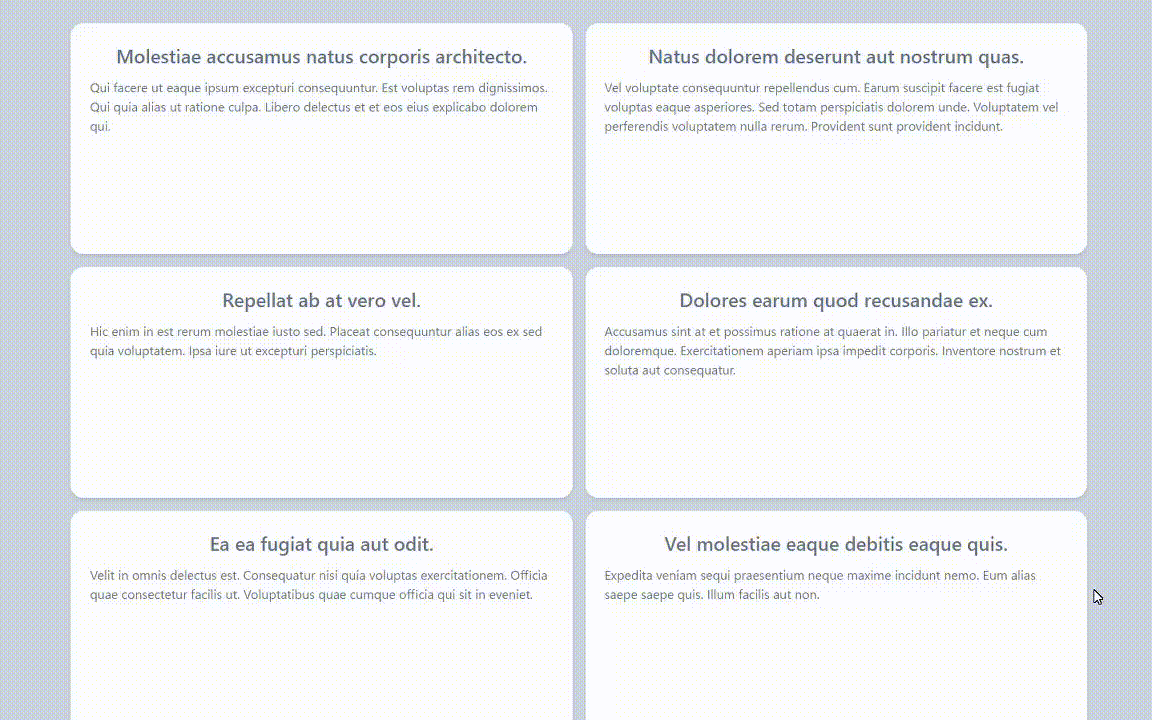
サーバーを立ててhttp://localhost:8000/postsにアクセスしてみると、こんな感じのJSONが帰ってきます。
{
    current_page: 1,
    data: [
    {
        id: 1,
        title: "Molestiae accusamus natus corporis architecto.",
        comment: "Qui facere ut eaque ipsum excepturi consequuntur. Est voluptas rem dignissimos. Qui quia alias ut ratione culpa. Libero delectus et et eos eius explicabo dolorem qui.",
        created_at: "2024-06-10T15:30:43.000000Z",
        updated_at: "2024-06-10T15:30:43.000000Z"
    },
    {
        id: 2,
        title: "Natus dolorem deserunt aut nostrum quas.",
        comment: "Vel voluptate consequuntur repellendus cum. Earum suscipit facere est fugiat voluptas eaque asperiores. Sed totam perspiciatis dolorem unde. Voluptatem vel perferendis voluptatem nulla rerum. Provident sunt provident incidunt.",
        created_at: "2024-06-10T15:30:43.000000Z",
        updated_at: "2024-06-10T15:30:43.000000Z"
    },
    // 省略
    ],
    first_page_url: "http://127.0.0.1:8000/posts?page=1",
    from: 1,
    last_page: 12,
    last_page_url: "http://127.0.0.1:8000/posts?page=12",
    links: [
    {
        url: null,
        label: "« Previous",
        active: false
    },
    {
        url: "http://127.0.0.1:8000/posts?page=1",
        label: "1",
        active: true
    },
    // 省略
    {
        url: "http://127.0.0.1:8000/posts?page=12",
        label: "12",
        active: false
    },
    {
        url: "http://127.0.0.1:8000/posts?page=2",
        label: "Next »",
        active: false
    }
    ],
    next_page_url: "http://127.0.0.1:8000/posts?page=2",
    path: "http://127.0.0.1:8000/posts",
    per_page: 9,
    prev_page_url: null,
    to: 9,
    total: 100
}
paginate()メソッドを使用することで、簡単にデータをページングすることができます。
上記のJSONレスポンスには、12件分のposts情報に加え、現在のページ番号、各ページのURL、総ページ数、次のページのURLなどが含まれています。
フロント側では、スクロール検知→12件分の投稿と次のページのURL(next_page_url)を取得→再度スクロールされたら、取得したnext_page_urlを使用し再度、12件分の投稿とnext_page_urlを取得 というのを繰り返すことで、無限スクロールが簡単に実装できるという寸法です。
それではReact側の実装をしていきます。
必要なライブラリのインストール
今回はaxiosとjs組み込みのIntersectionObserver apiを使用します。
npm i axios
レイアウト作成
簡単にレイアウトを作成します。今回はtailwindcssでスタイリングしています。
ダミー要素は、IntersectionObserver発火用に作成しています。

function App() {

    return (
        <>
            <div className="w-full min-h-screen bg-slate-300">
                <div className="grid grid-cols-2 w-2/3 gap-4 mx-auto py-10">
                    {/* 投稿一覧 */}
                    <div className="bg-white p-6 rounded-2xl shadow-md min-h-72">
                        <h1 className="text-2xl text-slate-500 font-bold text-center">Hello World</h1>
                        <p className="text-slate-500 mt-3 break-words">サンプルテキスト1</p>
                    </div>
                    <div className="bg-white p-6 rounded-2xl shadow-md min-h-72">
                        <h1 className="text-2xl text-slate-500 font-bold text-center">Hello World</h1>
                        <p className="text-slate-500 mt-3 break-words">サンプルテキスト2</p>
                    </div>
                    <div className="bg-white p-6 rounded-2xl shadow-md min-h-72">
                        <h1 className="text-2xl text-slate-500 font-bold text-center">Hello World</h1>
                        <p className="text-slate-500 mt-3 break-words">サンプルテキスト3</p>
                    </div>
                    {/* ダミー要素 */}
                    <div className="w-full h-20"></div>
                </div>
            </div>
        </>
    )
}

export default App
バックエンドにリクエストを送り投稿を取得
投稿とnext_page_urlをuseStateで管理し、Api通信用のfetchPosts()を作成し、useEffectで呼び出します。
import axios from "axios";
import { useEffect } from "react";
import { useState } from "react";

function App() {

    const [posts, setPosts] = useState([]);
    const [nextPageUrl, setNextPageUrl] = useState('http://127.0.0.1:8000/api/posts'); // laravel側で自動的にapiのprefixが付与されているので注意

    useEffect(() => {
        fetchPosts();
    }, []);

    const fetchPosts = async () => {
        try {
            const res = await axios.get(nextPageUrl);
            // スプレッド構文で投稿を取得する度に追加していく
            setPosts((prevPosts) => [...prevPosts, ...res.data.data]);
            setNextPageUrl(res.data.next_page_url);
            console.log(res.data);

        } catch (err) {
            console.error("エラー", err);
        }
    }

    return (
        <>
            <div className="w-full min-h-screen bg-slate-300">
                <div className="grid grid-cols-2 w-2/3 gap-4 mx-auto py-10">
                    {/* 投稿一覧 */}
                    {posts.map((post) => (
                        <div key={post.id} className="bg-white p-6 rounded-2xl shadow-md min-h-72">
                            <h1 className="text-2xl text-slate-500 font-bold text-center">{post.title}</h1>
                            <p className="text-slate-500 mt-3 break-words">{post.comment}</p>
                        </div>
                    ))}
                    {/* ダミー要素 */}
                    <div className="w-full h-20"></div>
                </div>
            </div>
        </>
    )
}

export default App
IntersectionObserverを使用し、スクロールを検知する
IntersectionObserver APIを利用することで、ページのスクロールを検知して特定の要素が表示された際に自動的に次のデータをロードすることができます。
以下のプログラムでは、ダミー要素がビューポートに入ったときにfetchPosts()を送信し、投稿を取得しています。
import axios from "axios";
import { useEffect, useRef } from "react";
import { useState } from "react";

function App() {

    const [posts, setPosts] = useState([]);
    const [nextPageUrl, setNextPageUrl] = useState('http://127.0.0.1:8000/api/posts');
    const observer = useRef(); // IntersectionObserverのインスタンス
    const observerRef = useRef(null); // IntersectionObserverの監視対象

    useEffect(() => {
        const options = {
            root: null, // ルート要素を指定、nullの場合はビューポート
            rootMargin: "0px", // ビューポートの外側からどれだけの範囲を監視するか
            threshold: 0, // 0~1の範囲で指定、要素がどの程度表示されたらコールバックを実行するか
        };

        // 第一引数のコールバック関数は、監視対象の要素がビューポートに入ると呼び出される
        observer.current = new IntersectionObserver((entries) => {
            if (entries[0].isIntersecting && nextPageUrl !== null) {
                fetchPosts();
            }
        }, options);

        // 監視対象の要素をセット
        if (observerRef.current) {
            observer.current.observe(observerRef.current);
        }

        // コンポーネントがアンマウントされた時に監視を解除
        return () => {
            if (observerRef.current) {
                observer.current.disconnect();
            }
        }
    }, [nextPageUrl]);

    const fetchPosts = async () => {
        try {
            const res = await axios.get(nextPageUrl);
            // スプレッド構文で配列を結合
            setPosts((prevPosts) => [...prevPosts, ...res.data.data]);
            // 次のページのURLをセット
            setNextPageUrl(res.data.next_page_url);

            console.log(res.data);
        } catch (err) {
            console.error("エラー", err);
        }
    }

    return (
        <>
            <div className="w-full min-h-screen bg-slate-300">
                <div className="grid grid-cols-2 w-2/3 gap-4 mx-auto py-10">
                    {/* 投稿一覧 */}
                    {posts.map((post) => (
                        <div key={post.id} className="bg-white p-6 rounded-2xl shadow-md min-h-72">
                            <h1 className="text-2xl text-slate-500 font-bold text-center">{post.title}</h1>
                            <p className="text-slate-500 mt-3 break-words">{post.comment}</p>
                        </div>
                    ))}
                    {/* ダミー要素 */}
                    <div ref={observerRef} className="w-full h-20"></div>
                </div>
            </div>
        </>
    )
}

export default App
通信中はfetchPostsを実行できないようにして完成
import axios from "axios";
import { useEffect, useRef } from "react";
import { useState } from "react";

function App() {

    const [posts, setPosts] = useState([]);
    const [nextPageUrl, setNextPageUrl] = useState('http://127.0.0.1:8000/api/posts'); // laravel側で自動的にapiのprefixが付与されているので注意
    const [loading, setLoading] = useState(false);
    const observer = useRef(); // IntersectionObserverのインスタンス
    const observerRef = useRef(null); // IntersectionObserverの監視対象

    useEffect(() => {
        const options = {
            root: null, // ルート要素を指定、nullの場合はビューポート
            rootMargin: "0px", // ビューポートの外側からどれだけの範囲を監視するか
            threshold: 0, // 0~1の範囲で指定、要素がどの程度表示されたらコールバックを実行するか
        };

        // 第一引数のコールバック関数は、監視対象の要素がビューポートに入ると呼び出される
        observer.current = new IntersectionObserver((entries) => {
            if (entries[0].isIntersecting && nextPageUrl !== null) {
                fetchPosts();
            }
        }, options);

        // 監視対象の要素をセット
        if (observerRef.current) {
            observer.current.observe(observerRef.current);
        }

        // コンポーネントがアンマウントされた時に監視を解除
        return () => {
            if (observerRef.current) {
                observer.current.disconnect();
            }
        }
    }, [nextPageUrl]);

    const fetchPosts = async () => {
        if (loading) return;
        setLoading(true);

        try {
            const res = await axios.get(nextPageUrl);
            // スプレッド構文で配列を結合
            setPosts((prevPosts) => [...prevPosts, ...res.data.data]);
            // 次のページのURLをセット
            setNextPageUrl(res.data.next_page_url);

            console.log(res.data);
        } catch (err) {
            console.error("エラー", err);
        } finally {
            setLoading(false);
        }
    }

    return (
        <>
            <div className="w-full min-h-screen bg-slate-300">
                <div className="grid grid-cols-2 w-2/3 gap-4 mx-auto py-10">
                    {/* 投稿一覧 */}
                    {posts.map((post) => (
                        <div key={post.id} className="bg-white p-6 rounded-2xl shadow-md min-h-72">
                            <h1 className="text-2xl text-slate-500 font-bold text-center">{post.title}</h1>
                            <p className="text-slate-500 mt-3 break-words">{post.comment}</p>
                        </div>
                    ))}
                </div>
                {/* ローディングアニメーション */}
                {loading && (
                    <div className="w-full flex justify-center py-16">
                        <div className="animate-spin h-10 w-10 border-4 border-sky-400 rounded-full border-t-transparent"></div>
                    </div>
                )}

                {/* ダミー要素 */}
                <div ref={observerRef} className="w-full h-20"></div>
            </div>
        </>
    )
}

export default App