この記事は ABEJA Platform Advent Calendar の17日目の記事です.
はじめまして,ABEJAの蓑手(みのて)といいます.
普段はResearcherとして,機械学習アルゴリズムの研究開発をしています.
エンジニアのみなさんはバージョン管理にGitHubなどを使うと思います.
自分もDeep Learningのコードを書く際は基本的にGitHubのリポジトリで作業をするのですが,コードを書き終わったら,すぐにPlatformにデプロイして学習させたいですよね?
そのときにABEJA PlatformとGitHubがうまく連携されたら嬉しくないですか?僕は嬉しいです.
そう思ったので,今回は少し自分の業務から離れて,GitHubにpushされたときにABEJA Platformに勝手にデプロイされて学習が走る仕組みを作ってみました.
CircleCIにプロジェクトを追加する
ーというわけでCircleCIを使ってpushしたときにABEJA Platformにデプロイしてみようと思います.
まず,連携したいGitHubリポジトリを下記のような構成にします.
scripts配下に実際にデプロイされるコード一式が入っています.
.
├── .circleci/
│   └── config.yml
├── .gitignore
├── manage.py
├── requirements.txt
└── scripts/
次に連携したいGitHubのリポジトリをCircleCIに登録します.
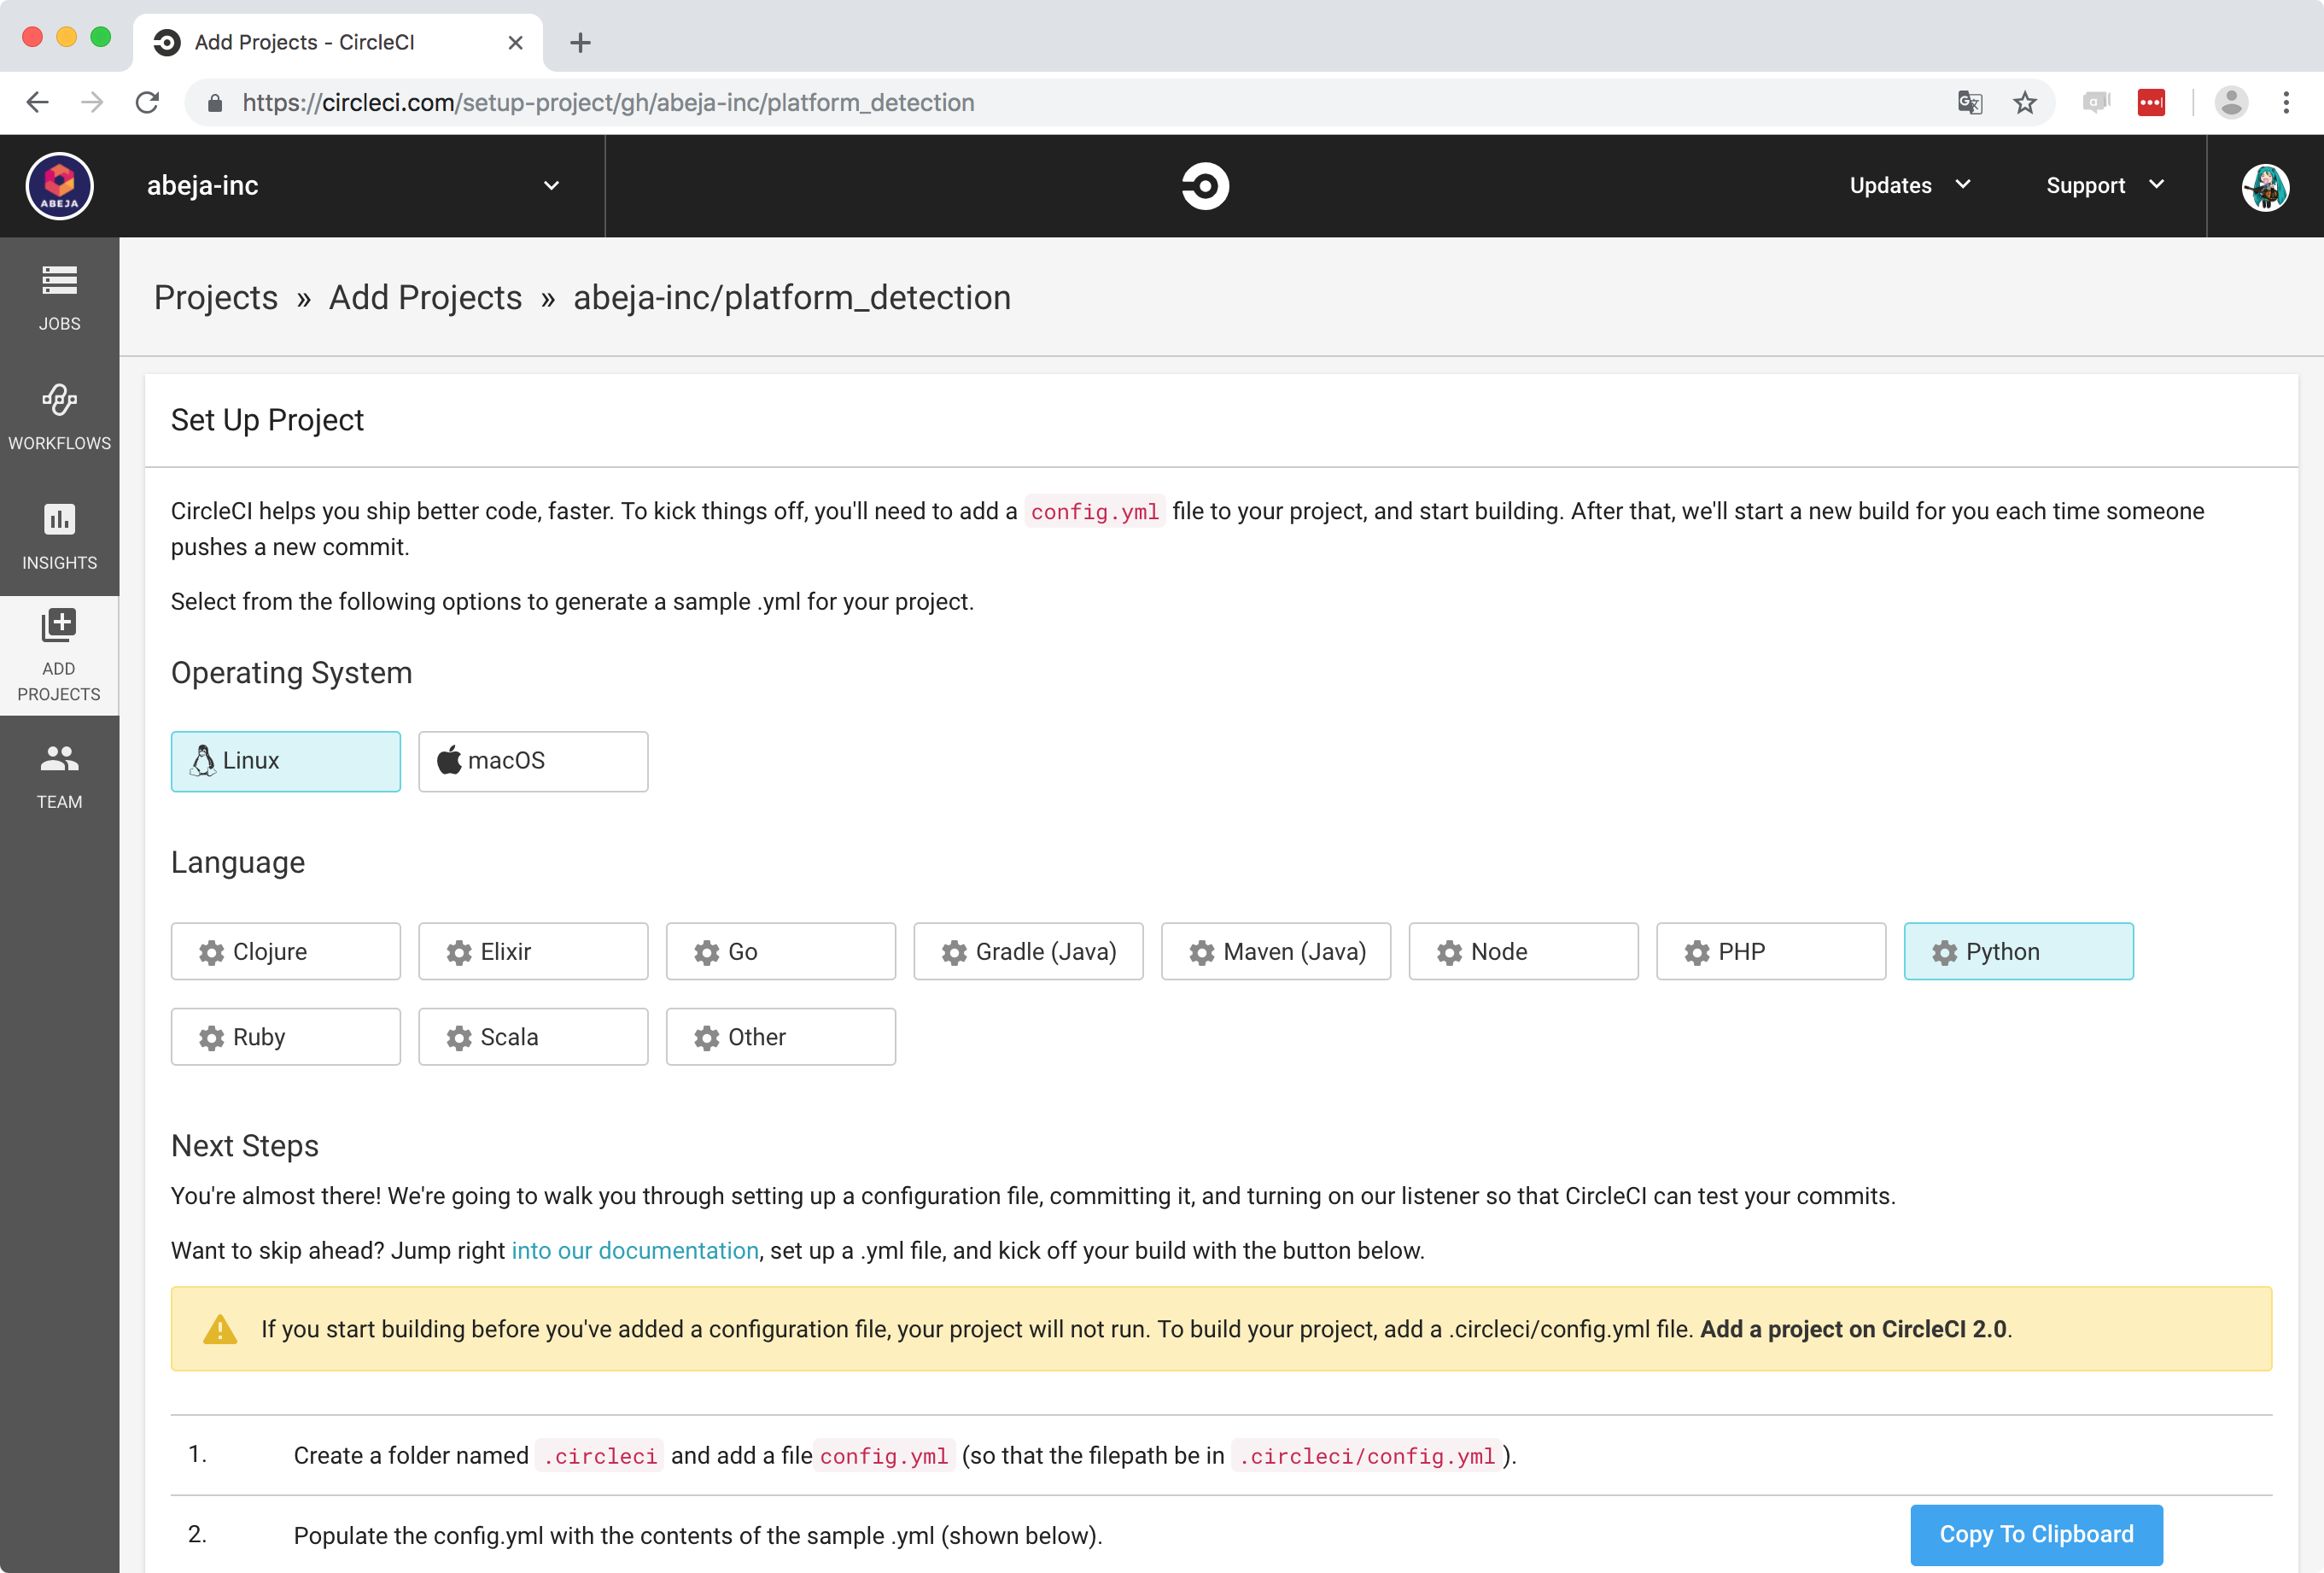
実はCircleCIでプロジェクト作るのは初めてなんですが,手探りでポチポチしたら簡単に作成できました.
CircleCIの設定ファイルを書く
次に.circleci/config.ymlに設定ファイルを書きます.
流石にブランチにいちいちpushされる度に学習が走られるのは厄介なので,今回はtagに新しいバージョンがリリースされた際に学習が走るように設定しました.
実際に書いたconfig.ymlを以下に示します.
# Python CircleCI 2.0 configuration file
#
# Check https://circleci.com/docs/2.0/language-python/ for more details
#
version: 2
jobs:
  deploy:
    docker:
      # specify the version you desire here
      # use `-browsers` prefix for selenium tests, e.g. `3.6.1-browsers`
      - image: circleci/python:3.6.1

      # Specify service dependencies here if necessary
      # CircleCI maintains a library of pre-built images
      # documented at https://circleci.com/docs/2.0/circleci-images/
      # - image: circleci/postgres:9.4

    working_directory: ~/repo

    steps:
      - checkout

      # Download and cache dependencies
      - restore_cache:
          keys:
          - v1-dependencies-{{ checksum "requirements.txt" }}
          # fallback to using the latest cache if no exact match is found
          - v1-dependencies-

      - run:
          name: install dependencies
          command: |
            mkdir -p ./venv
            python3 -m venv venv
            . venv/bin/activate
            curl -s https://packagecloud.io/install/repositories/abeja/platform-public/script.python.sh | bash
            pip3 install -r requirements.txt

      - save_cache:
          paths:
            - venv
          key: v1-dependencies-{{ checksum "requirements.txt" }}

      # run tests!
      # this example uses Django's built-in test-runner
      # other common Python testing frameworks include pytest and nose
      # https://pytest.org
      # https://nose.readthedocs.io
      - run:
          name: deploy build
          command: |
            . venv/bin/activate
            python3 manage.py

      - store_artifacts:
          path: test-reports
          destination: test-reports

workflows:
  version: 2
  build-and-deploy:
    jobs:
      - deploy:
          filters:
            tags:
              only: /v.*/
            branches:
              ignore: /.*/
基本的にはcircleciが作ってくれたテンプレートを流用しています.
特記事項としては,デプロイ時にABEJA SDKを使うために下記のコマンドを挿入しています.
curl -s https://packagecloud.io/install/repositories/abeja/platform-public/script.python.sh | bash
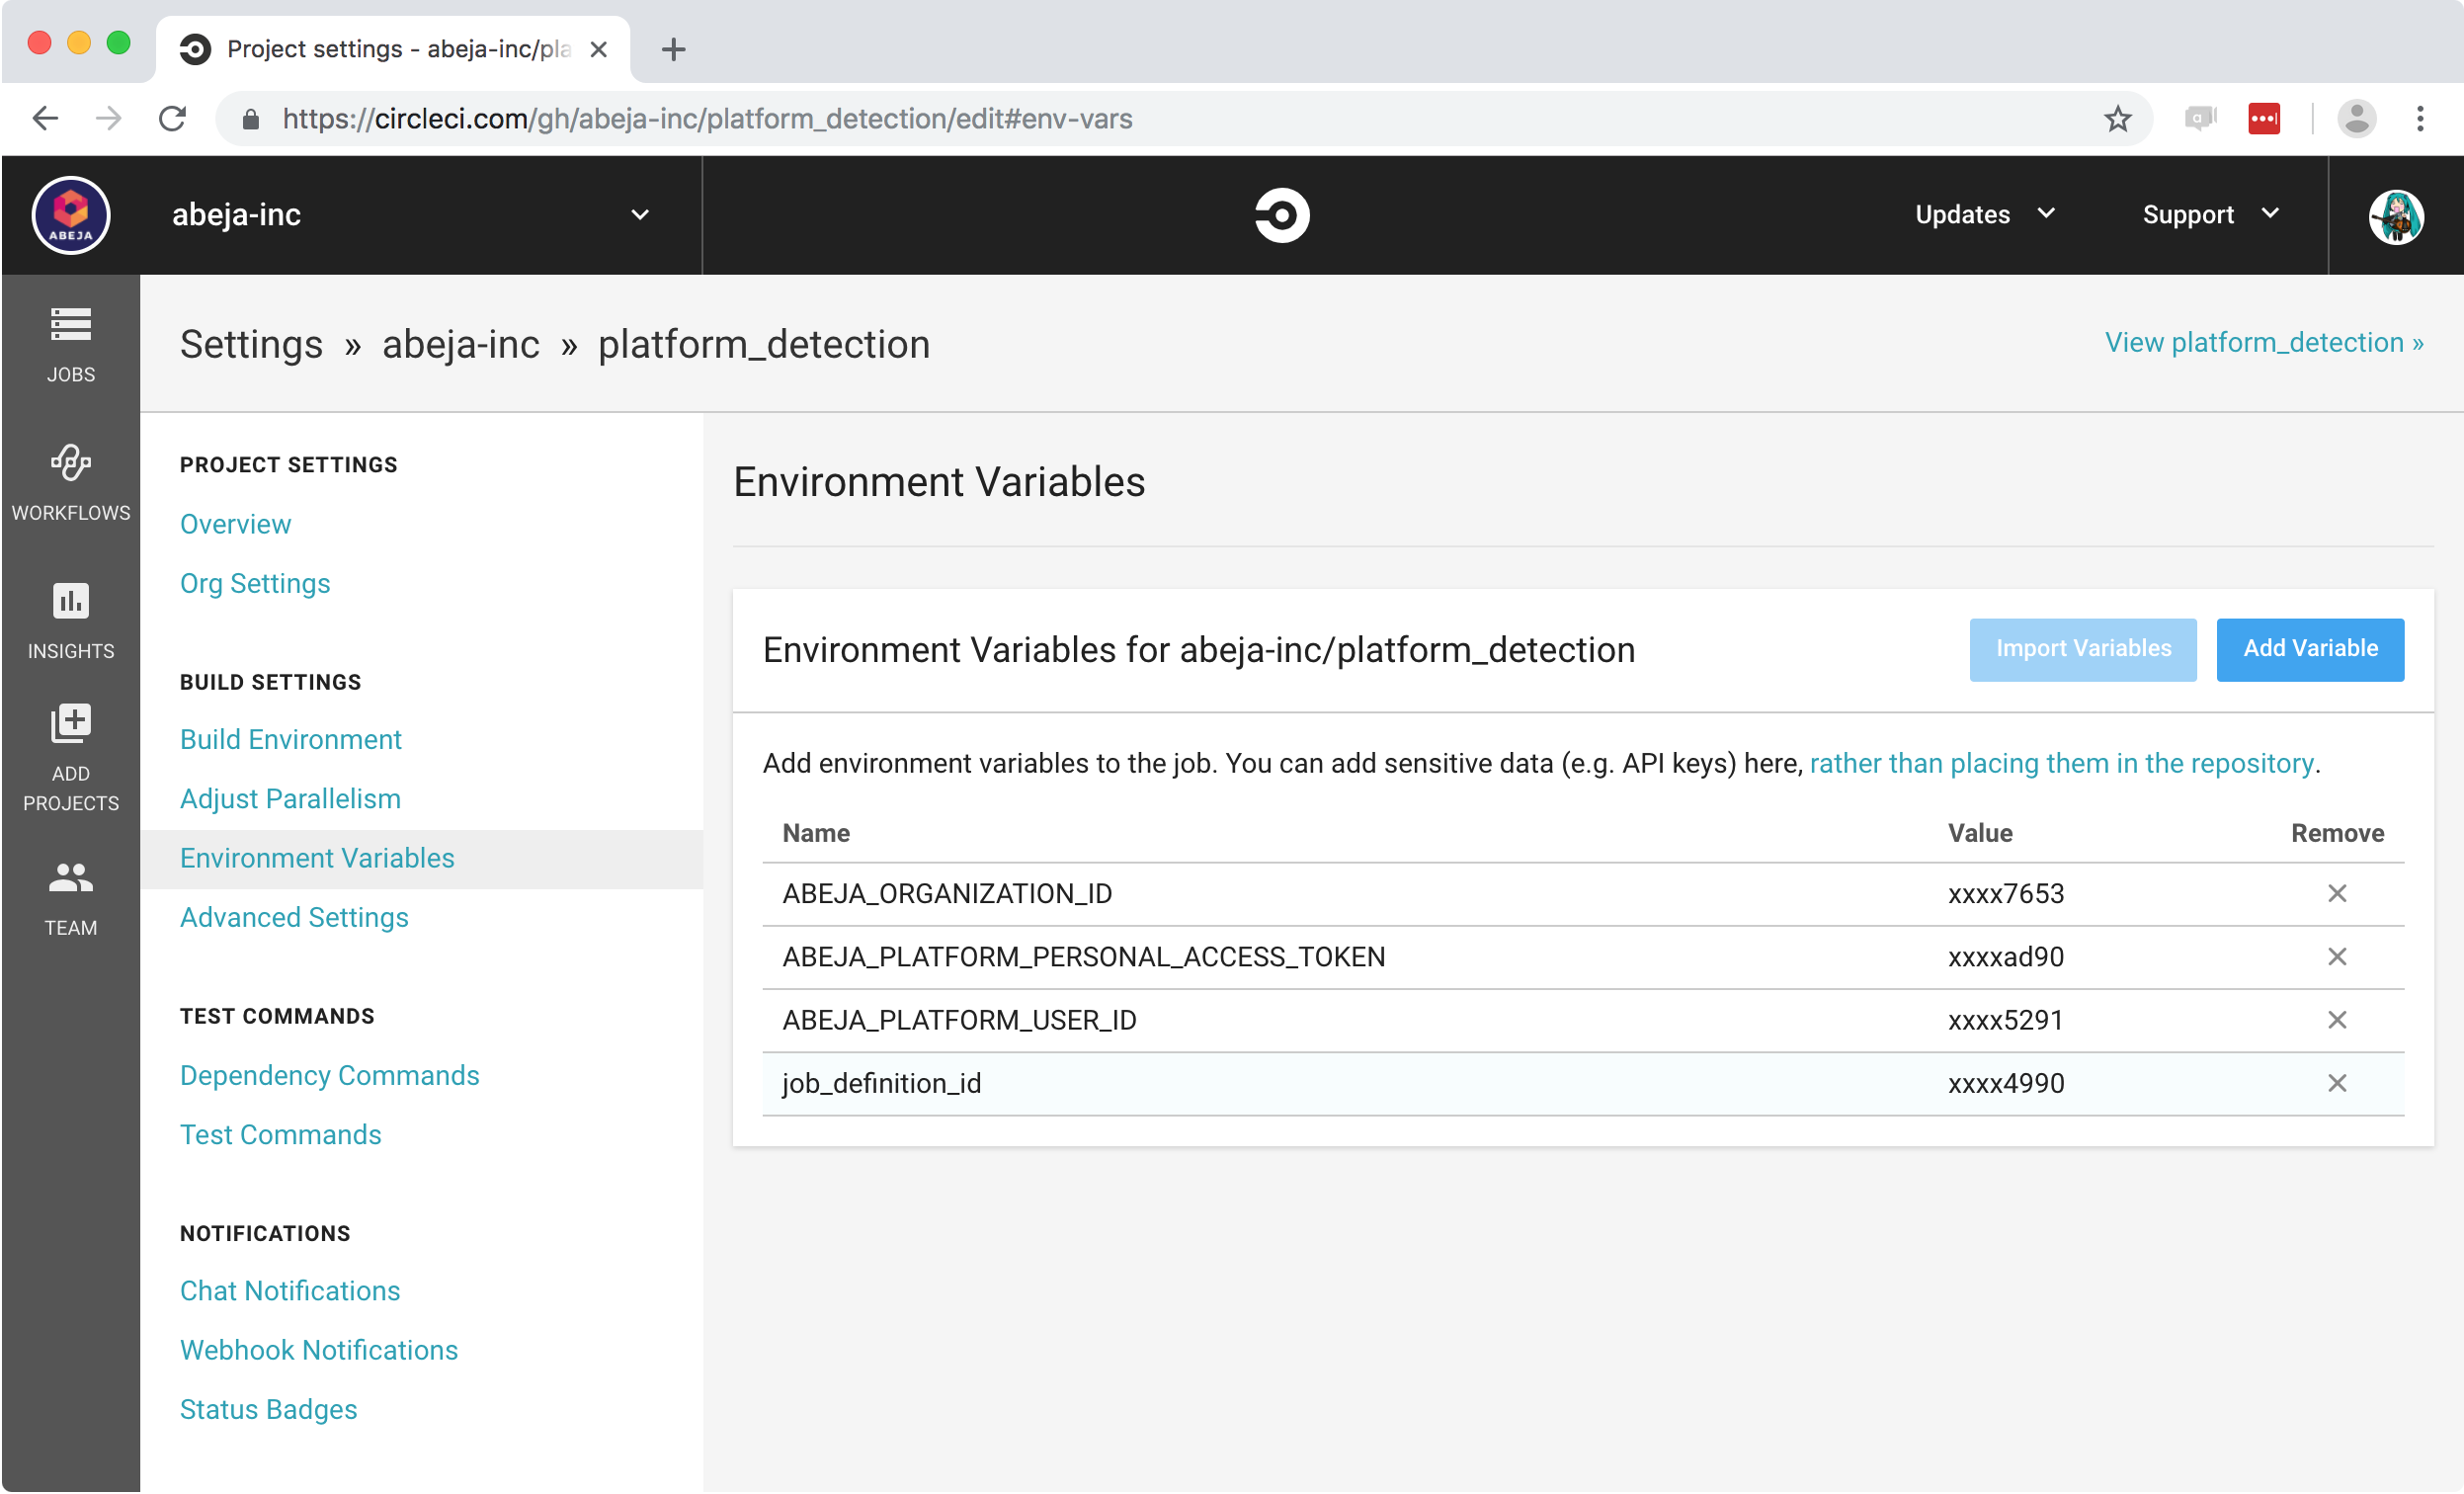
CircleCIに環境変数を設定する
デプロイ時に必要なABEJA PlatformのCredentialなどはCircleCIから環境変数で与えます.
学習コードのDeployスクリプトを書く
次にデプロイするためのコードを書きました.
import os
import base64
import shutil
from abeja.train import APIClient

# Set dataset_id
dataset_id =
# num epochs
num_epochs =

organization_id = os.environ['ABEJA_ORGANIZATION_ID']
job_definition_name = os.environ['job_definition_id']

shutil.make_archive('source', 'zip', root_dir='scripts')
with open('source.zip', 'rb') as f:
    source_code_base64 = base64.encodestring(f.read()).decode('ascii')

params = {
    "handler": "examples.ssd.train_from_scratch:handler",
    "datasets": {
        "train": dataset_id,
    },
    "image": "abeja-inc/all-gpu:18.10",
    "source_code_base64": source_code_base64,
    "user_parameters": {}
}
api_client = APIClient()
response = api_client.create_training_job_definition_version(organization_id, job_definition_name, params)

version_id = response['job_definition_version']
user_parameters = {
    'num_epochs': num_epochs,
}
response = api_client.create_training_job(organization_id,
                                          job_definition_name,
                                          version_id,
                                          user_parameters)
リポジトリで共通している部分は環境変数として外だしする感じで設計してます.
テスト
早速,最初のバージョンリリースを行なってみましょう.
$ git tag v0.0.1
$ git push origin v0.0.1
うまくいけば下記のようにsuccessしてくれます.

Platform Consoleを見にいくと.
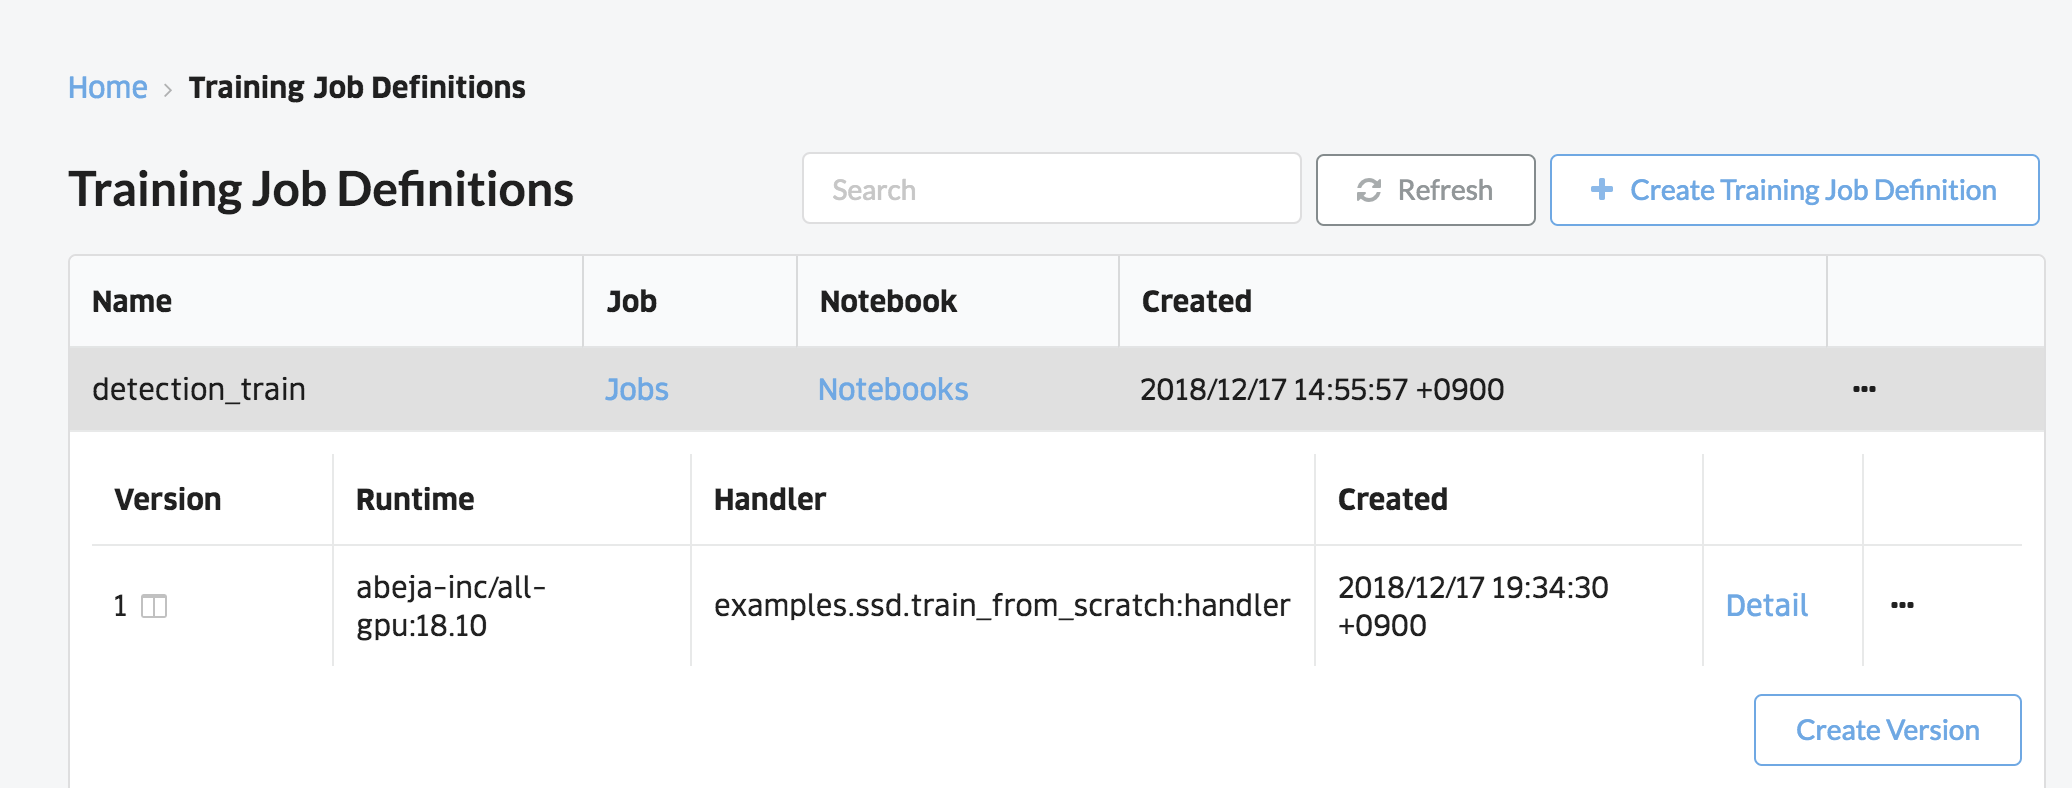
バージョンが出来ています!
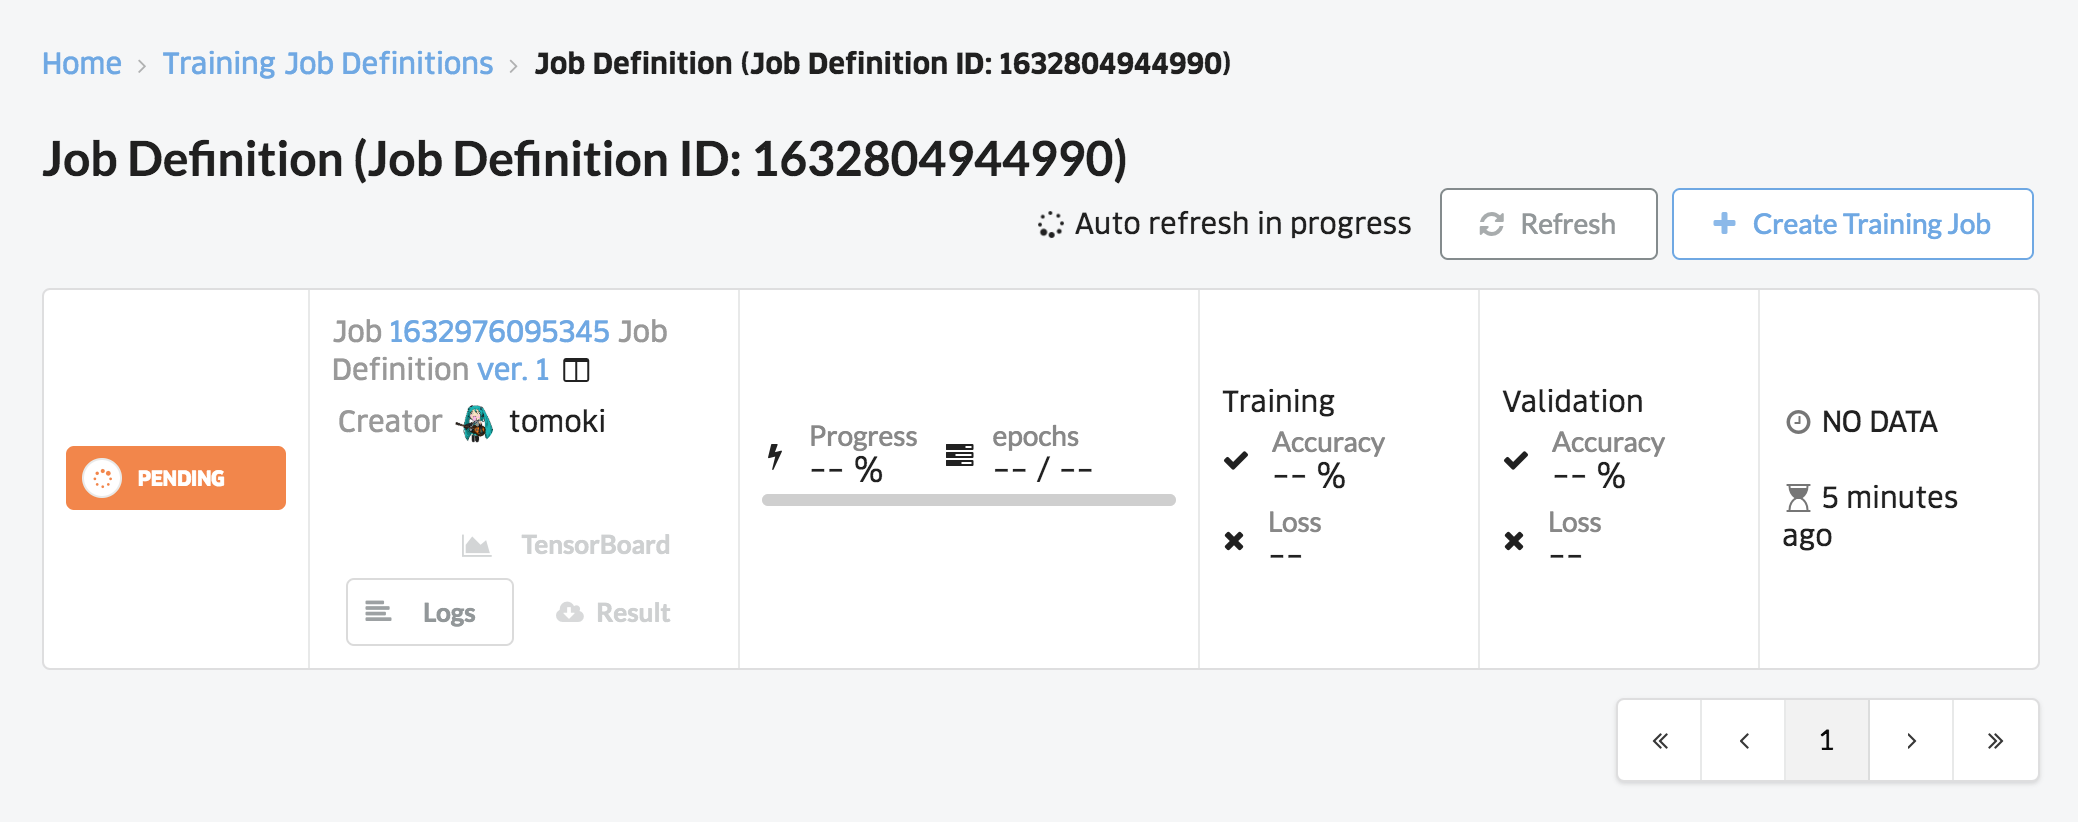
無事,Training Jobにデプロイされました!
まとめ
GitHubとABEJA Platformを連携させて,tag push時にデプロイさせることが出来ました.
GitHubと連携できるとコードの差分も見れますし,コミットメッセージから何を変更したのかもパッと見れてよりPlatformが便利になります.
個人的にはABEJA Platformを実験ポートフォリオとして,より使いやすくできるので良いのではないかなーと思っています.
良きPlatformライフを!