本記事はJUCE Advent Calendar 2024の12月7日向けに投稿した記事です。
はじめに
最少のスクリーンショットとソースコードでVSTプラグインの開発イメージをざっくりつかむための3夜連続JUCEチュートリアル最終回です。
これまでの2回でシンセの音声信号生成とUIの実装について説明しました。そこで今回は前々回作成したシンセに鍵盤UIを追加したいと思います。
チュートリアル
(1) Visual Studioでプロジェクトを確認
今回は既存のプロジェクトに機能を追加するのでProjucerは使いません。
Visual StudioでSineSynthのソリューションファイルを開いてPluginEditor.h/.cpp、PluginProcessor.h/.cppを編集します。
(2) Processorヘッダに鍵盤状態の変数を追加
Processorヘッダに、なにかひとつでも鍵盤が押されているかどうかを示す変数と、押されているときそのノートナンバーを示す変数を追加します。1
これらの変数はUIスレッドとリアルタイムスレッドの間で受け渡すのでjuce::Atomicにしておきます。前回は同様の目的でjuce::AudioParameterFloatを使いましたが、今回は永続的な状態を示すオーディオパラメータではないため、より手軽なAtomicにしました。
enum KBD { IDLE, NOTEON, NOTEOFF }; // 追加

class SineSynthAudioProcessor  : public juce::AudioProcessor
{
public:
    juce::Atomic<KBD>kbd_status = KBD::IDLE; // 追加 鍵盤GUIの状態
    juce::Atomic<int>kbd_notenumber = 0;     // 追加 押された鍵盤のノート番号
(3) ProcessorにNoteOn/NoteOff処理を再実装
processBlock()は、NoteOn/NoteOff処理の部分を前々回実装したものから変更します。
最初の2行でGUI鍵盤の状態を取得します。さらにMIDIメッセージを取得して、GUI鍵盤かMIDIメッセージのいずれかがNoteOnであれば発音処理を実行します。
void SineSynthAudioProcessor::processBlock (juce::AudioBuffer<float>& buffer, juce::MidiBuffer& midiMessages)
{
    // 前々回の実装から書き直す
    KBD kbd = kbd_status.get();    // 鍵盤GUIのステータス取得
    int nn = kbd_notenumber.get(); // ノートナンバー
    for (const auto metadata : midiMessages) // MIDIメッセージ処理
    {
        const auto msg = metadata.getMessage();
        if (msg.isNoteOn()) {
            kbd = KBD::NOTEON;
            nn = msg.getNoteNumber();
        }
        else if (msg.isNoteOff()) {
            kbd = KBD::NOTEOFF;
        }
    }
    if (kbd == KBD::NOTEON) // NoteOnの音声準備
    {
        double frequency = juce::MidiMessage::getMidiNoteInHertz(nn);
        angleDelta = 2.0 * juce::MathConstants<double>::pi * frequency / currentSampleRate;
        currentAngle = 0.0;
        currentGain = 0.1;
        kbd_status.set(KBD::IDLE);
    }
    else if (kbd == KBD::NOTEOFF) // NoteOffの音声準備
    {
        currentGain = 0.0;
        kbd_status.set(KBD::IDLE);
    }
    // 前々回の実装からここまで書き直す

    // 音声信号処理は前々回と同じ
    float* l_ch = buffer.getWritePointer(0);
    float* r_ch = buffer.getWritePointer(1);
    for (int n = 0; n < buffer.getNumSamples(); n++) {
        l_ch[n] = r_ch[n] = sin(currentAngle) * currentGain;
        currentAngle += angleDelta;
    }
}
(4) Editorヘッダに鍵盤GUIコンポーネントを追加
前回同様、使いたいGUIのListenerを継承することでコールバック関数を呼べるように機能追加します。
class SineSynthAudioProcessorEditor  : public juce::AudioProcessorEditor
                                      ,private juce::MidiKeyboardStateListener // 追加
{
public:
    // 追加 鍵盤GUIが押された/離されたときの処理
    void handleNoteOn(juce::MidiKeyboardState* source, int midiChannel, int midiNoteNumber, float velocity);
    void handleNoteOff(juce::MidiKeyboardState* source, int midiChannel, int midiNoteNumber, float velocity);
privateのメンバ変数として鍵盤コンポーネントを追加します。
private:
    juce::MidiKeyboardState keyboardState;         // 追加 鍵盤GUIの状態
    juce::MidiKeyboardComponent keyboardComponent; // 追加 鍵盤GUIコンポーネント
(5) Editorに鍵盤GUI関係処理を実装
コンストラクタでは、横長のウィンドウサイズとそれに合わせた鍵盤のサイズを設定します。初期化子リストでkeyboardComponentの初期化を追加することも忘れないでください。
SineSynthAudioProcessorEditor::SineSynthAudioProcessorEditor (SineSynthAudioProcessor& p)
    : AudioProcessorEditor (&p), audioProcessor (p),
    keyboardComponent(keyboardState, juce::MidiKeyboardComponent::horizontalKeyboard) // 追加
{
    // 関数の内容をすべて書き換え
    setSize(600, 100); // ウィンドウサイズ設定
    addAndMakeVisible(keyboardComponent); // 鍵盤GUIコンポーネント追加
    keyboardComponent.setBounds(10, 10, getWidth() - 20, getHeight() - 20);
    keyboardState.addListener(this);
}
paint()はテンプレの「Hello World!」文字の描画命令を削除して、背景塗りつぶし処理だけにします。
void SineSynthAudioProcessorEditor::paint (juce::Graphics& g)
{
    // 背景塗りつぶし処理を残して他は削除
    g.fillAll (getLookAndFeel().findColour (juce::ResizableWindow::backgroundColourId));
}
鍵盤が押されたとき/離されたときのコールバック関数です。Processorのメンバ変数にノートナンバーと状態を渡します。
// 鍵盤GUIが押されたとき呼ばれるhandleNoteOn関数を追加
void SineSynthAudioProcessorEditor::handleNoteOn(juce::MidiKeyboardState* source, int midiChannel, int midiNoteNumber, float velocity)
{
    audioProcessor.kbd_notenumber.set(midiNoteNumber);
    audioProcessor.kbd_status.set(KBD::NOTEON);
}

// 鍵盤GUIが離されたとき呼ばれるhandleNoteOff関数を追加
void SineSynthAudioProcessorEditor::handleNoteOff(juce::MidiKeyboardState* source, int midiChannel, int midiNoteNumber, float velocity)
{
    audioProcessor.kbd_notenumber.set(midiNoteNumber);
    audioProcessor.kbd_status.set(KBD::NOTEOFF);
}
実装はこれで完了です。ビルドして、生成された.vst3ファイルを所定のフォルダにコピーするとDAWから利用できるようになります。
参考
https://docs.juce.com/master/tutorial_synth_using_midi_input.html
https://m1m0zzz.github.io/juce-tutorial-ja/synth/tutorial_synth_using_midi_input/
https://docs.juce.com/master/tutorial_handling_midi_events.html
https://m1m0zzz.github.io/juce-tutorial-ja/midi/tutorial_handling_midi_events/
https://panda-clip.com/plugin-simple-midi-message/
おまけ
UIに鍵盤がついたということは、つまりそれだけで楽器として機能するということでもあります。
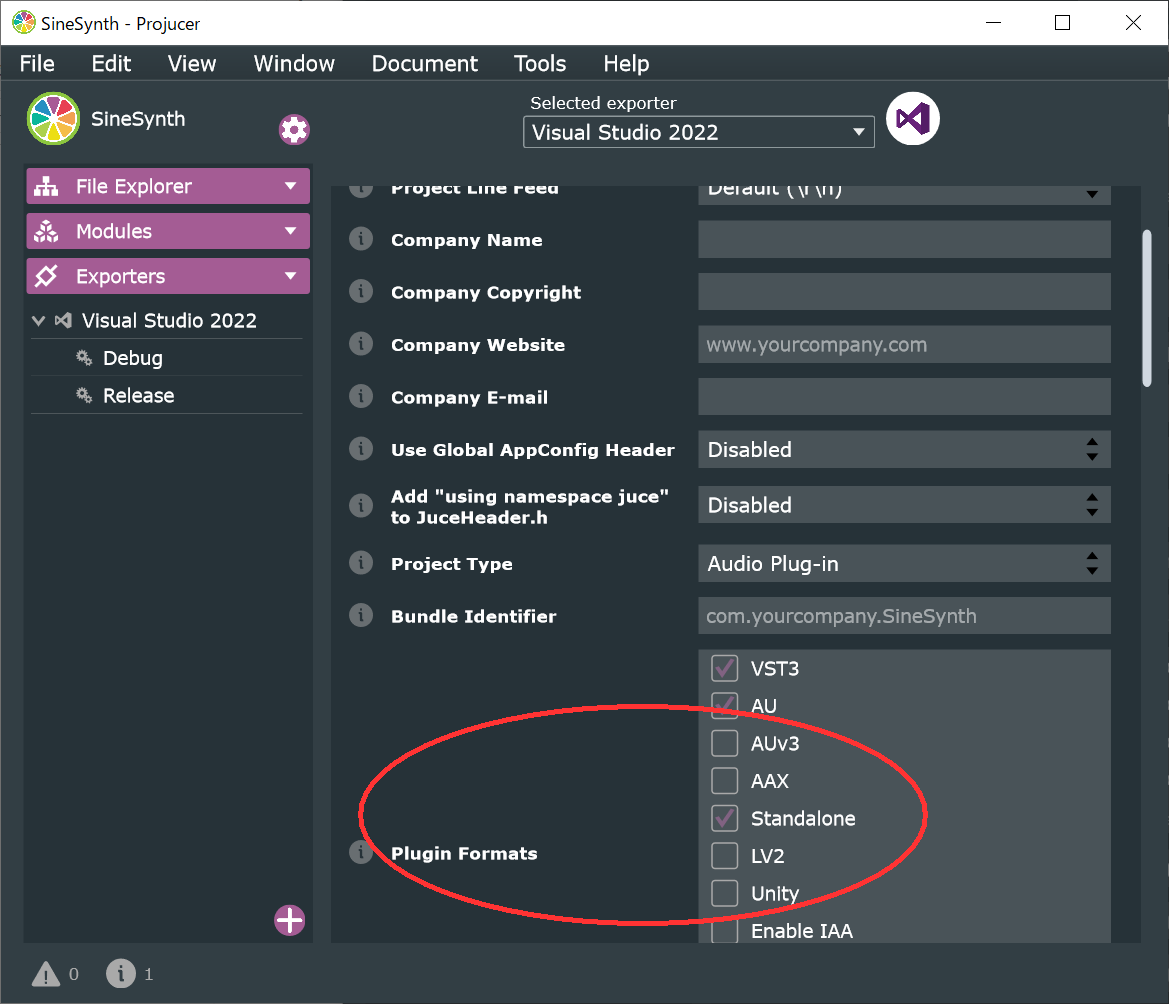
ProjucerのPlugin FormatsでStandaloneにチェックを入れて再度ビルドしてみてください。
以下のようなフォルダにスタンドアロン版SineSynth.exeができていると思います。
SineSynth\Builds\VisualStudio2022\x64\Debug\Standalone Plugin\
-
簡易的なモノシンセなのでシンプルにしています。しっかり実装するならモノシンセといえど全鍵盤の状態を配列で持つ方が良いです。 ↩


