はじめに
pic24にmruby/cで書き込む手順が公開されていたのでやってみる。
個人的になんとなくPICが好きなので動かしてみたかった。
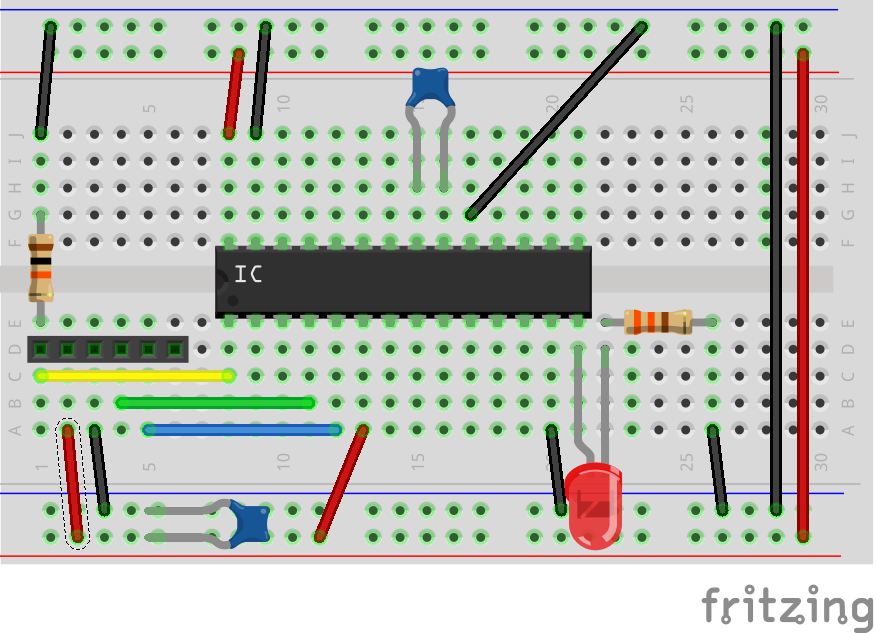
使用部品・回路
・pickit3
・pic24ep512gp202-i
・抵抗330,10k
・コンデンサ1u,10u
・LED
電源ラインが1uF
左のソケットがPickit3 左から1ピン
手順
基本的に同じ手順なので異なるところだけ書いておく。
https://www.s-itoc.jp/activity/research/mrubyc/mrubyc_news/842
・4.1の4は[pickit3]を選択
・MCCは無操作で「Generate」ボタンのみ押す
・main.cとsample1.rbは↓を使用
プログラム
Lチカのみ
sample1.rb
while true
  led1_write( 1 )
  sleep 1
  led1_write( 0 )
  sleep 1
end
main.c
# include "mcc_generated_files/mcc.h"
# include "mrubyc.h"
# define FCY (_XTAL_FREQ/2)

extern const uint8_t sample1[];
# define MEMORY_SIZE (1024*20)
static uint8_t memory_pool[MEMORY_SIZE];

static void c_led1_write(mrb_vm *vm, mrb_value *v, int argc) {
    int set_value = GET_INT_ARG(1);
    PORTBbits.RB5 = set_value;
}

int hal_write(int fd, const void *buf, int nbytes) {
    return 0;
}
int hal_flush(int fd) {
    return 0;
}

int main(void)
{
    SYSTEM_Initialize();
    TRISB = 0x0;

    mrbc_init(memory_pool, MEMORY_SIZE);
    mrbc_define_method(0, mrbc_class_object, "led1_write", c_led1_write);
    mrbc_create_task(sample1, 0);
    mrbc_run();
    return 1;
}
