最新版のSDKに対応した記事を投稿しました。
本記事は内容が古くなっていますので、こちらを参照してください。
はじめに
Pico Neo 3でのVRアプリ開発方法をまとめました。
開発イメージが分かりやすいよう、手順をステップごとに詳細に記載しています。
今回の開発環境
- Unity 2021.3.0f1
- Pico Unity XR SDK v2.0.4
- UnityのXR プラグインフレームワークに対応しています。
SDKをDownload & UnityにImportする
-
SDK入手先
-
https://developer.pico-interactive.com/sdk
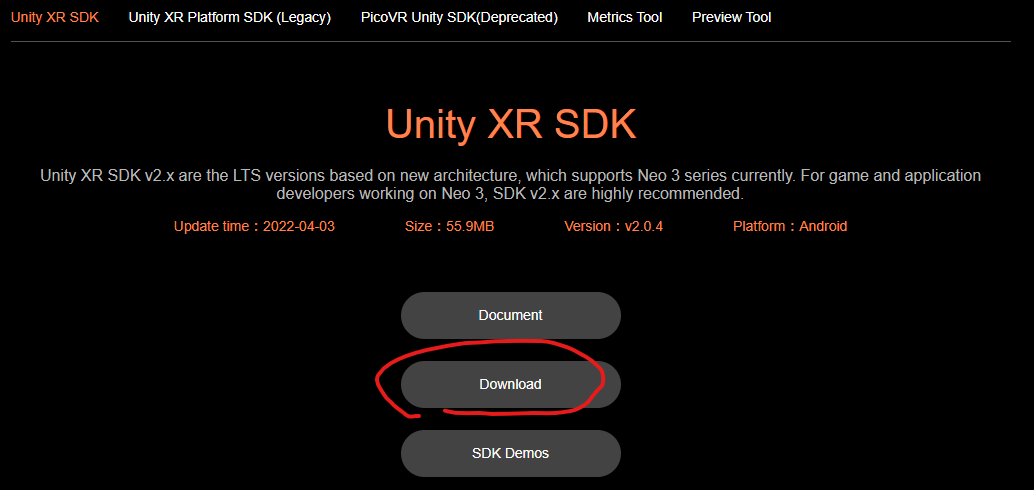
何種類かありますが、「Unity XR SDK」をDownloadしてください。
Zipファイルになっているので解凍します。

PackageManagerで取り込める形になっています。
-
https://developer.pico-interactive.com/sdk
-
Unityプロジェクトのpackageフォルダに解凍したフォルダをコピーして取り込む

-
PackageManagerでPico XR Pluginがインポートされている事が確認できます。

-
ダイアログが表示されるので、必要情報を入力してApply → Close

App IDはとりあえず不要なのでチェックを外します。
Unityプロジェクト設定
-
Project Settings > XR Plug-in Management > Android PicoXRにチェック

-
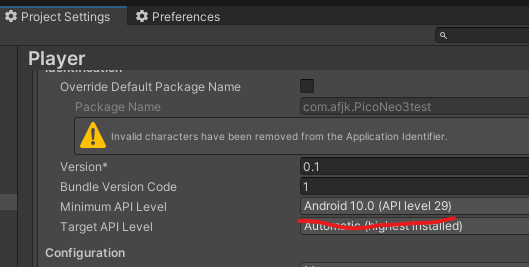
Project Settings > Player設定
- Company Name & Product Name
- 作りたいアプリに従って入力してください

- 作りたいアプリに従って入力してください
- Minimum API Level
- API Level 29
- API Level 29
- Company Name & Product Name
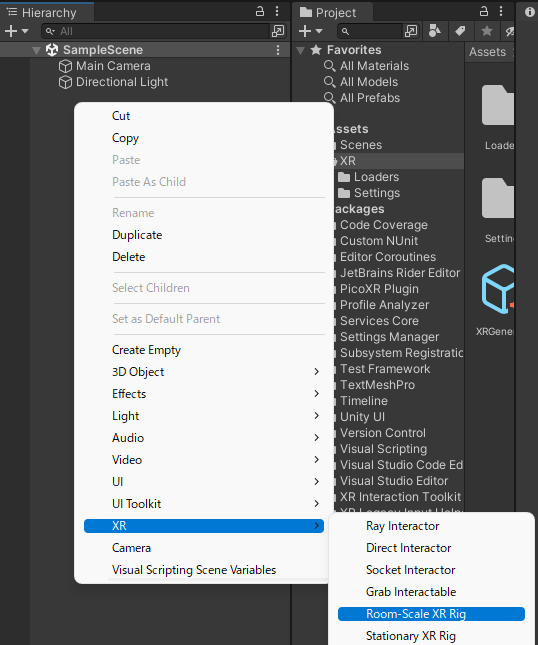
カメラをVR対応する
- このあたりはUnity XR Plugin標準の手順です。
- Hierarchyで右クリック > XR > Room-Scale XR Rigを選択してください
- Hierarchyで右クリック > XR > Room-Scale XR Rigを選択してください
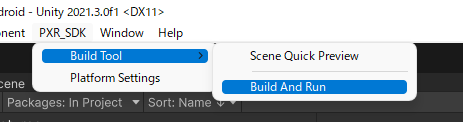
ビルド
- Pico Neo 3 ProをPCにUSB接続してください。
-
UnityのメニューにPXR_SDKがあるので、Build Tool > Build And Runを選択。
-
ビルド時にダイアログが出る場合、
- 動作確認したいだけなら「Ignore, Don't reminde again」でOKです

- 動作確認したいだけなら「Ignore, Don't reminde again」でOKです
-
動作確認
VRで動きました!
(コントローラーは表示されていませんが、Rayが出ています)

コントローラーモデルを表示する
-
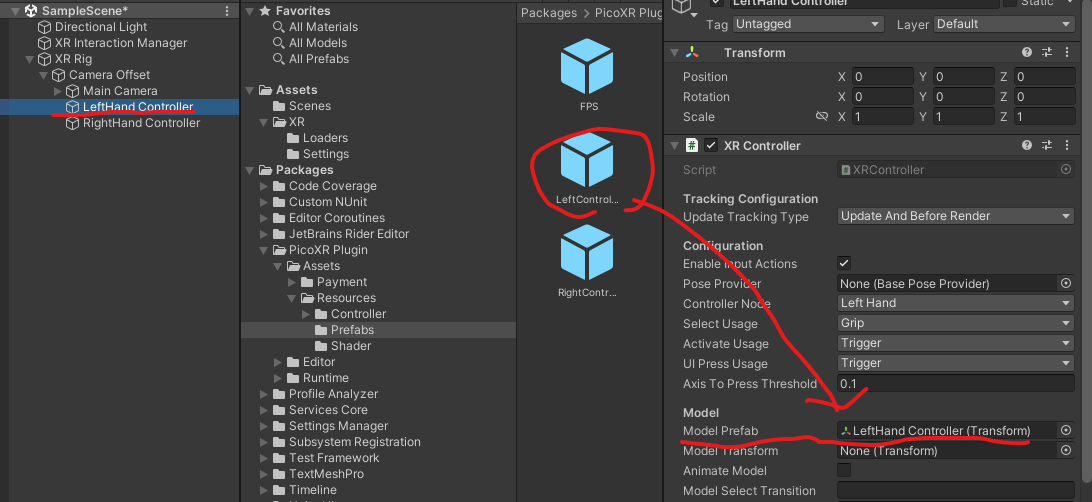
HierarchyのXR Rig > Camera Offset > LeftHand ControllerのXR Controller Model PrefabにPicoのコントローラーモデルを設定します。
- コントローラーモデルは Packages > PicoXR Plugin > Assets > Resources > Prefabsの中にあります。
- LeftHand Controller / RightHand Controllerにそれぞれ設定してください。
-
コントローラーが表示されました。

おわりに
CEDEC2021でSTYLYをPico Neo 3に対応した話をしましたが、当時の問題のほとんど修正されており、
本体、SDKともに改善が進んでいる印象を受けました。
今回は自分のアップデートを兼ねてPico Neo 3でのVRアプリ開発方法をまとめました。
次回はPico Neo 3でUnityの「XR Interactions Toolkit」のサンプルを動かす方法について説明します。