はじめに
今制作しているゲームにエンカウント演出(シュワアアァァって音が鳴りながら画面になんかエフェクトがかかってフェードアウトしていくようなやつ)を付けたいなと思ったので、実装してみました。
FF7風エンカウント演出のそれっぽいのができた気がする pic.twitter.com/TlpU8uo1Dx
— オイシ (@acey014) March 25, 2020
今回はOpecCVを利用してエンカウント演出を実装してみた例を紹介します。
やりかた
Unity 2018.2.0f2で実装しています。
最新のバージョンでもたぶん動くと思います。
アセットのインポート
OpenCV plus Unityをプロジェクトにインポートします
コンソールにエラーがごちゃごちゃ出る場合は、PlayerSettingsを開いてOtherSettingsの"Allow 'unsafe' Code"にチェックを入れます。
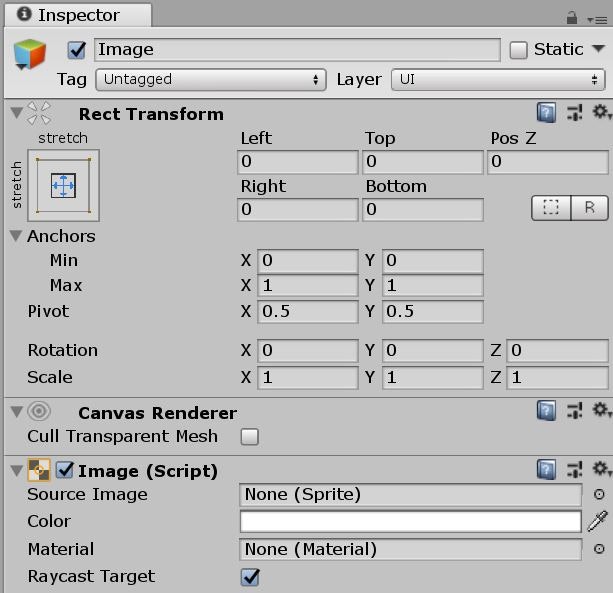
GameObjectの準備
HierarchyからCanvasを作成して、演出用のImageも作成します。
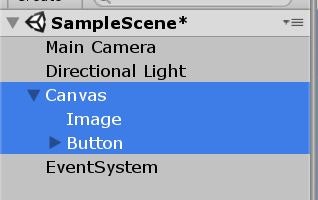
ImageのRect TransformのAnchorをstretchにしておけばそれだけで画面全体を覆うUIになります。
Scriptの準備
以下のScriptを用意します。
EncountEffectComponent.cs
using System.Collections;
using System.Collections.Generic;
using UnityEngine;
using UnityEngine.UI;
using OpenCvSharp;

/// <summary>
/// FF7風のエンカウント演出
/// </summary>
public class EncountEffectComponent : MonoBehaviour {

	[SerializeField]
	private Image targetImage;

	[SerializeField, Range(0, 720f)]
	private float rotationSpeed = 180f;

	[SerializeField, Range(0, 10f)]
	private float zoomSpeed = 2.5f;

	[SerializeField, Range(0.1f, 1f)]
	private float pixelRate = 0.5f;

	[SerializeField, Range(0f, 1f)]
	private float sourceAlpha = 0.80f;

	[SerializeField, Range(0f, 1f)]
	private float outAlpha = 0.18f;

	private bool isStartCameraEffect;

	public bool IsEffect {
		get {
			return this.isStartCameraEffect;
		}
	}

	protected void Start () {
		this.targetImage.enabled = false;
	}

	public void StartEffect () {
		this.StopAllCoroutines();
		this.isStartCameraEffect = true;
		this.StartCoroutine(this.EffectCoroutine());
	}

	public void StopEffect () {
		this.targetImage.enabled = false;
		this.isStartCameraEffect = false;
		this.StopAllCoroutines();
	}

	private IEnumerator EffectCoroutine () {
		yield return new WaitForEndOfFrame();

		this.targetImage.enabled = true;

		var texture = new Texture2D(Screen.width, Screen.height, TextureFormat.RGBA32, false);
		texture.ReadPixels(new UnityEngine.Rect(0, 0, Screen.width, Screen.height), 0, 0);
		TextureScale.Bilinear(texture, (int)(Screen.width * this.pixelRate), (int)(Screen.height * this.pixelRate));
		texture.Apply();

		this.targetImage.sprite = Sprite.Create(texture, new UnityEngine.Rect(0,0, texture.width, texture.height), new Vector2(0.5f, 0.5f));

		var center = new Point2f(texture.width / 2, texture.height / 2);

		Mat mat = OpenCvSharp.Unity.TextureToMat((Texture2D)this.targetImage.sprite.texture);

		while (true) {
			yield return null;

			Mat tmpMat = this.RotateAndResize(mat, center);
			Mat outMat = new Mat();

			Cv2.AddWeighted(mat, this.sourceAlpha, tmpMat, this.outAlpha, 0f, outMat);
			var outTexture = OpenCvSharp.Unity.MatToTexture(outMat);
			this.targetImage.sprite = Sprite.Create(outTexture, new UnityEngine.Rect(0, 0, outTexture.width, outTexture.height), new Vector2(0.5f, 0.5f));

			mat = outMat;
		}
	}

	private Mat RotateAndResize (Mat src, Point2f center) {
		var dest = new Mat();
		var rMat = Cv2.GetRotationMatrix2D(center, this.rotationSpeed * Time.deltaTime, 1f + (this.zoomSpeed * Time.deltaTime));
		Cv2.WarpAffine(src, dest, rMat, src.Size(), InterpolationFlags.Cubic);
		return dest;
	}

}
だいたいの内容としては、コルーチンを回してCv2.GetRotationMatrix2D()で回転とズームを施した画像をCv2.AddWeighted()でいい感じに合成しているものとなります。
以下の処理に関しては、TextureScale - Unify Community Wikiからソースコードを拝借してProjectに置かないと動作しません。ここではtextureのリサイズを行っています。
TextureScale.Bilinear(texture, (int)(Screen.width * this.pixelRate), (int)(Screen.height * this.pixelRate));
コンポーネントのアタッチ
適当なGameObject(CanvasとかでOK)にEncountEffectComponentをアタッチして、インスペクタから設定をいじります。

- Target Image
- HierarchyからImageを選択します。
- Rotation Speed
- 回転/sを設定します。
- Zoom Speed
- 拡大率/sを設定します。
- Pixel Rate
- 出力される解像度の比率を設定します。解像度が高いとクソ重いです……。
- Source Alpha
- 前フレーム(エフェクトがかかる前)の画像の透過度
- Out Alpha
- エフェクトがかかった後の画像の重なり具合
Source AlphaとOut Alphaの合計が1未満だと徐々にブラックアウトします。合計が1を超えるとホワイトアウトします。お好みで。
実行
適当なScriptでも作って、EncountEffectComponent.StartEffect()を呼べば動きます。StopEffect ()を呼ぶと演出がOFFになります。
課題
設定によっては画像の隅っこが暗くなる
Rotation Speed を上げすぎたりすると、画面の隅っこが暗くなってしまいます。

出力対象をあらかじめズームした状態にするなどの実装をすれば解決できそうです。
解像度が高いと激重
カメラの解像度と同じくらいにしたりすると多分恐ろしくカクつきます。スマホだと特にヤバそう。
処理の最適化とかその辺については今回は触れていないので、だ、誰か……。
終わりに
今回はFF7風のエンカウント処理の例を紹介しましたが、合成の処理をいろいろ弄れば様々なゲームのエンカウント処理っぽいものを実装できそうです。
本当は「バテン・カイトス」というゲームのエンカウント処理(画面が波打ってから吸い込まれるやつ)を実装したかったのですが、実装方法がまるでわからず断念(;ω;)