はじめに
タイトルにもある通り、今回はFirstVRの腕の向きを取得するシステムを作っていこうと思います。
下準備
まずは下準備として、FVRSDKを公式ページからダウンロードしてきて、プロジェクトを開きましょう。
https://dev.first-vr.com/downloads?locale=ja
SDKはこちらからダウンロードできます。
プロジェクトが開けたら、新しいシーンを作ります。
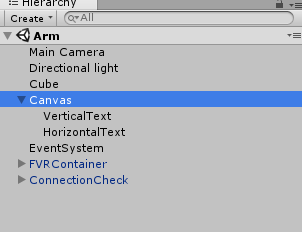
そのシーンにFVRContainer,ConnectionCheck,Text×2,cubeを追加します。
下準備はこれで終わりです。
コード
では実際にコードを組んでいきます。
適当なC#スクリプトを作り、その中に以下のコードを書きます。
public Text verticalText;
public Text horizontalText;

FVRConnection fvr;
string verticalStr;
string horizontalStr;

	// Use this for initialization
void Start ()
{
    fvr = FindObjectOfType<FVRConnection>();
}

	// Update is called once per frame
void Update ()
{
    transform.rotation = fvr.centeredRotation;

    switch(fvr.verticalOrientation)
    {
        case FVRConnection.VerticalOrientation.down:    verticalStr = "下";     break;
        case FVRConnection.VerticalOrientation.mid:     verticalStr = "真ん中"; break;
        case FVRConnection.VerticalOrientation.midDown: verticalStr = "斜め下"; break;
        case FVRConnection.VerticalOrientation.midUp:   verticalStr = "斜め上"; break;
        case FVRConnection.VerticalOrientation.up:      verticalStr = "上";     break;
    }

    switch (fvr.horizontalOrientation)
    {
        case FVRConnection.HorizontalOrientation.back:        horizontalStr = "後ろ";       break;
        case FVRConnection.HorizontalOrientation.backLeft:    horizontalStr = "左斜め後ろ"; break;
        case FVRConnection.HorizontalOrientation.backRight:   horizontalStr = "右斜め後ろ"; break;
        case FVRConnection.HorizontalOrientation.front:       horizontalStr = "前";         break;
        case FVRConnection.HorizontalOrientation.frontLeft:   horizontalStr = "左斜め前";   break;
        case FVRConnection.HorizontalOrientation.frontRight:  horizontalStr = "右斜め前";   break;
        case FVRConnection.HorizontalOrientation.left:        horizontalStr = "左";         break;
        case FVRConnection.HorizontalOrientation.right:       horizontalStr = "右";         break;
        case FVRConnection.HorizontalOrientation.none:        horizontalStr = "無し";       break;
    }
    verticalText.text = verticalStr;
    horizontalText.text = horizontalStr;
}
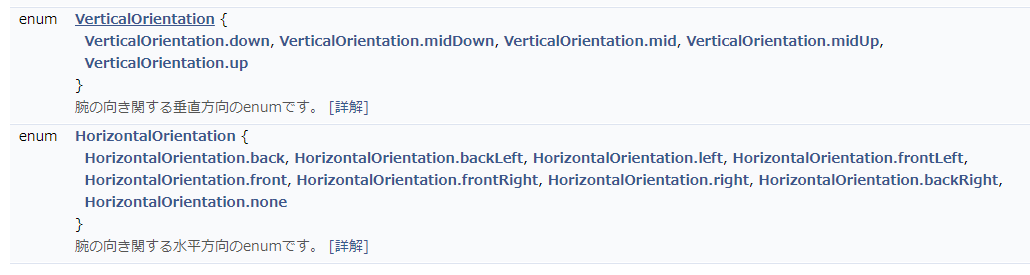
APIを見てみると、このように腕の向きに対応したenumが用意されているので、それを見てTextの内容を変えているだけですね!
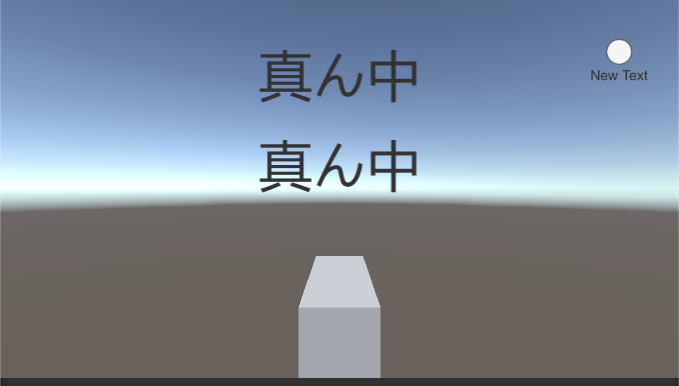
ここまで書けたらcubeにアタッチし、用意したテキストをそれぞれ入れましょう。
腕を向けた方向を検知できていたら成功です!