WebGLでテクスチャを作成するときに、texImage2Dのpixels引数にArrayBufferViewを渡せるようなので試してみました。具体的に使用できるArrayBufferViewの型やtype引数の組み合わせはMDNのドキュメントを参考にしてください。
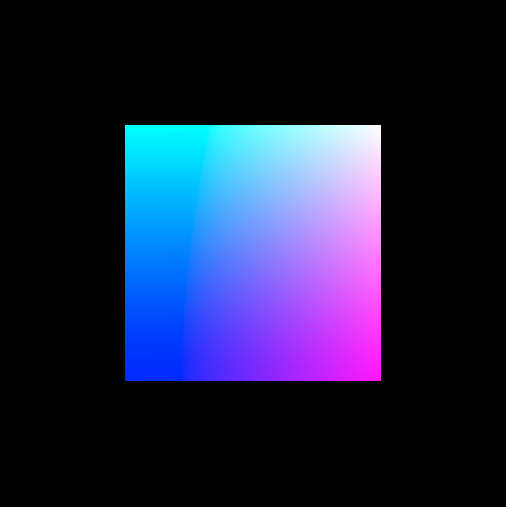
以下のサンプルコードでは、512x512のテクスチャを作成しています。一つのピクセルにRGBAの4要素を格納するので、Uint8Arrayの大きさはtexWidth*texHeight*4になっています。x要素が大きいほど赤色に、y要素が大きいほど緑色が強くなるようにしています。Uint8Arrayを使用しているのでtype引数にはgl.UNSIGNED_BYTEを使用しています。
const texWidth = 512;
const texHeight = 512;
const pixels = new Uint8Array(texWidth * texHeight * 4);
for (let y = 0; y < texHeight; y++) {
  for (let x = 0; x < texWidth; x++) {
    const offset = 4 * (x + texWidth * y);
    pixels[offset + 0] = 255 * (x / texWidth);
    pixels[offset + 1] = 255 * (y / texHeight);
    pixels[offset + 2] = 255;
    pixels[offset + 3] = 255;
  }
}

const texture = gl.createTexture();
gl.bindTexture(gl.TEXTURE_2D, texture);
gl.texImage2D(gl.TEXTURE_2D, 0, gl.RGBA, texWidth, texHeight, 0, gl.RGBA, gl.UNSIGNED_BYTE, pixels);
gl.texParameteri(gl.TEXTURE_2D, gl.TEXTURE_MAG_FILTER, gl.LINEAR);
gl.texParameteri(gl.TEXTURE_2D, gl.TEXTURE_MIN_FILTER, gl.LINEAR);
gl.bindTexture(gl.TEXTURE_2D, null);
サンプルのソースコード全体は以下に置いておきました。
https://gist.github.com/aadebdeb/e65b88d6efe421a734038dbc654d5208
作成したテクスチャを四角形のメッシュに張り付けると以下のようになり、意図通りの色になっています。

ArrayBufferViewを使うと任意の値を書き込んだテクスチャをCPU側で作成することができます。メッシュの表面に張るテクスチャを作成する以外に、シェーダーには定義できる定数に限りがあるので大量の定数がシェーダー側で必要な場合にも使用できるのではないでしょうか。