背景
突然ですが、画像を切り抜きたいときってありますよね![]()
最近は簡単に切り抜けて、簡単に合成できるツールがたくさんあり、
便利だなと思いますが...
![]() どうやってやっているんだろ...?
どうやってやっているんだろ...?
![]() AIとか用いるのかな...?
AIとか用いるのかな...?
といろいろ想像が膨らみ、自分で画像操作をコードに落とし込みたくなってみました!
ということで、今回は...
顔を切り抜く!!! ![]()
を目標に、画像操作を行っていきたいと思います!!!
※申し訳ありませんが、検証する時間が作れず中途半端で終わってしまっています...。mediapipeライブラリの検証ということで備忘録程度に残します!
想定 💭
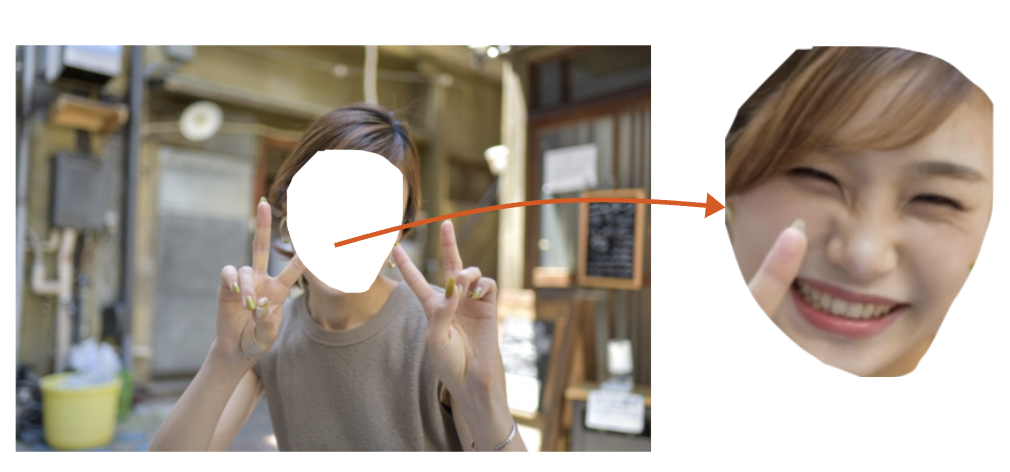
簡単にこんな感じでできるのかなと想像して、試してみます。
※今回使用した画像は無料素材を使用させていただきました...!
② 取得した座標をもとに、画像を抽出する!!(すみません、お姉さん!)

これがしたい...!!
まずは画像から顔を検知してみます!
Googleにmediapipeという技術があるみたいなので、そこから顔画像を検知してみます。
今回は、サンプルソースコードを参考に、
下記のソースコードをGoogle Colaboratoryで実行してみます。
1.mediapipeをインストールします。
!pip install -q mediapipe
2.モデルをインストールします
!wget -O face_landmarker_v2_with_blendshapes.task -q https://storage.googleapis.com/mediapipe-models/face_landmarker/face_landmarker/float16/1/face_landmarker.task
3.顔検出、検出後のマーク表示を実行する関数を定義します。
# @markdown

from mediapipe import solutions
from mediapipe.framework.formats import landmark_pb2
import numpy as np
import matplotlib.pyplot as plt


def draw_landmarks_on_image(rgb_image, detection_result):
  face_landmarks_list = detection_result.face_landmarks
  annotated_image = np.copy(rgb_image)

  # Loop through the detected faces to visualize.
  for idx in range(len(face_landmarks_list)):
    face_landmarks = face_landmarks_list[idx]

    # Draw the face landmarks.
    face_landmarks_proto = landmark_pb2.NormalizedLandmarkList()
    face_landmarks_proto.landmark.extend([
      landmark_pb2.NormalizedLandmark(x=landmark.x, y=landmark.y, z=landmark.z) for landmark in face_landmarks
    ])

    solutions.drawing_utils.draw_landmarks(
        image=annotated_image,
        landmark_list=face_landmarks_proto,
        connections=mp.solutions.face_mesh.FACEMESH_CONTOURS,
        landmark_drawing_spec=None,
        connection_drawing_spec=mp.solutions.drawing_styles
        .get_default_face_mesh_contours_style())

  return annotated_image

def plot_face_blendshapes_bar_graph(face_blendshapes):
  # Extract the face blendshapes category names and scores.
  face_blendshapes_names = [face_blendshapes_category.category_name for face_blendshapes_category in face_blendshapes]
  face_blendshapes_scores = [face_blendshapes_category.score for face_blendshapes_category in face_blendshapes]
  # The blendshapes are ordered in decreasing score value.
  face_blendshapes_ranks = range(len(face_blendshapes_names))

  fig, ax = plt.subplots(figsize=(12, 12))
  bar = ax.barh(face_blendshapes_ranks, face_blendshapes_scores, label=[str(x) for x in face_blendshapes_ranks])
  ax.set_yticks(face_blendshapes_ranks, face_blendshapes_names)
  ax.invert_yaxis()

  # Label each bar with values
  for score, patch in zip(face_blendshapes_scores, bar.patches):
    plt.text(patch.get_x() + patch.get_width(), patch.get_y(), f"{score:.4f}", va="top")

  ax.set_xlabel('Score')
  ax.set_title("Face Blendshapes")
  plt.tight_layout()
  plt.show()
4. 検知対象のファイルを読み込みます。
ファイルを、Colabの実行ルート配下に「target_images」というフォルダを作成し、
画像ファイル「samle_woman1.jpg」という名前で上げる。
import cv2
from google.colab.patches import cv2_imshow

TARGET_IMG="./target_images/sample_woman1.jpg"

img = cv2.imread(TARGET_IMG)

cv2_imshow(img) # エラーが出たら指定したファイル名を疑うこと!

5. 顔を検知し、マーカーを描く
import mediapipe as mp
from mediapipe.tasks import python
from mediapipe.tasks.python import vision

# STEP1:モデルを読み込み、検知対象の設定を行う。特徴量を計算するオブジェクト作成
base_options = python.BaseOptions(model_asset_path='face_landmarker_v2_with_blendshapes.task')
options = vision.FaceLandmarkerOptions(base_options=base_options,
                                       output_face_blendshapes=True,
                                       output_facial_transformation_matrixes=True,
                                       num_faces=1)
detector = vision.FaceLandmarker.create_from_options(options)

# STEP2:イメージオブジェクトの作成
image = mp.Image.create_from_file(TARGET_IMG)

# STEP 4: 顔の検出
detection_result = detector.detect(image)

# STEP 5: 検出した部位がわかるようにマーカーを描く
annotated_image = draw_landmarks_on_image(image.numpy_view(), detection_result)
cv2_imshow(cv2.cvtColor(annotated_image, cv2.COLOR_RGB2BGR))

6. 顔が画像全体のどの位置にあるか座標マトリックスを取得
Google mediapipe上で 画像上の座標化はここで処理していると予測。
landmark_px = _normalized_to_pixel_coordinates(landmark.x, landmark.y, > image_cols, image_rows)
こちらの関数で、処理していそうなのでそれを参考に実装してみる。
#from mediapipe.python.solutions.drawing_utils import _normalized_to_pixel_coordinates # mediapipeのライブラリにも、座標取得用の関数がある
import cv2
import math

img_rows, img_cols, _= img.shape
landmark_pixel_coordinates= []

for idx, face_landmark in enumerate(detection_result.face_landmarks):
  # idx人目(複数検知が可能)
  # print(">>>>> " + str(idx))
  # print(face_landmark)
  for idx, landmark in enumerate(face_landmark):
    x_pixcel = min(math.floor(landmark.x * img_rows), img_rows - 1) # 正規化されたx座標の位置から、実際の画像のx座標の位置を計算(x座標が画像のx座標最大より大きい場合は、画像のx座標の最大を取る)
    y_pixcel = min(math.floor(landmark.y * img_cols), img_cols - 1) # 正規化されたy座標の位置から、実際の画像のx座標の位置を計算(y座標が画像のy座標最大より大きい場合は、画像のy座標の最大を取る)
    nornmalized_landmark = (x_pixcel, y_pixcel)
    #nornmalized_landmark= _normalized_to_pixel_coordinates(landmark.x, landmark.y, img_rows, img_cols) #
    # print(">>>> landmark" + str(idx))
    # print(landmark)
    # print(nornmalized_landmark)
    landmark_pixel_coordinates.append(nornmalized_landmark)

print(landmark_pixel_coordinates)
顔の座標データが出てきました!
[(219, 317), (221, 301), (220, 306), (221, 275), (222, 294), (223, 284), (225, 259), (203, 239), (227, 239), (228, 229)...]]
7.OpenCVで取得した座標を使って書き出してみる
正規化されているx, y軸の座標を、実際の画像のピクセル数に合わせた座標位置へ修正をする。
# from mediapipe.python.solutions.drawing_utils import _normalized_to_pixel_coordinates
import cv2
import math

img_cols, img_rows, _= img.shape
landmark_pixel_coordinates= []

for idx, face_landmark in enumerate(detection_result.face_landmarks):
  # idx人目(複数検知が可能)
  # print(">>>>> " + str(idx))
  # print(face_landmark)
  for idx, landmark in enumerate(face_landmark):
    x_pixcel = min(math.floor(landmark.x * img_rows), img_cols - 1) # 正規化されたx座標の位置から、実際の画像のx座標の位置を計算(x座標が画像のx座標最大より大きい場合は、画像のx座標の最大を取る)
    y_pixcel = min(math.floor(landmark.y * img_cols), img_rows - 1) # 正規化されたy座標の位置から、実際の画像のx座標の位置を計算(y座標が画像のy座標最大より大きい場合は、画像のy座標の最大を取る)
    nornmalized_landmark = (x_pixcel, y_pixcel)
    # nornmalized_landmark= _normalized_to_pixel_coordinates(landmark.x, landmark.y, img_cols, img_rows)
    # print(">>>> landmark" + str(idx))
    # print(landmark)
    # print(nornmalized_landmark)
    landmark_pixel_coordinates.append(nornmalized_landmark)

print(landmark_pixel_coordinates)
画像上の顔の位置の座標がとれていることを確認。
[(328, 212), (332, 201), (330, 204), (331, 183), (333, 196), (334, 189), (338, 172), (305, 159), (341, 159), (342, 153)...
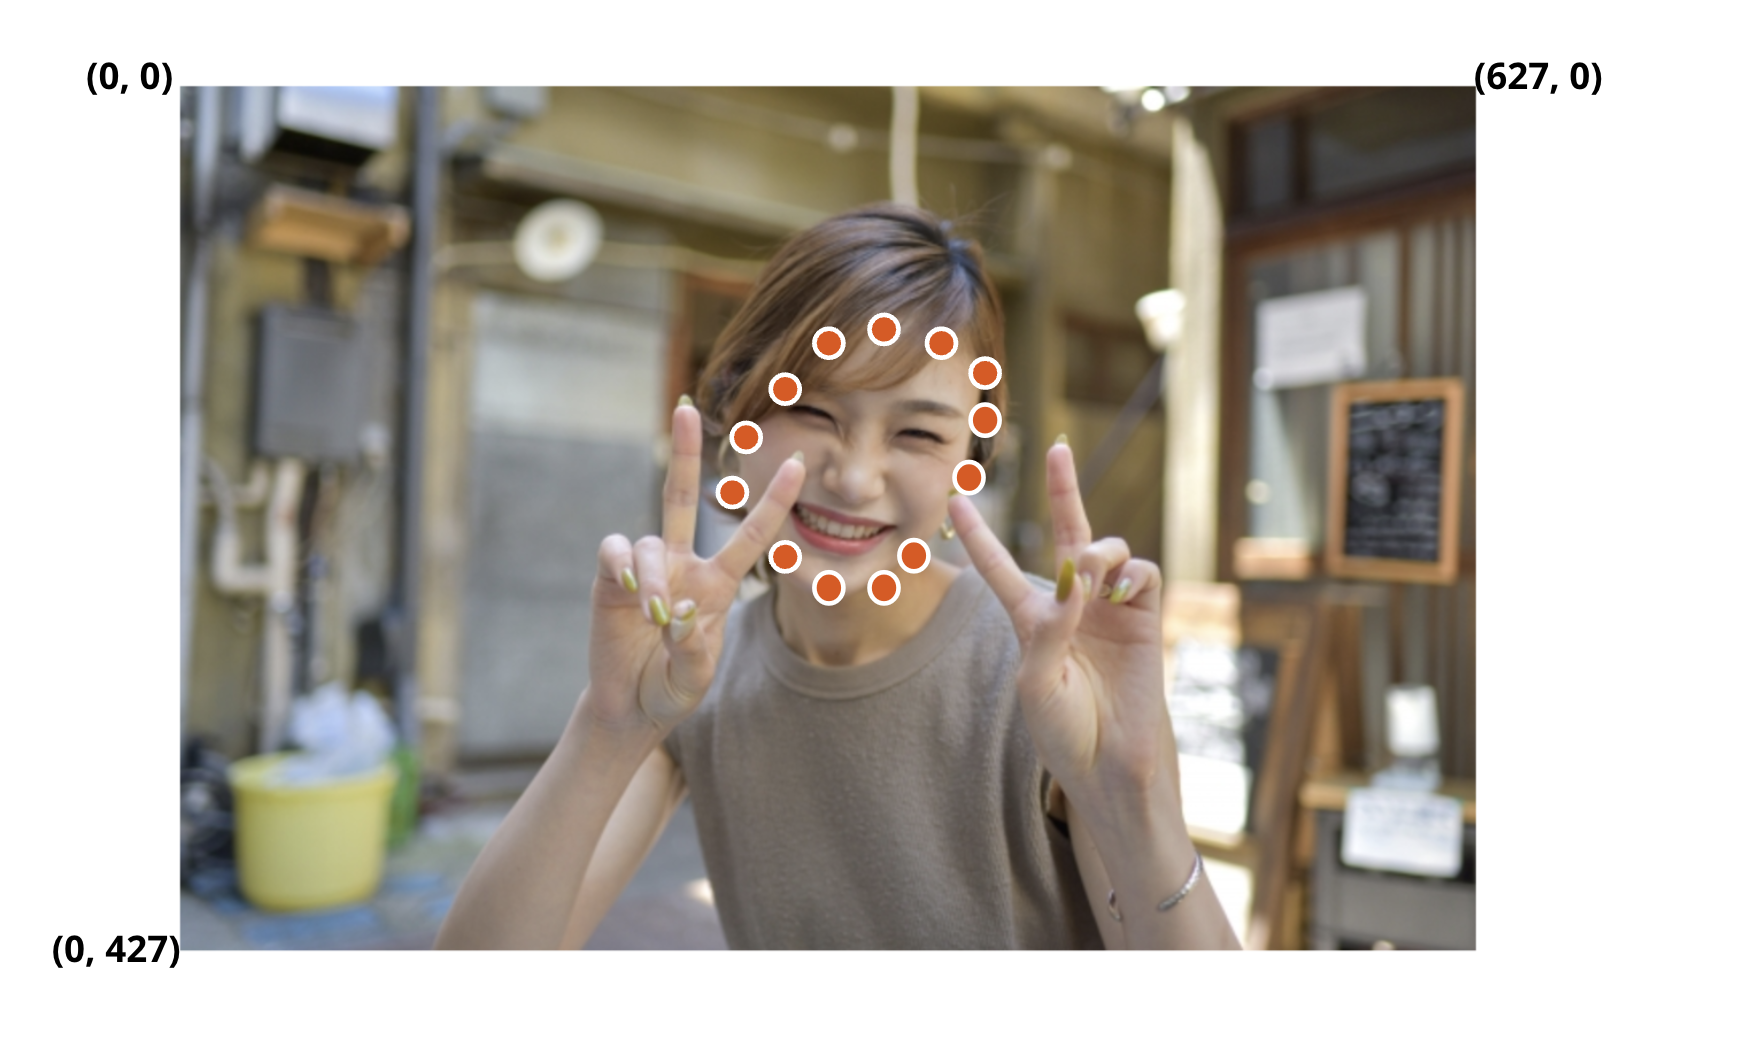
画像上に座標を点で描画して、抽出した座標位置があっているか確認してみる。
coordinates_tuple = np.array(tuple(landmark_pixel_coordinates))
img=cv2.imread(TARGET_IMG)
for idx, coordinates in enumerate(coordinates_tuple):
    cv2.circle(img, coordinates, 1, (255, 255, 0),
                 1)

cv2_imshow(img)

座標は取れたみたいですね!![]()
ここから顔の輪郭部分だけを抽出するのはどうするべきなんだろう...? ![]()
抽出した座標から計算でもとめられるのかな...
というところで、今回は、時間切れになってしまいました... 🙏(すみません...)
(オプション)特徴量を可視化してみる
Appleが定義している顔の特徴の定義をもとに、
この画像からどれくらいその特徴が検出できているかを測定した結果が表示されている
Apple ARFaceAnchor.BlendShapeLocation
plot_face_blendshapes_bar_graph(detection_result.face_blendshapes[0])
eyeSquintLeft・eyeSquintRightが特徴として大きく現れている。
これらは、

ということなので、目を瞑っているに近い、笑っている? 寝ている? ということが伺える特徴量になります。
こういう特徴量を計って、顔の表情を検知したりすることができるんですね...!
特徴量の情報を元に、いろいろできそうだな...![]() (...もう、すでにいろいろあるわ
(...もう、すでにいろいろあるわ ![]() )
)
まとめ
Google Mediapipeも今回使ってみて、顔検出、特徴量取得ができるということを知り、非常に興味深い技術でした。
考えたらいろいろ使えそうだな...と思いました。
今は便利な技術たくさんあるので、わざわざ自分で画像操作とかをソースコードに起こす必要はないのですが、内部の構造を少しでも知っておくことで、
やりたいことへの実現方法のレパートリーが増えるので、個人的には無駄ではないのかな...と思っています!
今回は、画像から顔の位置を検出して、座標を取得しましたが、
その座標から顔の輪郭を抽出して、顔の部分だけを切り出すところまでは今回できませんでした...
次回の記事で、座標から輪郭を抽出して、顔画像を切り取る操作をするところまでやっていけたらいいなと思います...!
年内あと少し、いい年にしましょう! ![]()

