やりたいこと
iPhoneの標準のカメラにある、画面スワイプしたらカメラの画面が正方形になったり長方形になったりするやつをしたい
ここに記載しないこと
- カメラの起動やシャッターなどの実装
- コード全文
なので断片的な情報/コードとなり大変申し訳ないのですが、実際に使用するには各自で補完してご利用ください
前提
xcode: Version 9.4.1
swift: 4.1
作ってみる
画面の作成
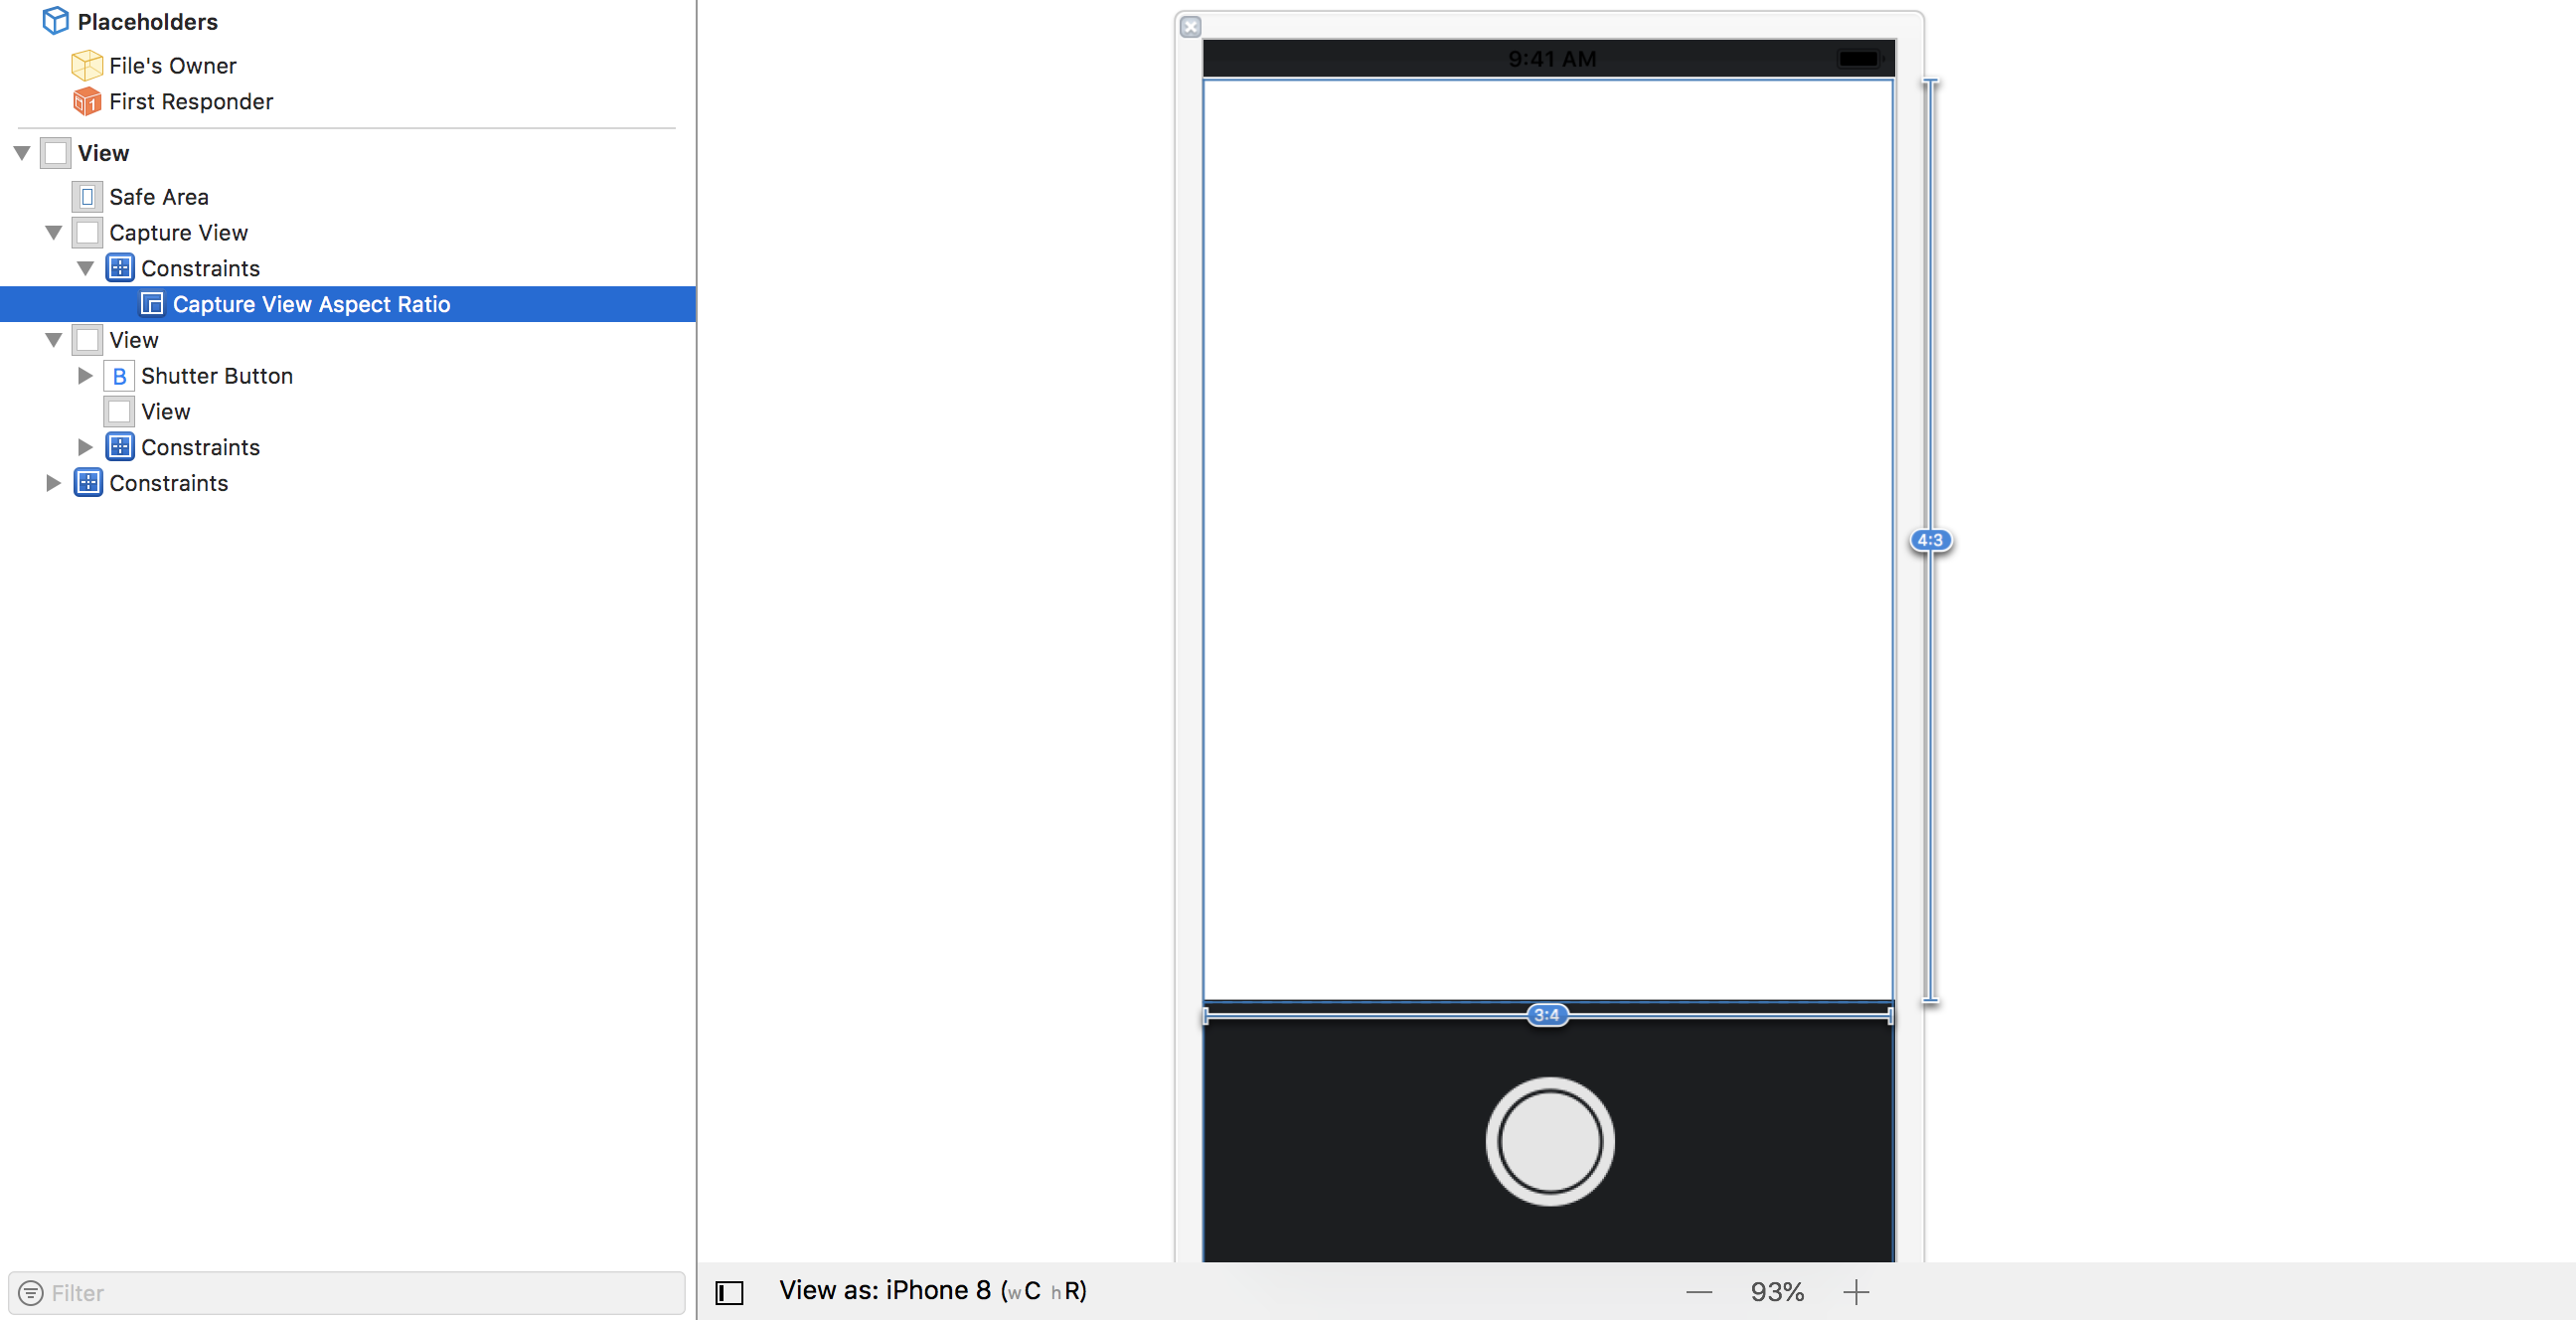
最初にカメラ画面を作ります
再利用しやすいのでxibで作っています
で、カメラ画面とシャッターボタンを設置し、カメラ画面のアスペクト比は幅3、高さ4に設定しておきます
その後、xibと紐付けるViewControllerを作成します
ViewControllerには以下のようにconstraintを紐付けておきます
@IBOutlet weak var captureViewAspectRatio: NSLayoutConstraint!
画面のサイズ変更
NSLayoutConstraintのmultiplierというプロパティが親ビューのattributeにかかる倍率を表しているパラメータなのですが、こいつはget onlyなので変更することが出来ません
参考: https://dev.classmethod.jp/smartphone/iphone/autolayout-dynamic-switching/
なので、以下の記事をそのまま使わせていただき、NSLayoutConstraintを拡張してmultiplierを変更できるようにします
参考: UITableViewCellの高さをネットワークから取得した画像に合わせて動的に変更する
extension NSLayoutConstraint {
    func setMultiplier(multiplier: CGFloat) -> NSLayoutConstraint {
        NSLayoutConstraint.deactivate([self])

        let newConstraint = NSLayoutConstraint(
            item: firstItem!,
            attribute: firstAttribute,
            relatedBy: relation,
            toItem: secondItem,
            attribute: secondAttribute,
            multiplier: multiplier,
            constant: constant)

        newConstraint.priority = priority
        newConstraint.shouldBeArchived = shouldBeArchived
        newConstraint.identifier = identifier

        NSLayoutConstraint.activate([newConstraint])
        return newConstraint
    }
}
ひとまずmultiplierを変更できるようになったので、swipeのジェスチャーを追加します
// アスペクト比
// 最初は長方形なので幅3に対して高さ4に設定
private var aspectRatio: (width: CGFloat, height: CGFloat) = (width: 3, height: 4)
private var isSquare = false


let swipeGesture =
            UISwipeGestureRecognizer(target: self,
                                     action: #selector(EcWorkPhotoViewController.swipedGesture(gestureRecognizer:)))

// Viewにスワイプのジェスチャーを追加
// 左右どちらのスワイプも受け取る
let directions: UISwipeGestureRecognizerDirection = [.right, .left]
swipeGesture.direction = directions
self.captureView.addGestureRecognizer(swipeGesture)


@objc func swipedGesture(gestureRecognizer: UISwipeGestureRecognizer) {
        aspectRatio = self.isSquare ? (width: 3, height: 4) : (width: 3, height: 3)
        captureViewAspectRatio = captureViewAspectRatio.setMultiplier(multiplier: aspectRatio.width / aspectRatio.height)
        // swift4.2だと以下のようにも書ける
        // self.isSquare.toggle()
        self.isSquare = !self.isSquare
    }
aspectRatioは次の写真のリサイズの項目で使用します
これで画面のスワイプ(左右どちらでも)で、カメラ画面を長方形と正方形に切り替えることができるようになります
写真のリサイズ
実はカメラ画面が正方形になっても、見えている範囲が正方形になるだけで実際に撮影される写真は正方形にはなりません
なので画面サイズに合わせて、写真のリサイズが必要になります
シャッターを切って撮影をしたタイミングで以下のアクションを起こすようにします
こちらのコードは以下などを参考にしています
参考: https://github.com/CatchChat/Yep/blob/master/YepKit/Extensions/UIImage%2BYep.swift
// カメラで撮った写真を画面のサイズにトリミングする関数
func cropToAspectRatio(image: UIImage) -> UIImage {
        guard let cgImage = image.cgImage else { return image }
        var width: CGFloat = CGFloat(cgImage.width)
        var height: CGFloat = CGFloat(cgImage.height)

        if (height * self.aspectRatio.height) > (width * self.aspectRatio.width) {
            height = width * self.aspectRatio.width / self.aspectRatio.height
        }
        else {
            width = height * self.aspectRatio.height / self.aspectRatio.width
        }
        let rect = CGRect(
            x: (CGFloat(cgImage.width) - width) * 0.5,
            y: (CGFloat(cgImage.height) - height) * 0.5,
            width: width,
            height: height
        )
        if let newCgImage = cgImage.cropping(to: rect) {
            let croppedUIImage = UIImage(cgImage: newCgImage, scale: image.scale, orientation: image.imageOrientation)
            return croppedUIImage
        }
        return image
    }
結論
これにより、スワイプによって長方形⇔正方形に切り替えられるカメラが完成します
画面のどこかにスワイプでカメラのサイズが切り替わる旨を示してあげると、よりユーザーライクになると思います