気が付くともう12月半ばで ニジボックス Advent Calendar 2015 も良い感じに進んでますね。
今回は最近さわりはじめたPHPの爆速フレームワークphalconで
簡単なアプリケーションの作成について書きたいと思います。
作成環境
- Vagrant
- CentOS6.7
- MySQL5.5
- phalcon2.08
- phalcon-devtools
作るもの
- ひとこと掲示板
- 名前とコメントをDBから拾ってきて表示
- 名前とコメントを入力して投稿が行える
- 投稿確定前に確認画面を入れる

Phalconフレームワークの特徴
主な特徴については以下の通りです。
- PHP拡張として実装されたフルスタックのフレームワーク
- 他のフレームワークと比べて非常に高速に動作する
※導入方法については公式サイトを参照。
Phalcon Developer Toolsとは
phalcon-devtoolsはプロジェクトの雛形を自動生成してくれる便利なツールです。
手っ取り早く動くものが用意できるので、積極的に使っていきます。
プロジェクトの作成
では、さっそく作っていきます。
ドキュメントルート下でプロジェクトの自動生成を行います。
phalcon create-project bbs micro
プロジェクトのタイプには以下の3種類の構成から選べます。
- micro マイクロフレームワーク(小規模、プロトタイプ、API実装向け)
- simple 普通のMVC構成
- module モジュール別のMVC構成 ※simpleとmoduleの違いについて
今回はシンプルなマイクロフレームワークを選択しています。
生成が完了すると、bbsアプリは以下の構成になると思います。
.
└── bbs
    ├── app.php
    ├── config
    │   ├── config.php
    │   ├── loader.php
    │   └── services.php
    ├── index.html
    ├── migrations
    ├── models
    ├── public
    │   ├── css
    │   ├── files
    │   ├── img
    │   ├── index.php
    │   ├── js
    │   └── temp
    └── views
        ├── 404.phtml
        └── index.phtml
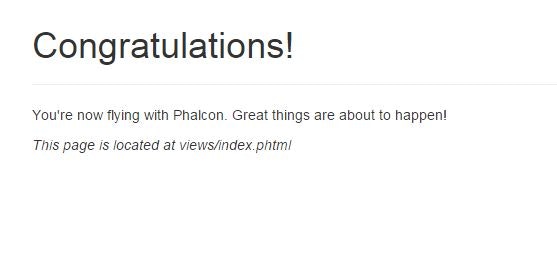
ブラウザでアクセスして以下のページが表示されていれば成功です。

DBの接続先設定
次にDB接続先の設定を行います。
# bbs/config/config.php
return new \Phalcon\Config(array(

    'database' => array(
        'adapter'    => 'Mysql',
        'host'       => 'localhost',
        'username'   => 'root',
        'password'   => '',
        'dbname'     => 'bbs', #データベース名をbbsに変更
        'charset'    => 'utf8',
    ),
MySQLでスキーマを作成
MySQLに接続してbbsデータベースを作成します。
mysql -u root
CREATE DATABASE bbs;
事前にテーブルも用意しておきます。(後でModelの自動生成に役立ちます)
use bbs
CREATE TABLE posts(
	id INT NOT NULL AUTO_INCREMENT,
	name VARCHAR(20) NOT NULL,
	comment VARCHAR(100) NOT NULL,
	create_date TIMESTAMP DEFAULT CURRENT_TIMESTAMP,
	PRIMARY KEY (id)
);
bbsデータベースとpostsテーブルができたら準備完了です。
Modelの自動生成
bbsアプリ下に移動して以下のコマンドを実行します。
cd bss/
phalcon create-model posts
すると、DBスキーマを元にModelが自動生成されました!
# bbs/models/Posts.php
class Posts extends \Phalcon\Mvc\Model
{

    /**
     *
     * @var integer
     */
    public $id;

    /**
     *
     * @var string
     */
    public $name;

    /**
     *
     * @var string
     */
    public $comment;

    /**
     *
     * @var string
     */
    public $create_date;

    /**
     * Returns table name mapped in the model.
     *
     * @return string
     */
    public function getSource()
    {
        return 'posts';
    }

    /**
     * Allows to query a set of records that match the specified conditions
     *
     * @param mixed $parameters
     * @return Posts[]
     */
    public static function find($parameters = null)
    {
        return parent::find($parameters);
    }

    /**
     * Allows to query the first record that match the specified conditions
     *
     * @param mixed $parameters
     * @return Posts
     */
    public static function findFirst($parameters = null)
    {
        return parent::findFirst($parameters);
    }

}
Postsモデルに関しては find() 関数があれば十分なので、特に修正する箇所はありません。
ルーティングの設定
micro アプリケーションでは app.php でルーティングの設定が記載されています。
トップページ(/)を修正して、確認ページ(/confirm)と投稿完了(/complete)の設定を追加しました。
今回は規模が小さいため app.php に処理を書いていますがControllerを使用する方法もあるようです。
# bbs/app.php
/**
 * Local variables
 * @var \Phalcon\Mvc\Micro $app
 */

/**
 * Add your routes here
 */

//トップページ
$app->get('/', function () use ($app) {
	//DBから投稿内容を新着順で取得
	$posts = Posts::find(array("order" => "create_date DESC"));

	//index.phtmlを表示
    echo $app['view']->render('index', array(
    	'posts' => $posts
    ));
});

//確認ページ
$app->post('/confirm', function () use ($app) {
	//リクエストのPOSTデータを取得
	$post = $app->request->getPost();

	//confirm.phtmlを表示
	echo $app['view']->render('confirm', array(
		'name' => $post['name'],
		'comment' => $post['comment']
	));
});

//投稿完了
$app->post('/compleate', function () use ($app) {
	//リクエストのPOSTデータを取得
	$post = $app->request->getPost();

	//決定ボタンが押されていたらDBに投稿内容を保存
	if ($post['submit'] === 'ok') {
		$bbs = new Posts();
		$bbs->save($post, array('name', 'comment'));
	}

	//トップページへリダイレクト
	$app->response->redirect("/")->sendHeaders();
});


/**
 * Not found handler
 */
$app->notFound(function () use ($app) {
    $app->response->setStatusCode(404, "Not Found")->sendHeaders();
    echo $app['view']->render('404');
});
POSTデータの受け取り、DBからデータの取得と保存の一連の流れが上記から分かるかと思います。
テンプレートエンジンVoltの有効化
基本的にViewに記載する処理は素のPHPで書けますが、
Volt: テンプレートエンジンを利用することで処理が短く、見た目が美しく書けます。
記法はSymfonyのTwigに似てると思います。
# bbs/config/services.php
$di = new FactoryDefault();

/**
 * Sets the view component
 */
$di->setShared('view', function () use ($config) {
    $view = new View();
    $view->setViewsDir($config->application->viewsDir);
    //テンプレートエンジンVoltを有効にする
    $view->registerEngines(
        array(
            ".phtml" => "Phalcon\Mvc\View\Engine\Volt"
        )
    );
    return $view;
});
上記の内容で *.phtml ファイルをVoltファイルに設定しています。
Voltが有効になると .phtml はブラウザに返されず .phtml.php というファイルに
コンパイルされてから返されるようになります。( .phtml.php は直接弄らないでください)
トップページの作成
次に掲示板のトップページを作ります。
PhalconではViewファイルの拡張子が.htmlではなくて.phtmlです。
最初からCSS Bootstrapが有効になっているので活用することにします。
index.phtmlを修正して、名前とコメントを投稿するフォームタグと
投稿内容を表示するテーブルタグを追加しました。
投稿内容についてはVoltのフィルタでエスケープしています。
<!-- bbs/views/index.phtml -->
<!DOCTYPE html>
<html>
    <head>
        <link rel="stylesheet" href="https://maxcdn.bootstrapcdn.com/bootstrap/3.3.4/css/bootstrap.min.css">
        <meta http-equiv="Content-Type" content="text/html; charset=utf-8" />
        <title>トップページ</title>
    </head>
    <body>
        <div class="container">

            <div class="page-header">
                <h1>ひとこと掲示板</h1>
            </div>

            <form action="confirm" method="post">
                <div class="form-group">
                    <label>name</label>
                    <input type="text" class="form-control" name="name" value="">
                </div>
                <div class="form-group">
                    <label>comment</label>
                    <input type="text" class="form-control" name="comment" value="">
                </div>
                <button type="submit" class="btn btn-default">投稿</button>
            </form>

            <br>

            <table class="table table-striped">
                <thead>
                    <tr>
                        <th>name</th>
                        <th>comment</th>
                        <th>create_date</th>
                    </tr>
                </thead>
                <tbody>
                    {% if posts is defined %}
                        {% for post in posts %}
                            <tr>
                                <td>{{ post.name|e }}</td>
                                <td>{{ post.comment|e }}</td>
                                <td>{{ post.create_date|e }}</td>
                            </tr>
                        {% endfor %}
                    {% endif %}
                </tbody>
            </table>
        </div>
    </body>
</html>
確認ページの作成
投稿内容を再度表示して、確認を促すページを作ります。
サブミットボタンが押されると complete へ遷移します。その先の処理は app.php に書いてある通りです。

<!-- bbs/views/confirm.phtml -->
<!DOCTYPE html>
<html>
    <head>
        <link rel="stylesheet" href="https://maxcdn.bootstrapcdn.com/bootstrap/3.3.4/css/bootstrap.min.css">
        <meta http-equiv="Content-Type" content="text/html; charset=utf-8" />
        <title>投稿内容の確認</title>
    </head>
    <body>
        <div class="container">

            <div class="page-header">
                <h1>ひとこと掲示板</h1>
            </div>

            <div class="text-center">
                <h3>この内容で投稿しますか?</h3>
            </div>

            <br>

            <form action="compleate" method="post" class="form-horizontal">
                <input type="hidden" name="name" value="{{ name|e }}">
                <input type="hidden" name="comment" value="{{ comment|e }}">
                <div class="form-group">
                    <label class="col-sm-3 control-label">name</label>
                    <div class="col-sm-9">
                        <p class="form-control-static">{{ name|e }}</p>
                    </div>
                </div>
                <div class="form-group">
                    <label class="col-sm-3 control-label">comment</label>
                    <div class="col-sm-9">
                        <p class="form-control-static">{{ comment|e }}</p>
                    </div>
                </div>
                <div class="form-group">
                    <div class="col-sm-offset-3 col-sm-9 text-right">
                        <button type="submit" name="submit" value="no" class="btn btn-default">キャンセル</button>
                        <button type="submit" name="submit" value="ok" class="btn btn-danger">決定</button>
                    </div>
                </div>
            </form>

        </div>
    </body>
</html>
完成と総括
これで、掲示板への表示・投稿・確認ページの機能が実装されました。
見た目上それっぽく動くようになったかと思います。
後は、バリデーションやエラー表示、脆弱性対策など細かいところの改修が必要ですが
(力尽きた) 記事の量が多くなってしまったので、また別の機会にしようと思います。
感想として、Phalconは意外とすんなり書けるので楽しかったです。
むしろ環境構築や導入のほうに時間がかかっていました…。
今後、仕事でも使える機会があるといいな。。
以上