背景
会社のPCが入れ替わったので環境作り直します。
前編があります
この記事は続きです。Atomでなんでもやろうという精神です。
筆者のできること・やりたいこと
Pythonで作った数値計算アルゴリズムにUIをつけたい。
もっといい方法あるのかもしれないけど、djangoでやりたい。
HTML/CSS(Scss)は勉強したので習得済み。
Pythonのインストール
Annacondaを使う手もあるんだけど、余計なのもインストールされちゃうしエディタかぶっちゃうし。
なので今回は純粋にPythonをインストールしてみます。
こちらを参考にします。
https://qiita.com/ryokurta256/items/7d5e87ad6827b20fddd0
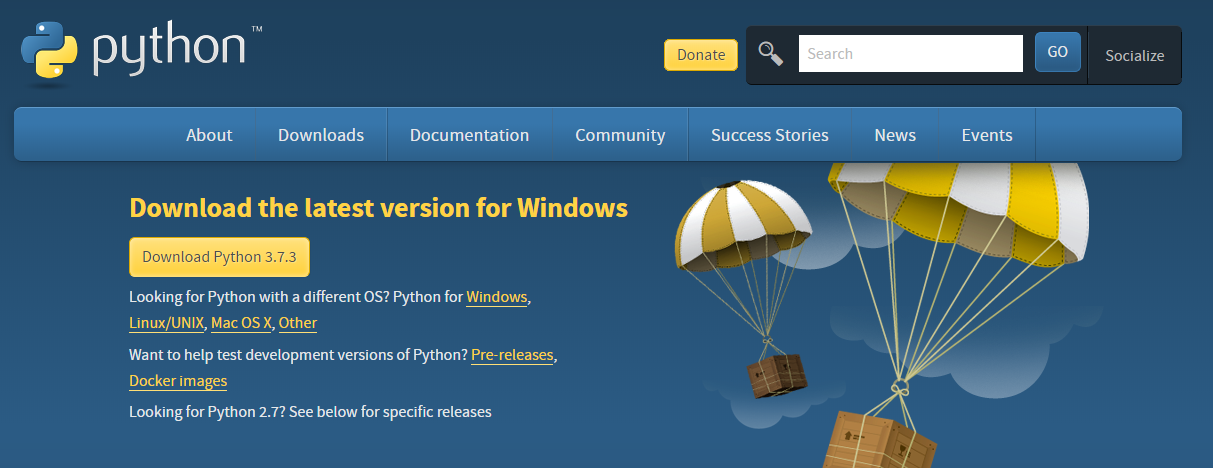
Pythonをダウンロードします。
https://www.python.org/downloads/

黄色いボタンぽちっと。
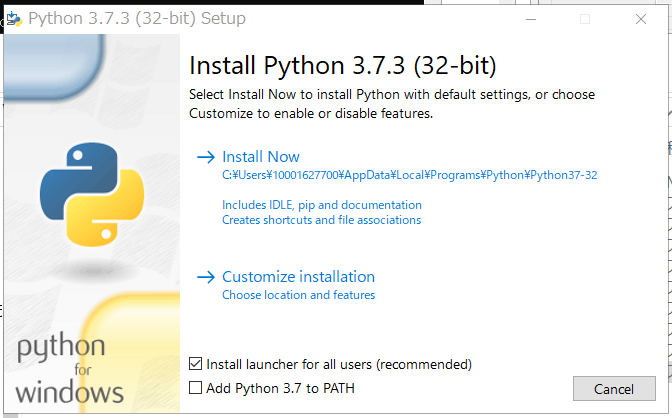
インストーラを起動すると

今回はCustomize installationを選択。
というのも、WindowsでPATHが上手く通らない事件を経験しているので。。
(筆者が無知なだけかも。)
今回は最初からPATHを通してもらいます。Pythonだけに蛇道。。。
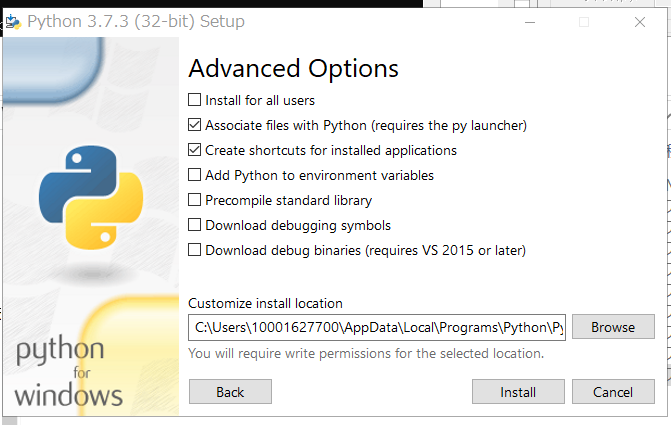
Nextで進めて、Advanced OptionsにてAdd python to environment variablesにチェック入れます。

どうせ私しか使わないPCなのでInstall for all usersにもチェック入れますか。(Pathが煩雑になるしね)
というわけでインストール完了です。
Atom-runnerのインストール
Atomでインストールします。これね。
https://atom.io/packages/atom-runner
これでJupyterNotebookと同じことがAtomでできるはず!
(私はJupyterNotebookが嫌い。。。)
インストール完了しました。
Windows環境では、Atom-runnerの実行ショートカットキーは**「Alt-r」**です。
なぜ実行できない~と悩んでいたけど、簡単なオチでした。

無事実行確認ができました。おお、今回も順調~。
おまけ
Numpyのインストール
管理者権限でコマンドプロンプトを起動し
pip install --proxy http://{ID}:{password}@:{プロキシサーバー}:{8080} numpy
これでインストールできます。
終わりに
JuyterNotebookは中間ファイルみたいなのができるでしょ~。
あれがよくわからなくてキライなんです。。。