0. はじめに
前回はQiitaを書くのに疲れてしまい、
投稿はESP-IDFまでと中途半端に終わってしまったので
今回はLチカまで進めます。
ドキュメントはここのAWS CLIのインストールからです。
例によってエラーとの格闘です![]()
1. AWS CLIインストール
AWSアカウントも何もないところからだと、ちと面倒ですが、
ココを乗り越えないと先に進めませんので、
ドキュメント通りにAWSのアカウント作成、AWS CLIのインストール、
aws configureを行います
2. Minicondaインストール
ドキュメント通り進めます。
私はココのPython3.8のpkgをインストールしました。
ドキュメントにある、edukit環境作成とedukit環境への切り替えは
下の通りうまくいきました
(base) オレ@MacBook ~ % conda create -n edukit python=3.7
Collecting package metadata (current_repodata.json): done
Solving environment: done

## Package Plan ##

  environment location: /Users/オレ/opt/miniconda3/envs/edukit

  added / updated specs:
    - python=3.7


The following packages will be downloaded:

    package                    |            build
    ---------------------------|-----------------
    ca-certificates-2021.1.19  |       hecd8cb5_0         121 KB
    certifi-2020.12.5          |   py37hecd8cb5_0         140 KB
    openssl-1.1.1j             |       h9ed2024_0         2.2 MB
    pip-21.0.1                 |   py37hecd8cb5_0         1.8 MB
    python-3.7.9               |       h26836e1_0        19.7 MB
    readline-8.1               |       h9ed2024_0         333 KB
    setuptools-52.0.0          |   py37hecd8cb5_0         721 KB
    wheel-0.36.2               |     pyhd3eb1b0_0          33 KB
    ------------------------------------------------------------
                                           Total:        25.0 MB

The following NEW packages will be INSTALLED:

  ca-certificates    pkgs/main/osx-64::ca-certificates-2021.1.19-hecd8cb5_0
  certifi            pkgs/main/osx-64::certifi-2020.12.5-py37hecd8cb5_0
  libcxx             pkgs/main/osx-64::libcxx-10.0.0-1
  libedit            pkgs/main/osx-64::libedit-3.1.20191231-h1de35cc_1
  libffi             pkgs/main/osx-64::libffi-3.3-hb1e8313_2
  ncurses            pkgs/main/osx-64::ncurses-6.2-h0a44026_1
  openssl            pkgs/main/osx-64::openssl-1.1.1j-h9ed2024_0
  pip                pkgs/main/osx-64::pip-21.0.1-py37hecd8cb5_0
  python             pkgs/main/osx-64::python-3.7.9-h26836e1_0
  readline           pkgs/main/osx-64::readline-8.1-h9ed2024_0
  setuptools         pkgs/main/osx-64::setuptools-52.0.0-py37hecd8cb5_0
  sqlite             pkgs/main/osx-64::sqlite-3.33.0-hffcf06c_0
  tk                 pkgs/main/osx-64::tk-8.6.10-hb0a8c7a_0
  wheel              pkgs/main/noarch::wheel-0.36.2-pyhd3eb1b0_0
  xz                 pkgs/main/osx-64::xz-5.2.5-h1de35cc_0
  zlib               pkgs/main/osx-64::zlib-1.2.11-h1de35cc_3


Proceed ([y]/n)? y


Downloading and Extracting Packages
setuptools-52.0.0    | 721 KB    | ##################################### | 100%
certifi-2020.12.5    | 140 KB    | ##################################### | 100%
wheel-0.36.2         | 33 KB     | ##################################### | 100%
ca-certificates-2021 | 121 KB    | ##################################### | 100%
readline-8.1         | 333 KB    | ##################################### | 100%
python-3.7.9         | 19.7 MB   | ##################################### | 100%
openssl-1.1.1j       | 2.2 MB    | ##################################### | 100%
pip-21.0.1           | 1.8 MB    | ##################################### | 100%
Preparing transaction: done
Verifying transaction: done
Executing transaction: done
#
# To activate this environment, use
#
#     $ conda activate edukit
#
# To deactivate an active environment, use
#
#     $ conda deactivate
次に環境の移動
(base) オレ@MacBookAir ~ % conda activate edukit
(edukit) オレ@MacBookAir ~ %
(base)から(edukit)に変わりました。
が、次のexport.shでまたコケました
(edukit) オレ@MacBookAir ~ % . $HOME/esp/esp-idf/export.sh
Setting IDF_PATH to '/Users/オレ/esp/esp-idf'
Adding ESP-IDF tools to PATH...
Using Python interpreter in /Users/オレ/opt/miniconda3/envs/edukit/bin/python
Checking if Python packages are up to date...
The following Python requirements are not satisfied:
click>=5.0
pyserial>=3.0
future>=0.15.2
cryptography>=2.1.4
pyparsing>=2.0.3,<2.4.0
pyelftools>=0.22
gdbgui==0.13.2.0
pygdbmi<=0.9.0.2
reedsolo>=1.5.3,<=1.5.4
bitstring>=3.1.6
ecdsa>=0.16.0
Please follow the instructions found in the "Set up the tools" section of ESP-IDF Getting Started Guide
Diagnostic information:
    IDF_PYTHON_ENV_PATH: (not set)
    Python interpreter used: /Users/オレ/opt/miniconda3/envs/edukit/bin/python
    Warning: python interpreter not running from IDF_PYTHON_ENV_PATH
    PATH: /Users/オレ/.espressif/tools/xtensa-esp32-elf/
〜〜〜以下略〜〜〜
Getting Started Guideを読みやがれと。。。
う〜ん、まあなんか
IDF_PYTHON_ENV_PATH: (not set)
が怪しそうだな。。。と思いつつも先に進める。。。
3. デバイス証明書の取得と登録
(edukit) オレ@MacBookAir % cd Core2-for-AWS-IoT-EduKit/Blinky-Hello-World/utilities/AWS_IoT_registration_helper
(edukit) オレ@MacBookAir AWS_IoT_registration_helper % pip3 install -r requirements.txtRequirement already satisfied: awscli>=1.18.202 in /Users/オレ/opt/miniconda3/envs/edukit/lib/python3.7/site-packages (from -r requirements.txt (line 1)) (1.19.11)
Requirement already satisfied: cryptography>=2.7 in /Users/オレ/opt/miniconda3/envs/edukit/lib/python3.7/site-packages (from -r requirements.txt (line 2)) (3.4.6)
Requirement already satisfied: pyasn1_modules==0.1.5 in /Users/オレ/opt/miniconda3/envs/edukit/lib/python3.7/site-packages (from -r requirements.txt (line 3)) (0.1.5)
〜〜〜中略〜〜〜
Requirement already satisfied: chardet<5,>=3.0.2 in /Users/オレ/opt/miniconda3/envs/edukit/lib/python3.7/site-packages (from requests->requests-aws4auth==1.0.1->-r requirements.txt (line 10)) (4.0.0)
Requirement already satisfied: certifi>=2017.4.17 in /Users/オレ/opt/miniconda3/envs/edukit/lib/python3.7/site-packages (from requests->requests-aws4auth==1.0.1->-r requirements.txt (line 10)) (2020.12.5)
(edukit) オレ@MacBookAir AWS_IoT_registration_helper %
なんかうまくいった模様
早速、デバイス証明書の取得と登録
シリアルデバイスは前のページと同じく
/dev/cu.usbserial-0225F023
を指定
(edukit) オレ@MacBookAir AWS_IoT_registration_helper % python registration_helper.py -p /dev/cu.usbserial-0225F023
Pyserial is not installed for /Users/オレ/opt/miniconda3/envs/edukit/bin/python. Check the README for installation instructions.
Traceback (most recent call last):
  File "registration_helper.py", line 42, in <module>
    import esptool
ModuleNotFoundError: No module named 'esptool'

During handling of the above exception, another exception occurred:

Traceback (most recent call last):
  File "registration_helper.py", line 49, in <module>
    import esptool
  File "/Users/オレ/esp/esp-idf/components/esptool_py/esptool/esptool.py", line 38, in <module>
    import serial
ModuleNotFoundError: No module named 'serial'
またエラー。。。
モジュールがないだけなので、何も考えずserialとesptoolをインストール!
〜〜〜まずはserial〜〜〜

(edukit) オレ@MacBookAir AWS_IoT_registration_helper % pip install serial
Collecting serial
  Downloading serial-0.0.97-py2.py3-none-any.whl (40 kB)
     |████████████████████████████████| 40 kB 4.5 MB/s
Collecting future>=0.17.1
  Using cached future-0.18.2.tar.gz (829 kB)
Requirement already satisfied: pyyaml>=3.13 in /Users/オレ/opt/miniconda3/envs/edukit/lib/python3.7/site-packages (from serial) (5.3.1)
Collecting iso8601>=0.1.12
  Downloading iso8601-0.1.14-py2.py3-none-any.whl (9.5 kB)
Building wheels for collected packages: future
  Building wheel for future (setup.py) ... done
  Created wheel for future: filename=future-0.18.2-py3-none-any.whl size=491059 sha256=52d0697b9ade772839886084076f64bc586b6c0869c69f501ce868c4d720f95a
  Stored in directory: /Users/オレ/Library/Caches/pip/wheels/56/b0/fe/4410d17b32f1f0c3cf54cdfb2bc04d7b4b8f4ae377e2229ba0
Successfully built future
Installing collected packages: iso8601, future, serial
Successfully installed future-0.18.2 iso8601-0.1.14 serial-0.0.97

〜〜〜つづいて esptool 〜〜〜

(edukit) オレ@MacBookAir AWS_IoT_registration_helper % pip install esptool
Collecting esptool
  Downloading esptool-3.0.tar.gz (149 kB)
     |████████████████████████████████| 149 kB 9.1 MB/s
Collecting bitstring>=3.1.6
  Using cached bitstring-3.1.7.tar.gz (195 kB)

〜〜〜中略〜〜〜

Successfully built esptool bitstring reedsolo
Installing collected packages: reedsolo, pyserial, bitstring, esptool
Successfully installed bitstring-3.1.7 esptool-3.0 pyserial-3.5 reedsolo-1.5.4
インストール完了!
ということで、再度チャレンジ
(edukit) オレ@MacBookAir AWS_IoT_registration_helper % python registration_helper.py -p /dev/cu.usbserial-0225F023

〜〜〜なんかちょっとwarning...笑〜〜〜

Conda 'edukit' environment active...
Python 3.7.x detected...
AWS CLI configured for IoT endpoint: xxxxxxxxxxxxxx-ats.iot.us-west-2.amazonaws.com
Checking module (1 of 13): awscli>=1.18.202

〜〜〜中略〜〜〜

Checking module (2 of 13): cryptography>=2.7
Requirement already satisfied: cryptography>=2.7 in /Users/オレ/opt/miniconda3/envs/edukit/lib/python3.7/site-packages (3.4.6)

〜〜〜13 of 13まで略〜〜〜

-----------------------------------------
Completed checking/installing package dependencies

Generating ECDSA 256-bit prime field key...
Generating self-signed x.509 certificate...
Successfully created x.509 certificate with expiration in 365 days...
Connecting....
Changing baud rate to 921600
Changed.
RAM boot...
Downloading 31364 bytes at 3ffb0000... done!
Downloading 456 bytes at 3ffb8f28... done!
Downloading 1028 bytes at 40080000... done!
Downloading 107384 bytes at 40080404... done!
Downloading 4 bytes at 4009a77c... done!
All segments done, executing at 40081bf0
Wait for init
- CLI Initialised
>>

>>

Serial Number:
012345678901234567
Generating Manifest
>>

Crypto Authentication Root CA 002
-----BEGIN CERTIFICATE-----
MIIB8TCCAZegAwIBAgIQd9NtlW7IrmI

〜〜〜中略〜〜〜MG1TrVv7HhhfdFyhYmA==
-----END PUBLIC KEY-----

Validate Device Certificate:
OK

012345678901234567
reading slot 0 public key
>>

reading slot 1 public key
>>

reading slot 2 public key
>>

reading slot 3 public key
>>

reading slot 4 public key
>>


Generated the manifest file 012345678901234567_manifest.json in output_files
Created policy Default
Number of certificates: 1

Loading the manifest_item...
	Unique ID: 012345678901234567

Try importing certificate...
Response: {'ResponseMetadata': {'RequestId': 'なんか', 'HTTPStatusCode': 200, 'HTTPHeaders': {'date': 'Fri, 19 Feb 2021 15:54:26 GMT', 'content-type': 'application/json', 'content-length': '209', 'connection': 'keep-alive', 'x-amzn-requestid': 'なんか', 'access-control-allow-origin': '*', 'x-amz-apigw-id': 'a__P5HbyPHcF6FA=', 'x-amzn-trace-id': 'Root=なんか'}, 'RetryAttempts': 0}, 'certificateArn': 'arn:aws:iot:us-west-2:なんか:cert/なんか', 'certificateId': 'なんか'}
Certificate import complete - returning
MANIFEST_IMPORT		SUCCESS	arn:aws:iot:us-west-2:なんか:cert/なんか	arn:aws:iot:us-west-2:なんか:thing/012345678901234567

Number of ThingIDs to check: 1
Checking the manifest item(1)
	Unique ID: 012345678901234567
Manifest was loaded successfully
おお、うまくいったようです〜!
4. ESP32ファームウェアの更新
(edukit) オレ@MacBookAir AWS_IoT_registration_helper % cd ../..
(edukit) オレ@MacBookAir Blinky-Hello-World % aws iot describe-endpoint --endpoint-type iot:Data-ATS
{
    "endpointAddress": "xxxxxxxxxxxxxx-ats.iot.us-west-2.amazonaws.com"
}
上で表示されたエンドポイントを控えておきます
xxxxxxxxxxxxxx-ats.iot.us-west-2.amazonaws.com ←これ
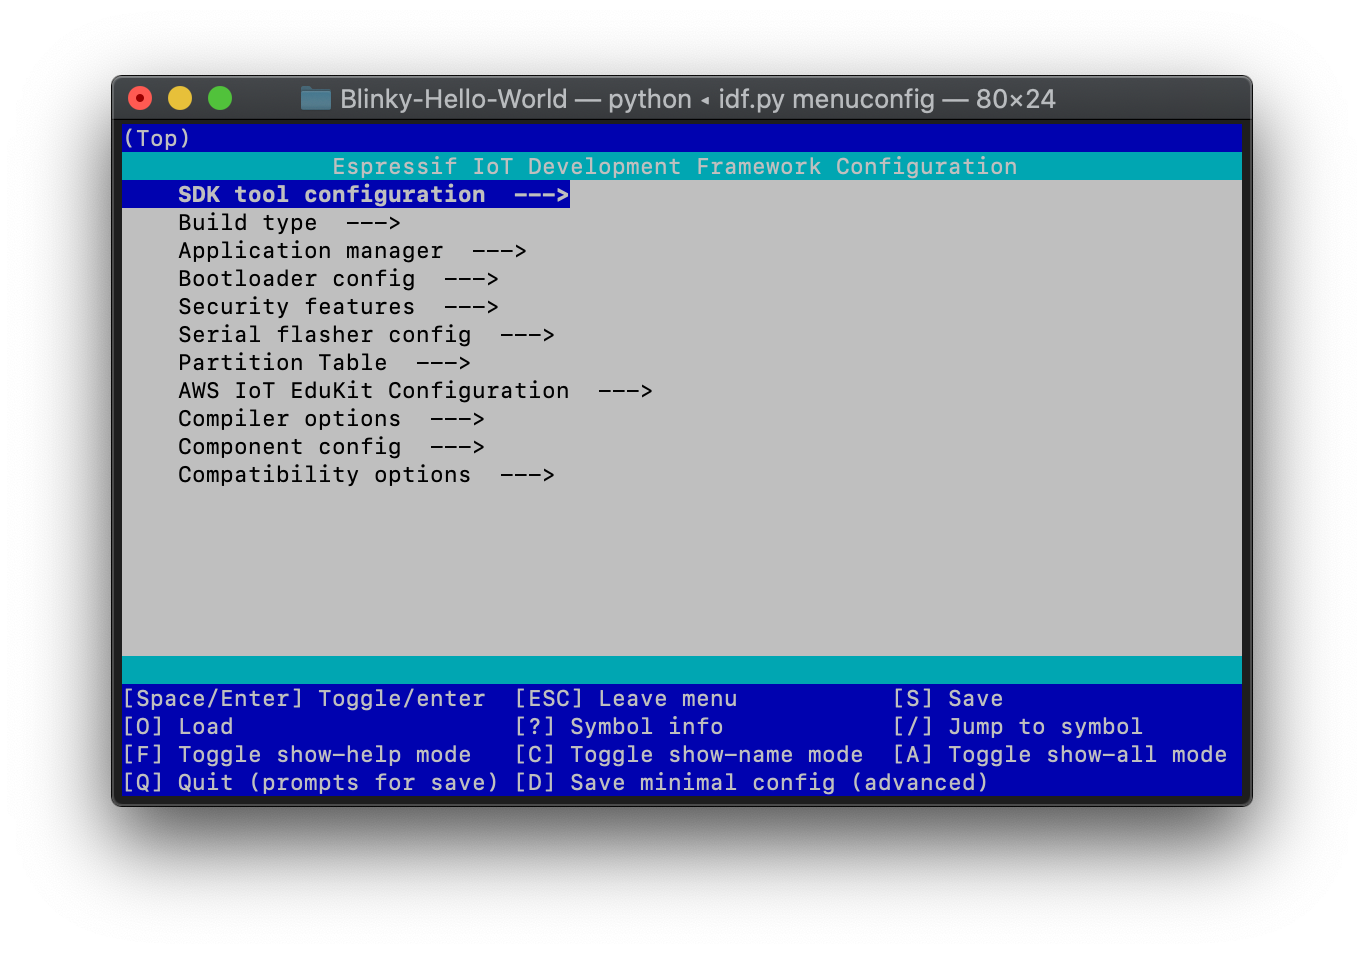
で、Kconfigによる設定
(edukit) オレ@MacBookAir Blinky-Hello-World % idf.py menuconfig
The following Python requirements are not satisfied:
pyparsing>=2.0.3,<2.4.0
pyelftools>=0.22
gdbgui==0.13.2.0
pygdbmi<=0.9.0.2
Please follow the instructions found in the "Set up the tools" section of ESP-IDF Getting Started Guide
Diagnostic information:
    IDF_PYTHON_ENV_PATH: (not set)
    Python interpreter used: /Users/オレ/opt/miniconda3/envs/edukit/bin/python
    Warning: python interpreter not running from IDF_PYTHON_ENV_PATH
    PATH: /Users/オレ/.espressif/tools/

〜〜〜中略〜〜〜

ESP-IDF v4.2-238-g8cd16b60f
むー、またGuideを見やがれが出てConfig画面でない。。。
どうやら先にあったIDF_PYTHON_ENV_PATHがないのが気に入らないらしい。
が、そもそも何を設定するんだ???
ディレクトリを歩き回り、
/Users/オレ/opt/miniconda3/envs/edukit
こんなのがあったので、とりあえず
(edukit) オレ@MacBookAir Blinky-Hello-World % export IDF_PYTHON_ENV_PATH="/Users/オレ/opt/miniconda3/envs/edukit"
気を取り直して
(edukit) オレ@MacBookAir Blinky-Hello-World % idf.py menuconfig
The following Python requirements are not satisfied:
pyparsing>=2.0.3,<2.4.0
pyelftools>=0.22
gdbgui==0.13.2.0
pygdbmi<=0.9.0.2
To install the missing packages, please run "/Users/オレ/esp/esp-idf/install.sh"
Diagnostic information:
    IDF_PYTHON_ENV_PATH: /Users/オレ/opt/miniconda3/envs/edukit
    Python interpreter used: /Users/オレ/opt/miniconda3/envs/edukit/bin/python

ESP-IDF v4.2-238-g8cd16b60f
お、さっきと違うエラー。
install.shを実行せよと。
(edukit) オレ@MacBookAir Blinky-Hello-World % /Users/オレ/esp/esp-idf/install.sh
Installing ESP-IDF tools
Installing tools: xtensa-esp32-elf, xtensa-esp32s2-elf, esp32ulp-elf, esp32s2ulp-elf, openocd-esp32
Skipping xtensa-esp32-elf@esp-2020r3-8.4.0 (already installed)

〜〜〜中略〜〜〜

Installing Python environment and packages
Creating a new Python environment in /Users/オレ/.espressif/python_env/idf4.2_py3.7_env

〜〜〜お、IDF_PYTHON_ENV_PATHに使えそうなのが表示された〜〜〜

Installing virtualenv
Collecting virtualenv

〜〜〜中略〜〜〜

Successfully built Flask-Compress
Installing collected packages: MarkupSafe, Werkzeug, python-engineio, Jinja2, itsdangerous, click, bidict, python-socketio, pycparser, greenlet, Flask, brotli, six, Pygments, pygdbmi, gevent, Flask-SocketIO, Flask-Compress, cffi, reedsolo, pyserial, pyparsing, pyelftools, gdbgui, future, ecdsa, cryptography, bitstring
Successfully installed Flask-0.12.5 Flask-Compress-1.9.0 Flask-SocketIO-2.9.6 Jinja2-2.11.3 MarkupSafe-1.1.1 Pygments-2.8.0 Werkzeug-0.16.1 bidict-0.21.2 bitstring-3.1.7 brotli-1.0.9 cffi-1.14.5 click-7.1.2 cryptography-3.4.6 ecdsa-0.16.1 future-0.18.2 gdbgui-0.13.2.0 gevent-1.5.0 greenlet-1.0.0 itsdangerous-1.1.0 pycparser-2.20 pyelftools-0.27 pygdbmi-0.9.0.2 pyparsing-2.3.1 pyserial-3.5 python-engineio-4.0.0 python-socketio-5.0.4 reedsolo-1.5.4 six-1.15.0
All done! You can now run:

  . /Users/オレ/esp/esp-idf/export.sh

(edukit) オレ@MacBookAir Blinky-Hello-World %
なんかうまくいったっぽい
export.shを実行せよとのことなので
. /Users/オレ/esp/esp-idf/export.sh
Adding ESP-IDF tools to PATH...
Using Python interpreter in /Users/オレ/.espressif/python_env/idf4.2_py3.7_env/bin/python
Checking if Python packages are up to date...
Python requirements from /Users/オレ/esp/esp-idf/requirements.txt are satisfied.
Updated PATH variable:

〜〜〜中略〜〜〜

Done! You can now compile ESP-IDF projects.
Go to the project directory and run:

  idf.py build

(edukit) オレ@MacBookAir Blinky-Hello-World %
今度はさらっとexport.shが完了!
この時点でIDF_PYTHON_ENV_PATHを確認すると
(edukit) オレ@MacBookAir Blinky-Hello-World % echo $IDF_PYTHON_ENV_PATH
/Users/オレ/.espressif/python_env/idf4.2_py3.7_env
おぉ、ちゃんと設定されている!
ということは、Minicondaをインストールしたときに
~~ export.shを実行する前に、適当なIDF_PYTHON_ENV_PATHを設定して ~~
~~ install.shを実行すればよかっただけな予感。。。
↑ではなく、初めて(edukit)に環境移動した直後、export.shの前だな、きっと
というわけで再度チャレンジ!
(edukit) オレ@MacBookAir Blinky-Hello-World % idf.py menuconfig
Executing action: menuconfig
ここからはドキュメント通り、
先ほど控えておいたエンドポイントと自宅のWifi設定を入れて保存後に終了
すると同時に
Running cmake in directory /Users/オレ/m5stack/Core2-for-AWS-IoT-EduKit/Blinky-Hello-World/build
Executing "cmake -G Ninja -DPYTHON_DEPS_CHECKED=1 -DESP_PLATFORM=1 -DCCACHE_ENABLE=0 /Users/オレ/m5stack/Core2-for-AWS-IoT-EduKit/Blinky-Hello-World"...
-- Found Git: /usr/bin/git (found version "2.24.2 (Apple Git-127)")
-- IDF_TARGET not set, using default target: esp32
-- The C compiler identification is GNU 8.4.0
-- The CXX compiler identification is GNU 8.4.0
-- The ASM compiler identification is GNU

〜〜〜中略〜〜〜

-- Configuring done
-- Generating done
-- Build files have been written to:

〜〜〜以下略〜〜〜
無事Configできたっぽい
ではBuildを!
(edukit) オレ@MacBookAir Blinky-Hello-World % idf.py build
Executing action: all (aliases: build)
Running ninja in directory /Users/オレ/m5stack/Core2-for-AWS-IoT-EduKit/Blinky-Hello-World/build
Executing "ninja all"...
[0/1] Re-running CMake...
-- Building ESP-IDF components for target esp32

〜〜〜なんとか走り始めました! ここから結構時間がかかります〜〜〜

[1244/1244] Generating binary image from built executable
esptool.py v3.0
Generated /Users/オレ/m5stack/Core2-for-AWS-IoT-EduKit/Blinky-Hello-World/build/AWS_IoT_EduKit-Blinky-Hello-World.bin

Project build complete. To flash, run this command:
/Users/オレ/.espressif/python_env/idf4.2_py3.7_env/bin/python ../../../esp/esp-idf/components/esptool_py/esptool/esptool.py -p (PORT) -b 460800 --before default_reset --after hard_reset --chip esp32  write_flash --flash_mode dio --flash_size detect --flash_freq 80m 0x1000 build/bootloader/bootloader.bin 0x8000 build/partition_table/partition-table.bin 0x10000 build/AWS_IoT_EduKit-Blinky-Hello-World.bin
or run 'idf.py -p (PORT) flash'
おぉ、ついにbinができあがりました!
転送する前にドキュメント通りに古いファームを消します
(edukit) オレ@MacBookAir Blinky-Hello-World % idf.py erase_flash -p /dev/cu.usbserial-0225F023
Executing action: erase_flash

〜〜〜中略〜〜〜

esptool.py v3.0
Serial port /dev/cu.usbserial-0225F023
Connecting........___
Chip is ESP32-D0WDQ6-V3 (revision 3)
Features: WiFi, BT, Dual Core, 240MHz, VRef calibration in efuse, Coding Scheme None
Crystal is 40MHz
MAC: 24:0a:c4:f9:9f:ac
Uploading stub...
Running stub...
Stub running...
Changing baud rate to 460800
Changed.
Erasing flash (this may take a while)...
Chip erase completed successfully in 26.2s
Hard resetting via RTS pin...
Done
きえました!
では、転送します!
(edukit) オレ@MacBookAir Blinky-Hello-World % idf.py flash monitor -p /dev/cu.usbserial-0225F023
Executing action: flash

〜〜〜中略(しばし待ちます)〜〜〜

I (7508) esp_netif_handlers: sta ip: xxx.xxx.xxx.xxx, mask: 255.255.255.0, gw: xxx.xxx.xxx.xxx
I (7528) Blinky: Connecting to AWS IoT Core...
I (7708) aws_iot: Attempting to use device certificate from ATECC608
I (20048) Blinky: Successfully connected to AWS IoT Core!
I (20048) Blinky: Subscribing...
I (20398) Blinky: Subscribed to topic: 012345678901234567/#
I (20398) Blinky:
I (20398) Blinky: **************************************
I (20398) Blinky: Client Id - 012345678901234567
I (20408) Blinky: **************************************
やっとAWSに接続できました!!!
5. Lチカ
もうあとは簡単です。
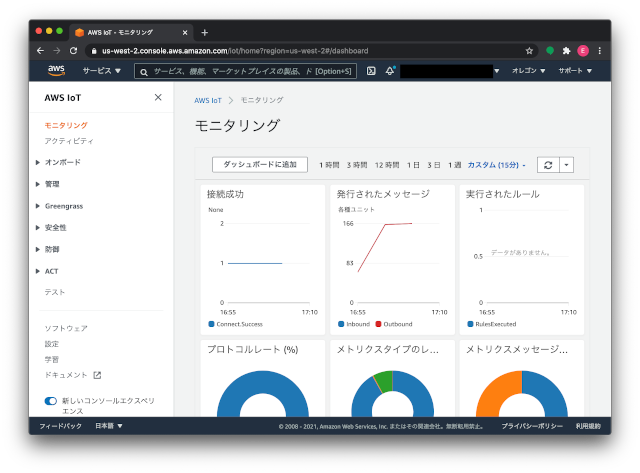
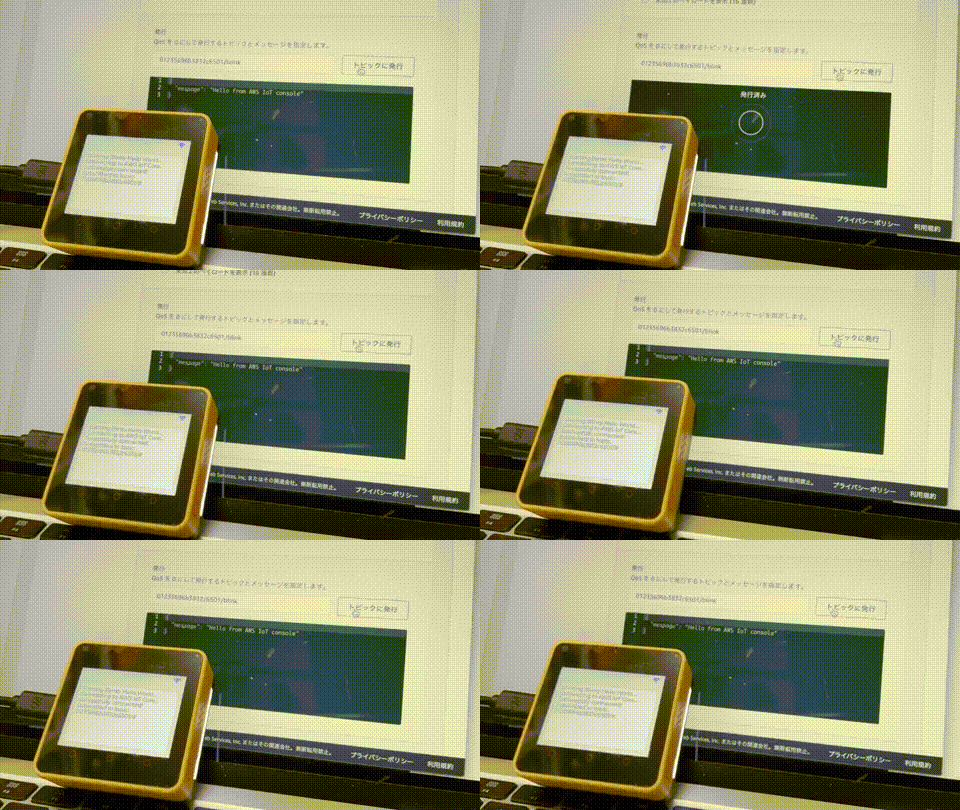
ドキュメント通りにAWS IoT Coreコンソールで状態確認!

Publishの入力画面で
<Client ID>/blink
をtopicにpublishすると
M5Stackの横にあるLEDが点滅し、
もう一回同じようにpublishすると点灯状態になります!
Macのターミナルではこんな感じでモニターすることができます
(4回publishしています)
I (635748) Blinky: Subscribe callback
I (635748) Blinky: 012345678901234567/blink	{
  "message": "Hello from AWS IoT console"
}
I (650488) Blinky: Subscribe callback
I (650488) Blinky: 012345678901234567/blink	{
  "message": "Hello from AWS IoT console"
}
I (731598) Blinky: Subscribe callback
I (731598) Blinky: 012345678901234567/blink	{
  "message": "Hello from AWS IoT console"
}
I (738968) Blinky: Subscribe callback
I (738968) Blinky: 012345678901234567/blink	{
  "message": "Hello from AWS IoT console"
}
6. とりあえず
IoTの勉強というよりも、環境設定のラボのようですが
とりあえずLチカのラボ終了!

