初心者がやりたいことを綺麗にできないのでゴリ押ししてやり通しています。
間違いなく綺麗な書き方ではないので、そういったコードが嫌いな方は本気で見ないことをお勧めします。
[やりたいこと]
ポートフォリオ用に、食べログのラーメン屋さん専門みたいなのを作ろうかなと
やろうとしている機能は
- 口コミ投稿機能(今回の主軸)
- Device機能(既に完了済み)
- GooglemapAPI(ちょっとだけ)
- 多対多(アソシエーション、フォロー機能)
-
AWS(デプロイ済み)
などです。
[注意]
かなり行き当たりばったりな記事です。
後々、他のgemなどの影響で書き方など変わる可能性があります。ご承知ください。
[環境]
※使っていない可能性のある環境も記載してます。
Mac M1チップ
rails 6.1.6
ruby 3.0.1
node v16.17.1
[前回まで]
まずは謝罪します。
前回作った分とかなり大きく変更しています
(ページの場所、使用コントローラーなどが)。
前回までにやったことをまとめると
- Googlemapの実装
- ラーメン屋の検索(最大20件)
- Googlemapの店舗位置にピンを立てる。
- ピンをクリックしたら吹き出しを出力(吹き出しの中は店舗名)
となっております。
[今回実装したいこと]
- 検索結果の店舗名を並べる
- 並べられた店舗名をクリックしたらGooglemapの店舗ピンが中央になる
- 吹き出しに投稿一覧までのリンクを出力
- リンク先に投稿一覧の出力
- 投稿一覧のページから新規投稿へのリンク
- 口コミ新規投稿
[前準備]
前回はテストアプリでの実装でしたが、今回はポートフォリオアプリに実装しております。
☆テーブル情報
  create_table "posts", force: :cascade do |t|
    t.string "content"
    t.string "image"
    t.datetime "created_at", precision: 6, null: false
    t.datetime "updated_at", precision: 6, null: false
    t.bigint "shop_id", null: false
    t.bigint "user_id", null: false
    t.index ["shop_id"], name: "index_posts_on_shop_id"
    t.index ["user_id"], name: "index_posts_on_user_id"
  end

  create_table "shops", force: :cascade do |t|
    t.string "name"
    t.string "address"
    t.float "latitude"
    t.float "longitude"
    t.bigint "user_id"
    t.datetime "created_at", precision: 6, null: false
    t.datetime "updated_at", precision: 6, null: false
    t.index ["name"], name: "index_shops_on_name", unique: true
    t.index ["user_id"], name: "index_shops_on_user_id"
  end

  create_table "users", force: :cascade do |t|
    t.string "name", default: "", null: false
    t.string "email", default: "", null: false
    t.string "encrypted_password", default: "", null: false
    t.string "reset_password_token"
    t.datetime "reset_password_sent_at"
    t.datetime "remember_created_at"
    t.integer "sign_in_count", default: 0, null: false
    t.datetime "current_sign_in_at"
    t.datetime "last_sign_in_at"
    t.string "current_sign_in_ip"
    t.string "last_sign_in_ip"
    t.datetime "created_at", precision: 6, null: false
    t.datetime "updated_at", precision: 6, null: false
    t.string "confirmation_token"
    t.datetime "confirmed_at"
    t.datetime "confirmation_sent_at"
    t.string "unconfirmed_email"
    t.boolean "admin", default: false
    t.index ["confirmation_token"], name: "index_users_on_confirmation_token", unique: true
    t.index ["email"], name: "index_users_on_email", unique: true
    t.index ["reset_password_token"], name: "index_users_on_reset_password_token", unique: true
  end

  add_foreign_key "posts", "shops"
  add_foreign_key "posts", "users"
  add_foreign_key "shops", "users"
gemは前回と変わらず(AWS,Deviceのgemは除外)
[省略]
gem 'dotenv-rails'  #railsでenvファイルを使えるようになるgem。
gem 'google_places' #google_placesを使用する際に必要なgem。
gem 'gmaps4rails'   #RailsでGoogleMapを表示させるのに必要らしい…が、使ってない記事もあったのでもしかしたらいらない可能性あり
gem 'geocoder'      #住所から緯度経度を出してくれるGooglemap機能を使うために必要。今回は使っていないけど後々使う可能性もあり
gem 'gon'           #railsの変数をJSで使うために必要なgem。
gem 'jquery-rails'  #JQueryを使うなら必要。正直どこで使っているか曖昧なので勉強中。
この二つは前回のままなので、省略いたします。
また、今回もまずはファイルを紹介後、初心者なりに解説をさせていただきます。
[手順]
- 検索結果の店舗名を並べる
- 並べられた店舗名をクリックしたらGooglemapの店舗ピンが中央になる
- 吹き出しに投稿一覧までのリンクを出力
上記をまとめて記載します。
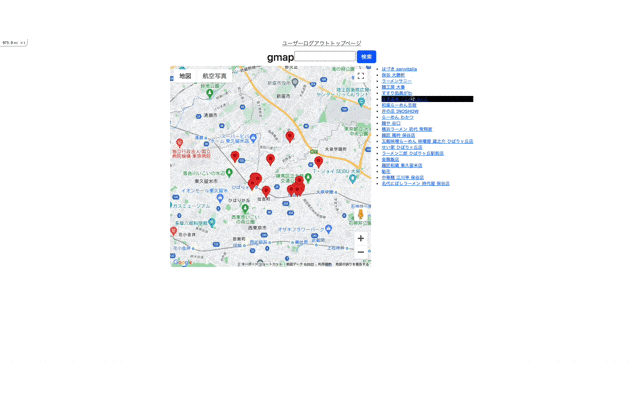
Googlemapは前回と違い、toppageに表示させるように設定しております。
<div style = "display:flex; justify-content: center;">
<h2>gmap</h2>

    <%= form_with url: toppages_path, local: true, method: :get do |f| %>
      <%= f.text_field :word , name: "search"%>
      <%= f.submit "検索", class: "btn btn-primary" %>
    <% end %>
</div>
<div style="display:flex; justify-content: center;" >
<div id='map'></div>

<ul>
<% @places.each do |place| %>
  <li><a style= "display:block;"class="post_name" onclick="zoom_shop('<%= place.lat %>','<%= place.lng %>')"><%= place.name %></a></li>
<% end %>
</ul>
</div>

<style>
#map {
  height: 600px;
  width: 600px;
}
</style>

<script>
var map
var geocoder
  var marker = [];
  var infoWindow = [];
  var allShops = gon.places;
  var markerData = []
// 下の1行を追加
var display = document.getElementById('display')
    for (var i = 0; i < allShops.length; i++) {
      markerData.push({
      title: allShops[i]['name'],
      lat: allShops[i]['lat'],
      lng: allShops[i]['lng'],
      content: allShops[i]['name'] + '<br><img src="./ippatsu.png" width="200"><br>'
  });
  };

function zoom_shop(lat,lng){
  geocoder = new google.maps.Geocoder()
  let mapShopMarker = new google.maps.LatLng({lat: Number(lat), lng: Number(lng)});
    map = new google.maps.Map(document.getElementById('map'), {
      center: mapShopMarker,
      zoom: 15,
  });
  allShopMarker(markerData);
  markerData.forEach((data, key) => {
    if(data['lat'] == lat && data['lng'] == lng){
      infoWindow[key].open(map, marker[key]);
    };
  });
}

function initMap(){
  geocoder = new google.maps.Geocoder()
  var mapLatLng = new google.maps.LatLng({lat: markerData[0]['lat'], lng: markerData[0]['lng']});
  map = new google.maps.Map(document.getElementById('map'), {
      center: mapLatLng,
      zoom: 13,
  });

  allShopMarker(markerData)
  }

  function allShopMarker(markerData){

  for (var i = 0; i < markerData.length; i++) {
    markerLatLng = new google.maps.LatLng({lat: markerData[i]['lat'], lng: markerData[i]['lng']});
    marker[i] = new google.maps.Marker({
      position: markerLatLng,
      map: map,
      title: markerData[i]['title']
    });

    // 吹き出しの設定
    infoWindow[i] = new google.maps.InfoWindow({
      content: `<a id="shop_content${i}" href="shops/show?content=${markerData[i].title}&lat=${markerData[i].lat}&lng=${markerData[i].lng}" >${markerData[i].title}</a><br />`
    });
      markerEvent(i);
    }
  }

    function markerEvent(i) {
      marker[i].addListener('click', function() {
        // 吹き出しの表示
        infoWindow[i].open(map, marker[i]);
    });
  }

</script>
<script src="https://maps.googleapis.com/maps/api/js?key=<%= ENV['GOOGLE_MAP_API'] %>&callback=initMap" defer></script>
それに伴い、controllerもtoppageに変更
class ToppagesController < ApplicationController
  def index
    if params[:search].nil?
      @client = ::GooglePlaces::Client.new(ENV['GOOGLE_MAP_API'])
      @places = @client.spots_by_query("ラーメン", language: 'ja', types: 'food')
      gon.places = @places
    else
    @client = ::GooglePlaces::Client.new(ENV['GOOGLE_MAP_API'])
    @places = @client.spots_by_query("#{params[:search]},ラーメン", language: 'ja', types: 'food')
    gon.places = @places
    end
  end
end
こちらの解説は後ほど。
4.リンク先に投稿一覧の出力
5.投稿一覧のページから新規投稿へのリンク
6.口コミ新規投稿
こちらもまとめて記載します。
なお、時短のためpost関連はscaffoldで作成しておりますので、ご認識をお願いします。
(完成までにはいらないものは消します)
class ShopsController < ApplicationController

  def create
    @shop = Shop.new(shop_params)
    shop = params[:shop]
    respond_to do |format|
      if @shop.save
        format.html { redirect_to controller: :posts, action: :new ,shop: {shop_id:@shop.id ,name:shop[:name], latitude:shop[:latitude], longitude:shop[:longitude]}}
      else
        format.html { render :show}
      end
    end
  end

  def show
    @shop = Shop.new
    @name = params[:content]
    @lat = params[:lat]
    @lng = params[:lng]
    if Shop.find_by(name: @name, latitude: @lat, longitude: @lng)
      @shop_config = Shop.find_by(name: @name, latitude: @lat, longitude: @lng)
      if Post.find_by(shop_id:@shop_config.id)
        @posts = Post.where(shop_id:@shop_config.id)
      end
    end
  end


  private

  def shop_params
    params.require(:shop).permit(:name, :latitude, :longitude).merge(user_id:current_user.id)
  end
end
class PostsController < ApplicationController
  before_action :set_post, only: %i[ show edit update destroy ]

  def index
    @posts = Post.all
  end

  def show
  end

  def new
    @post = Post.new
    @shop = params[:shop]
  end

  def edit
  end

  def create
    @post = Post.new(post_params)
    respond_to do |format|
      if @post.save
        format.html { redirect_to post_url(@post), notice: "Post was successfully created." }
      else
        format.html { render :new, status: :unprocessable_entity }
      end
    end
  end

  def update
    respond_to do |format|
      if @post.update(post_params)
        format.html { redirect_to post_url(@post), notice: "Post was successfully updated." }
      else
        format.html { render :edit, status: :unprocessable_entity }
      end
    end
  end

  def destroy
    @post.destroy
    respond_to do |format|
      format.html { redirect_to posts_url, notice: "Post was successfully destroyed." }
    end
  end

  private
    def set_post
      @post = Post.find(params[:id])
    end

    def post_params
      params.require(:post).permit(:content, :image, :shop_id).merge(user_id:current_user.id)
    end
end
<h1>test</h1>

<% unless @name.nil? %>
<td><%= @name %></td>
<td><%= @lat %></td>
<td><%= @lng %></td>

<% end %>
  <table>
<% unless @posts.nil? %>
  <thead>
    <tr>
      <th>Content</th>
      <th>Image</th>
      <th colspan="3"></th>
    </tr>
  </thead>

  <tbody>
    <% @posts.each do |post| %>
      <tr>
        <td><%= post.content %></td>
        <td><img src="<%= post.image %>" width="100"></td>
        <td><%= link_to 'Show', post %></td>
      </tr>
    <% end %>
  </tbody>
  <%else%>
    <p>投稿はありません<p>
<% end %>
</table>

  <% if @shop_config.nil? %>
    <td><%= link_to '投稿する(shop)',shops_path(shop: {name:@name, latitude:@lat, longitude:@lng}), method: :post %></td>
  <% else %>
    <td><%= link_to '投稿する(post)',new_post_path(shop: {shop_id:@shop_config.id ,name:@name, latitude:@lat, longitude:@lng})%></td>
<% end %>
<%= form_with(model: post) do |form| %>
  <% if post.errors.any? %>
    <div id="error_explanation">
      <h2><%= pluralize(post.errors.count, "error") %> prohibited this post from being saved:</h2>

      <ul>
        <% post.errors.each do |error| %>
          <li><%= error.full_message %></li>
        <% end %>
      </ul>
    </div>
  <% end %>

  <td><%= @shop[:shop_id] %></td>
  <td><%= @shop[:name] %></td>
  <td><%= @shop[:latitude] %></td>
  <td><%= @shop[:longitude] %></td>

  <%= form.hidden_field :shop_id, :value => @shop[:shop_id] %>

  <div class="field">
    <%= form.label :content %>
    <%= form.text_field :content %>
  </div>

<div class="field">
  <%= form.label :image %>
  <%= form.file_field :image %>
  </div>

  <div class="actions">
    <%= form.submit %>
  </div>
<% end %>
<h1>New Post</h1>

<%= render 'form', post: @post %>

<%= link_to 'Back', posts_path %>
もし漏れがあったら申し訳ございません。
[解説]
量が多いので、要所のみ
まず、HTML、CSS、JSに関してですが、前回の解説でほとんど解説しているので
編集した部分を一部紹介します。
<% @places.each do |place| %>
  <li><a style= "display:block;"class="post_name" onclick="zoom_shop('<%= place.lat %>','<%= place.lng %>')"><%= place.name %></a></li>
<% end %>
店舗名を並べ、クリックした際にfanctionを実行させるためのコード。
onclick="zoom_shop('<%= place.lat %>','<%= place.lng %>')"
onclockの設定で”zoom_shop”が起動して、引数として緯度経度を引き渡す。
function zoom_shop(lat,lng){
  geocoder = new google.maps.Geocoder()
  let mapShopMarker = new google.maps.LatLng({lat: Number(lat), lng: Number(lng)});
    map = new google.maps.Map(document.getElementById('map'), {
      center: mapShopMarker,
      zoom: 15,
  });
  allShopMarker(markerData);
  markerData.forEach((data, key) => {
    if(data['lat'] == lat && data['lng'] == lng){
      infoWindow[key].open(map, marker[key]);
    };
  });
}
店舗名にクリックした際にクリック対象の店舗がGooglemapの中央に位置するようになり、吹き出しを表示させるように設定する。
   // 吹き出しの設定
    infoWindow[i] = new google.maps.InfoWindow({
      content: `<a id="shop_content${i}" href="shops/show?content=${markerData[i].title}&lat=${markerData[i].lat}&lng=${markerData[i].lng}" >${markerData[i].title}</a><br />`
    });
      markerEvent(i);
    }
  }
content=${markerData[i].title}&lat=${markerData[i].lat}&lng=${markerData[i].lng}" >${markerData[i].title}</a><br />`
吹き出しの中に、店舗名を表示させ、クリックした際にリンクとしてshopscontrollerのshowアクションを実行させ、店舗名と緯度経度をパラメーターとして引き渡す。
JSの前回から変わった点は正直これくらいです。
他はCSSを見やすいようにちょこっと変えたくらい。
本番までにはちゃんとしたCSSを設定をしっかり作りたい。
というわけで、次は投稿機能の解説。
の前に、上記の店舗検索から投稿機能までどういった流れで実装しているかをまず理解していただけたらと思います。
- 店舗検索を行い、口コミを確認するため吹き出しのリンクをクリック
- 店舗の名前、緯度経度をshop/showへ渡す
- 店舗情報と、店舗の口コミ一覧を表示
- 新規投稿へのリンク
- 新規投稿の実行
1.2は上記にて実装済みです。
次に3に関しても、正直そんな難しいことではないので今回の解説は割愛します。
ただ、ここで注意してほしいことは、4.5を行う際のアソシエーション関係です。
新規投稿を行う際に必要な情報は、postテーブルにデータを登録するのに必要なデータです。
つまり、schemaファイルに記載されている
content
image
user_id
shop_id
の4つです。
こちらのページはdeviceが実装前提ですので、user_idはcurrent_user.idを使用すれば問題はありません。
ただ、店舗情報はGooglePlaceから取得しており、DBに事前に全て入れているわけではないので、shopのIDは作られていません。
なのでどこかのタイミングでshop_createアクションを実施し、shop_idを作成しておかないと、新規投稿ができません。
私はここに作る前に「まぁどうにかなるやろ」と思って取り掛かり、綺麗なコードが思いつかずにゴリ押ししました。
パラメーターの引き渡し関連がどうも綺麗なコードを書けないのが一番の気にかかる場所であり
もし、こちらの記事を参考に何かを実装しようとしている方がいらっしゃいましたら、気をつけてください。
これはRail学習歴3ヶ月の人間が作ったものなので、間違いなく汚いコードです。
綺麗なやり方ではありませんのでご承知ください。
ということで、スラスラと言い訳は書けたので、そろそろ本題の解説を順序立てて説明します。
※先ほど記載した店舗検索から投稿機能までどういった流れです。
- 店舗検索を行い、口コミを確認するため吹き出しのリンクをクリック
- 店舗の名前、緯度経度をshop/showへ渡す
- 店舗情報と、店舗の口コミ一覧を表示
- 新規投稿へのリンク
- 新規投稿の実行
まず今までのコードで2までは終わって、次は3になります。
アクションとしては、shop/showが実行されます。
ここで、shop/showを確認してみましょう。
  def show
    @shop = Shop.new
    @name = params[:content]
    @lat = params[:lat]
    @lng = params[:lng]
    if Shop.find_by(name: @name, latitude: @lat, longitude: @lng)
      @shop_config = Shop.find_by(name: @name, latitude: @lat, longitude: @lng)
      if Post.find_by(shop_id:@shop_config.id)
        @posts = Post.where(shop_id:@shop_config.id)
      end
    end
  end
部分の解説になります。
    @name = params[:content]
    @lat = params[:lat]
    @lng = params[:lng]
こちらは、2から3にゴリ押しで渡された店舗名、緯度経度のパラメータを定義しています。
正直しなくてもいいかもしれませんが、私がわかりやすい。という理由でしています。
    if Shop.find_by(name: @name, latitude: @lat, longitude: @lng)
      @shop_config = Shop.find_by(name: @name, latitude: @lat, longitude: @lng)
      if Post.find_by(shop_id:@shop_config.id)
        @posts = Post.where(shop_id:@shop_config.id)
      end
    end
このポートフォリオは自分で作っておいてなんですが、嫌いなコードたくさんあります。
その中でもゴリ押しパラメーター渡しコードの次に嫌いなゴリ押しコードです。
一応、やっていることは簡単です。
if Shop.find_by(name: @name, latitude: @lat, longitude: @lng)
 @shop_config = Shop.find_by(name: @name, latitude: @lat, longitude: @lng)
で、この店舗名、緯度経度が一致するデータがShopテーブルに存在するかを検索しています。
店舗情報がない場合は、処理終了。
もし同様の店舗情報があった場合は、それを@shop_configに代入しております。
そして、そのまま次の処理へ。
if Post.find_by(shop_id:@shop_config.id)
 @posts = Post.where(shop_id:@shop_config.id)
店舗情報がある場合、かつ店舗に対する投稿があった場合は全てを@postsに入れるだけ。
ここまでで重要なのは、@shop_configに情報が入っているかどうか。
単純に、@shop_configに情報が入っていれば、店舗情報がShopテーブルに情報があり、入っていなければ情報はない。
これを条件とすれば、次のshowページのように分岐を使って店舗情報を登録するかどうかを判断できます。
  <% if @shop_config.nil? %>
    <td><%= link_to '投稿する(shop)',shops_path(shop: {name:@name, latitude:@lat, longitude:@lng}), method: :post %></td>
  <% else %>
    <td><%= link_to '投稿する(post)',new_post_path(shop: {shop_id:@shop_config.id ,name:@name, latitude:@lat, longitude:@lng})%></td>
<% end %>
こちらもゴリ押し。マジでゴリ押し。
@shop_configがnilかどうかを判断させることで
- shop/createへ店舗名、緯度経度をパラメーターとして送る
- post/newへshop_id、店舗名、緯度経度をパラメーターとして送る
の分岐を作成しています。
(”投稿する”の後のshop,postはわかりやすくするために記載しているので、もし使用する場合は消してください)
注意点としましては、shop/createで飛んだ後にブラウザバックをしてこのページに戻り、再度際にshop/createを押した場合は当たり前ですがエラーが起こります。
明確な対策は思いつかないので、現在は例外処理を検討してます。
上記のコードで分岐になりますが、まずは店舗情報がなく、shop/createに飛んだ場合。
つまり、この時点で店舗情報を保存して、shop_idを作成する。
class ShopsController < ApplicationController

  def create
    @shop = Shop.new(shop_params)
    shop = params[:shop]
    respond_to do |format|
      if @shop.save
        format.html { redirect_to controller: :posts, action: :new ,shop: {shop_id:@shop.id ,name:shop[:name], latitude:shop[:latitude], longitude:shop[:longitude]}}
      else
        format.html { render :show}
      end
    end
  end
これもゴリ押し!
ここまでこれば、大体今までの繰り返し。
shop = params[:shop]
これは正直いらないかもしれませんが、定義した方が個人的にやりやすかっただけです。
          if @shop.save
        format.html { redirect_to controller: :posts, action: :new ,shop: {shop_id:@shop.id ,name:shop[:name], latitude:shop[:latitude], longitude:shop[:longitude]}}
      else
        format.html { render :show}
      end
これが今回のゴリ押しポイント。
どうすれば短くできるか3ヶ月の頭では全然思いつきませんでした。
やっていることは今まで同じなのでそろそろ割愛。と言いたいですが、ここでポイントが一つ。
今回、ゴリ押しでパラメーターを送っている場所はpost/newです。
つまり、先ほどの分岐の
- shop/createへ店舗名、緯度経度をパラメーターとして送る
- post/newへshop_id、店舗名、緯度経度をパラメーターとして送る ←ここに送るだけです
post/newへshop_id、店舗名、緯度経度をパラメーターとして送る場合ということで、コードはそんな変なことはしていません。
<%= form_with(model: post) do |form| %>
  <% if post.errors.any? %>
    <div id="error_explanation">
      <h2><%= pluralize(post.errors.count, "error") %> prohibited this post from being saved:</h2>

      <ul>
        <% post.errors.each do |error| %>
          <li><%= error.full_message %></li>
        <% end %>
      </ul>
    </div>
  <% end %>

  <td><%= @shop[:shop_id] %></td>
  <td><%= @shop[:name] %></td>
  <td><%= @shop[:latitude] %></td>
  <td><%= @shop[:longitude] %></td>

  <%= form.hidden_field :shop_id, :value => @shop[:shop_id] %>

  <div class="field">
    <%= form.label :content %>
    <%= form.text_field :content %>
  </div>

<div class="field">
  <%= form.label :image %>
  <%= form.file_field :image %>
  </div>

  <div class="actions">
    <%= form.submit %>
  </div>
<% end %>
<h1>New Post</h1>

<%= render 'form', post: @post %>

<%= link_to 'Back', posts_path %>
scaffoldで作ったところなので、ほぼテンプレートです。
なので、解説するところは一箇所だけです。
<%= form.hidden_field :shop_id, :value => @shop[:shop_id] %>
submitを押した場合にパラメーターとしてshop_idにうまく嵌めるためにこちらのコードを設定しております。
もうちょい綺麗な形はありそうな気もしなくはないけど、ここはこれでいい気がしています。
というか、今までが雑な引き渡しばかりだったので、いざ登録となると自由度が低いような気がする。
Railsはしっかりルールが決まっているはずなので、ここまでのパラメーターの引き渡し方法は本来から外れたやり方でしたでしょうしね・・・
といったところで、今回の雑解説は終わりです。
ちなみに、このまま編集、削除機能を作成したらエラー吐きまくっているので、むしろ綺麗なコード本当に教えてほしいです。
このままだと雑なコードでゴリ押しする野蛮人ができちまう・・・
次回は”ユーザーから店舗へ「気になる」機能”、”ユーザー間のフォロー機能”、”投稿へのいいね機能”くらいを考えております。
いうてここら辺はもう山ほど記事はありそうですし、私より丁寧に書いている方は山ほどいるでしょうから正直あまり書く気はありません。
時間に余裕があれば。程度です。
[追記] 2022/12/5
いくつか変な書き方をしていることが分かりましたので、近日中に修正版+いくつか機能を追加したVerを投稿します。
もし、こちらの記事を参考にしている!という方がいらっしゃいましたら、変な記載方法がいくつかありますが、投稿までは自分で修正してみてね!コードリーディングって事にしておいて!