まずはじめに、現状ではNuxt2でPWAはうまくいきませんのでご注意を。
今回、開発環境は Docker for Mac、本番環境は Heroku を想定しています。
WindowsでVagrant上にDockerを立てる場合はローカルでは別途設定、オプション追加、パスの追加指定が必要となります。
まずは初期ディレクトリ、初期ファイルを作成します。
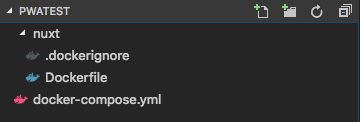
pwatest/nuxt/Dockerfile
FROM node:9

RUN mkdir -p /nuxt
COPY . /nuxt
WORKDIR /nuxt

RUN npm uninstall -g yarn && \
    npm install -g yarn && \
    chmod u+x /usr/local/bin/yarn && \
    yarn global add nuxt vue-cli create-nuxt-app

ENV HOST 0.0.0.0
EXPOSE 3000
pwatest/nuxt/.dockerignore
node_modules
.nuxt
npm-debug.log
package-lock.json
pwatest/docker-compose.yml
version: '3'
services:
  nuxt:
    build: ./nuxt
    command: yarn dev
    volumes:
      - ./nuxt:/nuxt
    ports:
      - '3000:3000'
ターミナルで作業していきます。
# docker-compose.ymlのあるディレクトリに移動
$ cd pwatest

# コンテナを起動してNuxt.jsプロジェクトの初期化
$ docker-compose run nuxt yarn create nuxt-app
対話形式で質問に答えていきます。
下記は一例です。適当でも大丈夫です。
? Project name (enter)
? Project description (enter)
? Use a custom server framework (express)
? Use a custom UI framework (bulma)
? Choose rendering mode (Universal)
? Use axios module (yes)
? Use eslint (no)
? Author name (enter)
? Choose a package manager (yarn)
# PWAモジュールのインストール
$ docker-compose run nuxt yarn add @nuxtjs/pwa
ファイルを編集します。
pwatest/nuxt/nuxt.config.js
  modules: [
+   '@nuxtjs/pwa'
  ],
+ workbox: {
+   dev: true
+ },
pwatest/nuxt/Dockerfile
FROM node:9

RUN mkdir -p /nuxt
COPY . /nuxt
WORKDIR /nuxt

RUN npm uninstall -g yarn && \
    npm install -g yarn && \
    chmod u+x /usr/local/bin/yarn && \
-    yarn global add nuxt vue-cli create-nuxt-app
+    yarn global add nuxt vue-cli create-nuxt-app && \
+    yarn install && \
+    yarn build

ENV HOST 0.0.0.0
EXPOSE 3000
+ CMD ["yarn", "start"]
ターミナルで作業します。
# Nuxtアプリのビルド
$ docker-compose run nuxt yarn run build

# Docker imageのビルド
$ docker-comose build nuxt

# heroku-cliのインストール
$ brew install heroku/brew/heroku

# herokuにログイン
$ heroku login

# コンテナ用のプラグインを追加
$ heroku plugins:install heroku-container-registry

# コンテナにログイン
$ heroku container:login

# アプリの作成(作成されたアプリ名称を控えておく)
$ heroku create

# Nuxtプロジェクトのディレクトリに移動
$ cd nuxt/

# コンテナをデプロイ
$ heroku container:push web -a {your_heroku_app_name}

# コンテナのリリース(2回目以降のデプロイの場合)
$ heroku container:release web -a {your_heroku_app_name}

# ブラウザで確認
$ heroku open -a {your_heroku_app_name}
以上でPWAの作成完了です。
スマートフォンでアクセスしてホームに追加すると、次回以降はブラウザではなくPWAとして起動します。