この記事は「Xamarin Advent Calendar 2015 - Qiita」の10日目の記事です。
内容
Android/iOSだけではなく、Windows Desktop/OSXまで含んだクロスプラットフォーム開発をこんな風にやってます!
という話を、単純なサンプルアプリの作成を例にしてお届けします。
必要なもの
- Visula Studio 2015
- Xamarin Studio
- Xamarin.Mac/Android/iOSのBusiness License
フレームワーク
必須というわけではないですが、
以下のフレームワークにお世話になっております。
ReactiveProperty
ViewModel(に限らないですが)をReactiveにいろいろ書けるようになります。
Xamarin.Macでも動きます!
MVVMLight
Messengerパターンを使うためだけに利用しています。
比較的ViewModelに対する要求が大きい(ViewModelBaseを継承しないといけない)ので、
ほかの軽量フレームワークがあればそれに乗り換えてもいいかな、とも思います。
ちなみに、本記事の範囲では一切出てきません。
Xamarin.Macでも動きます!
PropertyListener
フレームワークではないですが、非常に便利です。ありがとうございます。
Xamarin.Macにおけるオレオレバインディング処理に利用させていただいてます。
速度については現状気になっていません。
つくったもの
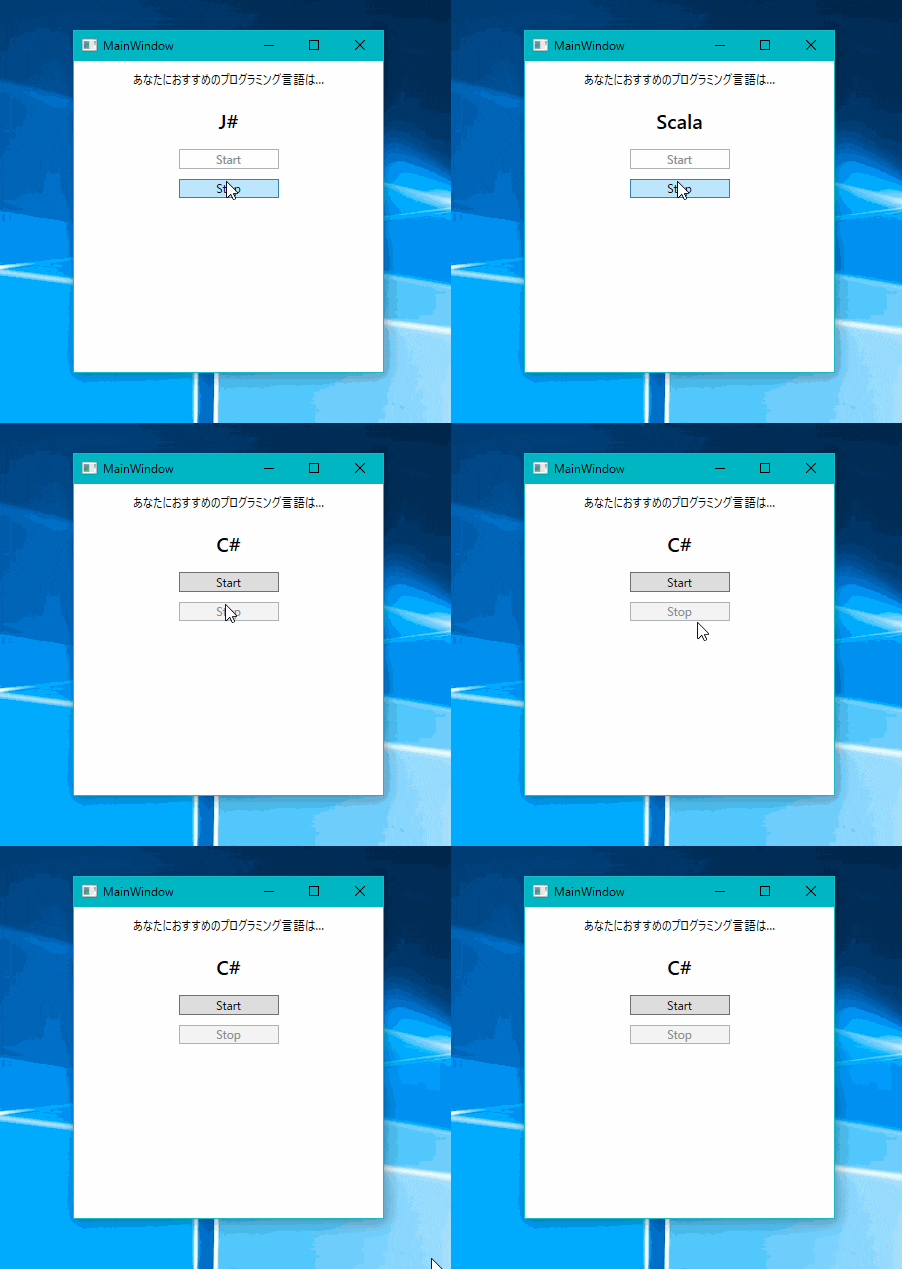
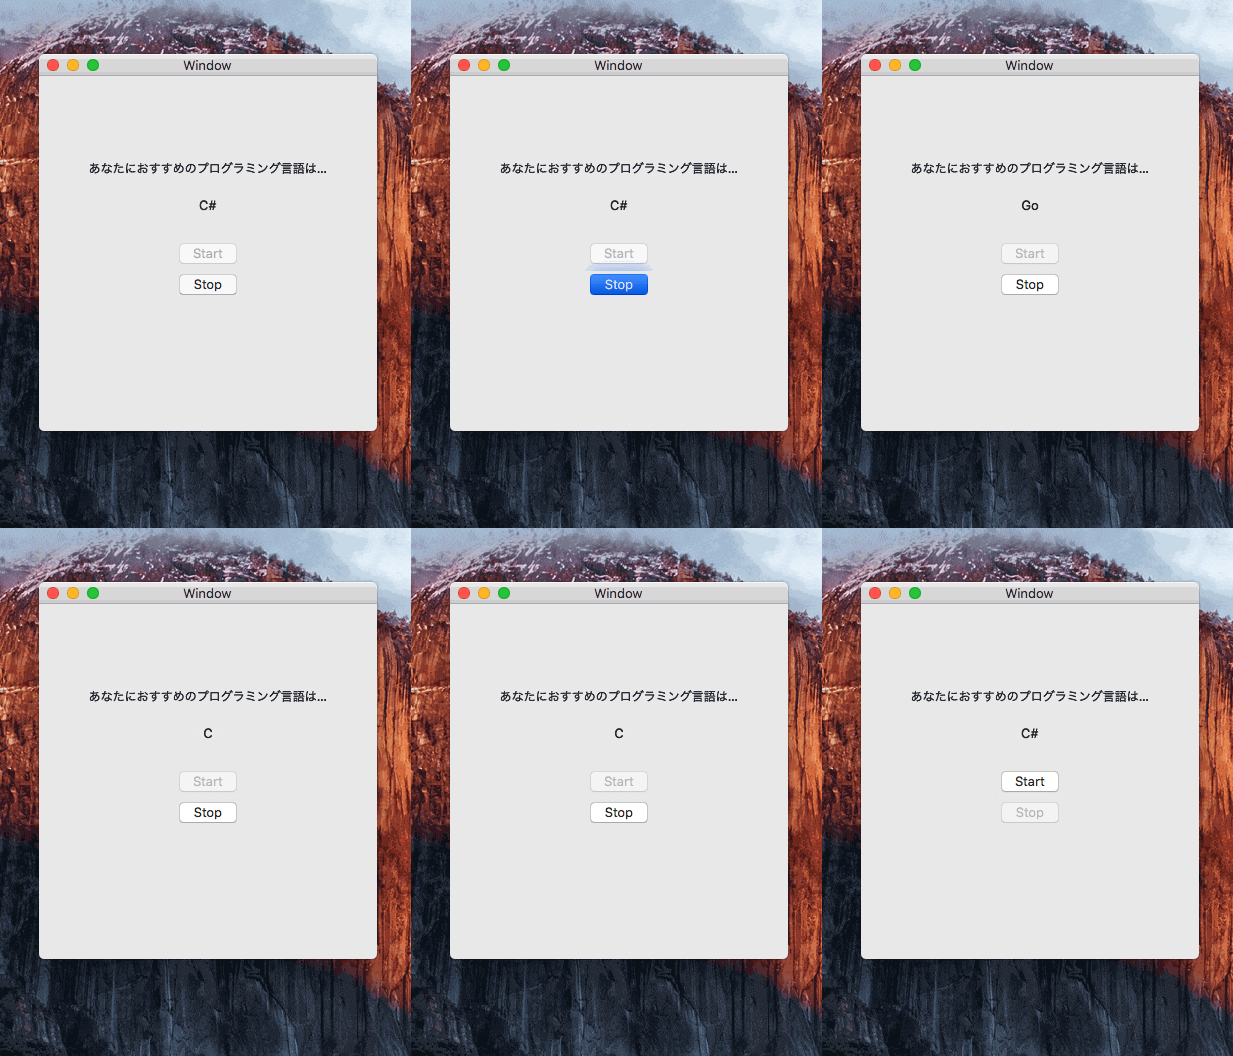
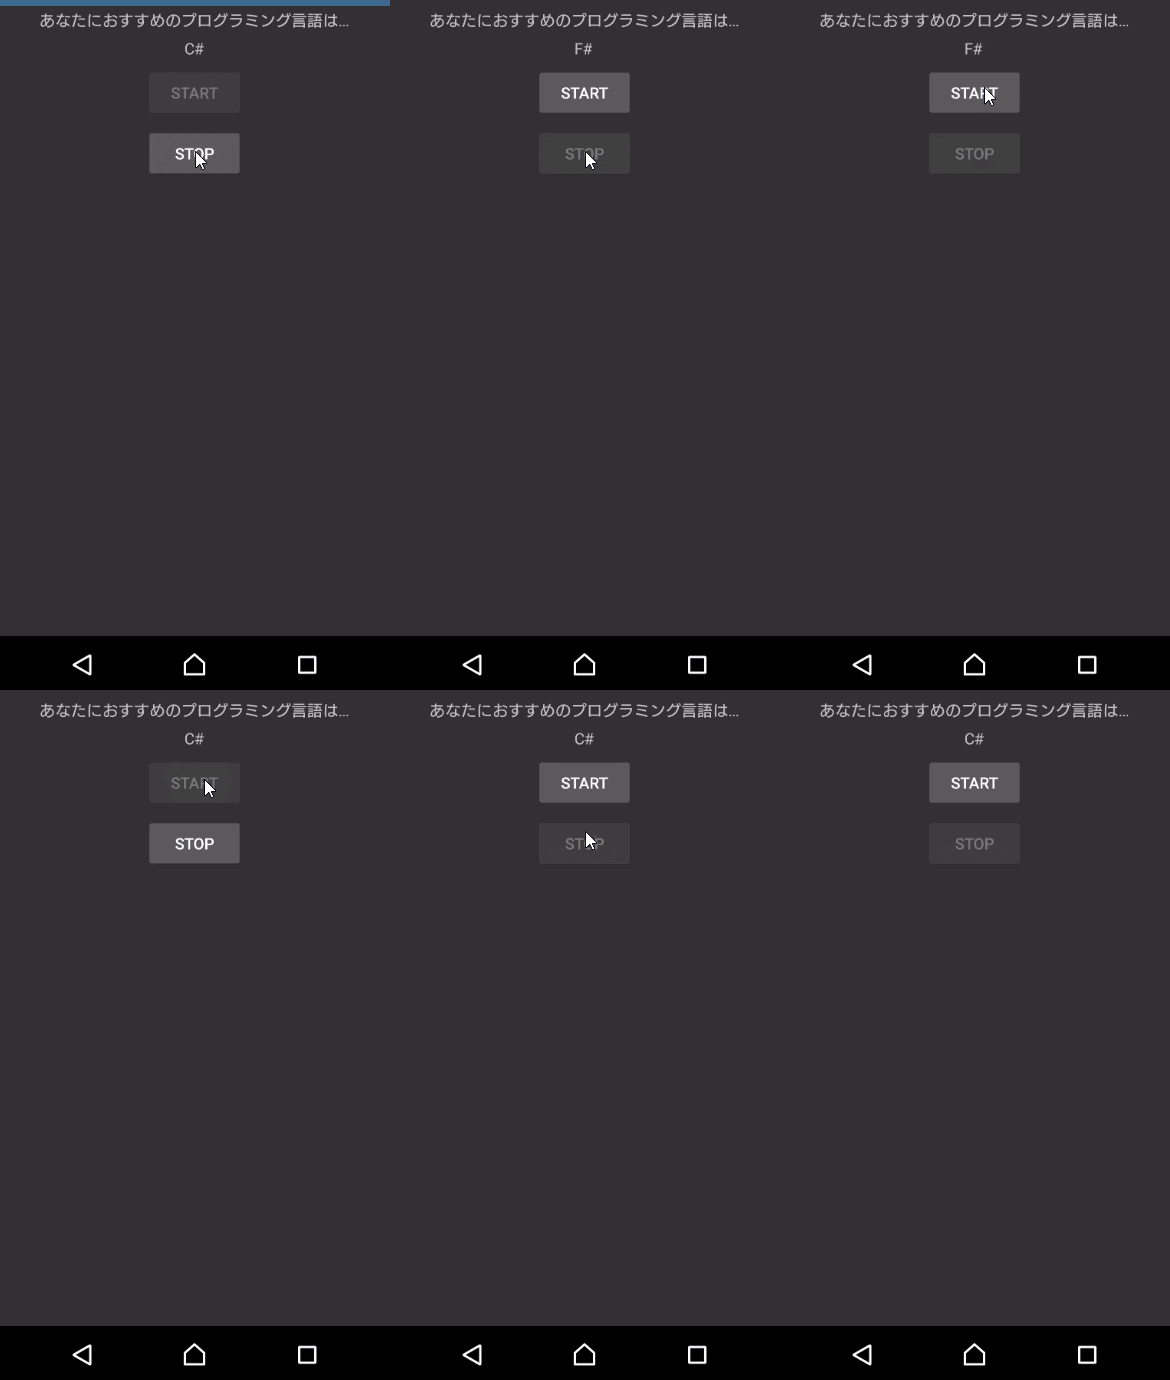
「あなたにおすすめのプログラミング言語」を公正な立場からジャッジしてくれるアプリケーションを作成しました。
Windows(WPF)
OSX
Android/iOS
Xamarin.Formsを使用しています。
Android版のみ今回ビルドしましたが、iOSでもきっと動くはずです1。
では、以下に作業手順を示します。
開発します
0.まずプロジェクト作成
以下のような構成でプロジェクトを作成しました。
- ModelやViewModelを実装するプロジェクト(全環境むけ。PCLでもSharedでもお好きなものを)
- WPFプロジェクト(Windowsむけ)
- Xamarin.Macプロジェクト(OSXむけ)
- Xamarin.Formsプロジェクト(Android/iOSむけ)
- 言語リソースを格納するプロジェクト(全環境むけ。PCLでよいでしょう)
都合に合わせて作成してください。
1.Modelの実装
ルーレットを実行するモデルです。Dispose処理等は省略しています。
非常に公平にジャッジしてくれることがお分かりいただけるかと思います。
    class Roulette : IRoulette, IDisposable
    {
        private Subject<bool> IsProcessing { get; }
        private CompositeDisposable Disposables { get; } = new CompositeDisposable();
        private IReadOnlyCollection<string> Items { get; } = new[]
        {
            "C",
            "C++",
            "Java",
            "Scala",
            "Go",
            "J#",
            "F#",
            "C#",
            "C#",
            "C#",
            "C#",
            "C#",
            "C#",
            "C#",
        };

        public Roulette()
        {
            this.IsProcessing = new Subject<bool>().AddTo(this.Disposables);
            this.StartEvent = new Subject<Unit>().AddTo(this.Disposables);
            this.StopEvent = new Subject<Unit>().AddTo(this.Disposables);
            var random = new Random();
            this.ObservableValue = Observable.Timer(DateTimeOffset.Now, TimeSpan.FromMilliseconds(100))
                .SkipUntil(StartEvent.Do(_ => IsProcessing.OnNext(true)))
                .TakeUntil(StopEvent.Do(_ => IsProcessing.OnNext(false)))
                .Select(value => Items.ElementAt(random.Next(0, Items.Count)))
                .Repeat();
        }

        public IObservable<string> ObservableValue { get; }

        IObservable<bool> IRoulette.IsProcessing => this.IsProcessing;

        public void Start()
        {
            this.StartEvent.OnNext(Unit.Default);
        }

        public void Stop()
        {
            this.StopEvent.OnNext(Unit.Default);
        }
        // 略
    }
Startメソッドコール後、Stopメソッドが呼ばれるまでObservableValueに文字列を発行し続けるだけの単純なクラスです。
状態を示すIObservableと、Start/Stopメソッドのみをインタフェースとして提供しています。
2.ViewModelの実装
1画面しかないアプリなので、ViewModelも1つだけ。
    public class MainViewModel : ViewModelBase, IDisposable
    {
        private CompositeDisposable Disposables { get; } = new CompositeDisposable();
        private ReactiveCommand _StartCommand { get; }
        private ReactiveCommand _StopCommand { get; }
        public MainViewModel(IRoulette roulette)
        {
            roulette.AddTo(this.Disposables);

            this.Roulette = roulette.ObservableValue.ToReadOnlyReactiveProperty().AddTo(this.Disposables);
            this._StopCommand = roulette.IsProcessing.ToReactiveCommand(false).AddTo(this.Disposables);
            this._StartCommand = roulette.IsProcessing.Select(processing => !processing).ToReactiveCommand(true).AddTo(this.Disposables);
            this._StartCommand.Subscribe(_ => roulette.Start()).AddTo(this.Disposables);
            this._StopCommand.Subscribe(_ => roulette.Stop()).AddTo(this.Disposables);
        }

        public ReadOnlyReactiveProperty<string> Roulette { get; }
        public ICommand StartCommand => _StartCommand;
        public ICommand StopCommand => _StopCommand;
    }
ユーザ操作をICommandで受け付け、それに基づいたRouletteクラスに対するメソッドの呼び出しと、
状態の表示を行うプロパティの提供のみを行います。
3.Viewの実装
ここではじめて、各プラットフォーム固有の実装を行います。
やることは、UIの定義と、ViewModelに対する各種バインディングのみです。
WPF
なんの変哲もないMainWindow.xamlです。Rouletteプロパティをテキストボックスに、各コマンドをボタンにバインドしています。
ちなみに言語リソース(Resources)は別アセンブリから引っ張ってきています。
<Window x:Class="SampleApp.MainWindow"
        xmlns="http://schemas.microsoft.com/winfx/2006/xaml/presentation"
        xmlns:x="http://schemas.microsoft.com/winfx/2006/xaml"
        xmlns:d="http://schemas.microsoft.com/expression/blend/2008"
        xmlns:mc="http://schemas.openxmlformats.org/markup-compatibility/2006"
        xmlns:local="clr-namespace:SampleApp"
        xmlns:Resources="clr-namespace:SampleApp.Resources.Properties;assembly=SampleApp.Resources"
        mc:Ignorable="d"
        Title="MainWindow" Height="350" Width="325">
    <Grid>
        <StackPanel>
            <Label Content="{x:Static Resources:Resources.Roulette_Title}" HorizontalAlignment="Center" Margin="5"/>
            <TextBlock Text="{Binding Roulette.Value}" Margin="10" FontSize="20" FontWeight="Bold" HorizontalAlignment="Center"/>
            <Button Content="Start" Command="{Binding StartCommand}" Margin="5" Width="100"/>
            <Button Content="Stop" Command="{Binding StopCommand}" Margin="5" Width="100"/>
        </StackPanel>
    </Grid>
</Window>
OSX
次にOSX向けにViewを実装します。
一番気が重い作業です。
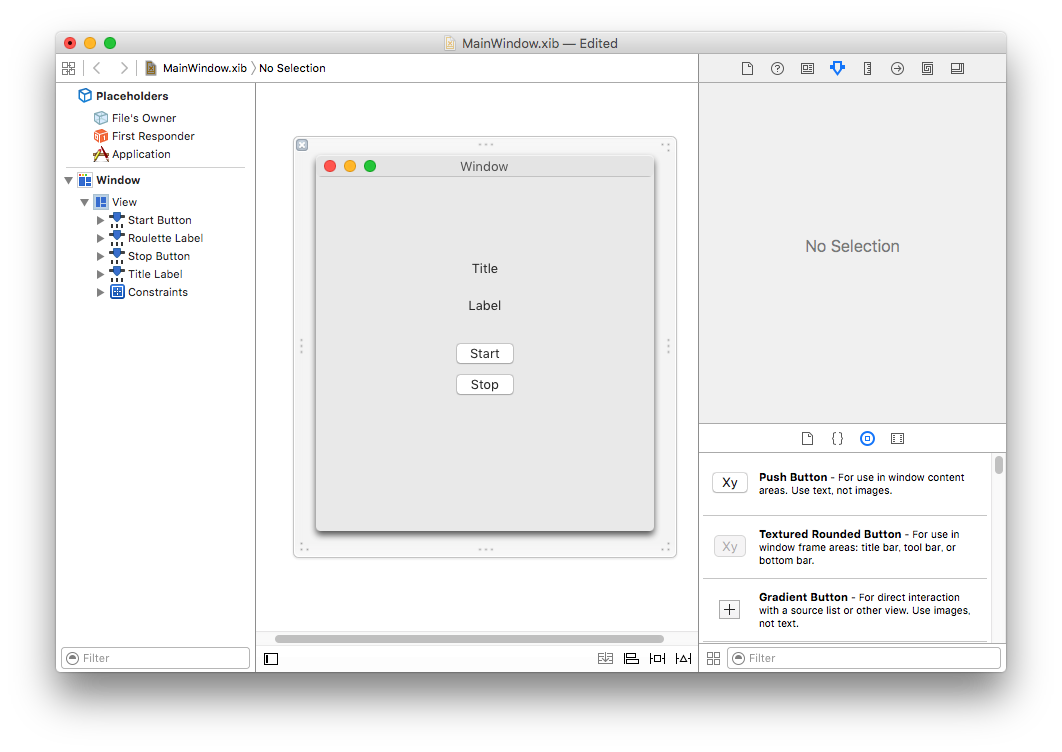
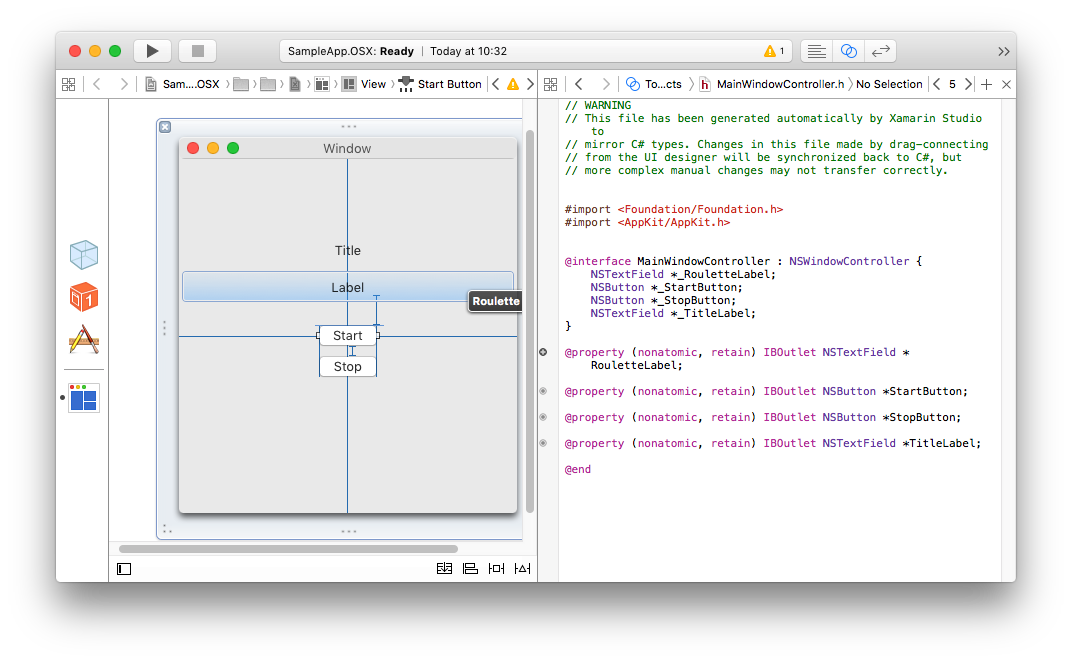
まずXCodeでビュー作成
ControlをOutletに接続
バインド定義を記述
ここまでで、WindowControllerから、Window内のコントロールやViewを触れるようになりました。
次は、WindowControllerの初期化処理内で、ViewのコントロールをViewModelのプロパティにバインドします。
AwakeFromNib
AwakeFromNibメソッド内でバインドを行います。
以下のコードで、なんとなくバインドしてる感を感じていただけるかと思います。
public override void AwakeFromNib()
{
    base.AwakeFromNib();

    this.TitleLabel.StringValue = Resources.Properties.Resources.Roulette_Title;
    BindingUtils.BindTextField(this, this.ViewModel, vm => vm.Roulette.Value, v => v.RouletteLabel).AddTo(this.Disposables);
    BindingUtils.BindCommand(this, this.ViewModel, vm => vm.StartCommand, v => v.StartButton).AddTo(this.Disposables);
    BindingUtils.BindCommand(this, this.ViewModel, vm => vm.StopCommand, v => v.StopButton).AddTo(this.Disposables);
}
バインディング処理の中身
NSTextFieldに対する値のバインド
public static IDisposable BindTextField<TController, TViewModel>(
    TController controller,
    TViewModel viewModel,
    Expression<Func<TViewModel, object>> displayMemberProperty,
    Expression<Func<TController, NSTextField>> textFieldProperty,
    ICommonValueConverter valueConverter = null
)
{
    var disposables = new CompositeDisposable();
    var textField = textFieldProperty.Compile().Invoke(controller);
    var listener = new PropertyListener<TViewModel>(viewModel).AddTo(disposables);
    var displayMemberPropertyCompiled = displayMemberProperty.Compile();
    textField.StringValue = GetPropertyValueConverted(displayMemberPropertyCompiled, viewModel, valueConverter);

    listener.RegisterHandler(displayMemberProperty, () =>
    {
        textField.StringValue = GetPropertyValueConverted(displayMemberPropertyCompiled, viewModel, valueConverter);
    });

    textField.ChangedAsObservable().Subscribe(_ =>
    {
        displayMemberProperty.SetPropertyValue(viewModel, valueConverter != null ? valueConverter.ConvertBack(textField.StringValue, typeof(object), null, CultureInfo.CurrentCulture) : textField.StringValue);
    }).AddTo(disposables);

    return disposables;
}
ViewModel側のプロパティの変更があった場合には、コントロールに反映させます。
反対に、NSTextFieldの内容が変更された場合も、プロパティに値をセットします。
プロパティの変更検知はPropertyListenerを使用しています。
NSButtonに対するコマンドのバインド
public static IDisposable BindCommand<TController, TViewModel>(
    TController controller,
    TViewModel viewModel,
    Expression<Func<TViewModel, ICommand>> commandProperty,
    Expression<Func<TController, NSControl>> buttonProperty)
{
    var disposables = new CompositeDisposable();
    var target = buttonProperty.Compile ().Invoke (controller);
    var command = commandProperty.Compile ().Invoke (viewModel);

    target.ActivatedAsObservable().Subscribe(_ => command.Execute(null)).AddTo(disposables);
    Observable.FromEventPattern(command, "CanExecuteChanged").Subscribe(x => target.Enabled = command.CanExecute(null)).AddTo(disposables);
    return disposables;
}
ICommandのCanExecuteChangedイベントを検知し、コントロールの状態(Enable/Disable)に反映させます。
コントロールクリック時(Activatedイベント発火時)に、ICommandをexecuteします。
以上でOSX向けの実装は終了です。
Android/iOS
最後に、モバイル向けのViewを実装します。
とっても便利なのでXamarin.Formsを使用します。
WPFのXAMLとほぼ同じ感覚で書けて幸せ。外部アセンブリからのリソースの読み込みもできちゃいます。
<?xml version="1.0" encoding="utf-8" ?>
<ContentPage xmlns="http://xamarin.com/schemas/2014/forms"
             xmlns:x="http://schemas.microsoft.com/winfx/2009/xaml"
             x:Class="SampleApp.Mobile.MainPage"
             xmlns:Resources="clr-namespace:SampleApp.Resources.Properties;assembly=SampleApp.Resources"
             >
  <Grid Padding="10">
    <Grid.RowDefinitions>
      <RowDefinition Height="auto"/>
      <RowDefinition Height="auto"/>
      <RowDefinition Height="auto"/>
      <RowDefinition Height="auto"/>
    </Grid.RowDefinitions>
  	<Label Text="{x:Static Resources:Resources.Roulette_Title}" VerticalOptions="Center" HorizontalOptions="Center" />
  	<Label Text="{Binding Roulette.Value}" VerticalOptions="Center" HorizontalOptions="Center" Grid.Row="1"/>
    <Button Text="Start" Command="{Binding StartCommand}" Grid.Row="2" HorizontalOptions="Center"/>
    <Button Text="Stop" Command="{Binding StopCommand}" Grid.Row="3" HorizontalOptions="Center"/>
  </Grid>
</ContentPage>
ほとんどWindows向けのXAMLと同様の記述ができていますね。
これだけです。
4.完成!!
やったね!
所感
Model~ViewModelのレイヤーまでは、最強のIDEであるVisualStudio2を使って実装を詰められます。
それが何より素晴らしいですね。
またViewも、WPF/Xamarin.FormsについてはXAMLでガシガシかけるので非常にスムーズに開発が可能です。
Xamarin.FormsのXAMLもだいぶ書きやすくなってきました。
ところが、OSXについてはデータバインディングの内部処理(BindingUtils.BindXXX系)を自身で定義する必要があります3ので、最初のほうは辛かったです。
ただし、一通り必要なバインディング内部処理を書いてしまえば、非常に少ない工数でOSX向けのViewも定義することができます!
あー幸せ!
書けなかったこと
デスクトップ/モバイルアプリのクロスプラットフォーム開発においては、
ダイアログなどによるユーザへの通知や、
画面遷移処理の抽象化がViewModelにおいて不可欠です。
また、デスクトップアプリに搭載している全機能が
モバイルにおいて必要になることも考えにくいですし、
そもそも画面の動線や表示内容が異なることもあるでしょう。
そのあたりをどう折り合いをつけているかは、
追々記事にできればと思っています。4
ほかにも、VisualStudio/C#は、ネイティブライブラリ呼び出しを伴う開発が
デバッグ面でも非常に快適なので、その点についてもそのうち書ければと思います。
まとめ
以上、非常にざっくりとではありますが、
私自身が行っている、Xamarinを使ったクロスプラットフォーム開発の流れを紹介させていただきました。
各プラットフォーム固有の実装はあまり多くない!幸せそう!
ということがわかっていただけたかと思います。
ソースコード
あ、あとで配置して更新します。
