主に C++ を使ってた人が Scala を学ぶシリーズ。
Scala で pgm 形式画像を作成・保存するサンプルコードです。
準備
今回のコードではファイルの入出力を行うために外部ライブラリを使用します。そのためにライブラリ参照情報を含む sbt ファイルを作成します。
作業ディレクトリに "build.sbt" という名前のテキストファイルを作って下記のように編集します。
libraryDependencies ++= Seq(
  "org.scalaforge" % "scalax" % "0.1",
  "com.github.scala-incubator.io" % "scala-io-core_2.10" % "0.4.3",
  "com.github.scala-incubator.io" % "scala-io-file_2.10" % "0.4.3"
)
(パッケージの最新バージョン等はここのサイトから調べられます。 http://mvnrepository.com/)
sbt ファイルに記載されたライブラリを読み込んだ状態でインタプリタを起動するには、 sbt console コマンドを使用します。(注: sbt のインストールは→ http://www.scala-sbt.org/index.html)
このとき、
> sbt ~console
という風に console の頭に ~ をつけて起動すると、 :quit のたびにソースを自動コンパイルしてくれるようになります。ソースファイルを少しずつ変更しながらコーディングしたいときに便利です。
コード
"build.sbt" と同じフォルダに下記のようなファイルを作成します。
import scalax.file.Path
import scala.util.Random

// 2次元画像クラス
class Image2D(width: Int, height: Int) {

	// Int に Pixel という別名をつける
	type Pixel = Int

	// pixel data
	val mPixel = new Array[Pixel](width * height)

	// getter
	def get(x: Int, y: Int) = {
		mPixel(x + y * width)
	}

	// setter
	def set(x: Int, y: Int, value: Pixel): Unit = {
		mPixel(x + y * width) = value
	}

	// 画像にランダム値をセットする
	def setRandom(): Unit = {

		// scala.Util.Random インスタンス作成
		var r = new Random
		r.setSeed(1234)

		for(y <- 0 to height - 1) {
			for(x <- 0 to width - 1) {
				// ピクセルに [0-255] のランダム値をセット
				set(x, y, r.nextInt(256))
			}
		}
	}

  // pgm 形式で画像をファイル出力
  def saveAsPgm(name: String): Unit = {

	// pgm 画像ヘッダ情報
	var s = "P2\n"
	s += "%d %d\n".format(width, height)
	s += "255\n\n"

	// ピクセル情報
	for(y <- 0 to height - 1) {
		for(x <- 0 to width - 1) {
			s += " %d".format(get(x, y))
		}
		s += "\n"
	}

	var path = Path(name + ".pgm")
	// 既存ファイルを削除
	path.delete()
	// 新規ファイル作成
	path.createFile()
	// 画像情報をファイルに書き込む
	path.write(s)
  }
}
Image2D はシンプルな画像コンテナです。メンバ関数としてランダムな画像を生成する setRandom, 画像情報を pgm 形式画像として出力する saveAsPgm 関数を持っています。
Scala インタプリタがすでに起動しているなら :quit, 起動していないなら sbt ~console を実行すると "Image2D.scala" が自動的にコンパイルされます。
scala> var img = new Image2D(256, 256)
scala> img.setRandom()
scala> img.saveAsPgm("out")
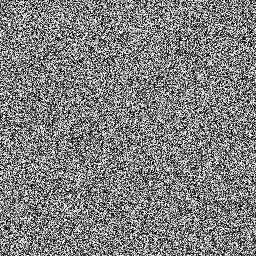
上記コマンドをインタプリタで実行すると、作業ディレクトリに "out.pgm" というファイルが作成されます。
"out.pgm" を irfanview など pgm 形式対応の画像ビューワで開いたとき、テレビのノイズのような画像が出力されていれば成功です。
*PGM ファイルとはテキスト形式のシンプルな画像フォーマットです。フォーマットは以下のような感じです。
P2         <== 画像形式(この場合グレースケール画像)
256 256    <== 画像の [幅 高さ]
255        <== 最大画素値

// *** 以下は [幅 × 高] 個のピクセル情報 ***
165 66 243 60 219 81 117 140 86 23 52 3 88...
補足
Image2D クラスに対応するクラスを cpp で書くとだいたい↓のような感じだと思います(コンパイルは通ったけど動作未確認)。
# include <sstream>
# include <vector>
# include <random>
# include <cstdio>

// 2次元画像クラス
class Image2D {

public:
	// Int に Pixel という別名をつける
	typedef int Pixel;

	Image2D(int _width, int _height)
		: width(_width),
		height(_height)
	{
		mPixel.resize(width * height);
	}

	// getter
	const Pixel& get(int x, int y) const { return mPixel[x + y * width]; }

	// setter
	void set(int x, int y, Pixel value) { mPixel[x + y * width] = value; }

	// 画像にランダム値をセットする
	void setRandom()
	{
		std::mt19937 mt(1234);
		std::uniform_int_distribution<Pixel> rand(0, 255);

		for(int y = 0; y < height; ++y)
		{
			for(int x = 0; x < width; ++x)
			{
				// ピクセルに [0-255] のランダム値をセット
				set(x, y, rand(mt));
			}
		}
	}

	// pgm 形式で画像をファイル出力
	void saveAsPgm(const std::string& name)
	{
		std::stringstream s;

		// pgm 画像ヘッダ情報
		s << "P2\n";
		s << width << " " << height;
		s << "255\n\n";

		// ピクセル情報
		for(int y = 0; y < height; ++y)
		{
			for(int x = 0; x < width; ++x)
			{
				s << " " << get(x, y);
			}
			s << "\n";
		}

		std::string path = name + ".pgm";

		// 既存ファイルを削除
		remove(path.c_str());

		// 新規ファイル作成
		FILE* file = fopen(path.c_str(), "wt");

		// 画像情報をファイルに書き込む
		fprintf(file, s.str().c_str());

	}

private:

	int width;
	int height;

	// pixel data
	std::vector<Pixel> mPixel;
};