New Version(Swift3)
偉そうにこんな記事書いていましたが、snakayama さんがSNDrawという素晴らしいライブラリを作っていたので、それに乗っけてライブラリ化して、Carthageで公開しました。
リポジトリ:ha1f/SNDrawableView
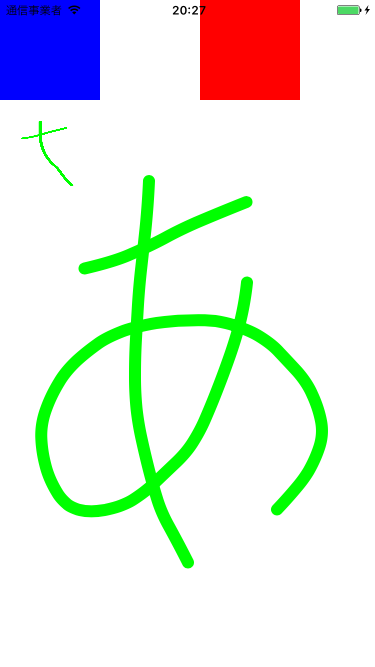
サンプルを実行するとこんな感じになります。
SNDrawについて
iOS Developers JAPANというFacebookグループで、以前snakayama さんご本人が紹介されていたライブラリです。
この記事で僕の書いていた拙作と違い、曲線を補間してくれます。すごい。
上のスクショを見ても、曲線がなめらかなのがわかると思います(下にある旧verのスクショに比べて)
SNDrawableView
SNDrawをラップして、Viewにしました。そのついでに、undoなどを追加しました。
ただお絵かき機能を入れたいぐらいなら十分だと思います。
ほぼSatoshi Nakajimaさんのライブラリで、それをラップしただけなので、イニシャルになっているprefixをそのまま残しました。
Carthageでインストールすることができます
github "ha1fha1f/SNDrawableView"
使い方は、
- Carthage周りを準備(フレームワークの追加など)
- storyboardでUIViewを配置
- 配置したUIViewのクラスをDrawableViewにする
だけで描けるようになります。その他プロパティはリポジトリha1fha1f/SNDrawableViewのREADMEに記載してあります
// 設定項目
.lineColor: CGColor
.lineWidth: CGFloat
.numberOfQueuesToUndo: Int

// メソッド
.clear()
.redo()
.undo()
.getImage() -> UIImage!
だいたい名前の通りだと思います。 numberOfQueuesToUndo はundoで戻れる上限を示します。
PRもお待ちしております。
********以下は旧記事です********
概要
iOSで手書き入力を受付け、そのまま表示するプログラムです。
最近の記事で書いてあるのを見たことがなかったので。
CoreGraphicsを用いています。
(2015/11/2 undo機能などを追加し、大幅にコードを修正しました)
完成品 → https://github.com/ha1fha1f/paintPallet

この実装では、今後の使い回しのために、メインのViewControllerの上に、自分で描くことのできるビューを全画面にして載せている実装にしています。
まずcontextに描く
CoreGraphics
CG〜〜で始まるものはCoreGraphicsの略で、C言語で実装されているらしく、呼び出しはやや煩雑ですが高速に動作するようです。
最近は更に高速なMetalというのが出たらしい?ので今度使ってみます
サンプルコード
import UIKit

class ViewController: UIViewController {

    var drawableView: DrawableView! = nil

    override func viewDidLoad() {
        super.viewDidLoad()

        self.view.backgroundColor = UIColor.blackColor()

        if drawableView == nil {
            drawableView = DrawableView(frame: CGRectMake(0, 100, self.view.bounds.width, self.view.bounds.width))
            drawableView.backgroundColor = UIColor.whiteColor()
            self.view.addSubview(drawableView)
        }
    }
}
mainのviewの上に、DrawableViewを乗せているだけです。
import UIKit

class DrawableView: UIView {

    class Line {
        var points: [CGPoint]
        var color :CGColorRef
        var width: CGFloat

        init(color: CGColorRef, width: CGFloat){
            self.color = color
            self.width = width
            self.points = []
        }

        func drawOnContext(context: CGContextRef){
            UIGraphicsPushContext(context)

            CGContextSetStrokeColorWithColor(context, self.color)
            CGContextSetLineWidth(context, self.width)
            CGContextSetLineCap(context, CGLineCap.Round)

            // 2点以上ないと線描画する必要なし
            if self.points.count > 1 {
                for (index, point) in self.points.enumerate() {
                    if index == 0 {
                        CGContextMoveToPoint(context, point.x, point.y)
                    } else {
                        CGContextAddLineToPoint(context, point.x, point.y)
                    }
                }
            }
            CGContextStrokePath(context)

            UIGraphicsPopContext()
        }
    }

    var lines: [Line] = []
    var currentLine: Line? = nil

    // タッチされた
    override func touchesBegan(touches: Set<UITouch>, withEvent event: UIEvent?) {
        let point = touches.first!.locationInView(self)
        currentLine = Line(color: UIColor.redColor().CGColor, width: 5)
        currentLine?.points.append(point)
    }

    // タッチが動いた
    override func touchesMoved(touches: Set<UITouch>, withEvent event: UIEvent?) {
        let point = touches.first!.locationInView(self)
        currentLine?.points.append(point)
        self.setNeedsDisplay()
    }

    // タッチが終わった
    override func touchesEnded(touches: Set<UITouch>, withEvent event: UIEvent?) {
        // 2点以上のlineしか保存する必要なし
        if currentLine?.points.count > 1 {
            lines.append(currentLine!)
        }

        currentLine = nil
        self.setNeedsDisplay()
    }

    func resetContext(context: CGContextRef) {
        CGContextClearRect(context, self.bounds)
        if let color = self.backgroundColor {
            color.setFill()
        } else {
            UIColor.whiteColor().setFill()
        }
        CGContextFillRect(context, self.bounds)
    }

    //描画設定
    override func drawRect(rect: CGRect) {

        let context = UIGraphicsGetCurrentContext()

        //画面を一旦初期化
        resetContext(context!)

        // 描き終わったline
        for line in lines {
            line.drawOnContext(context!)
        }

        // 描いてる途中のline
        if let line = currentLine {
            line.drawOnContext(context!)
        }
    }
}
Line
短い直線の組み合わせで、長い曲線を表現しています。
Lineは各タッチ開始〜タッチ終了までのパス情報を保持する構造体です。pointsに適宜座標が入れられます。innerクラスとして定義しています。
drawOnContext()で、pointを順次読み出しながら、lineを描画しています。初期座標からタッチがごくたびにどんどん伸ばしていく感じです。
setNeedsDisplay()、DrawRect()
self.setNeedsDisplay()が呼ばれると、そこからからできるだけ早く描画できるところで描画処理を行います(drawRectメソッドが呼ばれる)
drawRectは標準ではなにもしない関数なので、super.drawRect()を呼ぶ必要はありません。
context
描画対象となるバッファのようなものです。contextは標準ではnilですが、drawRectメソッドが呼ばれる前には、OSが自動的に用意してくれるので、UIGraphicsGetCurrentContext()メソッドで取得するだけで利用できます。
描画処理のたびに全画面のクリア(CGContextClearRect(context, self.bounds))を行っているのは、更新のあった時のみcontextをclearしても、lineを一度描画するたび、交互に今までの線が復活したりまた消えたりしたためです。塗りつぶしても同じでした。今回は毎回の初期化で対処しましたが、原因がわかる方いらっしゃれば教えていただきたいです。
→原因わかりました。backgroundColorを設定していると、自動的に画面が背景色でクリアされるようです。なので、処理ごとに線描画するこの方法であまり間違ってはいなさそうですが、適宜キャッシュした方がいいかもしれません。
undoとかsaveとかloadとかパフォーマンスとか
import UIKit

class ViewController: UIViewController, DrawableViewDelegate, UIImagePickerControllerDelegate, UINavigationControllerDelegate {

    var drawableView: DrawableView! = nil

    var undoButton: UIButton! = nil
    var saveButton: UIButton! = nil
    var clearButton: UIButton! = nil
    var loadButton: UIButton! = nil

    override func viewDidLoad() {
        super.viewDidLoad()

        self.view.backgroundColor = UIColor.blackColor()

        let buttonWidth = self.view.bounds.width/4

        if drawableView == nil {
            drawableView = DrawableView(frame: CGRectMake(0, 100, self.view.bounds.width, self.view.bounds.width))
            drawableView.backgroundColor = UIColor.whiteColor()
            drawableView.delegate = self
            self.view.addSubview(drawableView)
        }

        if undoButton == nil {
            undoButton = UIButton(frame: CGRectMake(0, 0, buttonWidth, 100))
            undoButton.backgroundColor = UIColor.yellowColor()
            undoButton.setTitle("undo", forState: .Normal)
            undoButton.setTitleColor(UIColor.brownColor(), forState: .Normal)
            undoButton.addTarget(drawableView, action: "undo", forControlEvents: .TouchUpInside)
            self.view.addSubview(undoButton)
        }

        if loadButton == nil {
            loadButton = UIButton(frame: CGRectMake(buttonWidth*1, 0, buttonWidth, 100))
            loadButton.backgroundColor = UIColor.orangeColor()
            loadButton.setTitle("load", forState: .Normal)
            loadButton.setTitleColor(UIColor.brownColor(), forState: .Normal)
            loadButton.addTarget(self, action: "load", forControlEvents: .TouchUpInside)
            self.view.addSubview(loadButton)
        }

        if clearButton == nil {
            clearButton = UIButton(frame: CGRectMake(buttonWidth*2, 0, buttonWidth, 100))
            clearButton.backgroundColor = UIColor.greenColor()
            clearButton.setTitle("clear", forState: .Normal)
            clearButton.setTitleColor(UIColor.brownColor(), forState: .Normal)
            clearButton.addTarget(drawableView, action: "clear", forControlEvents: .TouchUpInside)
            self.view.addSubview(clearButton)
        }

        if saveButton == nil {
            saveButton = UIButton(frame: CGRectMake(buttonWidth*3, 0, buttonWidth, 100))
            saveButton.backgroundColor = UIColor.cyanColor()
            saveButton.setTitle("save", forState: .Normal)
            saveButton.setTitleColor(UIColor.brownColor(), forState: .Normal)
            saveButton.addTarget(drawableView, action: "save", forControlEvents: .TouchUpInside)
            self.view.addSubview(saveButton)
        }

    }

    func load() {
        if UIImagePickerController.isSourceTypeAvailable(UIImagePickerControllerSourceType.PhotoLibrary) {
            let ipc: UIImagePickerController = UIImagePickerController()
            ipc.delegate = self
            ipc.allowsEditing = true

            ipc.sourceType = UIImagePickerControllerSourceType.PhotoLibrary

            self.presentViewController(ipc, animated:true, completion:nil)
        }
    }

    func imagePickerController(picker: UIImagePickerController, didFinishPickingImage image: UIImage, editingInfo: [String : AnyObject]?) {
        picker.dismissViewControllerAnimated(true, completion: nil)
        drawableView.setBackgroundImage(image)
    }

    func onUpdateDrawableView() {

    }

    func onFinishSave() {
        let alertController = UIAlertController(title: "Saved!", message: "saved to camera roll.", preferredStyle: .Alert)
        alertController.addAction(UIAlertAction(title: "OK", style: .Default, handler: nil))
        self.presentViewController(alertController, animated: true, completion: nil)
    }
}
先ほどとの違いは、ボタンを配置していることぐらいです。
import UIKit

protocol DrawableViewDelegate {
    func onUpdateDrawableView()
    func onFinishSave()
}

protocol DrawableViewPart {
    func drawOnContext(context: CGContextRef)
}

class DrawableView: UIView {

    class Line: DrawableViewPart {
        var points: [CGPoint]
        var color :CGColorRef
        var width: CGFloat

        init(color: CGColorRef, width: CGFloat){
            self.color = color
            self.width = width
            self.points = []
        }

        func drawOnContext(context: CGContextRef){
            UIGraphicsPushContext(context)

            CGContextSetStrokeColorWithColor(context, self.color)
            CGContextSetLineWidth(context, self.width)
            CGContextSetLineCap(context, CGLineCap.Round)

            // 2点以上ないと線描画する必要なし
            if self.points.count > 1 {
                CGContextMoveToPoint(context, points.first!.x, points.first!.y)
                for (index, point) in self.points.dropFirst().enumerate() {
                    CGContextAddLineToPoint(context, point.x, point.y)
                }
            } else {
                Dot(line: self).drawOnContext(context)
            }
            CGContextStrokePath(context)

            UIGraphicsPopContext()
        }

        // 更新分だけ描画したい時用
        func drawLastlineOnContext(context: CGContextRef) {
            if self.points.count > 1 {
                UIGraphicsPushContext(context)
                CGContextSetStrokeColorWithColor(context, self.color)
                CGContextSetLineWidth(context, self.width)
                CGContextSetLineCap(context, CGLineCap.Round)

                let startPoint = self.points[self.points.endIndex-2]
                let endPoint = self.points.last!
                CGContextMoveToPoint(context, startPoint.x, startPoint.y)
                CGContextAddLineToPoint(context, endPoint.x, endPoint.y)

                CGContextStrokePath(context)
                UIGraphicsPopContext()
            } else if !self.points.isEmpty() {
                Dot(line: self).drawOnContext(context)
            }
        }
    }

    class Dot: DrawableViewPart {
        var pos: CGPoint
        var radius: CGFloat
        var color: CGColorRef

        init(pos: CGPoint, radius: CGFloat, color: CGColorRef) {
            self.radius = radius
            self.pos = pos
            self.color = color
        }

        init(line: Line) {
            self.pos = line.points.first!
            self.radius = line.width
            self.color = line.color
        }

        func drawOnContext(context: CGContextRef){
            UIGraphicsPushContext(context)
            CGContextSetFillColorWithColor(context, self.color)
            CGContextAddEllipseInRect(context, CGRectMake(pos.x-(radius/2), pos.y-(radius/2), radius, radius));
            CGContextFillPath(context);
            UIGraphicsPopContext()
        }
    }

    class Image: DrawableViewPart {
        var image: UIImage
        init(image: UIImage) {
            self.image = image
        }
        func drawOnContext(context: CGContextRef){
            UIGraphicsPushContext(context)
            image.drawInRect(CGRect(origin: CGPointZero, size: image.size))
            UIGraphicsPopContext()
        }
    }

    struct DrawableViewSetting {
        var lineColor: CGColorRef = UIColor.redColor().CGColor
        var lineWidth: CGFloat = 5
    }

    // DrawableViewParts
    var parts: [DrawableViewPart] = []
    // 描画中のLine
    var currentLine: Line? = nil
    // これまでに描画したimage
    private var currentImage: UIImage? = nil

    var delegate:DrawableViewDelegate? = nil

    private var currentSetting = DrawableViewSetting()

    func setLineColor(color: CGColorRef) {
        currentSetting.lineColor = color
    }

    func setLineWidth(width: CGFloat) {
        currentSetting.lineWidth = width
    }

    //初期化
    required init(coder aDecoder: NSCoder) {
        super.init(coder: aDecoder)!

        self.parts = [Image(image: UIImage())]
        currentSetting.lineColor = UIColor.redColor().CGColor
        currentSetting.lineWidth = 5
    }

    override init(frame: CGRect) {
        super.init(frame: frame)
    }

    func undo() {
        if !self.parts.isEmpty {
            self.parts.removeLast()
            requireRedraw()
        }
    }

    // タッチされた
    override func touchesBegan(touches: Set<UITouch>, withEvent event: UIEvent?) {
        let point = touches.first!.locationInView(self)
        currentLine = Line(color: self.currentSetting.lineColor, width: self.currentSetting.lineWidth)
        currentLine?.points.append(point)
        self.setNeedsDisplay()
    }

    // タッチが動いた
    override func touchesMoved(touches: Set<UITouch>, withEvent event: UIEvent?) {
        let point = touches.first!.locationInView(self)
        currentLine?.points.append(point)
        self.setNeedsDisplay()
    }

    // タッチが終わった
    override func touchesEnded(touches: Set<UITouch>, withEvent event: UIEvent?) {
        if currentLine?.points.count > 1 {
            parts.append(currentLine!)
        } else {
            self.parts.append(Dot(line: currentLine!))
        }

        currentLine = nil
    }

    private func requireRedraw() {
        self.currentImage = nil
        self.setNeedsDisplay()
    }

    // UIImageとして取得
    func getCurrentImage() -> UIImage {
        // nilだったら再度描画させる
        if self.currentImage == nil {
            UIGraphicsBeginImageContextWithOptions(self.bounds.size, false, 0)
            let context = UIGraphicsGetCurrentContext()
            parts.forEach{$0.drawOnContext(context!)}
            currentLine?.drawOnContext(context!)
            self.currentImage = UIGraphicsGetImageFromCurrentImageContext()
            UIGraphicsEndImageContext()
        }
        return self.currentImage!
    }

    func updateCurrentImage() {
        UIGraphicsBeginImageContextWithOptions(self.bounds.size, false, 0)
        let imageContext = UIGraphicsGetCurrentContext()
        // 今までのimageを取得して描画
        self.getCurrentImage().drawInRect(self.bounds)
        // 追加分を描画
        if let line = currentLine {
            line.drawLastlineOnContext(imageContext!)
        }
        // 更新
        self.currentImage = UIGraphicsGetImageFromCurrentImageContext()
        UIGraphicsEndImageContext()
    }

    func clear() {
        self.parts = []
        self.requireRedraw()
    }

    private func getResizedImage(image: UIImage, size: CGSize) -> UIImage {
        UIGraphicsBeginImageContext(size)
        image.drawInRect(CGRect(origin: CGPointZero, size: size))
        let resizedImage = UIGraphicsGetImageFromCurrentImageContext()
        UIGraphicsEndImageContext()
        return resizedImage
    }

    func setBackgroundImage(image: UIImage) {
        let resizedImage = getResizedImage(image, size: CGSizeMake(self.bounds.width, self.bounds.height))

        let backgroundImage = Image(image: resizedImage)

        if let part = self.parts.first where part is Image {
            self.parts[0] = backgroundImage
        } else {
            self.parts.insert(backgroundImage, atIndex: 0)
        }

        self.requireRedraw()
    }

    func save() {
        // 念のため再描画
        updateCurrentImage()
        UIImageWriteToSavedPhotosAlbum(self.currentImage!, self, "image:didFinishSavingWithError:contextInfo:", nil)

    }

    func image(image: UIImage, didFinishSavingWithError error: NSError!, contextInfo: UnsafeMutablePointer<Void>) {
        if error != nil {
            //プライバシー設定不許可など書き込み失敗時は -3310 (ALAssetsLibraryDataUnavailableError)
            print("DrawableView:Error -> " + String(error.code))
        } else {
            delegate?.onFinishSave()
        }
    }

    //描画設定
    override func drawRect(rect: CGRect) {
        delegate?.onUpdateDrawableView()

        let _ = UIGraphicsGetImageFromCurrentImageContext()

        updateCurrentImage()
        self.currentImage?.drawInRect(self.bounds)
    }
}
Dot
線描画だけでは、タップした時に点が表示されないのは不自然なため、dotを新しく定義しました
DrawableViewPart
Line, Dot以外のパーツも追加する可能性があるため、抽象化したプロパティDrawableViewPartを用意しました。これをimplementしていれば、何でもパーツとして描画できます。
スタンプとかもいいかもしれませんね!
必要最小限の描画
重複した描画した処理を減らすため、適宜UIImageとして保存しながら、新たなcontextを作成し、今までの分と追加分を描画する処理を繰り返しています。
もしかしたらsetNeedsDisplay()が呼ばれてからdrawRectが実行される前に再度setNeedsDisplay()が呼ばれると、表示漏れが発生する可能性がありますので、save時などには再度描画するようにしています。undoでも更新できます。
getImage
現在のDrawableViewの状態をUIImageとして取得できます。
画像用のcontextを別で生成して、描画処理を行っています。これだと保存などもできるはずです。
self.currentImageがnilなら再描画を行っています。
undo
リストから削除した後、再描画を行うことで実現しています。
requireRedraw()はcurrentImageをnilにすることで、次の描画時に再描画を強制しています。
以上で完成です!