Sign in with Appleの必須化
2019/6/3に更新されたレビューガイドラインに以下の記述がありました。
Sign in with Apple will be available for beta testing this summer. It will be required as an option for users in apps that support third-party sign-in when it is commercially available later this year
※ 公式:https://developer.apple.com/news/?id=06032019j
どうやらログイン連携にサードパーティを用いているアプリには、Sign in with Apple の実装が必須になるよう…。
これは早めに試してみようということで早速実装してみました!!
環境
- Xcode11 以上
- 対応端末iOS13 以上
今回は自社の HiNative を使ってお試し実装してみました。
(ちゃっかり宣伝: WEB・Apple Store)
実装
ステップはたったの3つ!結論からいうと超簡単でした。
- Xcodeの設定
- Providerを生成してリクエスト
- Delegateでその後の処理
1. Xcodeの設定
TARGET > Signing & Capabilities に Sign in with Apple を追加します。
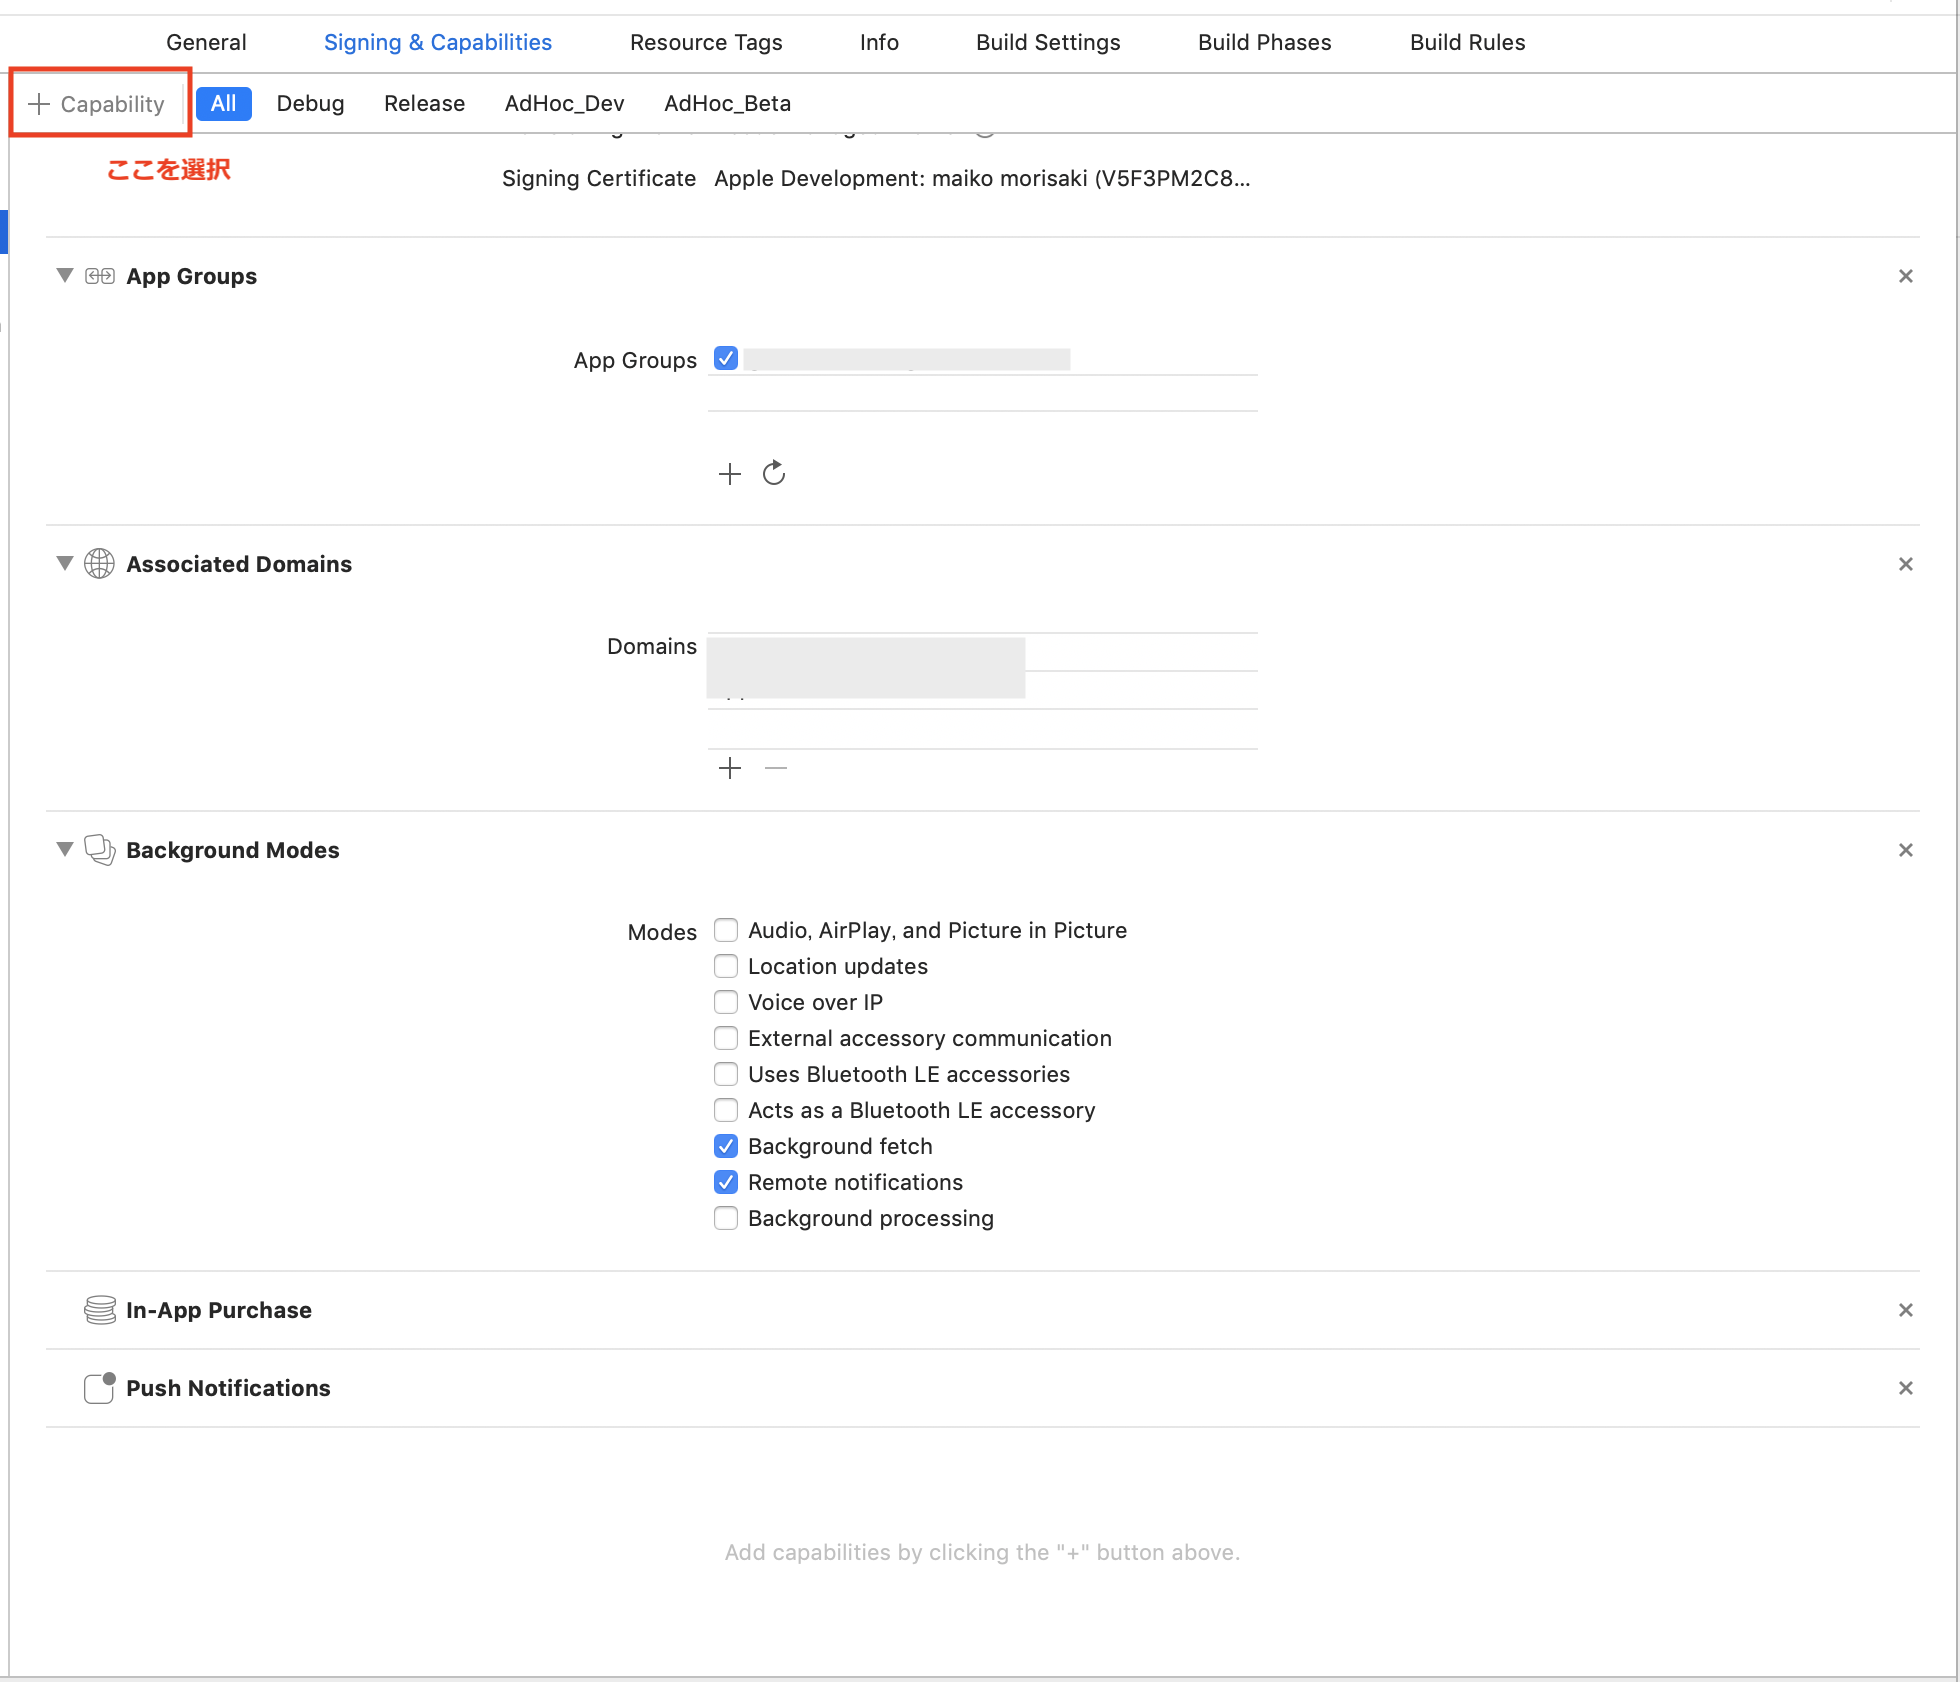
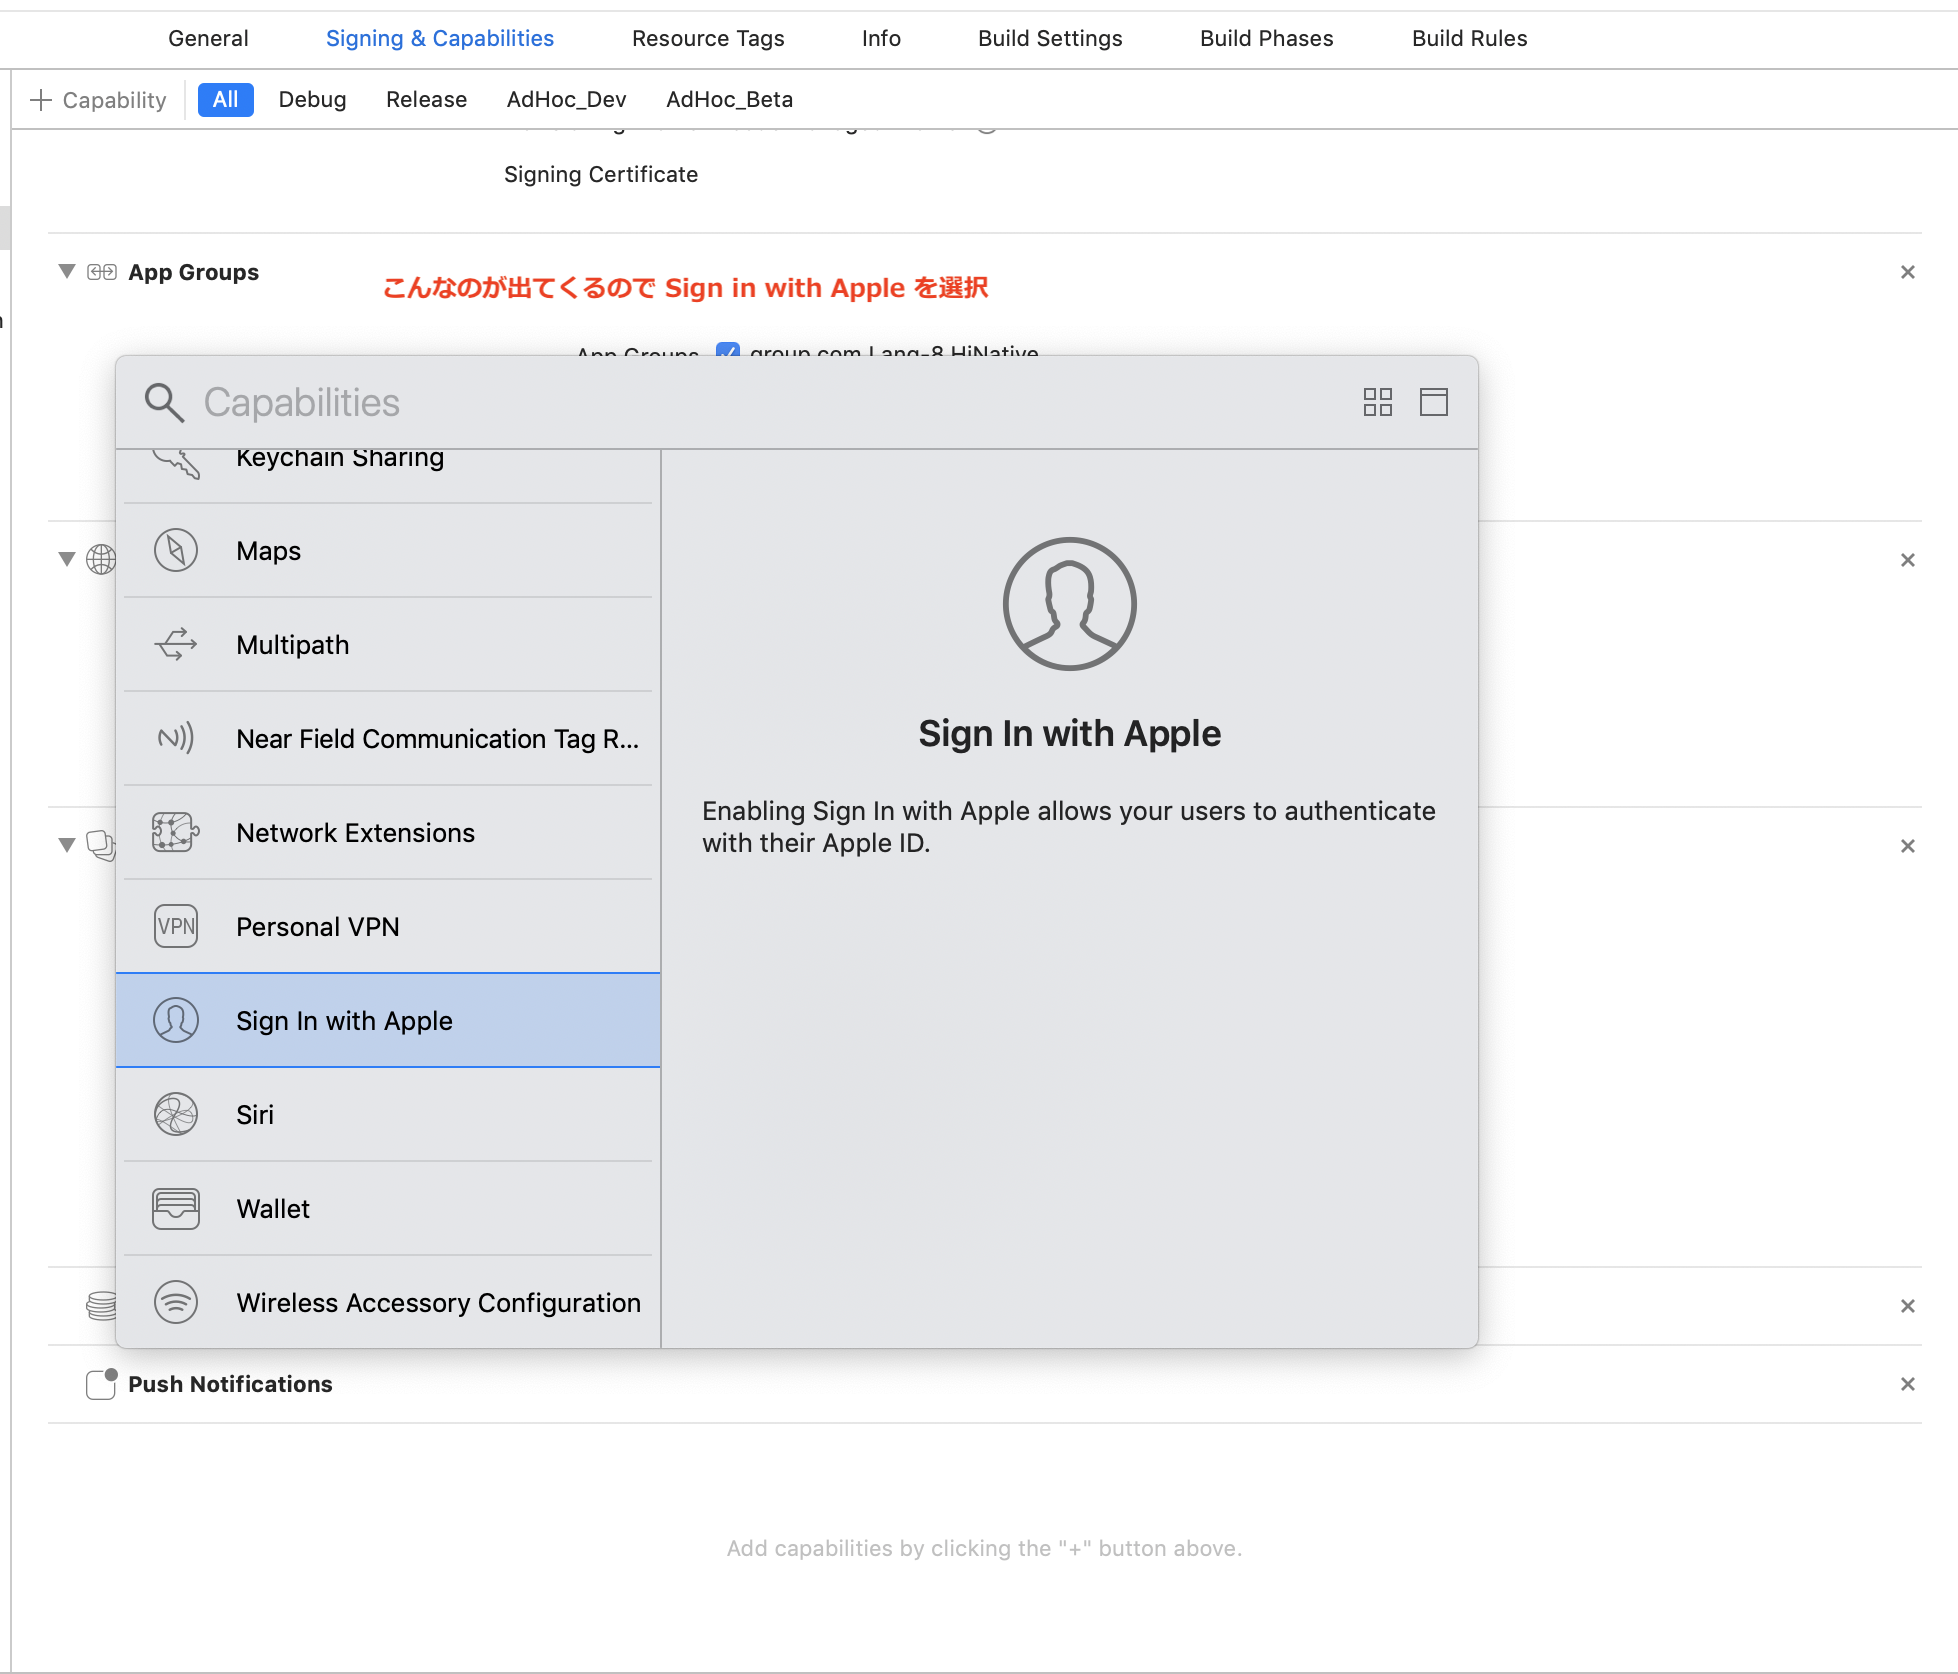
これでXcodeの設定は完了です。
1.2. (ステップには記載なし) 適当にボタン作ってね
ボタンとActionを用意してください。
ボタンのレイアウトは公式から指定があるので、こちらの公式を参考に!
2. Providerを生成してリクエスト
import AuthenticationServices

@objc
func authorizationAppleID() {
  if #available(iOS 13.0, *) {
    let appleIDProvider = ASAuthorizationAppleIDProvider()
    let request = appleIDProvider.createRequest()
    request.requestedScopes = [.fullName, .email]

    let authorizationController = ASAuthorizationController(authorizationRequests: [request])
    authorizationController.delegate = self
    authorizationController.performRequests()
  }
}
if #available(iOS 13.0, *) なので、ボタンの表示非表示も気をつけないといけないですね。
3. Delegateでその後の処理
extension ViewController: ASAuthorizationControllerDelegate {
    @available(iOS 13.0, *)
    func authorizationController(controller: ASAuthorizationController, didCompleteWithAuthorization authorization: ASAuthorization) {
        if let appleIDCredential = authorization.credential as? ASAuthorizationAppleIDCredential {
            // 取得できる値
            let userIdentifier = appleIDCredential.user
            let fullName = appleIDCredential.fullName
            let email = appleIDCredential.email
        }
    }

    @available(iOS 13.0, *)
    func authorizationController(controller: ASAuthorizationController, didCompleteWithError error: Error) {
        // エラー処理
    }
}
取得できる値について
Sign in with Appleで取得できるApple IDのデータは、初回の認証時のみ取得できます。
そのため2回目以降の認証時に現在(2020/8/25)取得できません。そのデータを使ってユーザー登録する場合とか大変不便ですね。
どうしてもその値を使いたい場合は初回認証時のデータを永続保持しておくしか無さそうです。
補足
ASAuthorizationAppleIDCredential は 2 で生成した ASAuthorizationAppleIDProvider のリクエストが成功した際に呼ばれます。
今回はこの実装のみですが、他にも iCloud Keychainのクレデンシャル情報 を用いた実装もあるようです。
(詳しく知りたい方は下記の参考記事を見てみてください!)
動かすとこんな画面が出てきます
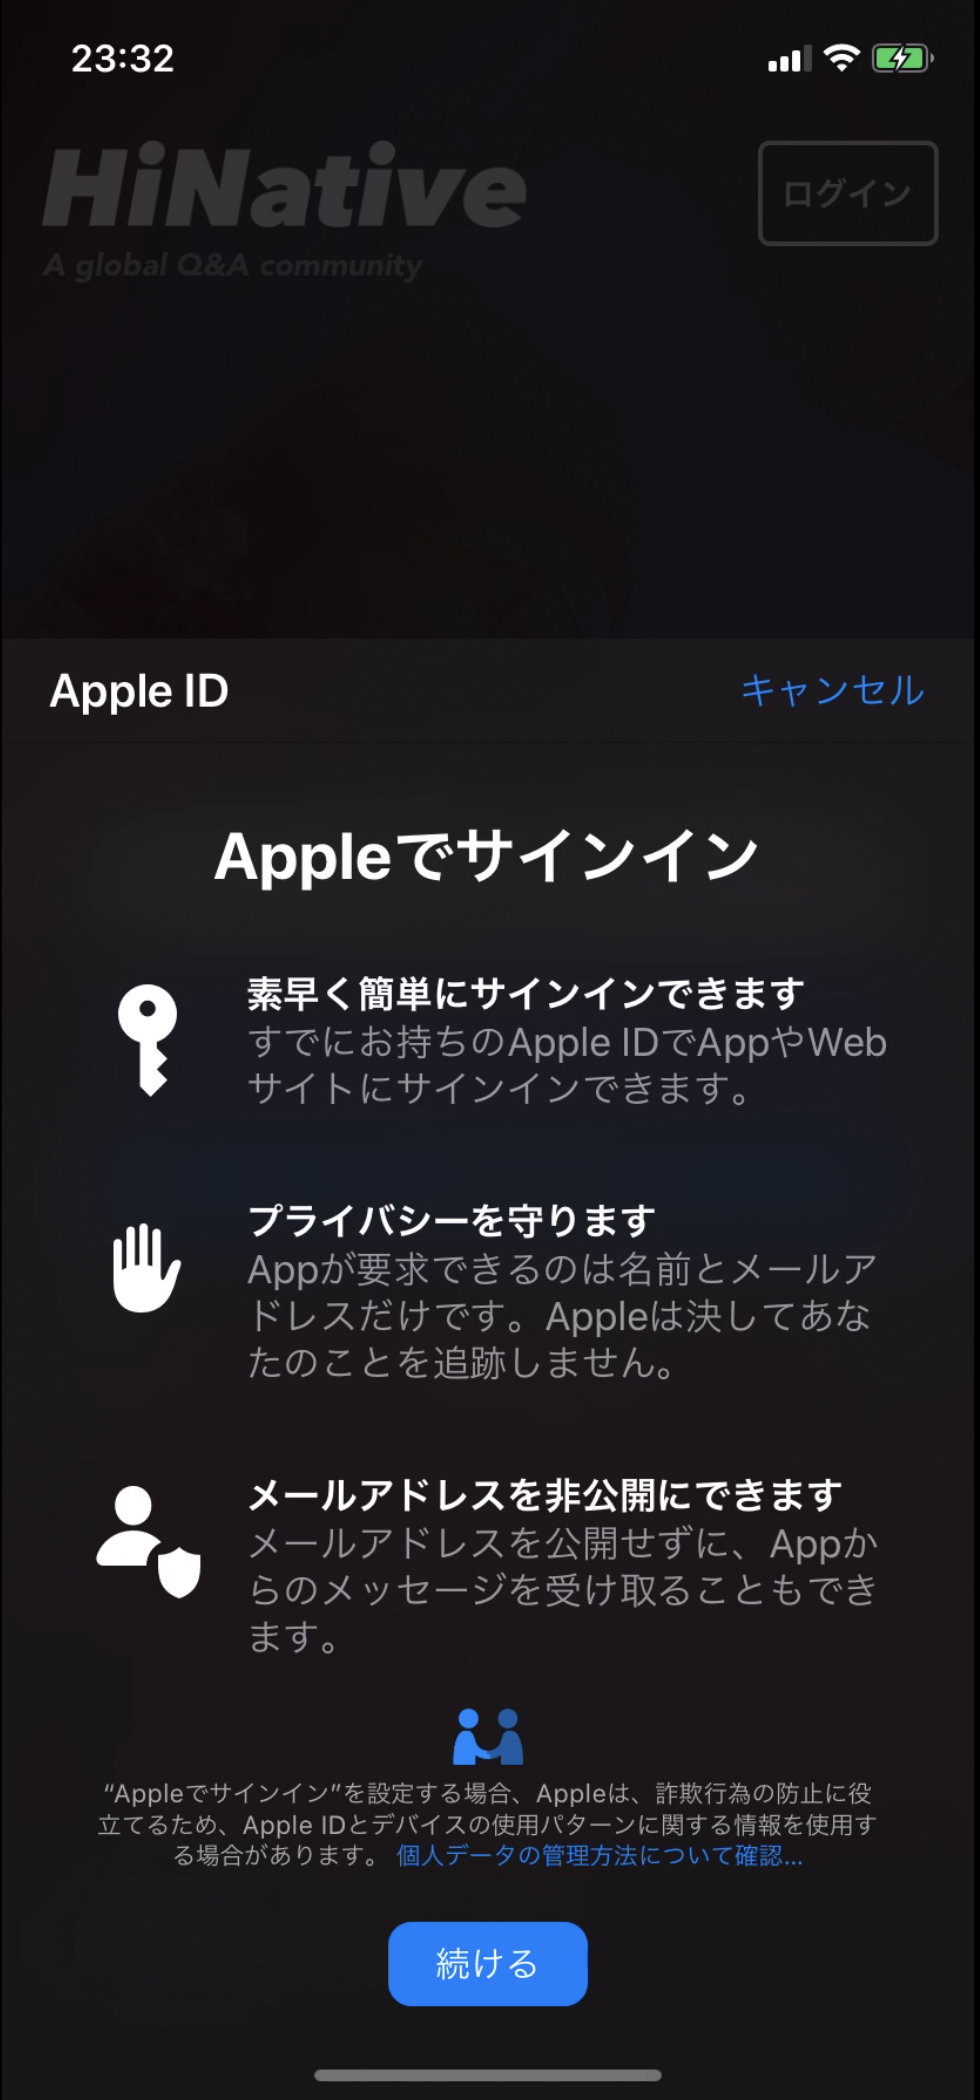
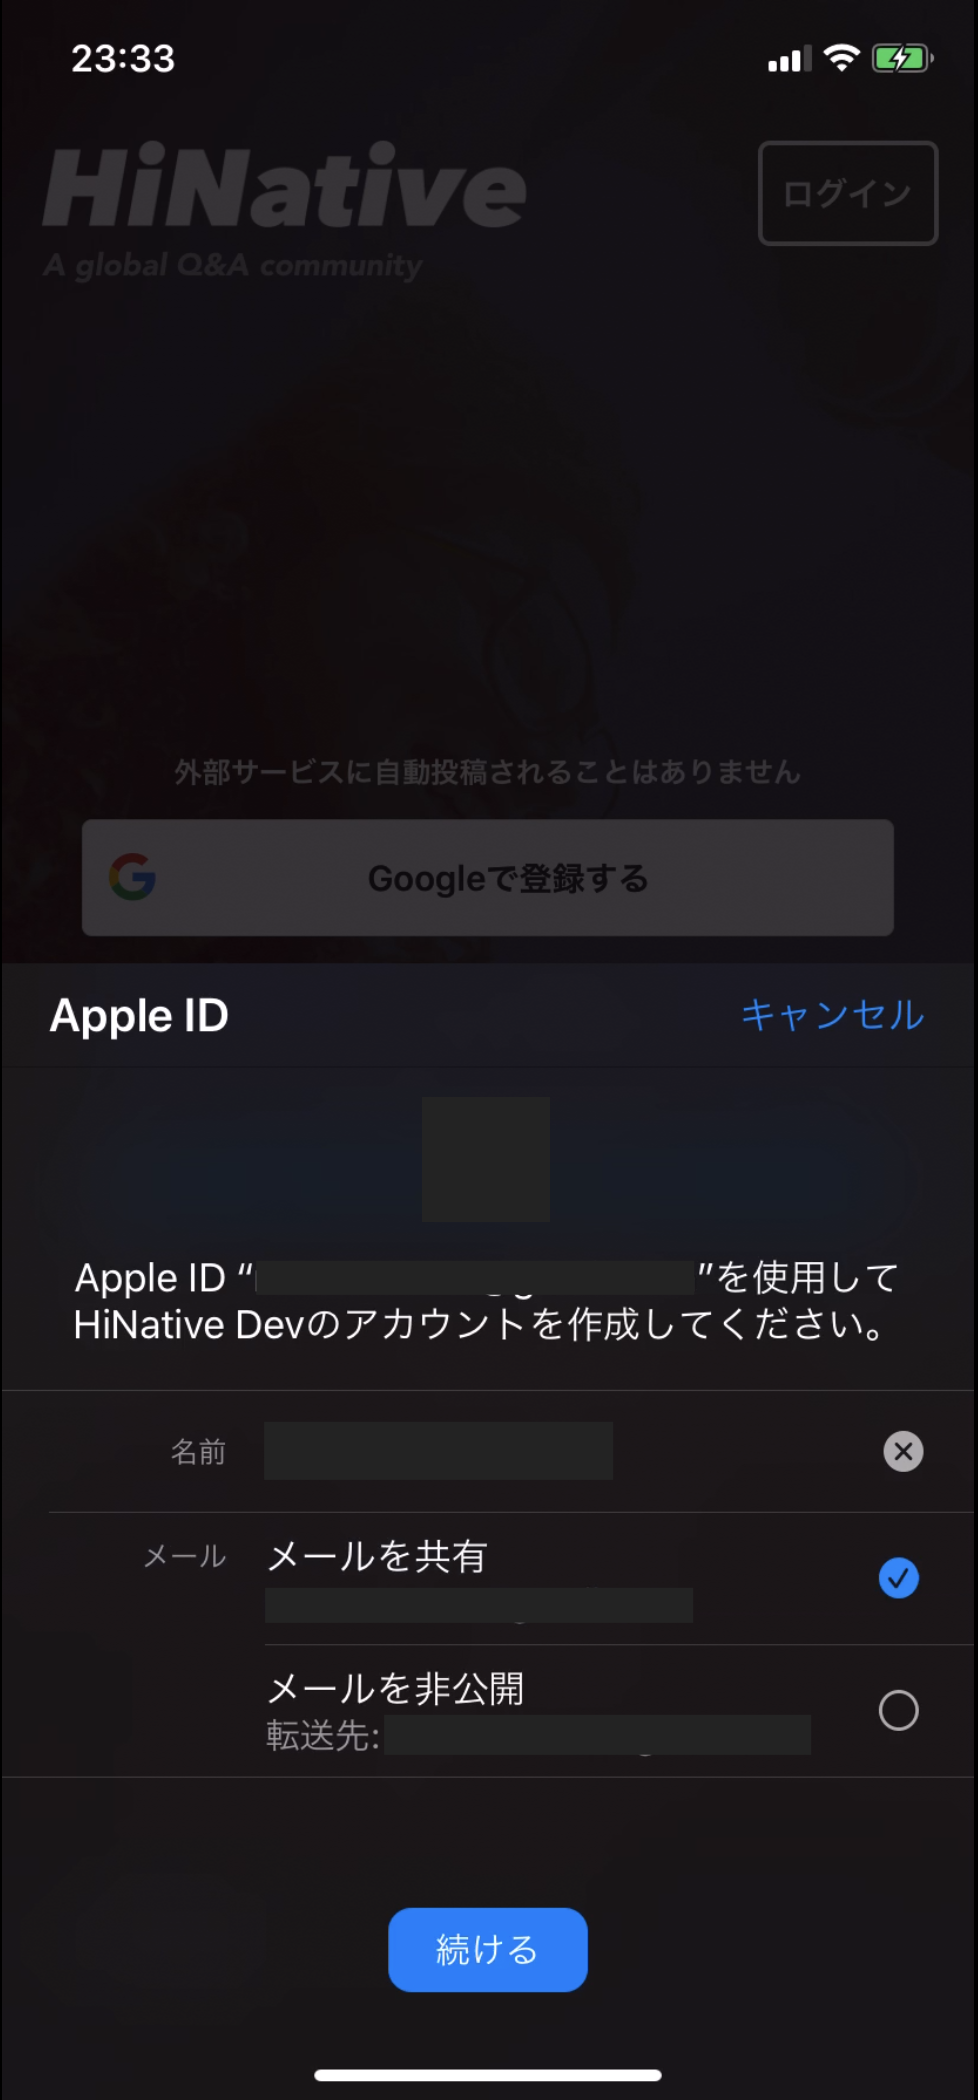
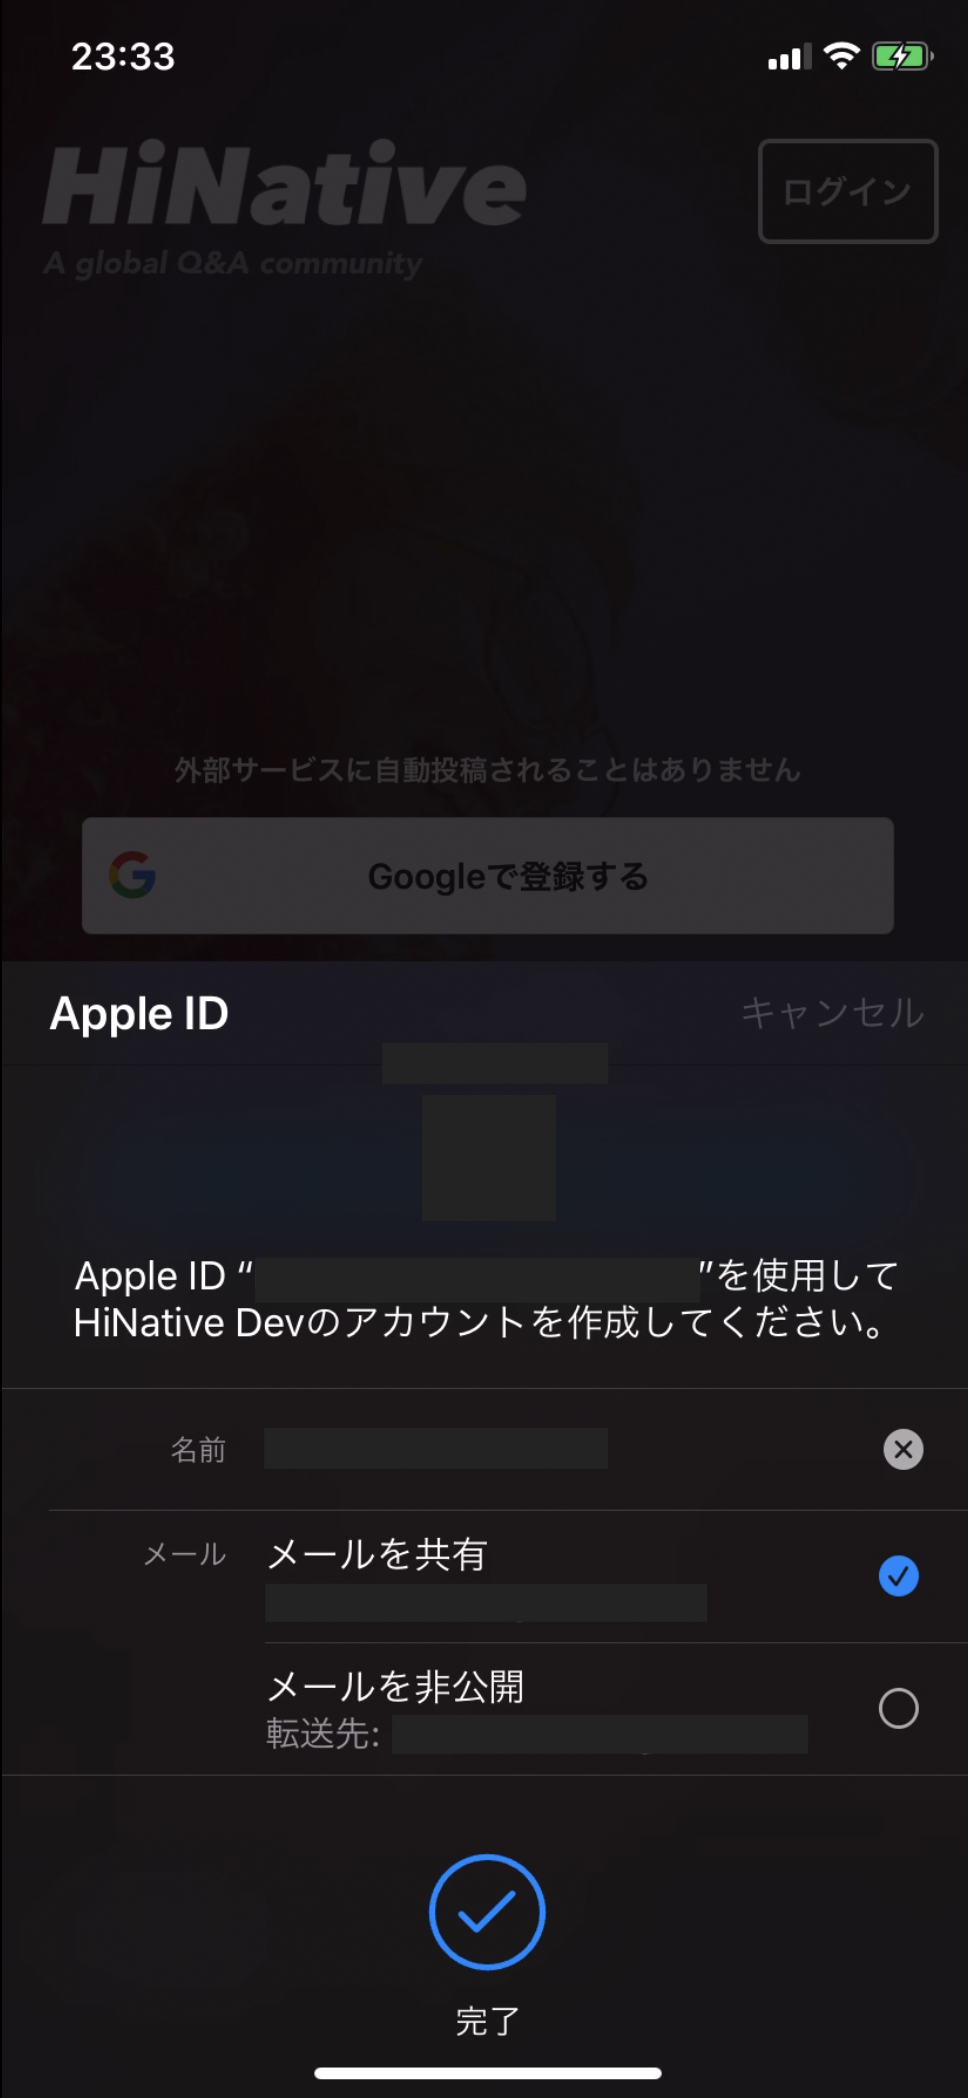
FaceIDでログインできるので本当に楽…!!