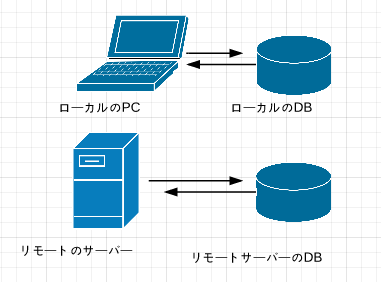
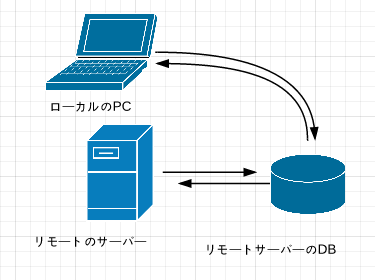
node.jsで開発をする時、開発環境と本番環境では別のデータベースを使っていませんか?

この場合、ローカルでデータを更新しながら開発して、いざ本番環境で動作をテストする時に1からまたデータを追加更新しなければいけません。
なので開発時もデータベースだけはリモートサーバーのものを使いたいと思い、このエントリを書きました。
リモートサーバーの環境はさくらVPS+centOSです。
リモートサーバーのmongoDBに接続する方法(node.js)
ドライバは
Node.JS MongoDB Driver
を使います。
npm install mongodb
でインストールできます。
以下はnode.jsからmongoDBに接続するコードです。
mongo = require("mongodb")
Server = require('mongodb').Server
Db = mongo.Db
BSON = mongo.BSONPure
assert = require('assert')

db = new Db('db1', new Server('xxx.xx.xx.xx', 27017),{safe:false})
db.open (err, db)->
  if err
    log err
  else
    db.collectionNames (err, items)->
      assert items.length > 0
localのDBに接続する時は127.0.0.1と設定するところをリモートサーバーの
IPアドレスに書き換えただけで接続できました。
あれ?
もしかして?
これって誰からもアクセスできちゃうんじゃね???
改めて調べてみると、mongoDBは初期状態だと外部からのアクセスはオールOKです。
ザルです。
mongoDBのセキュリティを見直す
ザルだとわかった所でなんとかしましょう。
MySQL等では最初にアクセス権のあるユーザーを設定します。
そしてRootでのアクセスを禁止してセキュリティを高めます。
MongoDBでも同じような設定ができます。
1.管理者(admin)の設定
mongoシェルを起動して以下を入力します
> use admin
switched to db admin
> db.addUser('user1','password')
{
	"user" : "user1",
	"readOnly" : false,
	"pwd" : "e7e8a26d330dbb8bef5b1886ceb5e290",
	"_id" : ObjectId("53cdf6cf3baadf71b7b2a006")
}
adminコレクションにaddUser('ユーザー名','パスワード')
というコマンドで設定できます。
現時点では認証設定が無効ですが、
有効化した後では管理者としてログインしていないとユーザーの追加はできません。
2.使用するDBでユーザーを設定
> use db1
switched to db db1
> db.addUser('user1','password')
{
	"user" : "user1",
	"readOnly" : false,
	"pwd" : "e7e8a26d330dbb8bef5b1886ceb5e290",
	"_id" : ObjectId("53cdf8d0b31d6d88862bae5e")
}
これで「db1」というデータベースにアクセスできる「user1」を設定しました。
3.認証を有効化する
/etc/mongod.confに設定ファイルがあるので書き換えます。
% sudo vim /etc/mongod.conf
26行目くらいに
#auth = trueとあるのでこのコメントを外してauthを有効にします
# auth = true
↓
auth = true
esc - :wqで保存して設定は完了です。
mongodを再起動します。
% sudo service mongod restart
4.mongoシェルでDBにアクセスする。
mongoシェルを開き、use db1してから
show collectionsでコレクションの一覧を取得してみましょう。
> show collections
Tue Jul 22 14:53:01.657 error: {
	"$err" : "not authorized for query on db1.system.namespaces",
	"code" : 16550
} at src/mongo/shell/query.js:128
認証設定が有効になっていたら失敗するはずです。
ログインしてみましょう。
db.auth('ユーザー名','パスワード')でログインできます。
続けて再度show collectionsすると取得できるはずです。
> db.auth('user1','password')
1
> show collections
system.indexes
system.users
>
または、mongoシェルを開く時にユーザーとパスワードを入力することもできます。
% mongo 127.0.0.1:27017/db1 -u user1 -p password
MongoDB shell version: 2.4.10
connecting to: 127.0.0.1:27017/db1
> show collections
system.indexes
system.users
5.localからnode.jsでリモートサーバーのDBにアクセスする
ここまでの作業はsshでサーバーにログインして作業していましたが、
以下はlocalから直接サーバーのmongoDBにアクセスする方法です。
冒頭のリモートサーバーのmongoDBに接続する方法(node.js)をそのまま試してみましょう。
{ [MongoError: not authorized for query on db1.system.namespaces]
[stack]: [Getter/Setter],
[arguments]: undefined,
[type]: undefined,
[message]: 'not authorized for query on db1.system.namespaces',
name: 'MongoError' }
ログインしていないのでエラーになりました。
db.authenticate('ユーザー名', 'パスワード',コールバック関数(err, result))
でログインできます。
成功ならresultに1が返ります。
db = new Db('db1', new Server('xxx.xxx.xx.xx', 27017),{safe:false})
    db.open (err, db)->
      if err
        log err
      else
        db.authenticate 'user1', 'password', (err, result)->
          if err
            log err
          else
            db.collectionNames (err, items)->
              if err
                log err
              else
                assert items.length > 0
                log items
まとめ
管理者設定
> use admin
> db.addUser('user1','password')
DBごとの接続ユーザー設定
> use db1
> db.addUser('user1','password')
/etc/mongod.confを設定
# auth = true
↓
auth = true
mongoシェルでログイン
db.auth('user1','password')
または
mongo 127.0.0.1:27017/db1 -u user1 -p password
node.jsでログイン
db.authenticate 'user1', 'password', (err, result)->
以上です。
