やりたいこと
スマホゲームのクラッシュオブクラウン(以下クラクラ)において,対戦の配置画像からいろいろなこと(攻撃施設の密度の可視化や配置の弱点など)が分かりやすくなれば面白いかなと思ったので,pythonの勉強も兼ねて配置画像を解析したいと思います.今回はpythonのOpenCVを用いて入力画像の前処理までしたいと思います.
0.環境
MacOS
VScode 1.52.0
Python 2.7.16
numpy==1.18.1
opencv-python==4.4.0.46
1.対戦配置について
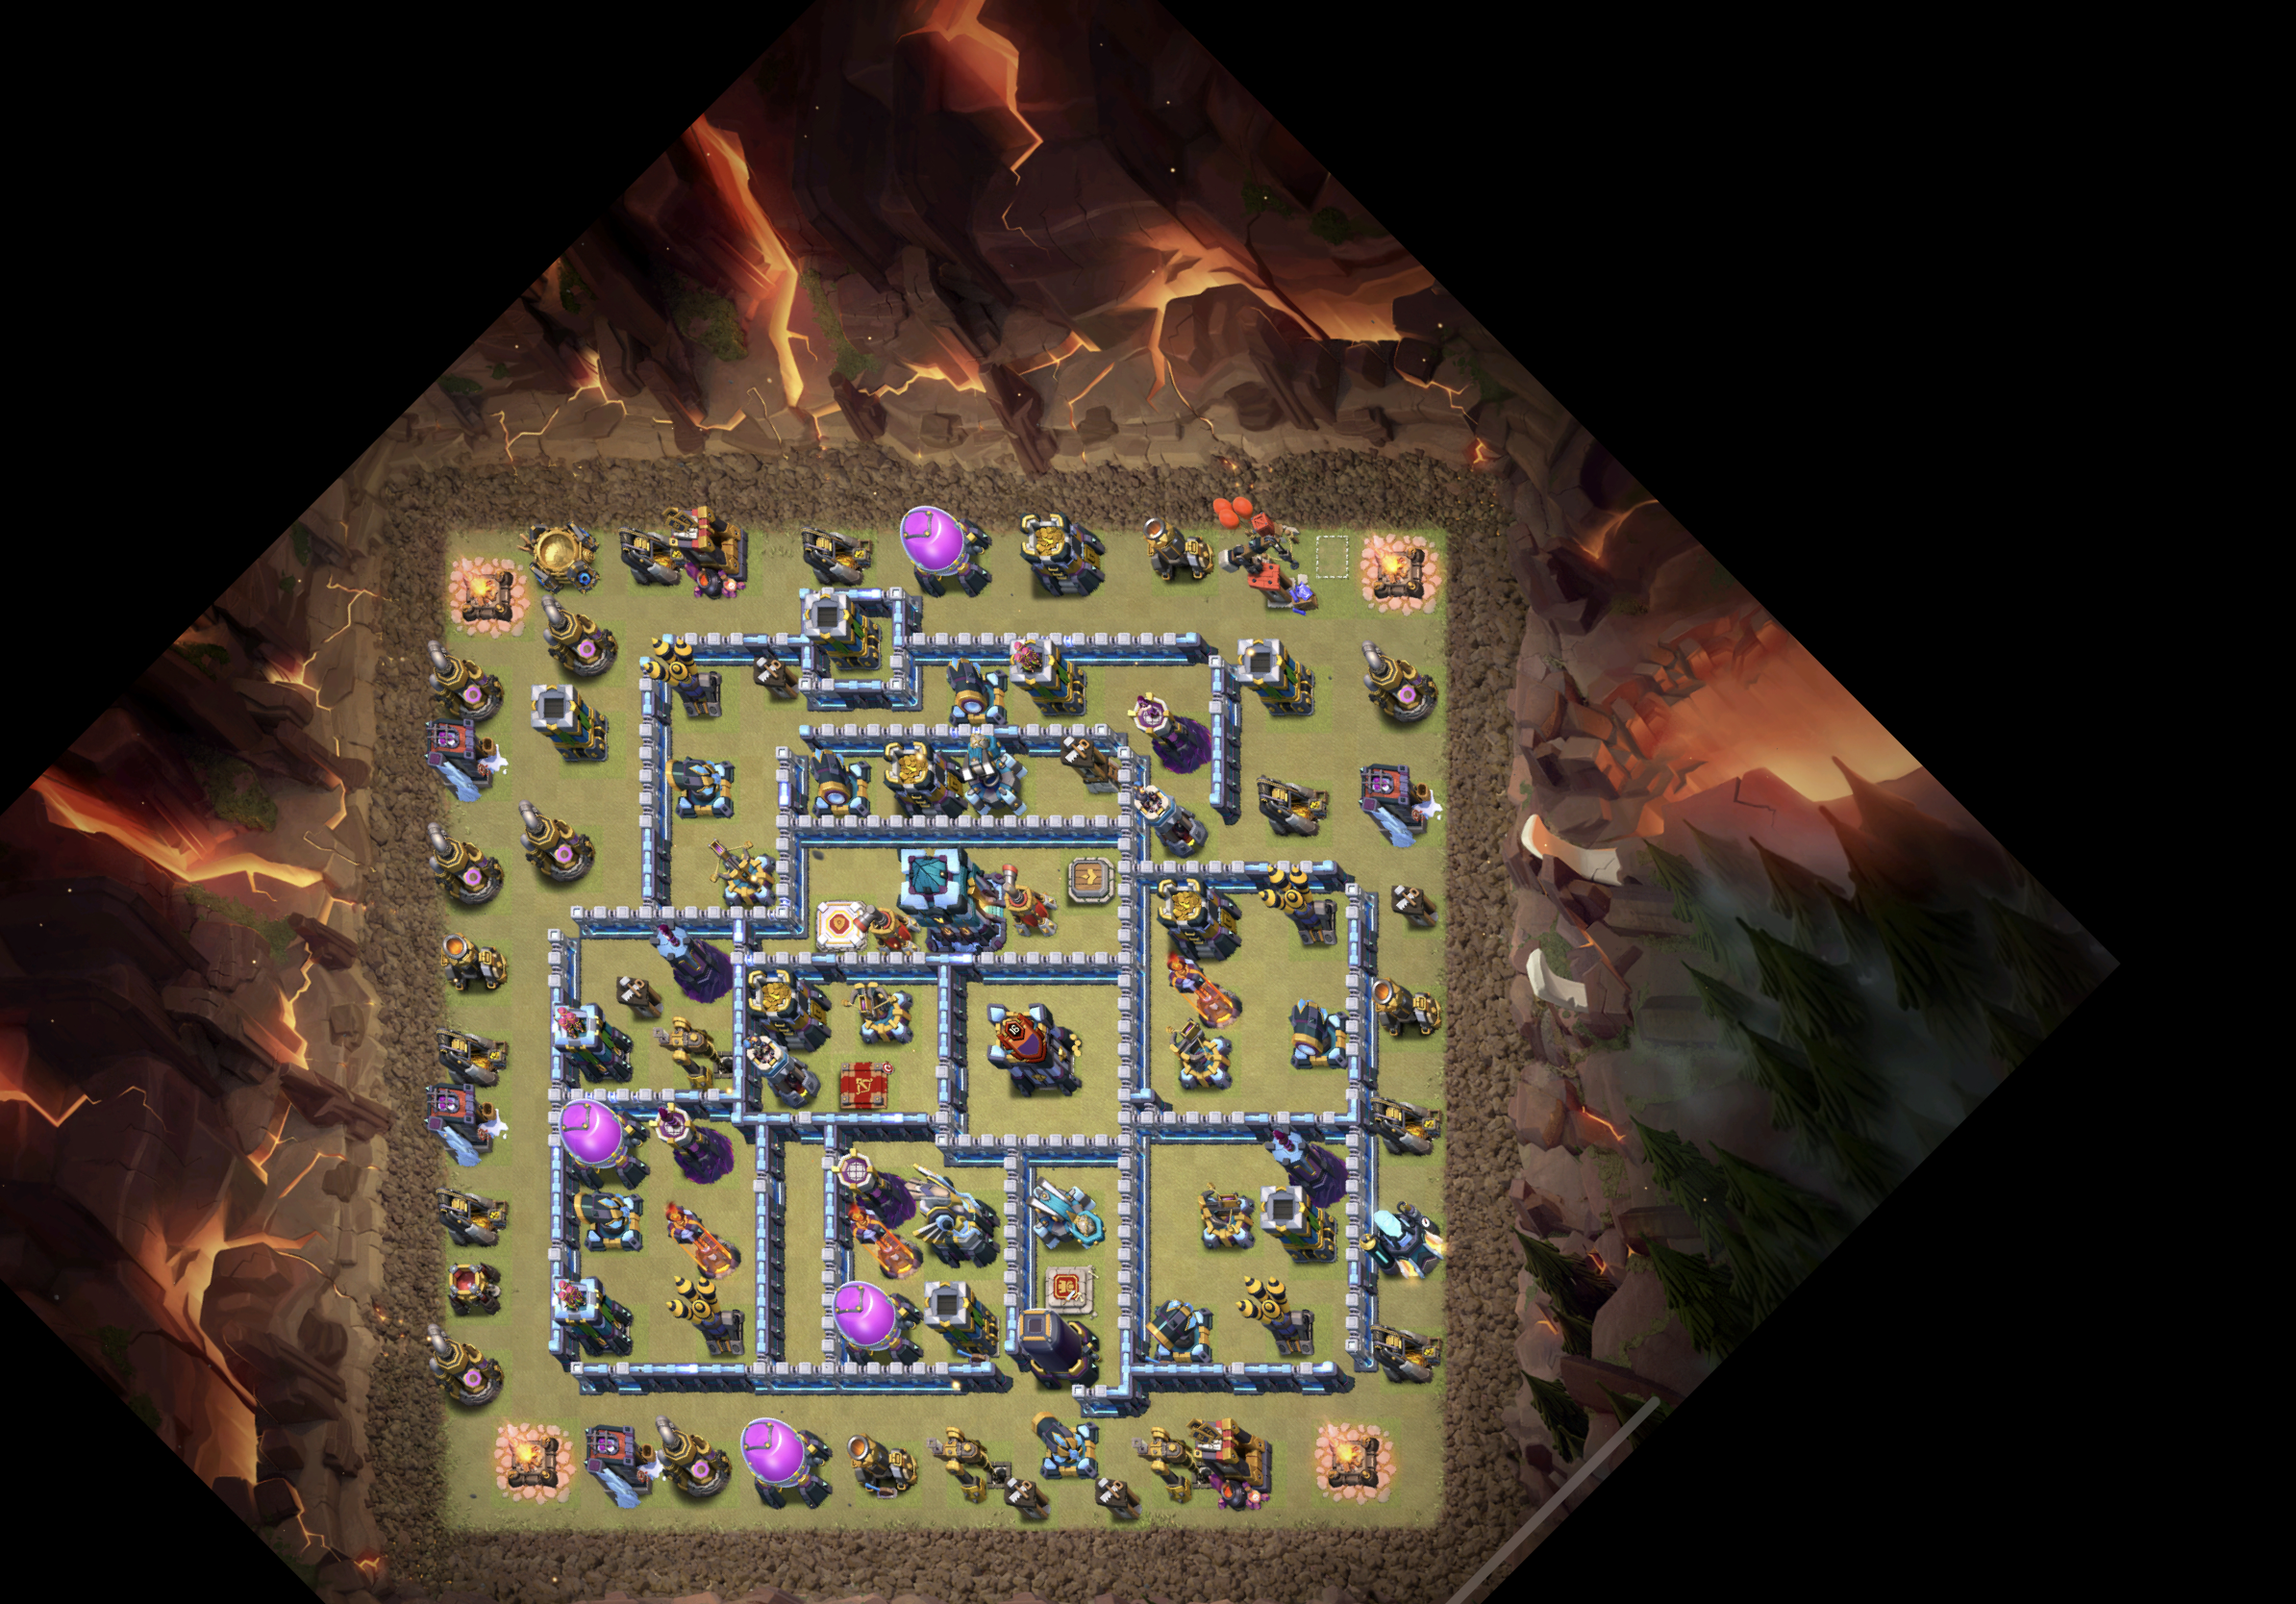
配置は以下の写真のようなものを想定しています.レイアウトエディタから撮影モードにしてスクリーンショトしたものです.
(この配置はQueen walkersのかたが配られたもので,それを拝借しています.)

2.画像の加工
クラクラの配置のフォーマットは$48 \times 48$のマス目状になっているため,まずは菱形上の配置を正方形にする必要があります.そこで以下のコードを実行しました.
import numpy as np
import cv2

def resize_image():
  # 入力画像の読み込み
  pictrue = 'picture/GAKU2020.jpeg'
  img = cv2.imread(pictrue, cv2.IMREAD_COLOR)

  # 高さを定義
  height = img.shape[0]
  # 幅を定義
  width = img.shape[1]
  # 回転の中心を指定
  center = (int(width/2), int(height/2))
  # 回転角度
  angle = 45.0
  # 拡大・縮小率
  scale = 1.0

  # 画像の横方向を縮小する
  img = cv2.resize(img , (int(width*0.75), height))
  # 画像を回転
  trans = cv2.getRotationMatrix2D(center, angle , scale)
  img2 = cv2.warpAffine(img, trans, (width,height))

 #画像の保存
 cv2.imwrite('./picture/GAKU2020_resize.png',img2)

if __name__ == '__main__':
  img2 = resize_image()
すると以下のような画像を得ることができます.
3.画像のトリミング
画像を正方形にすることができました.次にいらない部分のトリミングを行いたいと思います.欲しい画像は下地が緑色の部分なので,緑の部分を抽出しようと考えました.実装したコードは以下の通りです.(ほぼ参考したコードですが)
def detect_green_color(img):
    # HSV色空間に変換
    hsv = cv2.cvtColor(img, cv2.COLOR_BGR2HSV)

    # 緑色のHSVの値域1
    hsv_min = np.array([20, 64, 0])
    hsv_max = np.array([90,255,255])

    # 緑色領域のマスク(255:赤色、0:赤色以外)
    mask = cv2.inRange(hsv, hsv_min, hsv_max)

    # マスキング処理
    masked_img = cv2.bitwise_and(img, img, mask=mask)

    return mask, masked_img
参考:https://algorithm.joho.info/programming/python/opencv-color-detection/
得られたmaskの画像がこちらです.欲しい部分の正方形がなんとなく分かるようになったと思います.

4.正方形の検出
最後に上の画像から配置の部分の正方形を検出したいと思います.正方形を検出するコードが検索すると出てきたので,とりあえずそれをそのまま実行してみました.すると,以下のような画像が得られました.
参考:https://www.366service.com/jp/qa/886f2ccd5feba07ec3b78b49744ceb4b
たくさん正方形が検出されました.しかも,若干ずれています.そこで複数検出した正方形のうち一番大きいものを選び,それを縦横の座標を整えて出力するようなものを実装しました.以下がそのコードです.
もっといい方法があると思いますが,思いつかなかったので頭が悪そうな書き方になってしまいました…
import numpy as np
import cv2


def resize_image():
    ...

def detect_green_color(img):
    ...

# resize_imageの続き
def trim_image(img2):
  # 緑の部分を抽出
  green_mask, green_masked_img = detect_green_color(img2)
  cv2.imwrite("./picture/green_mask.png", green_mask)
  #cv2.imwrite("./picture/green_masked_img.png", green_masked_img)

  square = find_squares(green_mask)
  print(square)
  cv2.drawContours(img2, square, -1, (0, 255, 0), 3)

  # 検知した領域を表示
  cv2.imwrite('./picture/GAKU2020_a.png', img2)


# cosの計算
def angle_cos(p0, p1, p2):
    d1, d2 = (p0-p1).astype('float'), (p2-p1).astype('float')
    return abs( np.dot(d1, d2) / np.sqrt( np.dot(d1, d1)*np.dot(d2, d2) ) )

# 正方形の検出
def find_squares(img):
    img = cv2.GaussianBlur(img, (5, 5), 0)
    squares = []
    for gray in cv2.split(img):
        for thrs in range(0, 255, 26):
            if thrs == 0:
                bin = cv2.Canny(gray, 0, 50, apertureSize=5)
                bin = cv2.dilate(bin, None)
            else:
                _retval, bin = cv2.threshold(gray, thrs, 255, cv2.THRESH_BINARY)
            contours, _hierarchy = cv2.findContours(bin, cv2.RETR_LIST, cv2.CHAIN_APPROX_SIMPLE)
            for cnt in contours:
                cnt_len = cv2.arcLength(cnt, True)
                cnt = cv2.approxPolyDP(cnt, 0.02*cnt_len, True)
                if len(cnt) == 4 and cv2.contourArea(cnt) > 1000 and cv2.isContourConvex(cnt):
                    cnt = cnt.reshape(-1, 2)
                    max_cos = np.max([angle_cos( cnt[i], cnt[(i+1) % 4], cnt[(i+2) % 4] ) for i in range(4)])
                    if max_cos < 0.1:
                        squares.append(cnt)

    max_length = 0
    largest_square = None
    for square in squares:
      # 全ての座標の読み込み
      x0, y0 = square[0]
      x1, y1 = square[1]
      x2, y2 = square[2]
      x3, y3 = square[3]

      # 横と縦の長さの平均
      x_length = int(1/2 * (abs(x1 - x2) +  abs(x3 - x0)))
      y_length = int(1/2 * (abs(y0 - y1) +  abs(y2 - y3)))
      length = int(1/2*(x_length+y_length))

      # 新しい座標(仮)
      x0_new = int(1/2 * (x0 + x1))
      x1_new = int(1/2 * (x2 + x3))
      y0_new = int(1/2 * (y1 + y2))
      y1_new = int(1/2 * (y0 + y3))
      #print('*old*')
      #print(y0_new)
      #print(y1_new)

      # 横と縦の長さを揃えるための処理
      x_len = x1_new - x0_new
      y_len = y0_new - y1_new

      x_diff = length - x_len
      y_diff = length - y_len

      x0_new += int(x_diff/2)
      x1_new = x0_new + length
      y0_new += int(y_diff/2)
      y1_new = y0_new - length
      #print('*new*')
      #print(y0_new)
      #print(y1_new)

      x_len = x1_new - x0_new
      y_len = y0_new - y1_new

      # 新しい座標
      new_square = np.array([[x0_new, y1_new],
                            [x0_new, y0_new],
                            [x1_new, y0_new],
                            [x1_new, y1_new]])
    # 一番長い辺を持つ正方形を記憶
      if length > max_length:
        max_length = length
        largest_square = new_square

    # データ形状の微調整
    largest = []
    largest.append(largest_square)

    return largest


if __name__ == '__main__':
  img2 = resize_image()
  trim_image(img2)
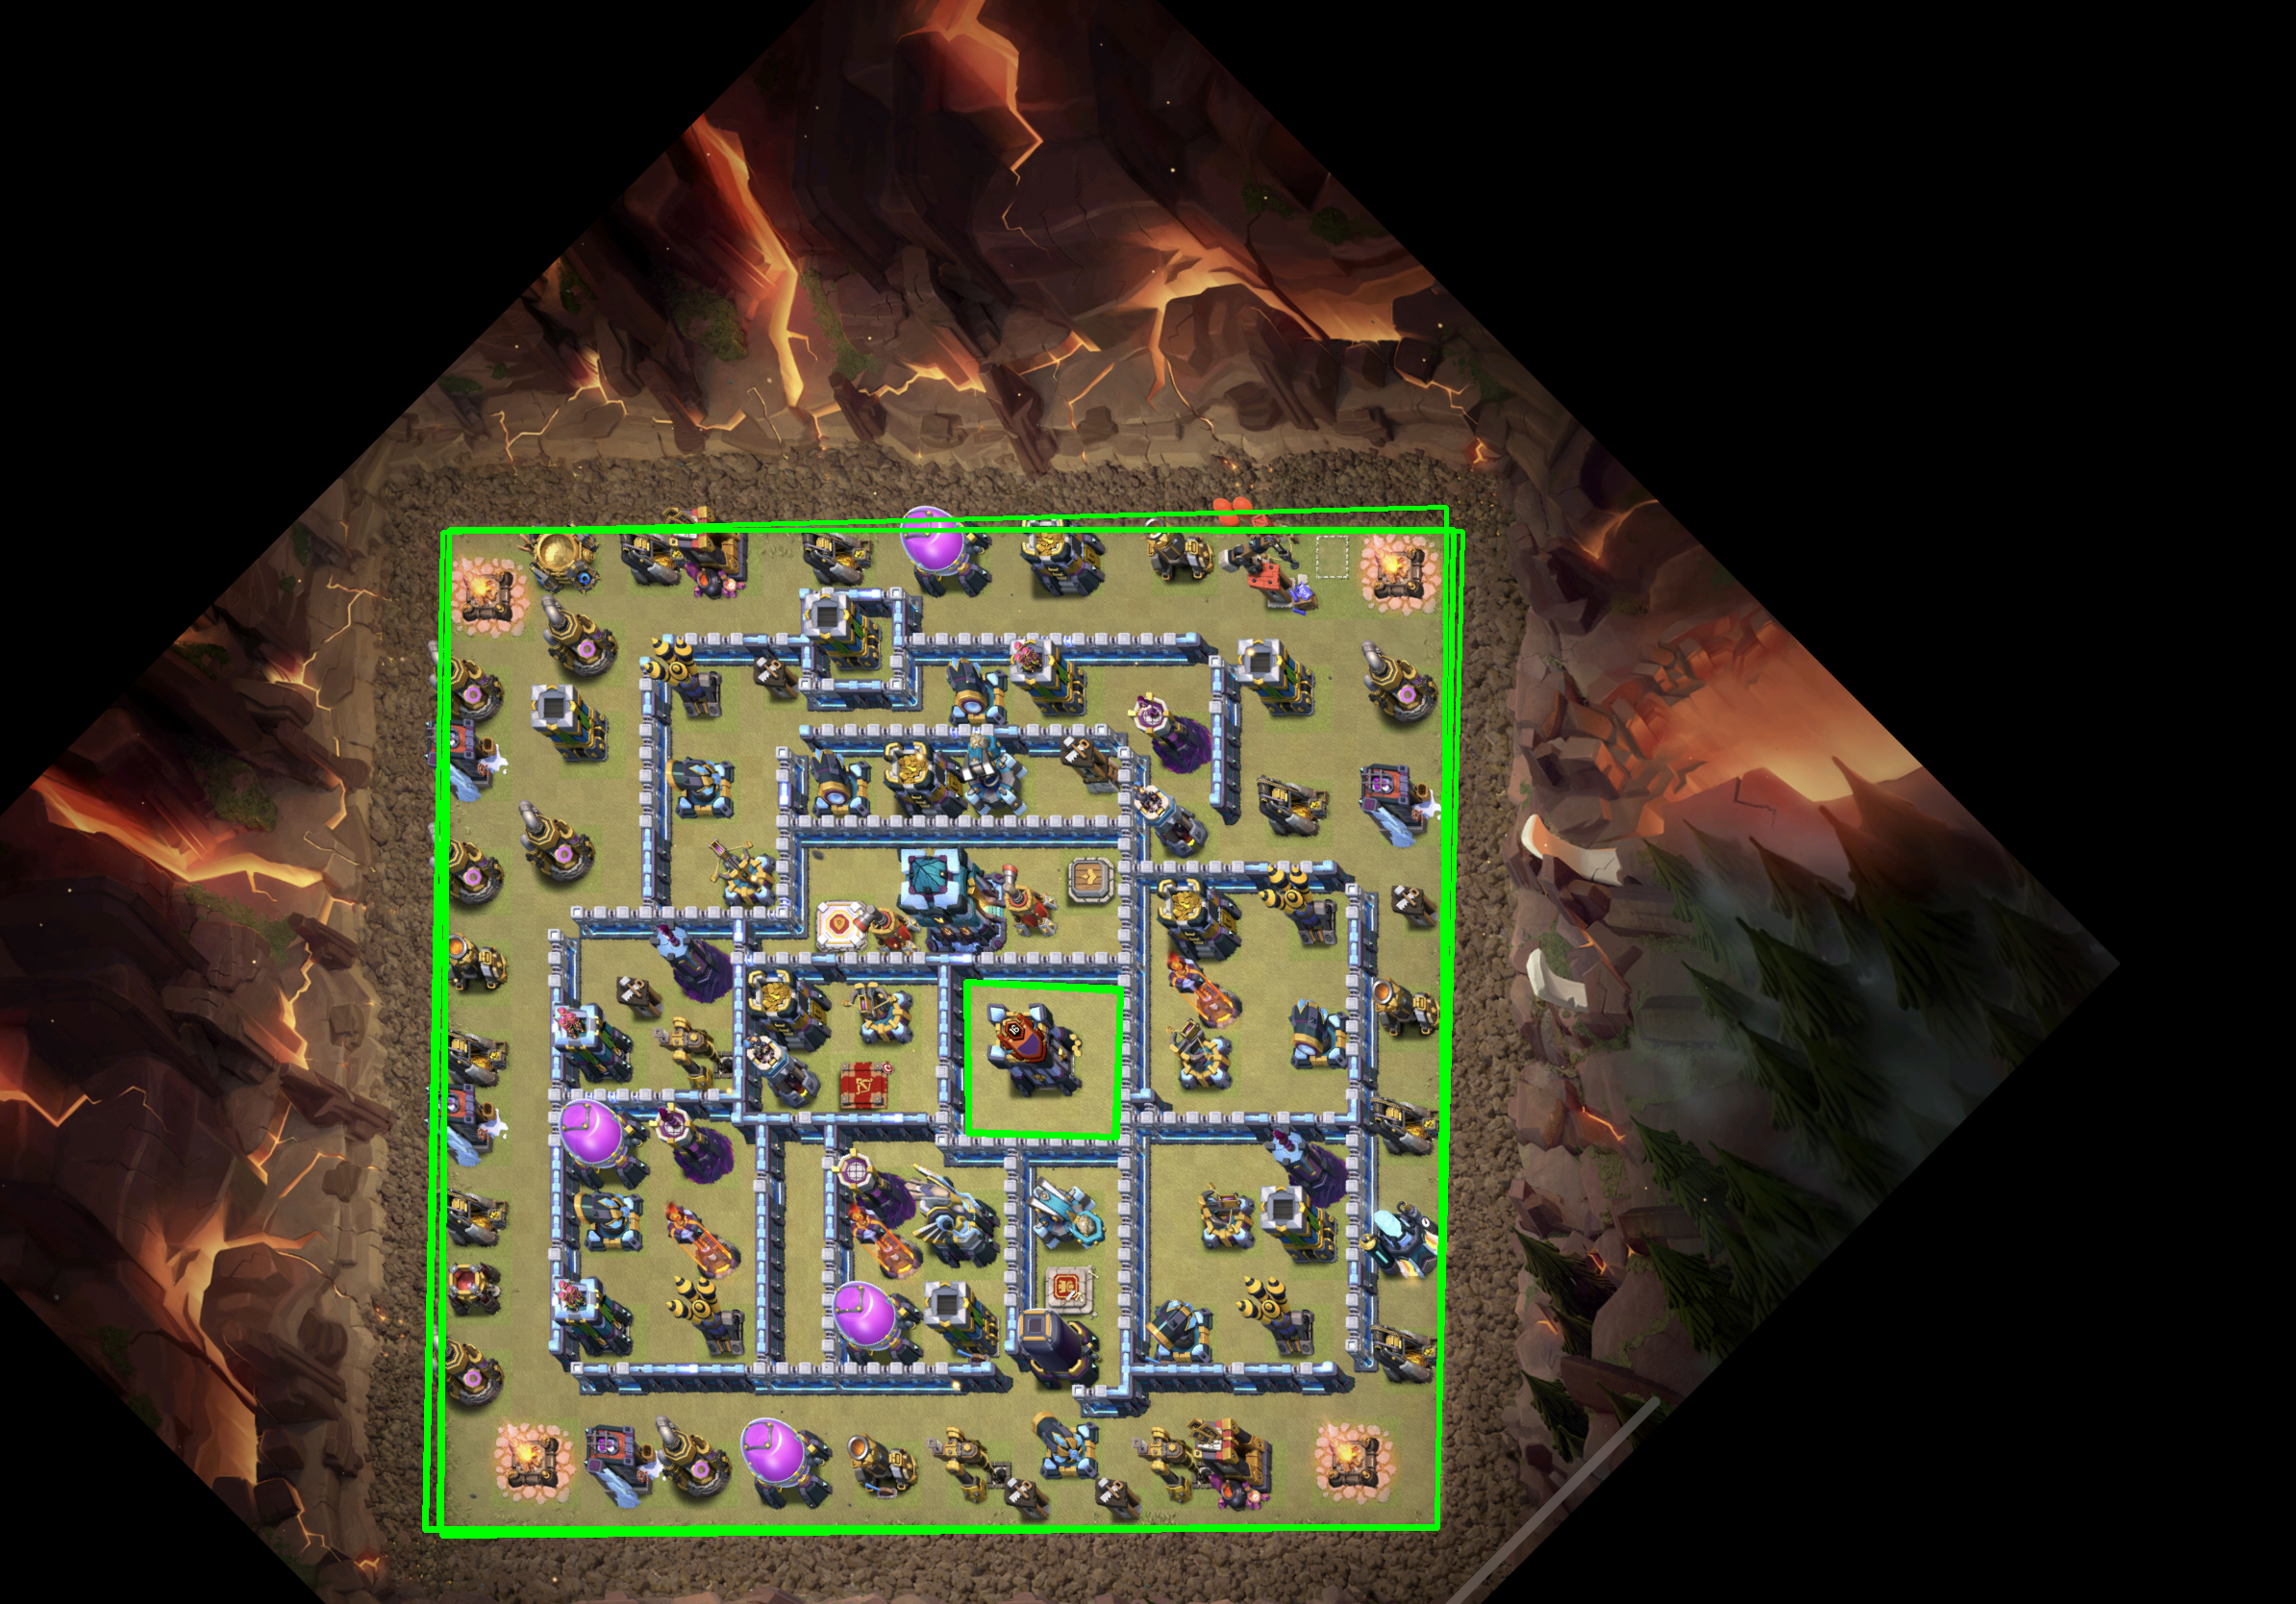
得られた画像がこちらです.

いい感じだけど,左と上が若干ずれているのが気になる.ズレた部分は10ピクセル程度で,配置の1マスが40ピクセル程度だからこれがどう響いてくるか…
5.最後に
今回は入力画像を整形して欲しい部分の抽出を行いました.
次は施設を検出できるかどうか試したいと思います.
$48 \times 48$マスのどこにあるか分かればいいから比較的簡単なはず(多分)
(訂正2020/12/29)マス目は$48 \times 48$でなく$44 \times 44$みたいでした.