はじめに
Cloudを利用利用すると課金状態が気なると思います。また思い出したタイミングで見に行くような運用は面倒であるので、定期的に通知する仕組みをIBM Cloud Functionで作って見ました。今回の通知先はSlackで、IBM Cloud
の課金情報を取得して見ます。
前準備
Slackのアプリの準備
Slackへ通信のためにSlack Appを経由させる必要があります。
アプリを作成し、Incoming Webhooksを有効にしてください。
以下のリンクから作成する感じですが、ここでは詳細について紹介しません。
https://api.slack.com/apps
IBM CloudのAPIキーを発行
IBM Cloudの操作を行うために必要です。
APIキーと発行ユーザーは対象アカウントの課金情報にアクセスする権限があることが前提になります。
複数のアカウントに対して実施する場合に、アカウント毎にAPIキーの発行が必要です。
以下の記事が参考になります。
https://qiita.com/nishikyon/items/fa8b951267efbe911fe7
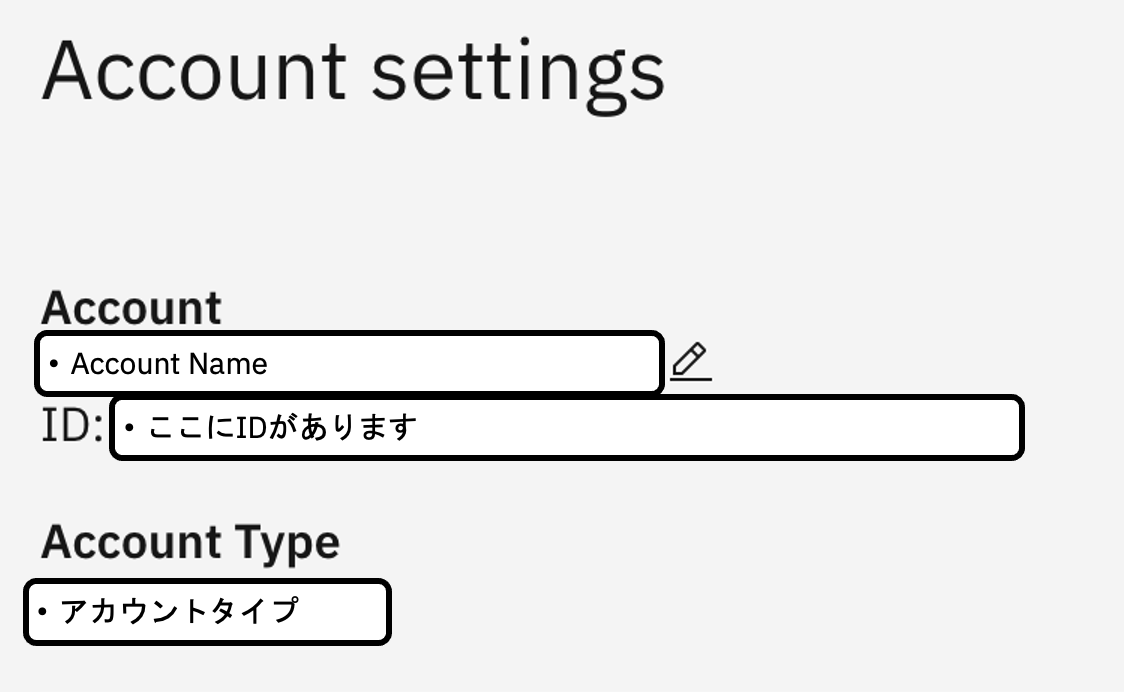
IBM CloudアカウントIDの確認
課金情報の取得に必要な情報です。以下のリンクから確認ができます。
https://cloud.ibm.com/account/settings
IBM Cloud Functionの作成
IBM Cloud FunctionはIBM Cloudが提供するサーバーレスのサービスです。
詳細について説明しませんので、下記のリンクを参考してください。
https://cloud.ibm.com/docs/openwhisk
全体の流れ
- 「Action」の作成
- 課金情報取得用
- Slackへ送信用
- 「Sequence」の作成
- 上記にて作成下アクションを順番に実行させる
- 「Trigger」 の作成
- 定期的に実行させる
- 「Action」に環境変数を渡す
「Action」の作成
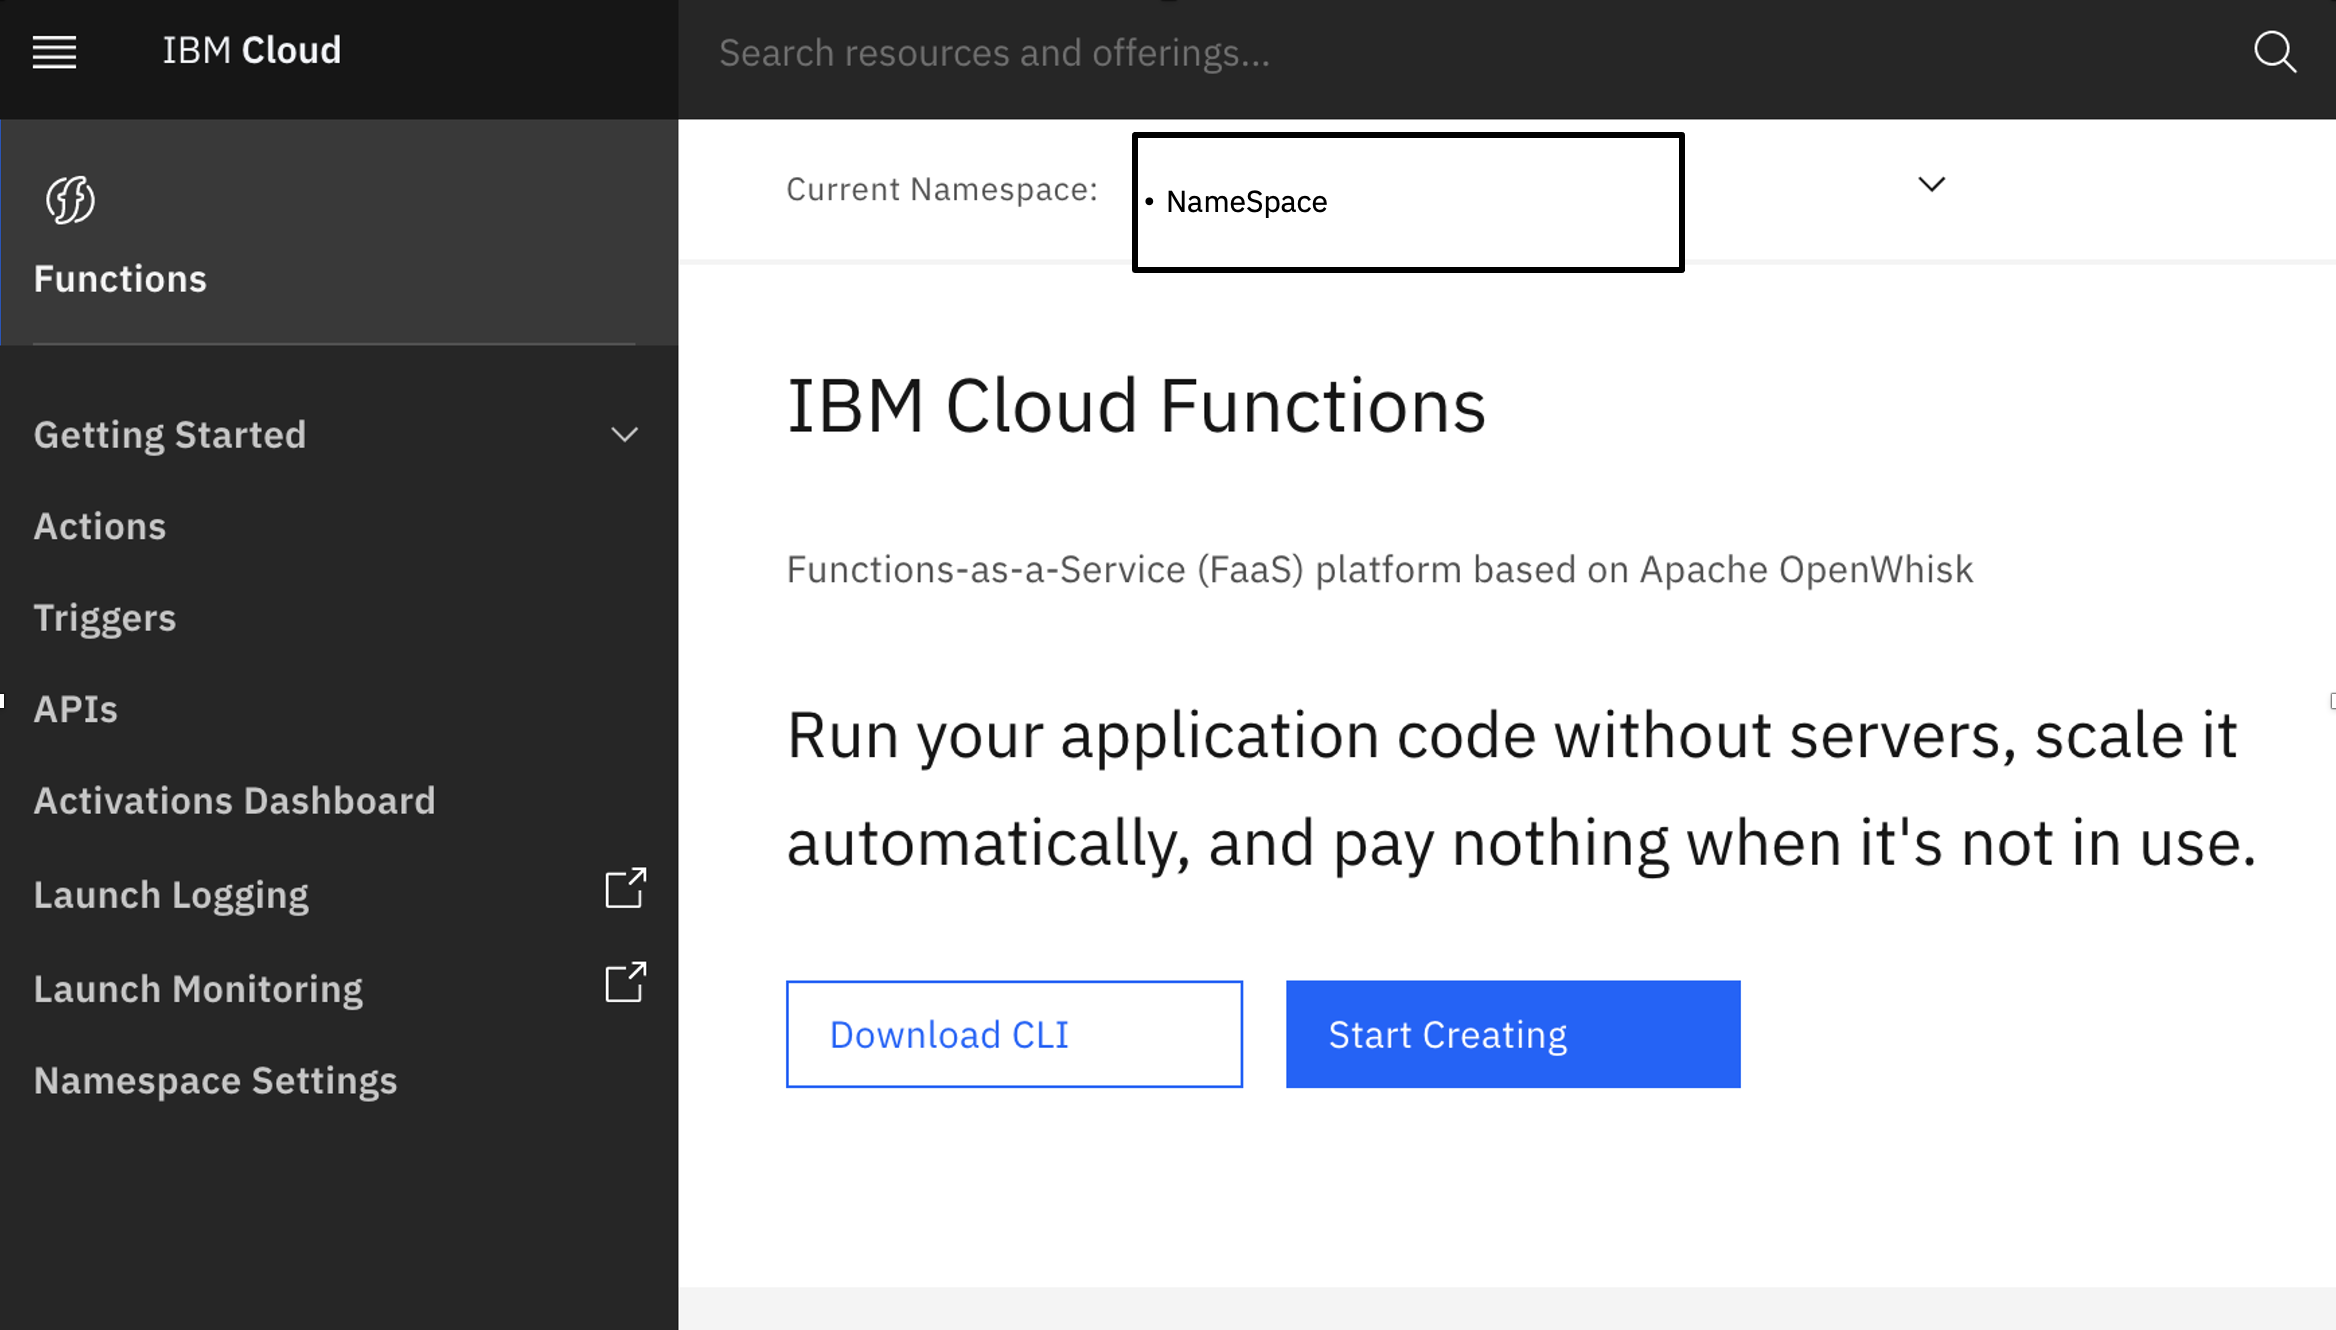
- IBM Cloud Functionsコンソールにアクセスする。
https://cloud.ibm.com/functions/
上記のような画面が表示されます。Namespaceがない場合に作成してください。
Actionsボタンをクリックします。
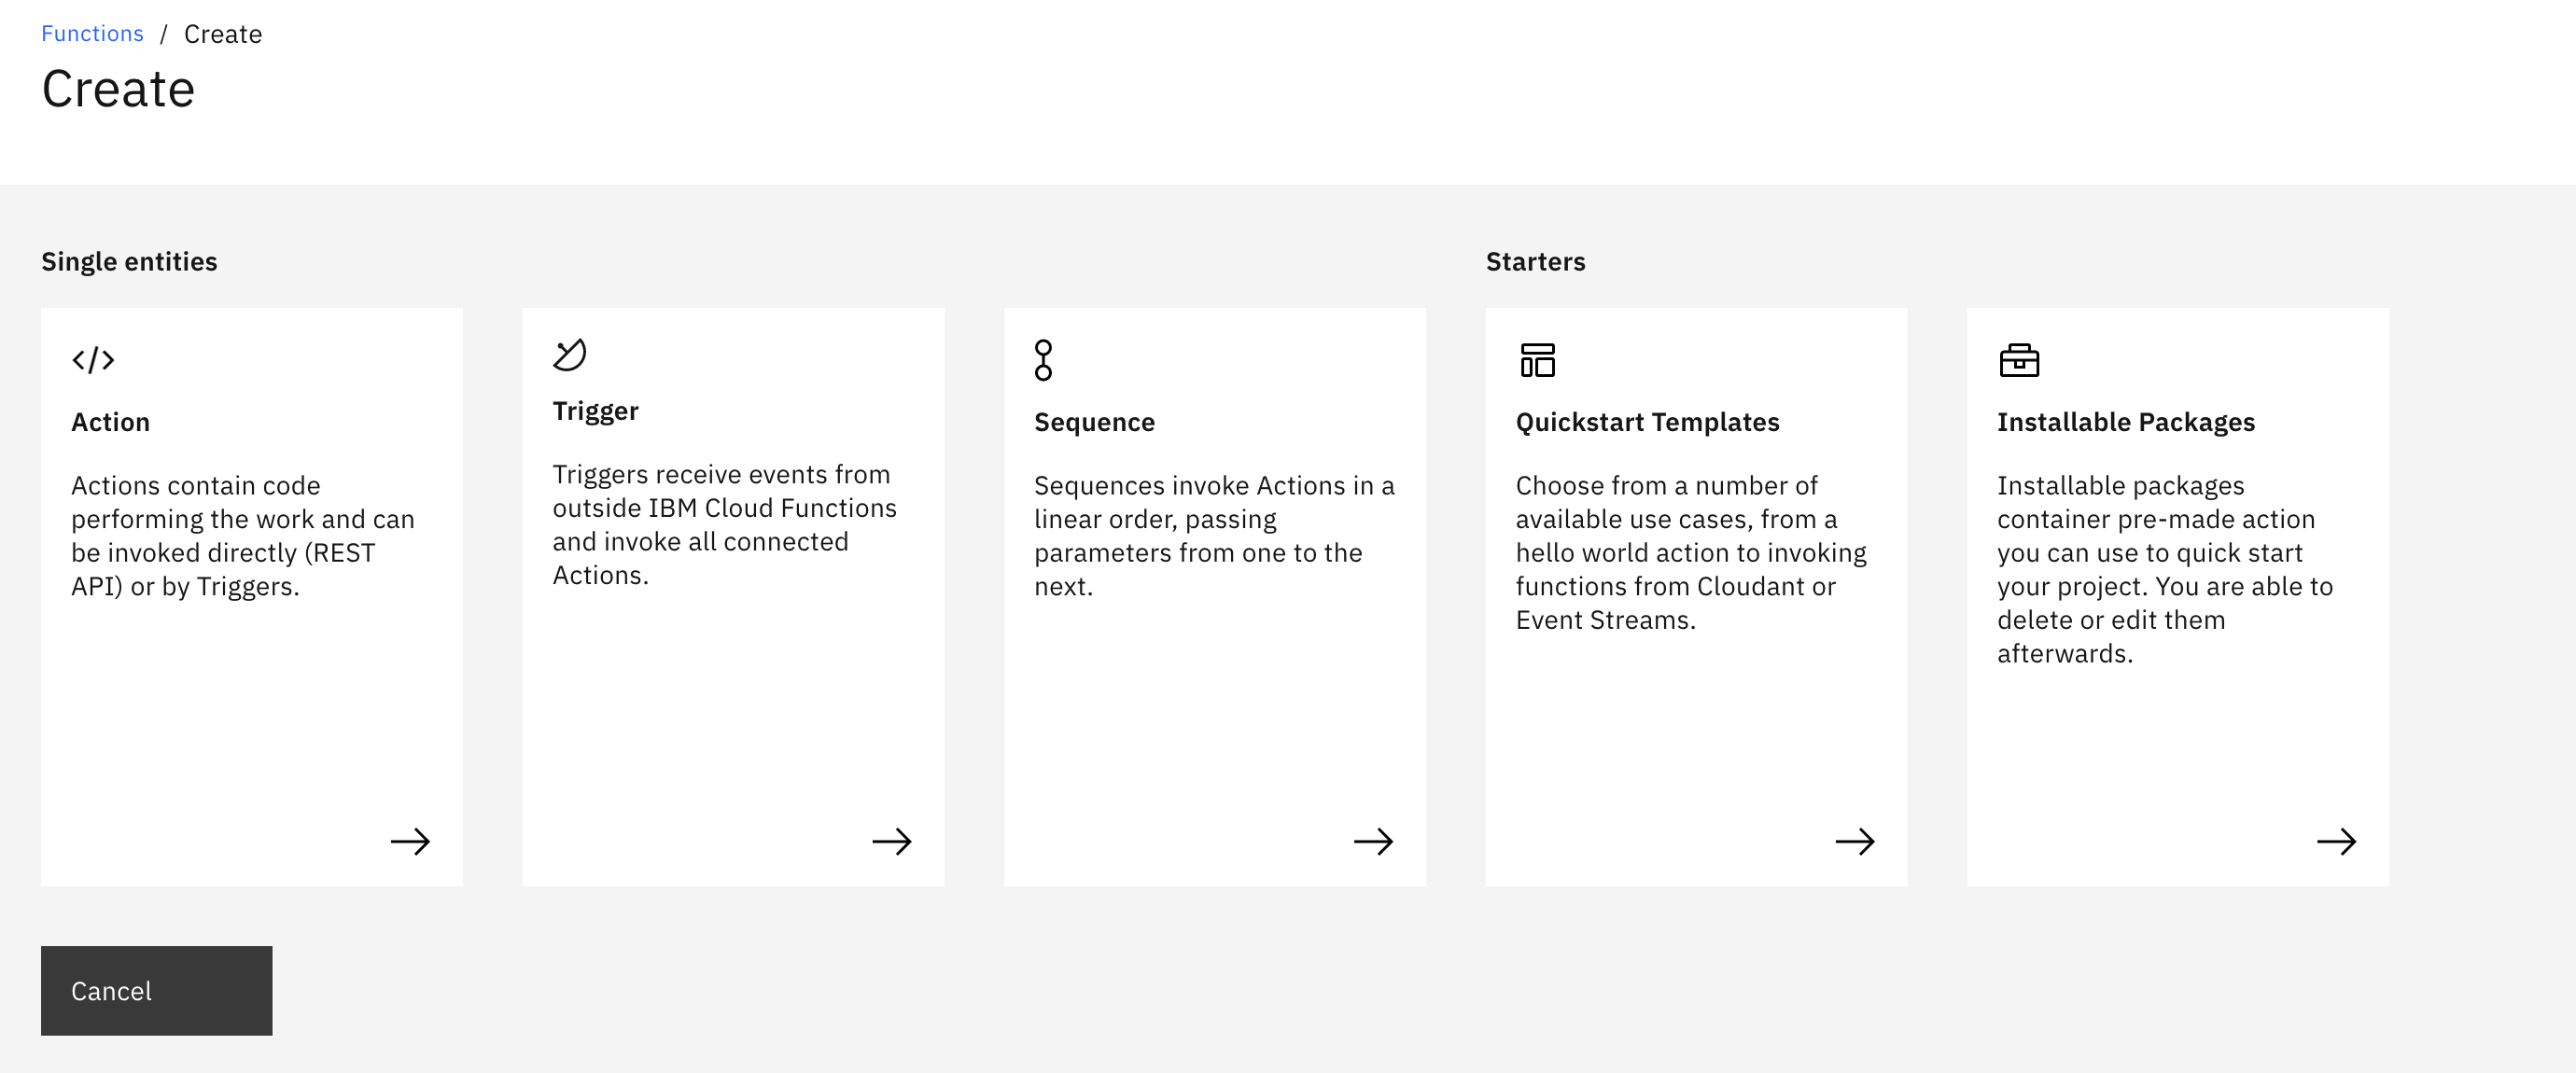
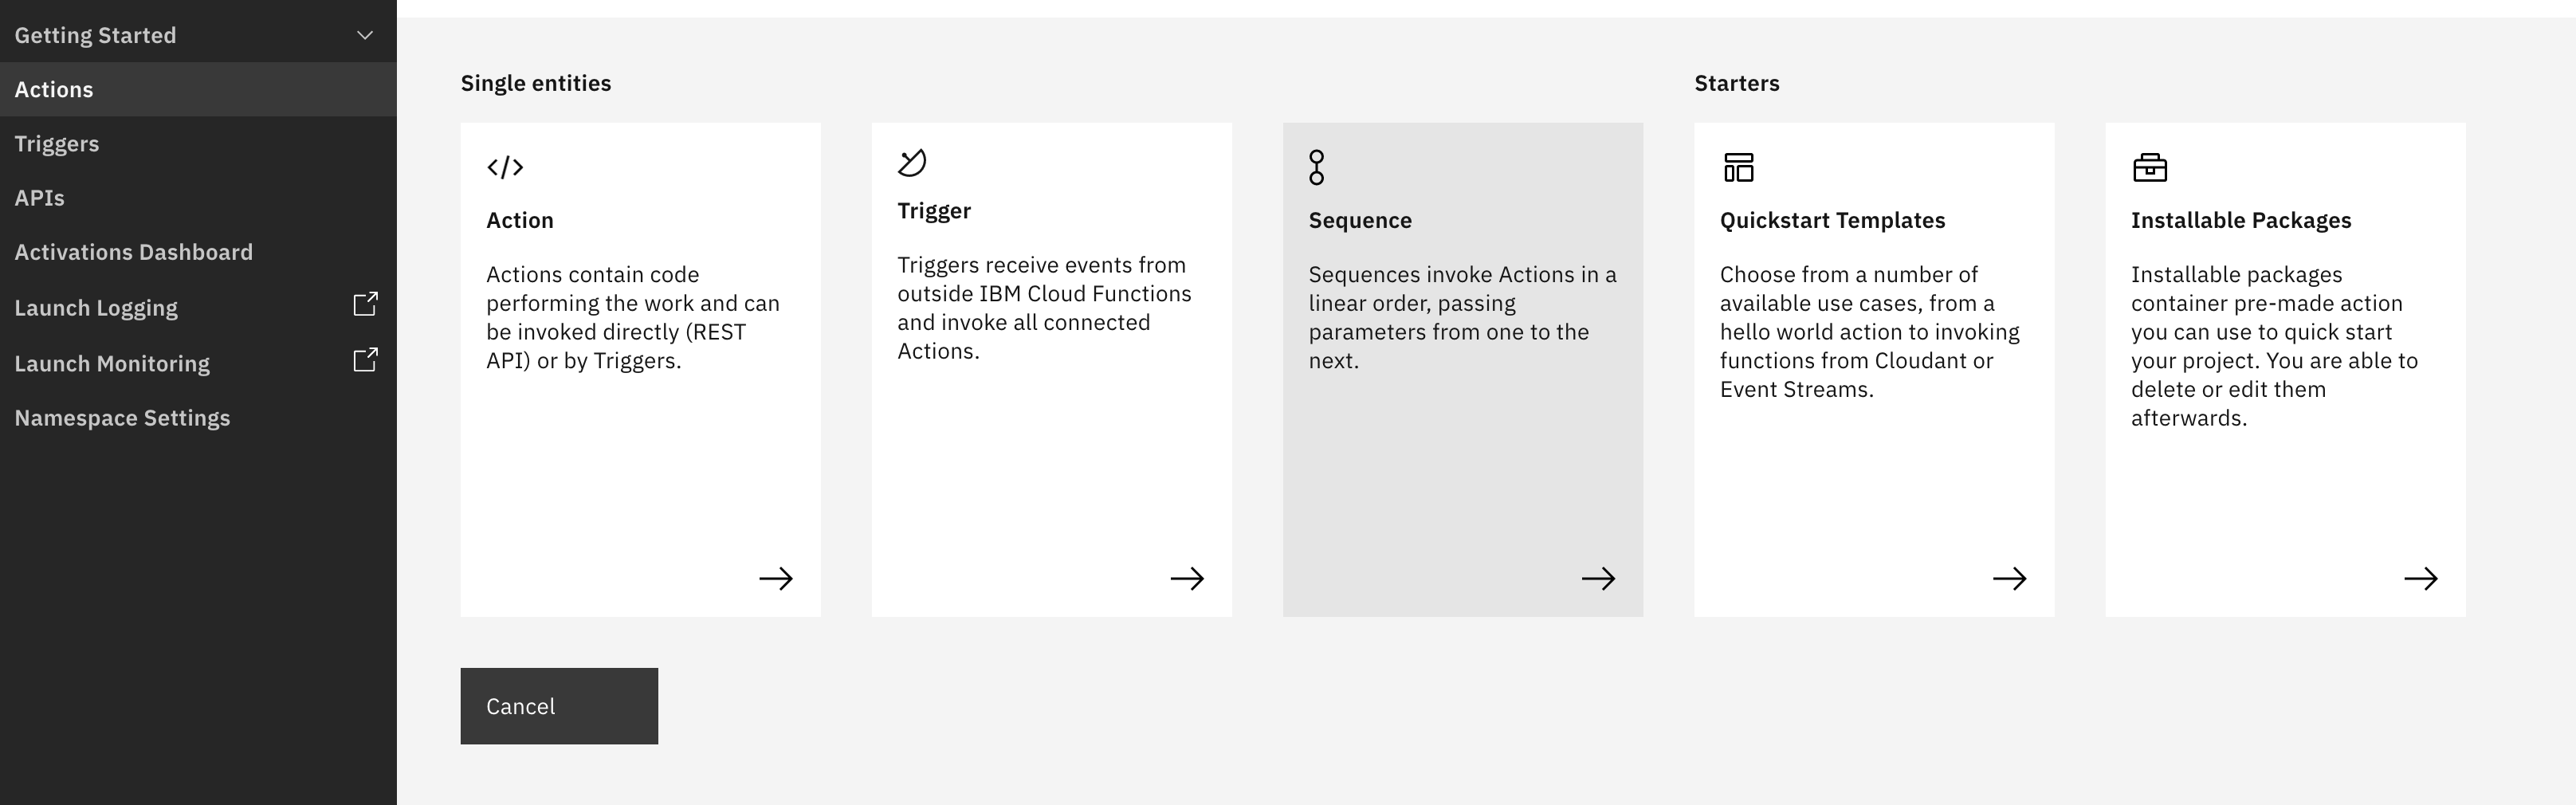
Createボタンをクリックします。

Actionをクリックします。
Action Nameを記入し、Packageは「Default」、Runtimeは「Node.js 12」のままCreateをクリックします。
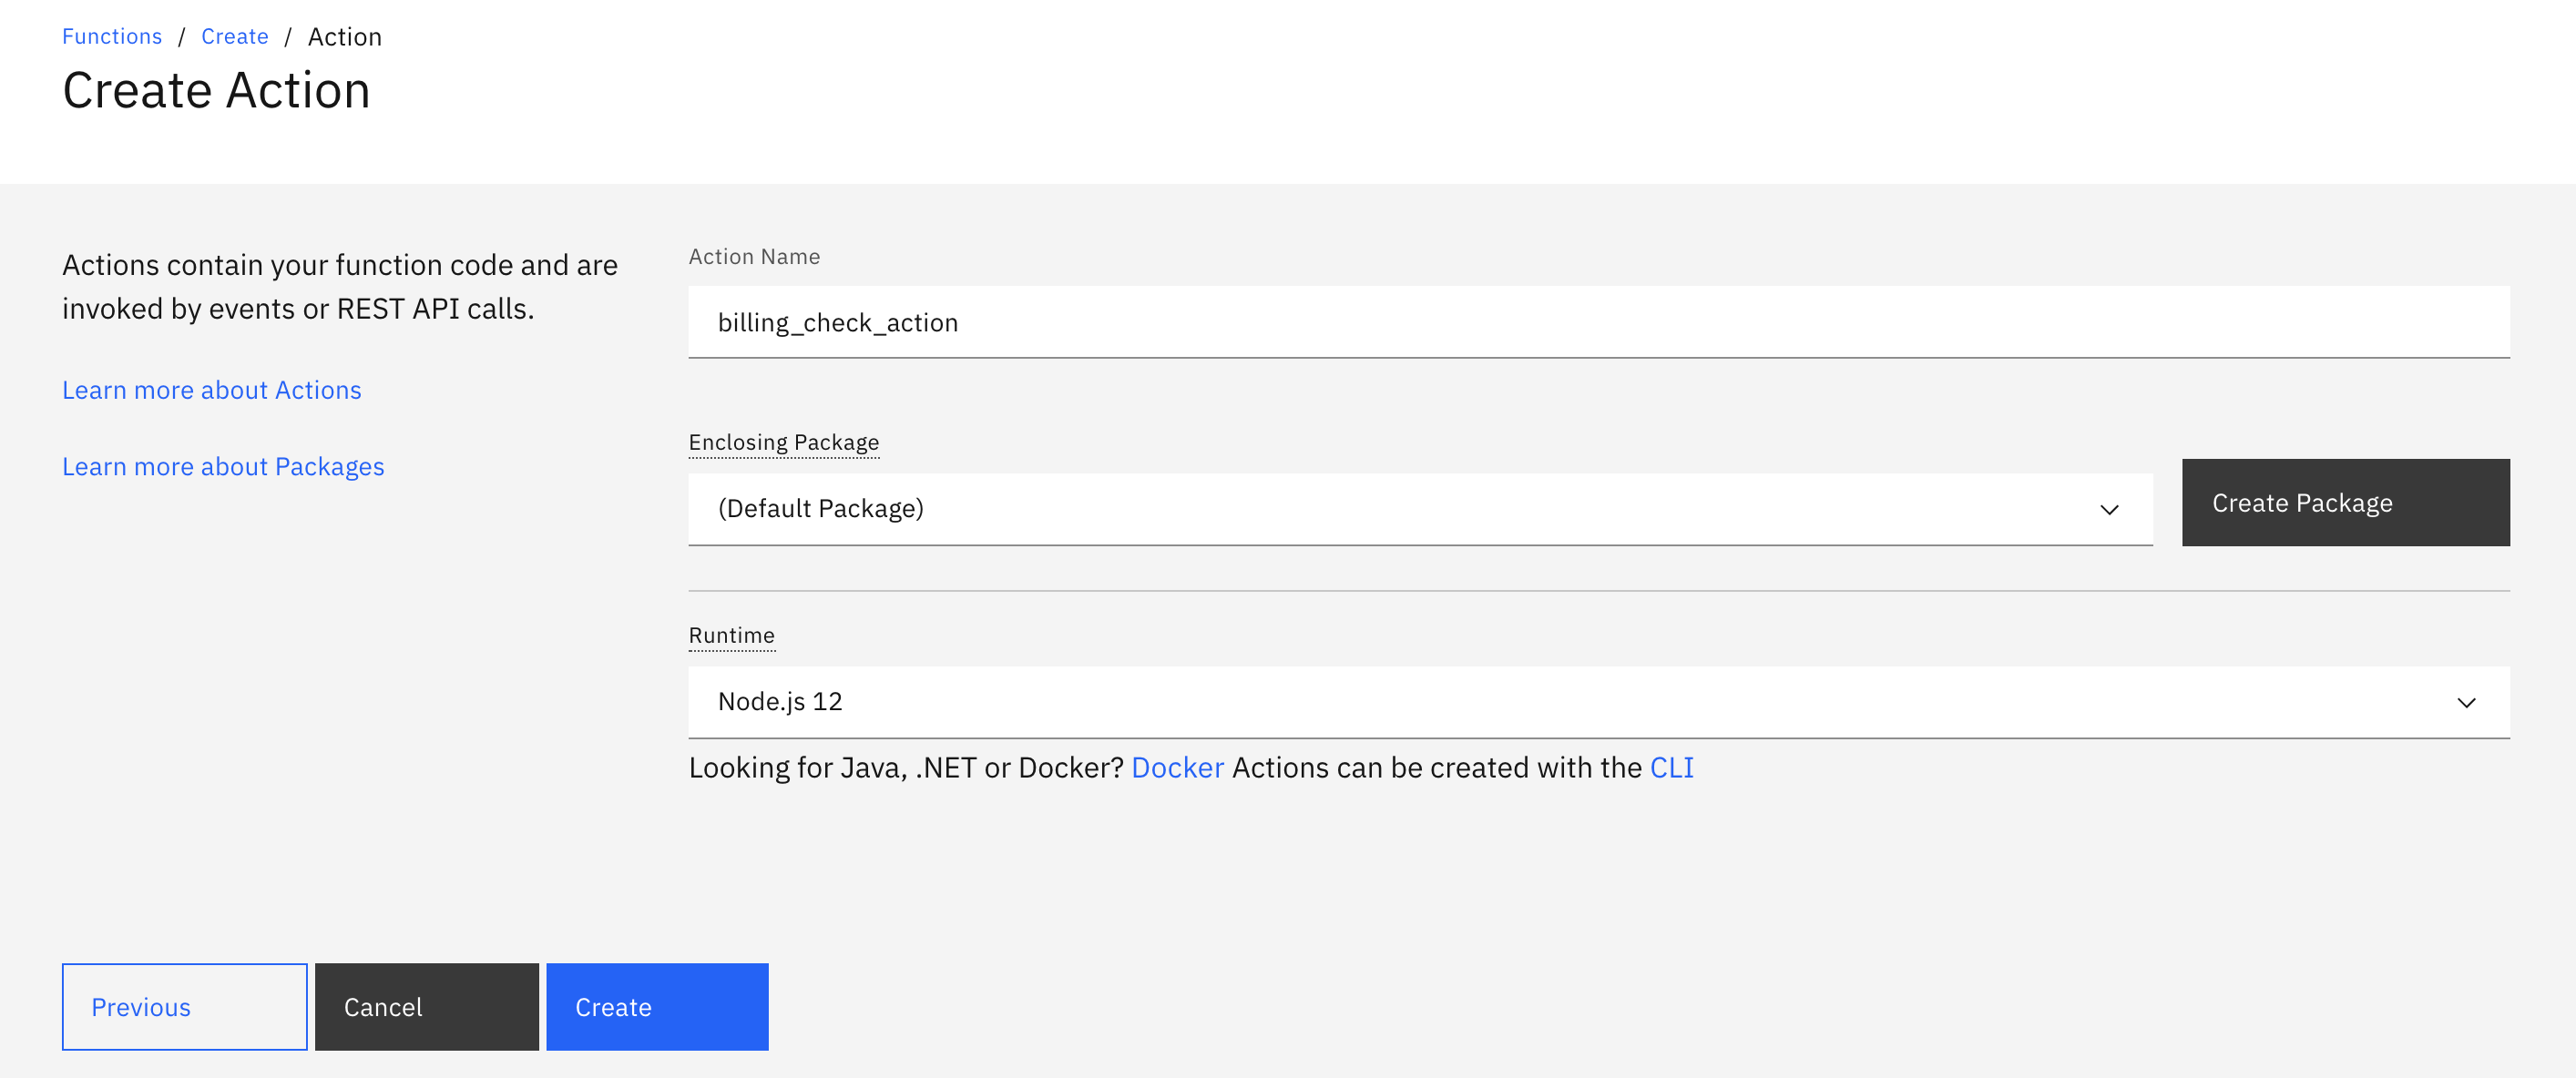
以下のような画面が表示されます。
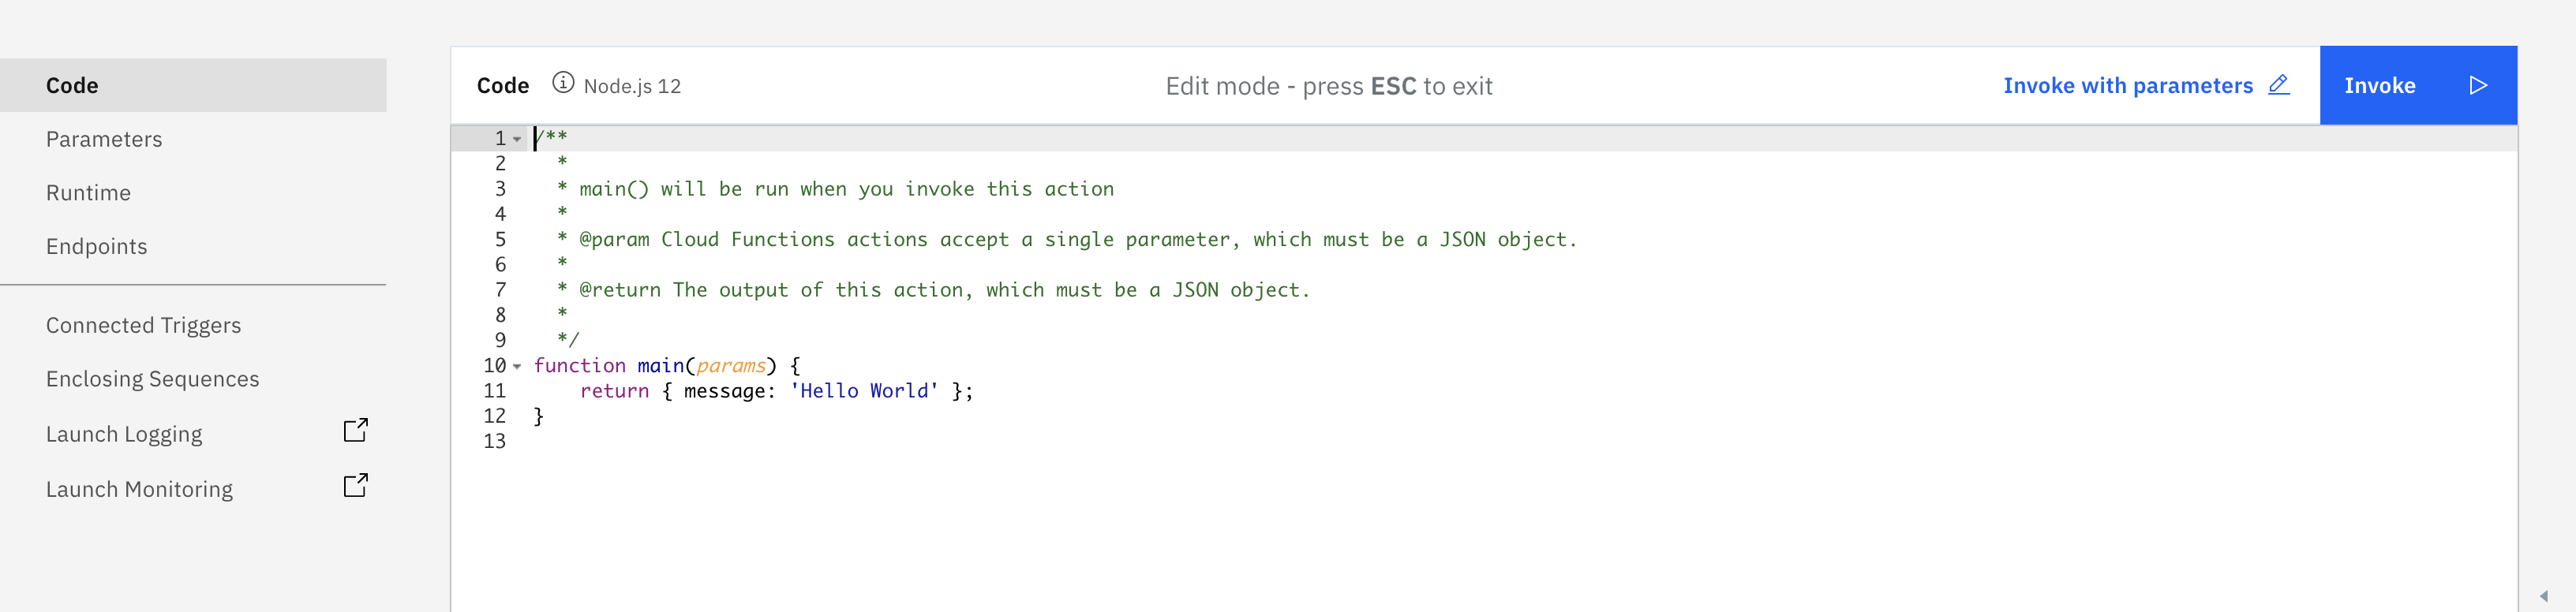
コードの部分を以下のコードに置き換えます。
下記のコードでやっていること
・ 課金情報取得用APIを呼び出すために、Access Tokenを発行してもらう
・ アクセストークンを用いて課金情報の「Summary」を取得する。
・ 必要な部分のみ整形し、Messageにいれる。
APIの詳細は以下のリンクを参照してください。
https://cloud.ibm.com/apidocs/metering-reporting#get-account-summary
/*

*/

const axios = require('axios')

async function main(params) {

  //環境変数からAPIキーを取得
    var apikey = params.API_KEY
  var bodyData = "grant_type=urn:ibm:params:oauth:grant-type:apikey&apikey="+apikey;
  var getTokenHeader = {
        "accept": "application/json",
        'Content-Type' : 'application/x-www-form-urlencoded'
    }
    var getTokenUrl = "https://iam.cloud.ibm.com/identity/token"

    var header = {
        headers: getTokenHeader
    }

    var getTokenresponse = await axios.post(getTokenUrl,bodyData,header)
    var access_token = getTokenresponse.data.access_token;


    var headers= {
        "Accept": "application/json",
        "Authorization" :  "Bearer " + access_token
    }

    const header = {
        "headers": headers
    }

//対象の月を今月に指定
    var date = new Date();
    var year = date.getFullYear();
    var month = date.getMonth() + 1;
    var monthString = month < 10 ? "0"+String(month) : month;

    let url =  "https://billing.cloud.ibm.com/v4/accounts/"+params.ACCOUNT_ID+"/summary/"+year+"-"+monthString;
    const response = await axios.get(url,header)

  const message = "Account: "+params.ACCOUNT_NAME+"\n Month: " + response.data.month + "\n Month to now spending: $" + response.data.resources.billable_cost;
  return { text: message, url: params.url };
}

exports.main = main;
上記の記入が完了したら、Saveボタンをクリックする。
またActions画面に戻る。
https://cloud.ibm.com/functions/actions
上記と同じ手順でSlackへ送信用「Post」アクションを作成する。
コードの部分は以下のコードを利用する。
// Licensed to the Apache Software Foundation (ASF) under one or more contributor
// license agreements; and to You under the Apache License, Version 2.0.

var request = require('request');

/**
 * Action to post to slack
 *  @param {string} url - Slack webhook url
 *  @param {string} channel - (optional) Slack channel to post the message to
 *  @param {string} username - name to post the message as
 *  @param {string} text - message to post
 *  @param {string} icon_emoji - (optional) emoji to use as the icon for the message
 *  @param {boolean} as_user - (optional) when the token belongs to a bot, whether to post as the bot itself
 *  @param {object} attachments - (optional) message attachments (see Slack documentation for format)
 *  @return {object} Promise
 */
function main(params) {
    let errorMsg = checkParams(params);
    if (errorMsg) {
        return { error: errorMsg };
    }

    var body = {
        channel: params.channel,
        username: params.username || 'Simple Message Bot'
    };

    if (params.icon_emoji) {
        // guard against sending icon_emoji: undefined
        body.icon_emoji = params.icon_emoji;
    }

    if (params.as_user === true) {
        body.as_user = true;
    }

    if (params.text) {
        body.text = params.text;
    }

    if (params.attachments) {
        body.attachments = JSON.stringify(params.attachments);
    }

    if (params.token) {
        //
        // this allows us to support /api/chat.postMessage
        // e.g. users can pass params.url = https://slack.com/api/chat.postMessage
        //                 and params.token = <their auth token>
        //
        body.token = params.token;
    } else {
        //
        // the webhook api expects a nested payload
        //
        // notice that we need to stringify; this is due to limitations
        // of the formData npm: it does not handle nested objects
        //
        body = {
            payload: JSON.stringify(body)
        };
    }

    var promise = new Promise(function (resolve, reject) {
        request.post({
            url: params.url,
            formData: body
        }, function (err, res, body) {
            if (err) {
                console.log('error: ', err, body);
                reject(err);
            } else {
                console.log('success: ', params.text, 'successfully sent');
                resolve();
            }
        });
    });

    return promise;
}

/**
 *  Checks if all required params are set.
 */
function checkParams(params) {
    if (params.text === undefined && params.attachments === undefined) {
        return ('No text provided');
    }
    else if (params.url === undefined) {
        return 'No Webhook URL provided';
    }
    else {
        return undefined;
    }
}
「Sequence」の作成
「Actions」画面にてCreateボタンをクリックします。

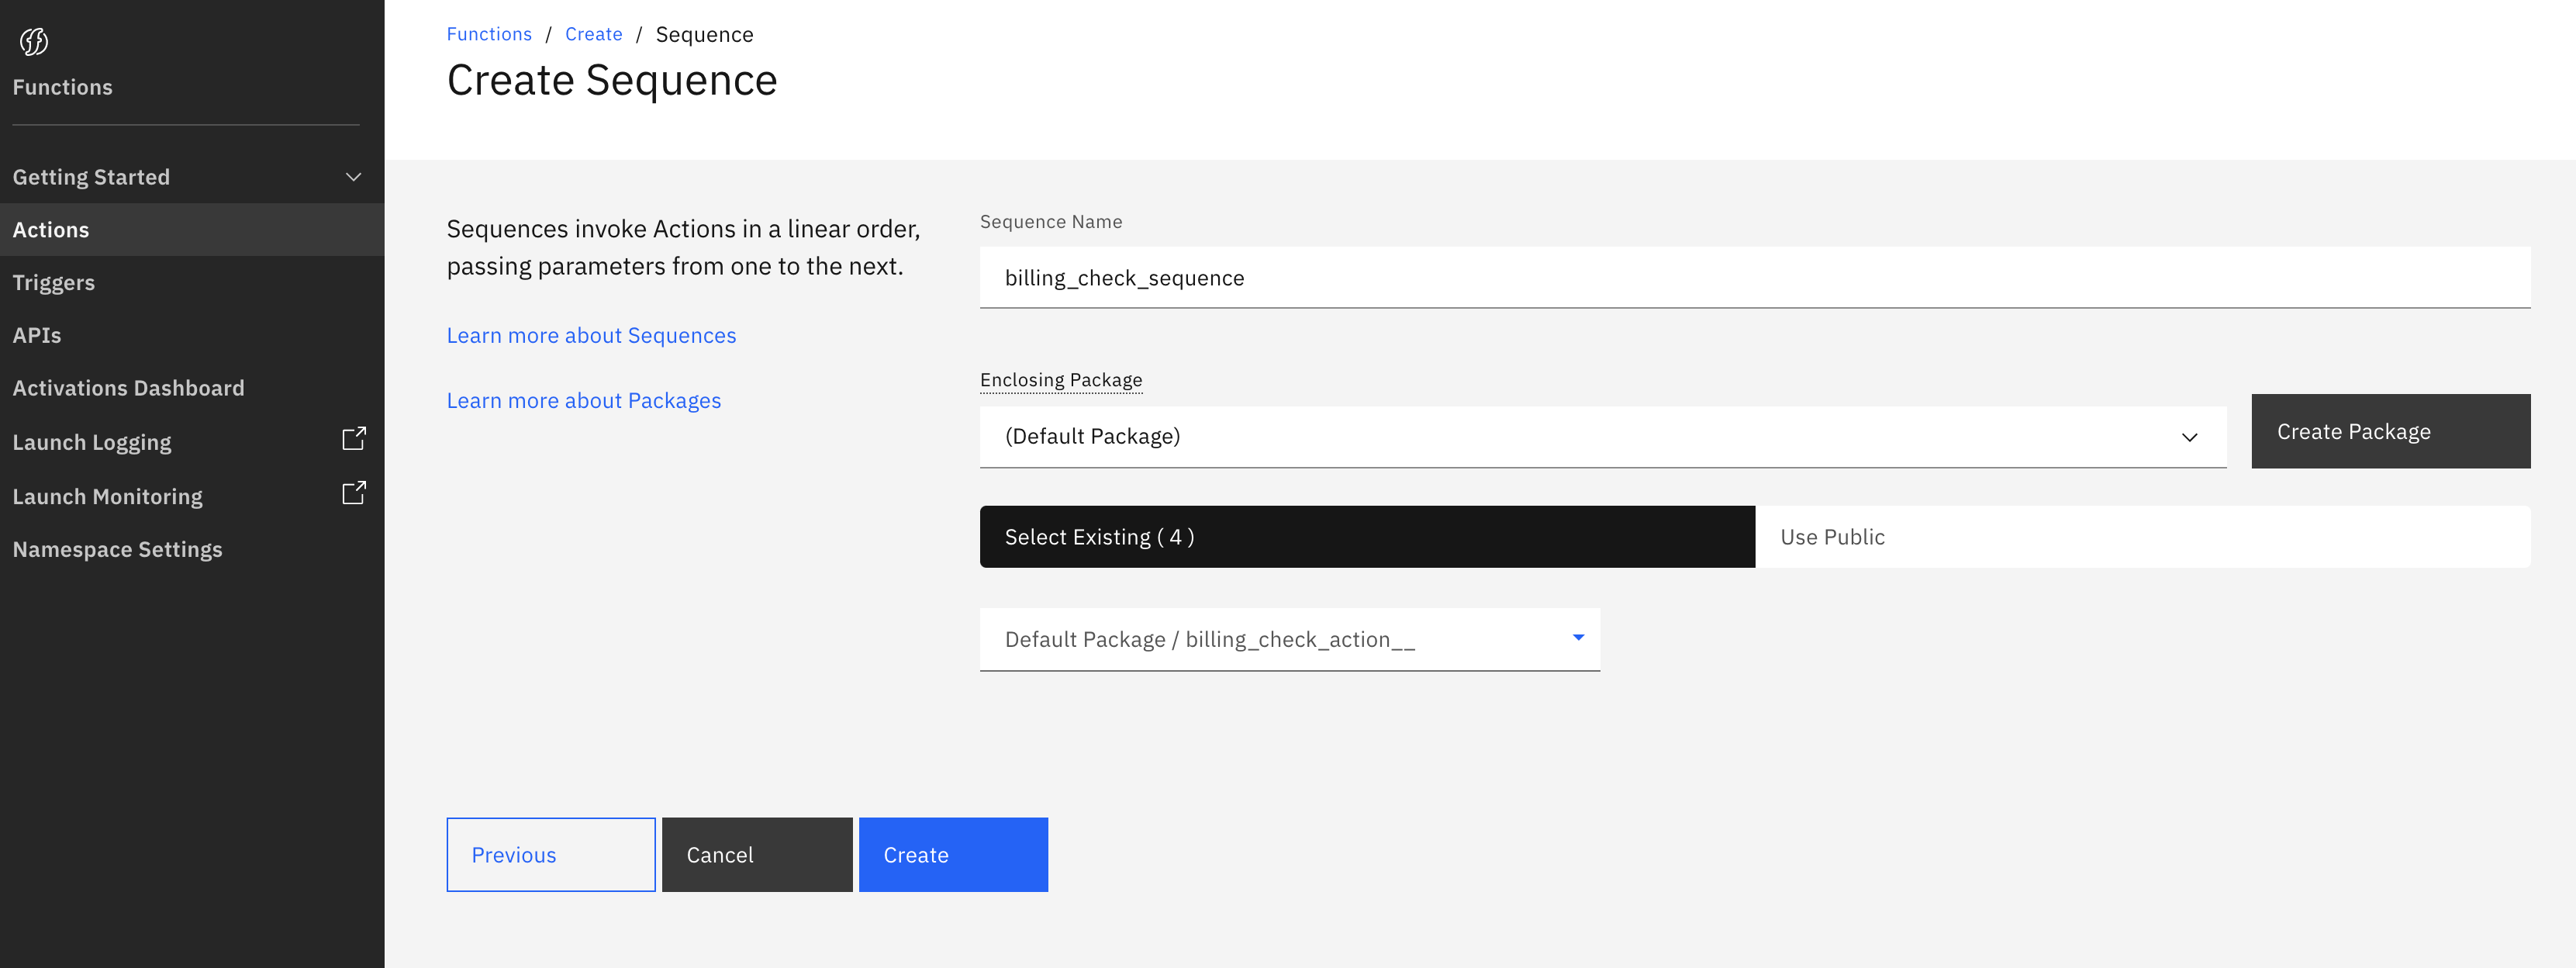
Sequenceをクリックします。
Sequence名の入力し、既存のアクションの「billing_check_action」を選択し、作成ボタンをクリックします。
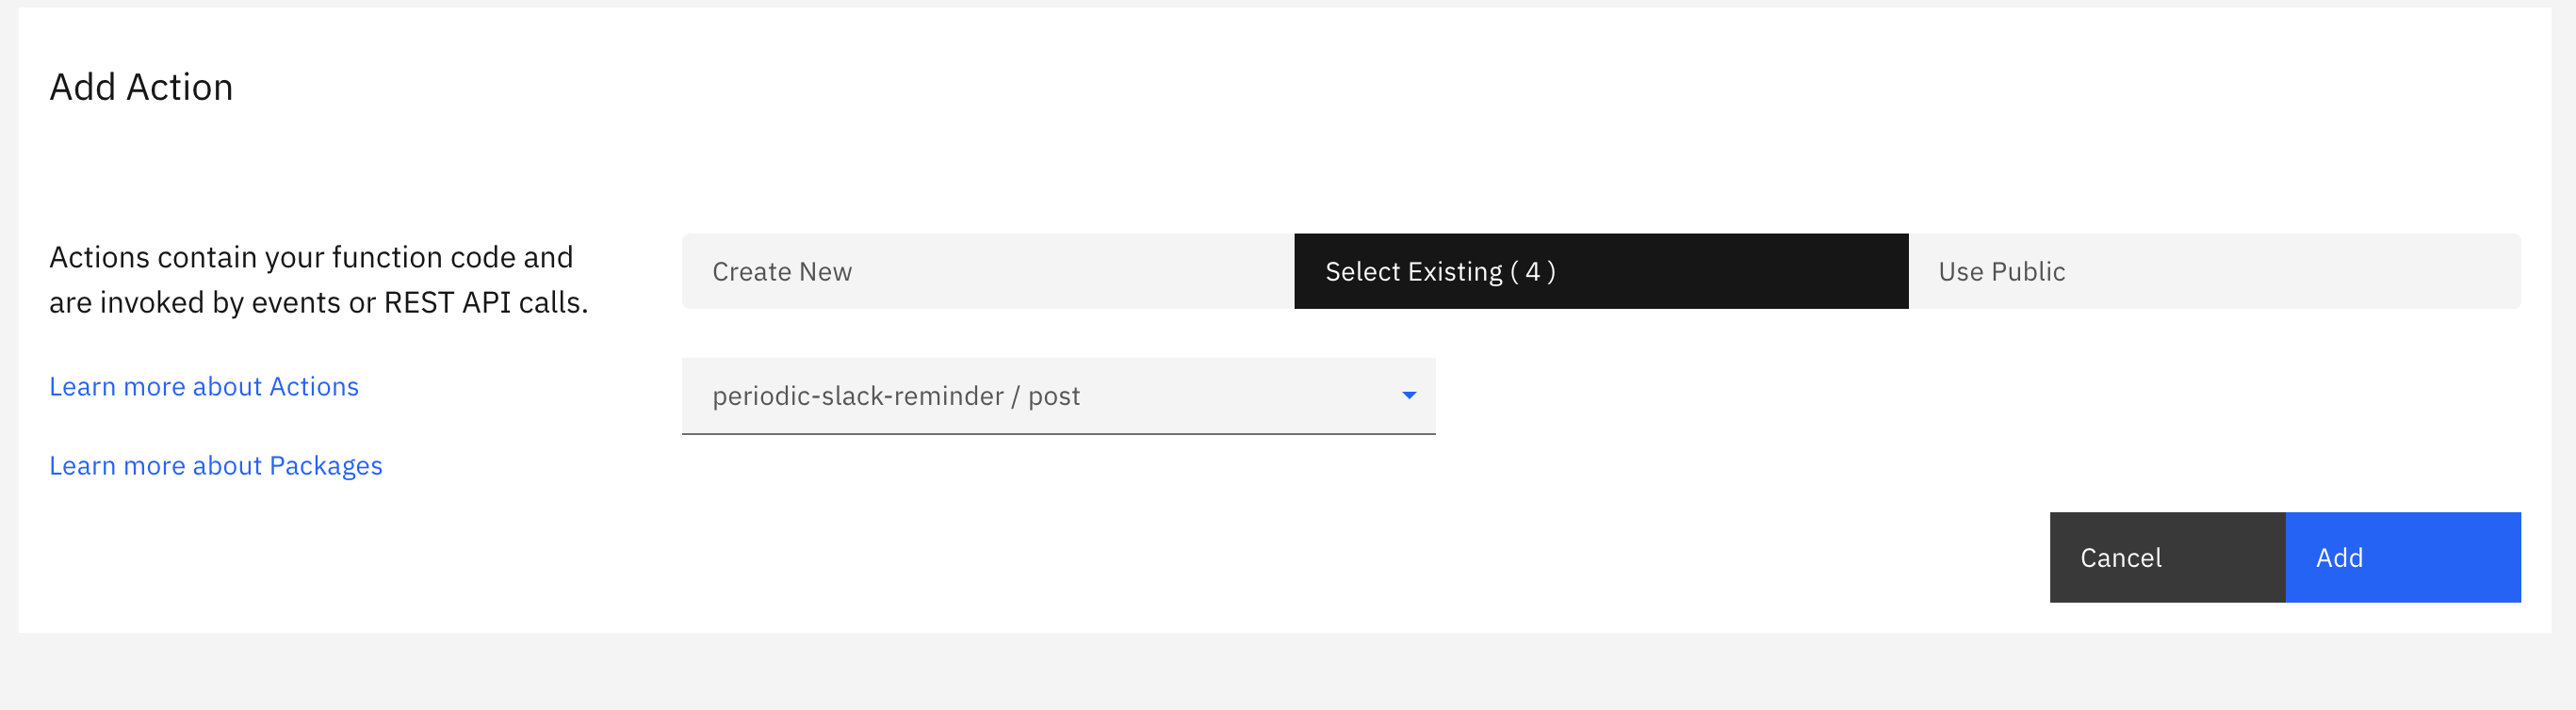
以下のような画面が表示されたら「Add +」ボタンをクリックします。

「Select Existing」を選択し、上記にて作成した「Post」アクションを選択します。またAddボタンをクリックします。
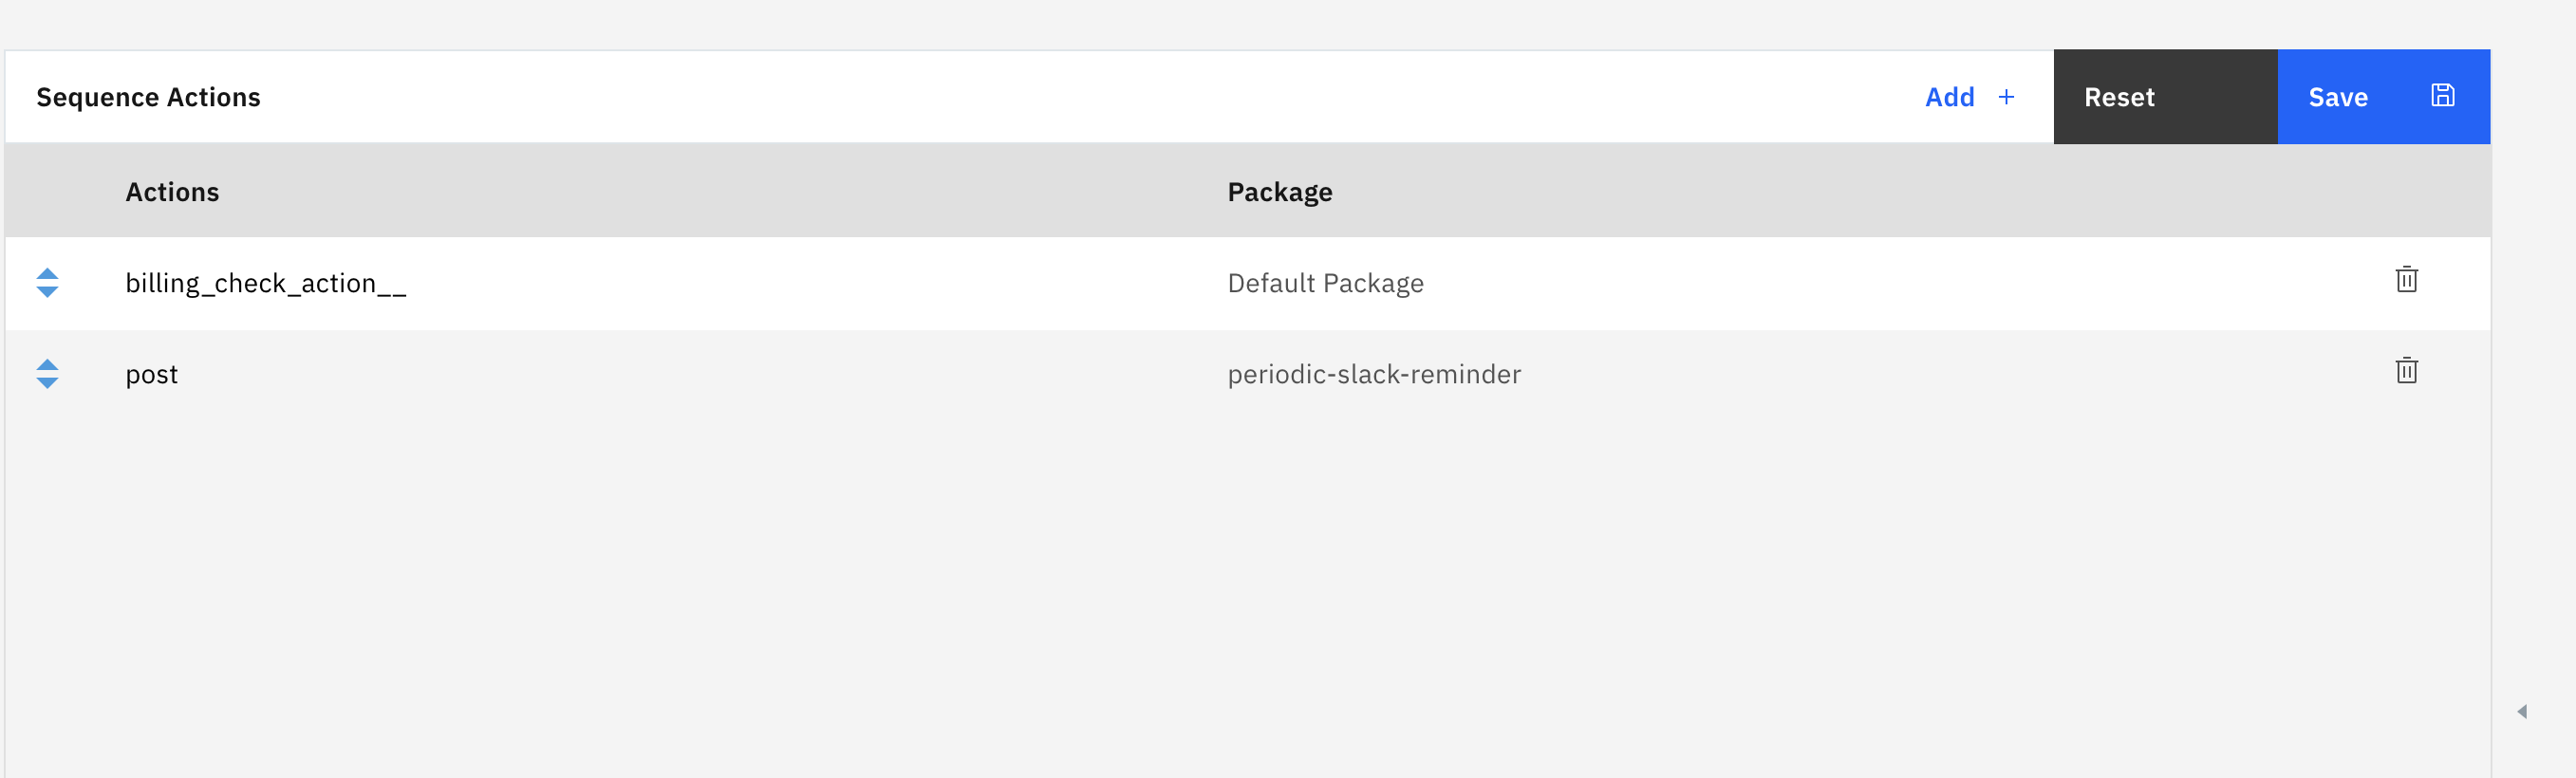
下記のような画面が表示されますが、「Save」を忘れずにクリックしてください。
「Trigger」の作成
Trigger画面にアクセスします。
https://cloud.ibm.com/functions/triggers
下記のような画面で、「Create」ボタンをクリックします。

Triggerを選択します。
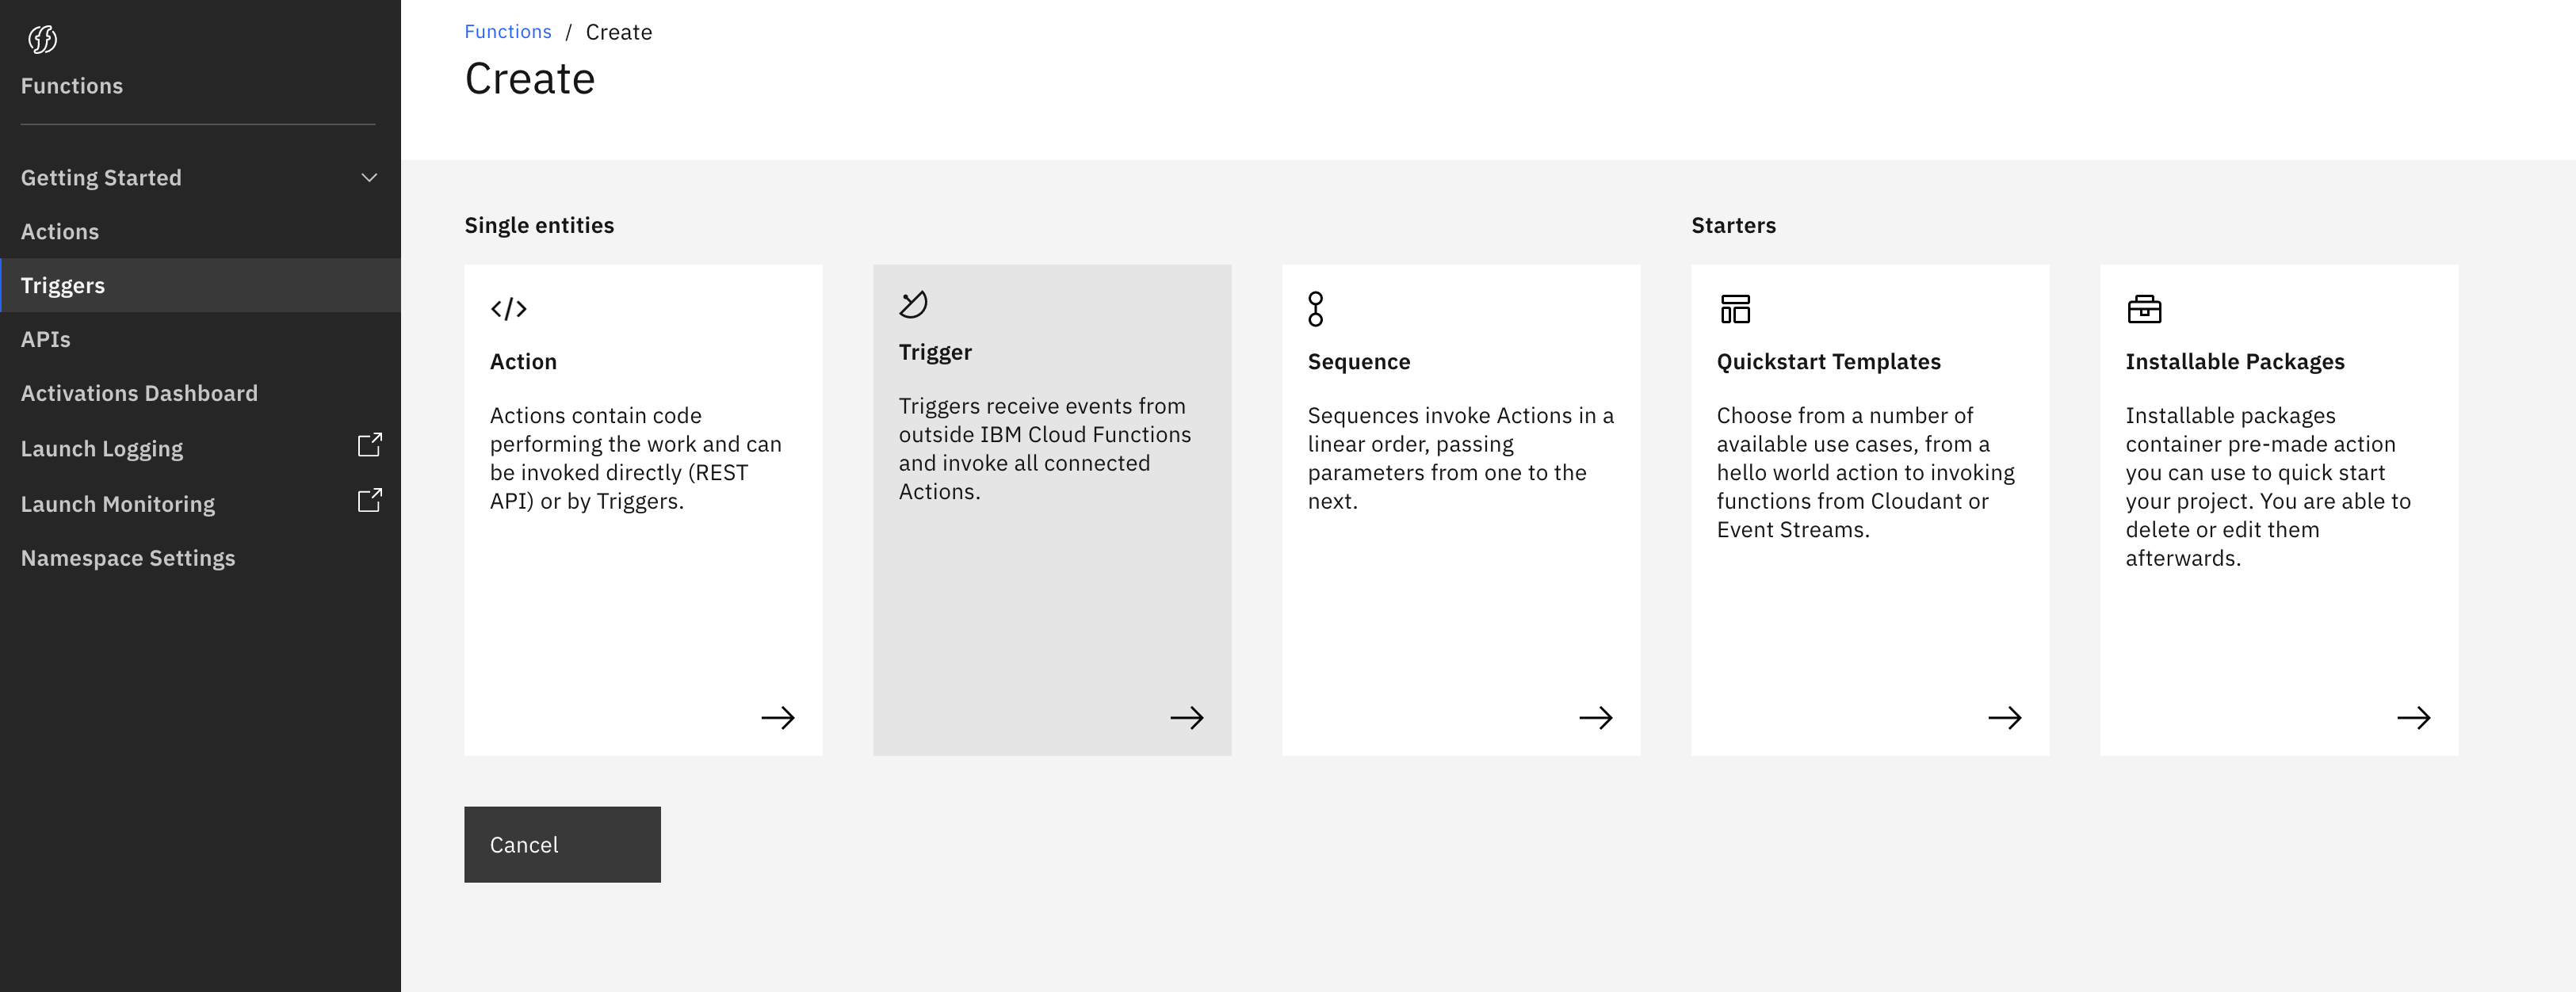
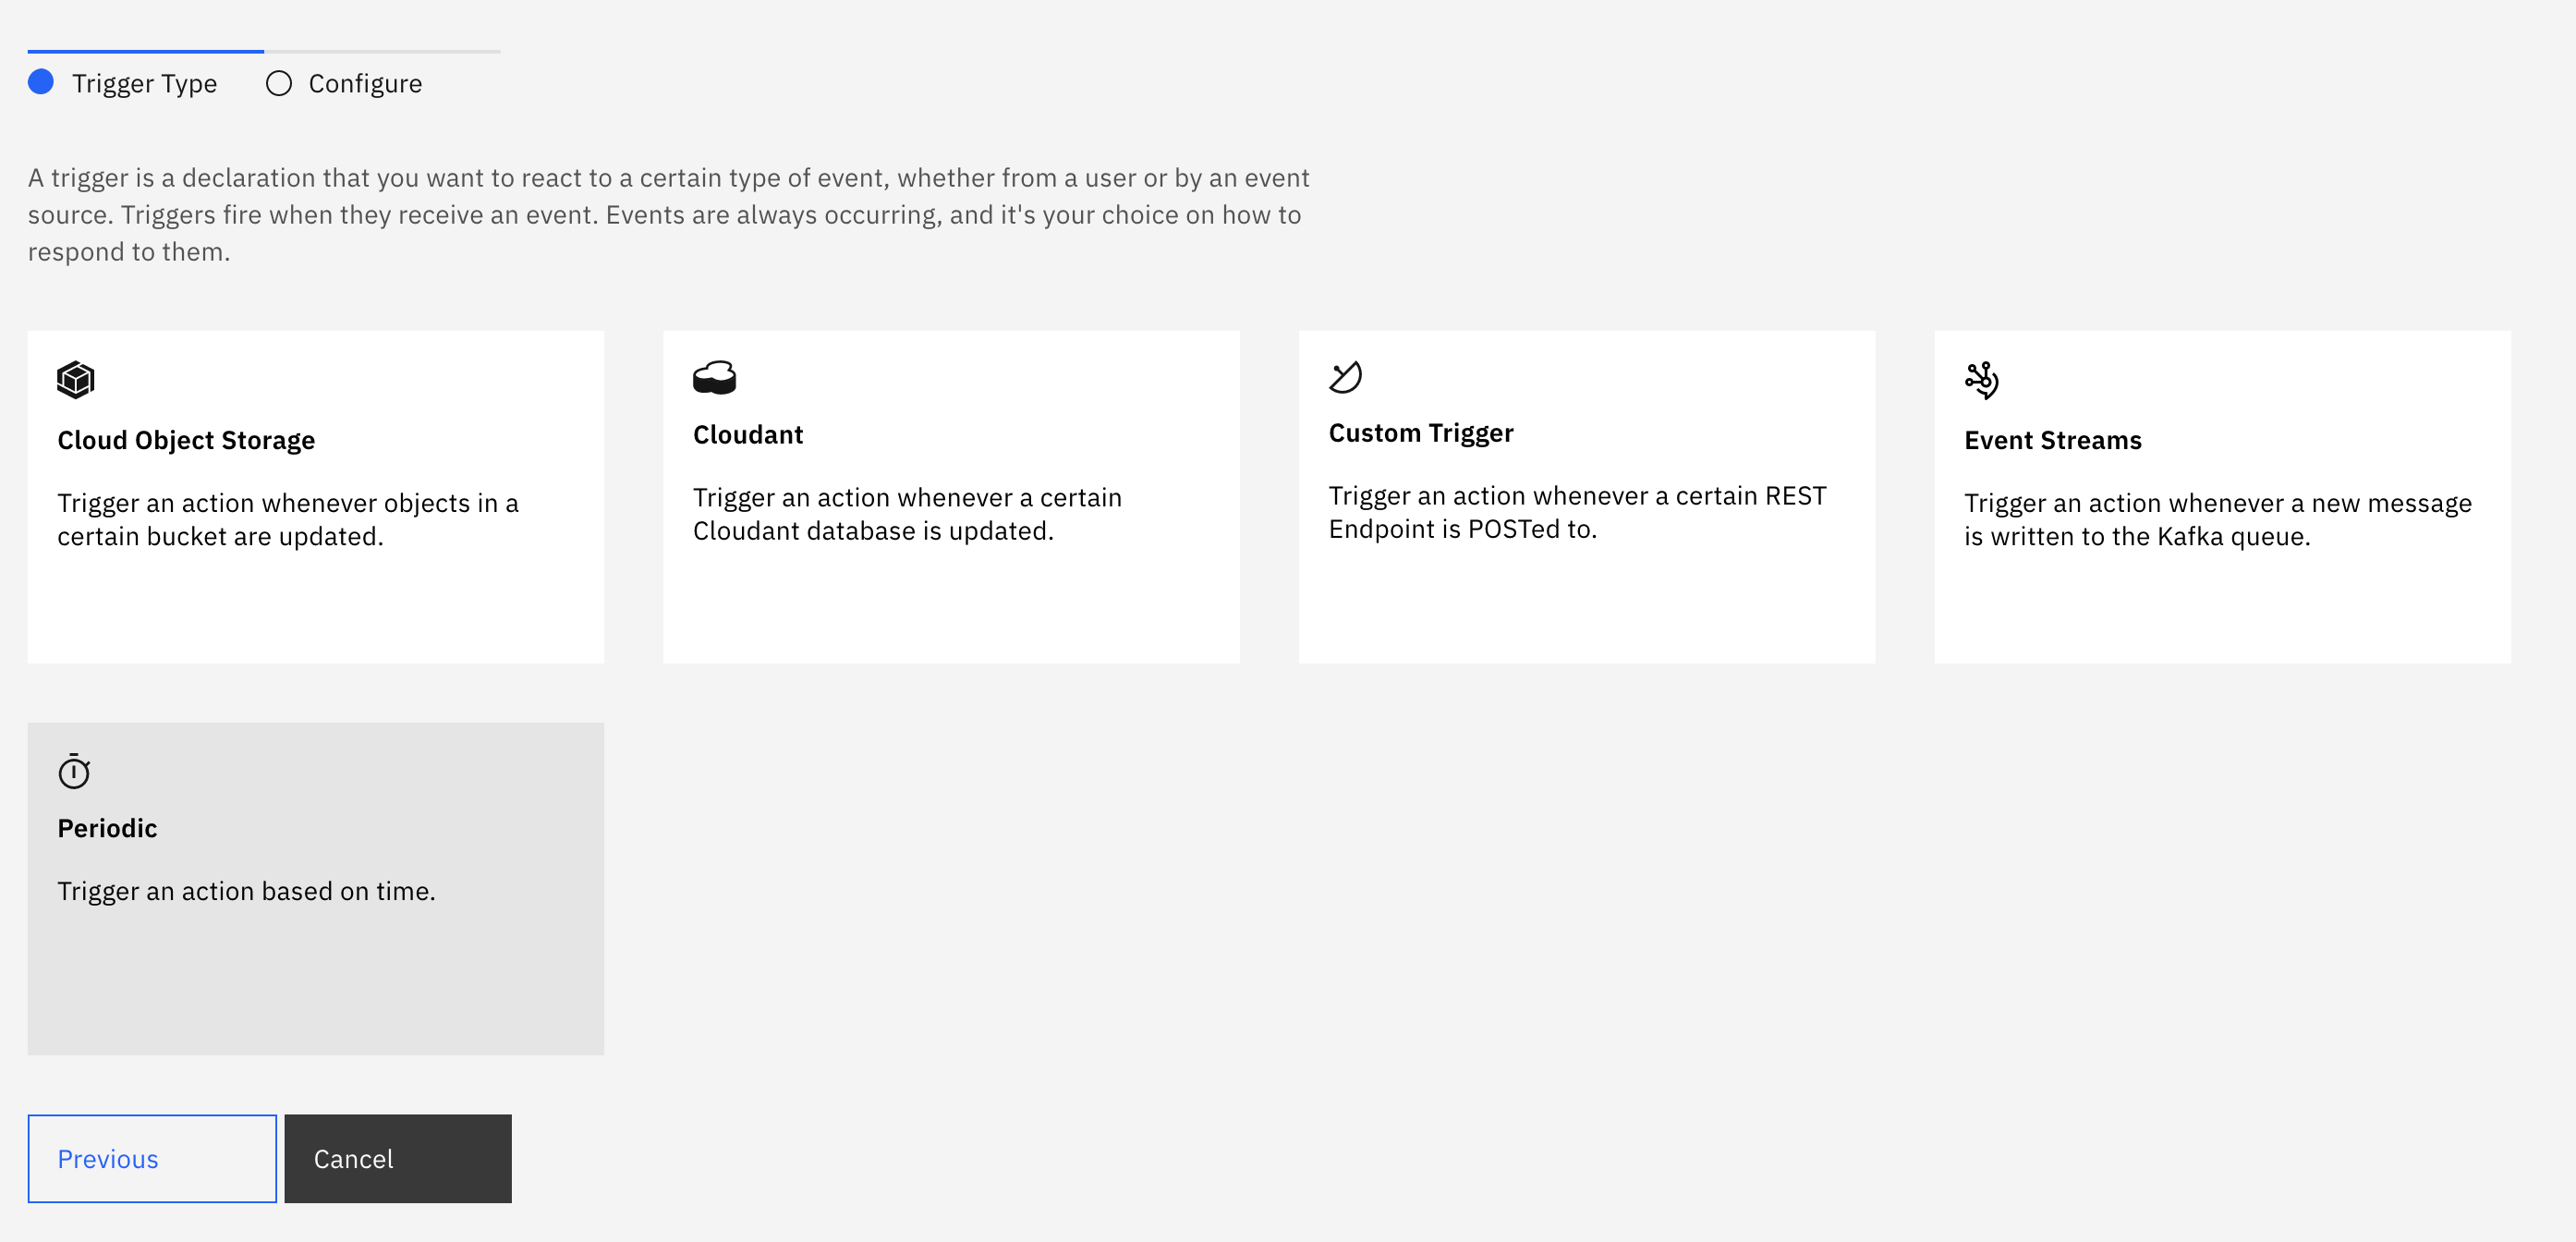
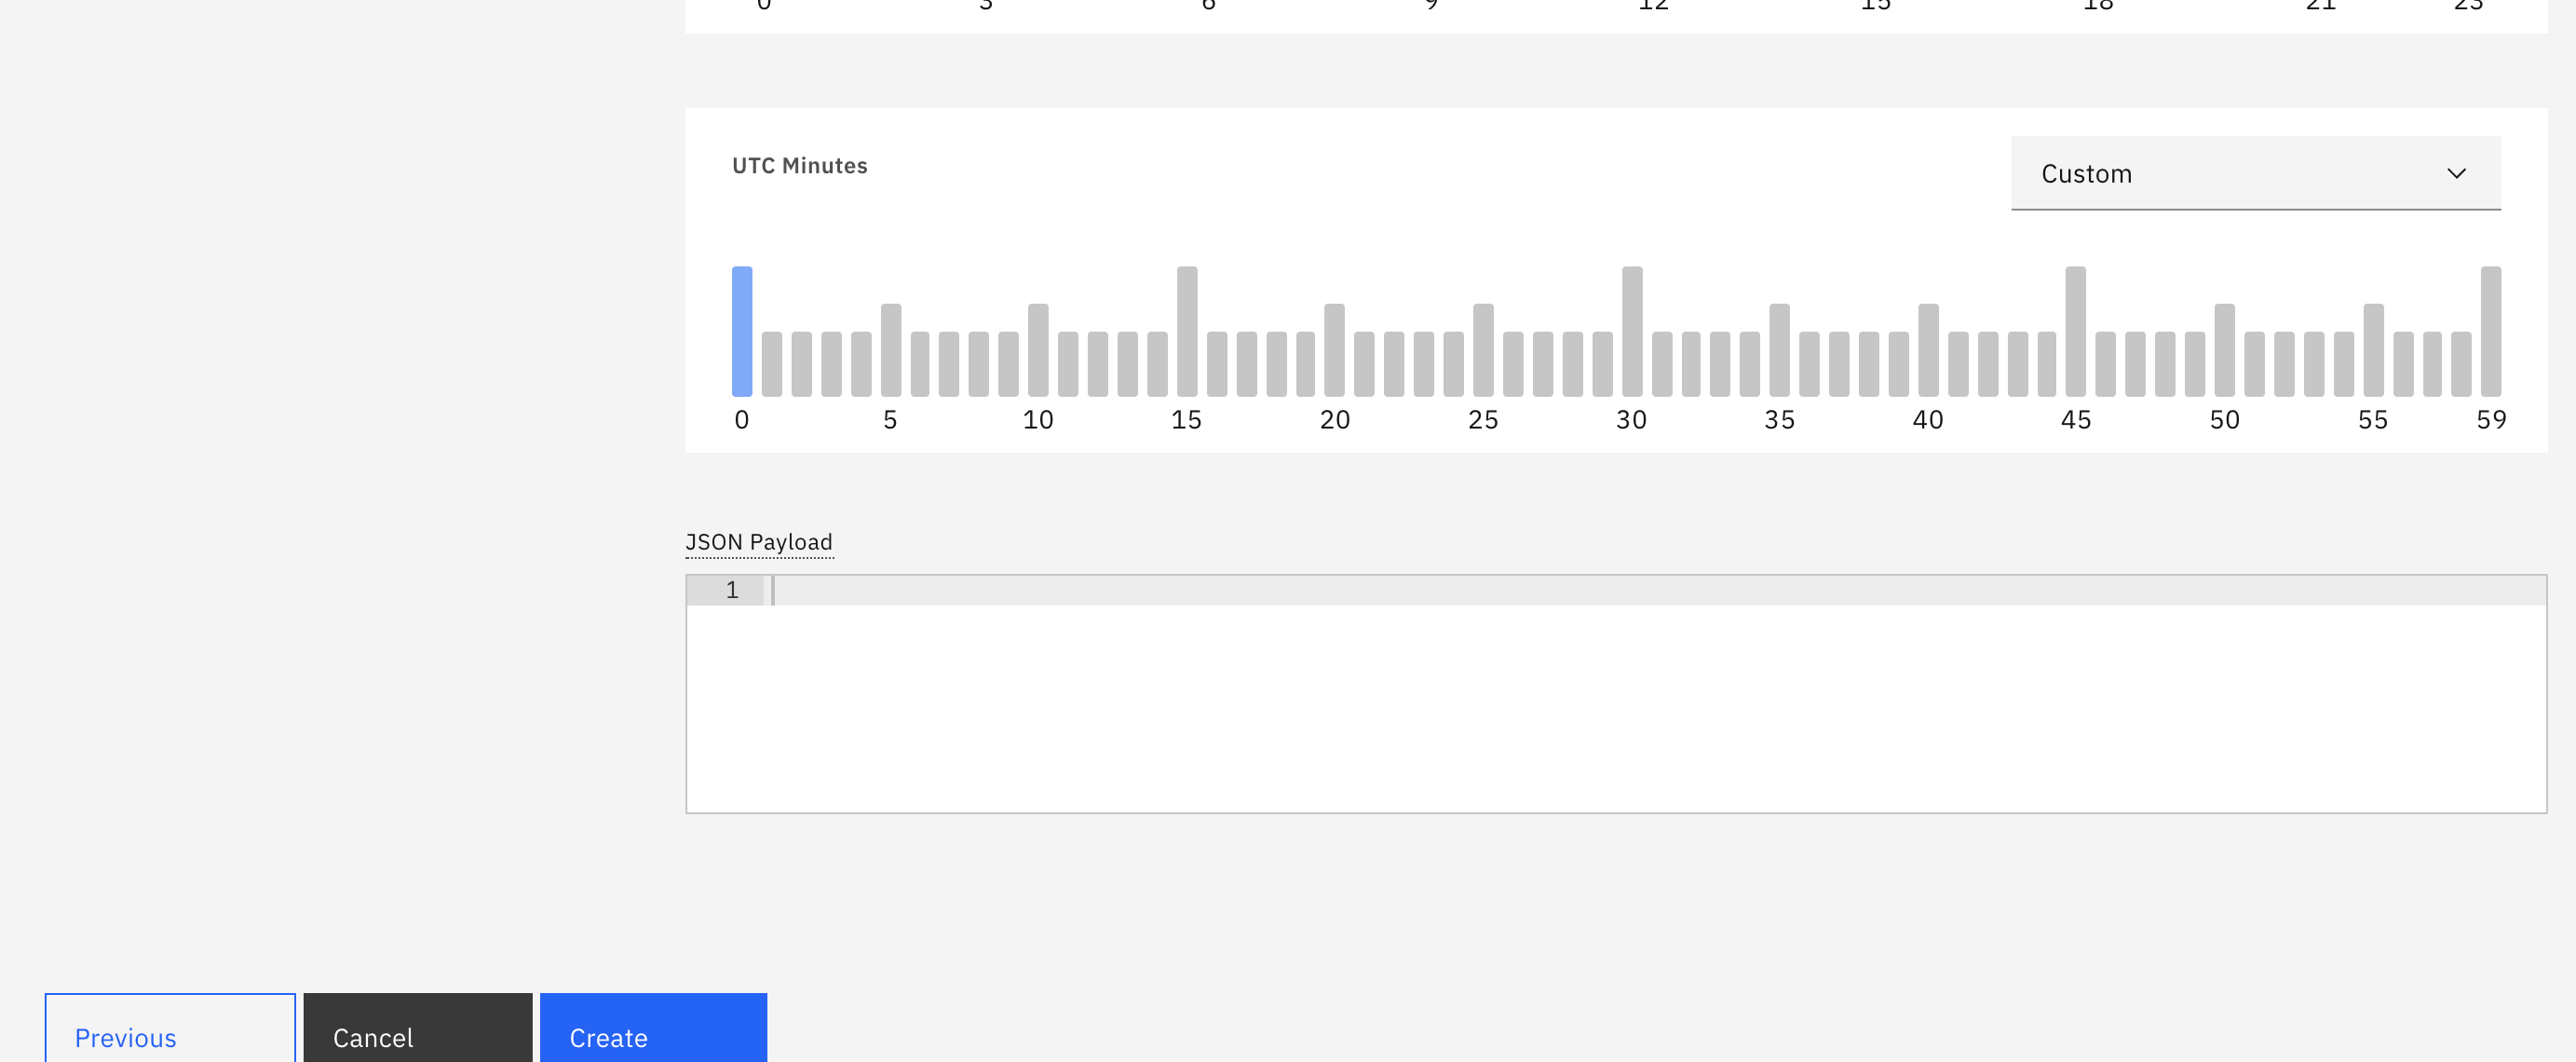
今回は定期的に実行させるために、「Periodic」を選択します。
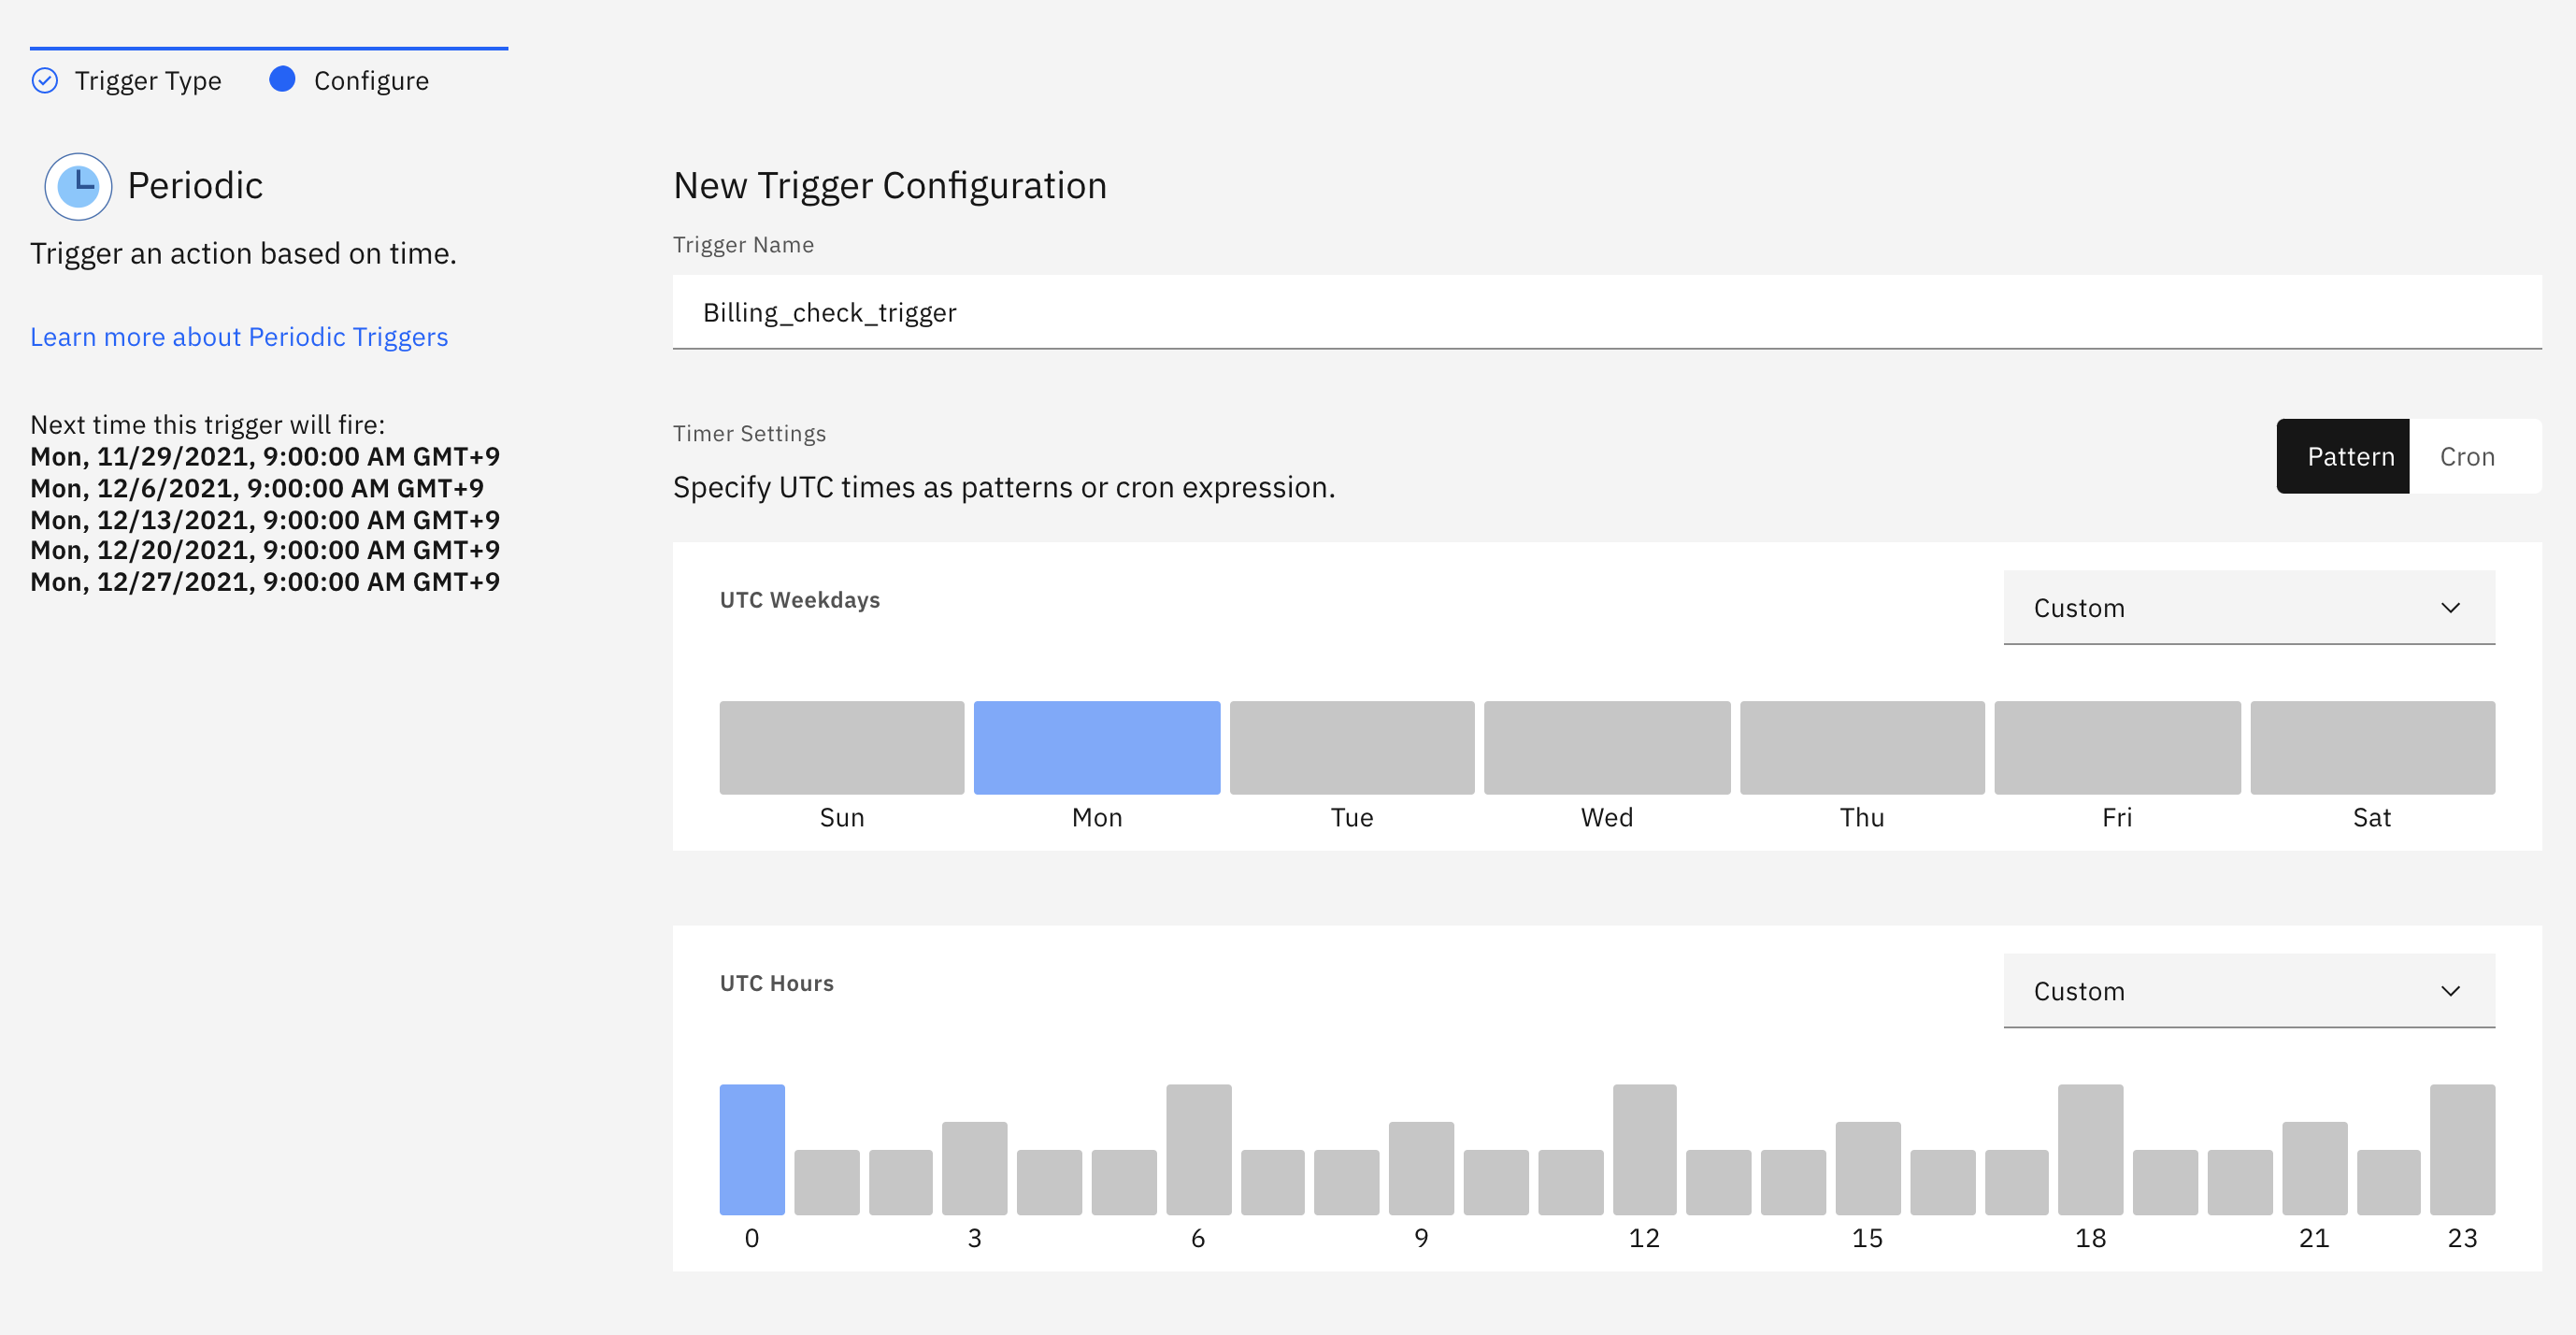
Triggerの名前を記入し、通知してもらいたい時間を選択します。選択が完了したら「Create」ボタンをクリックします。
以下のような画面に遷移しますが、「Add +」をクリックします。

「Select Existing」を選択し、Actionから上記で作成したSequenceを選択します。選択したら、「Add」ボタンをクリックします。

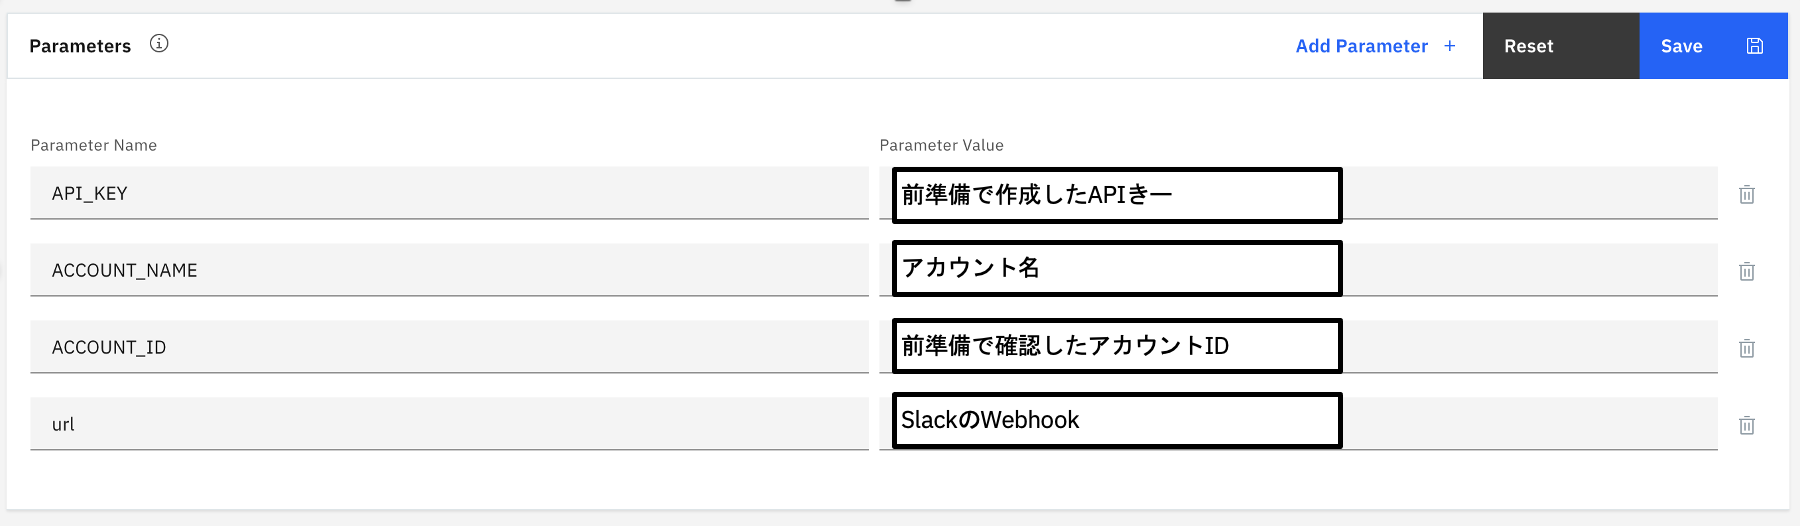
「Parameters」を選択し、「Add Parameter +」 を選択します。

「API_KEY」、「ACCOUNT_NAME」、「ACCOUNT_ID」、「url」を追加してください。完了したら「Save」ボタンをクリックします。
上記「url」は小文字です。
環境変数の値は必ず「""」で囲んでください。
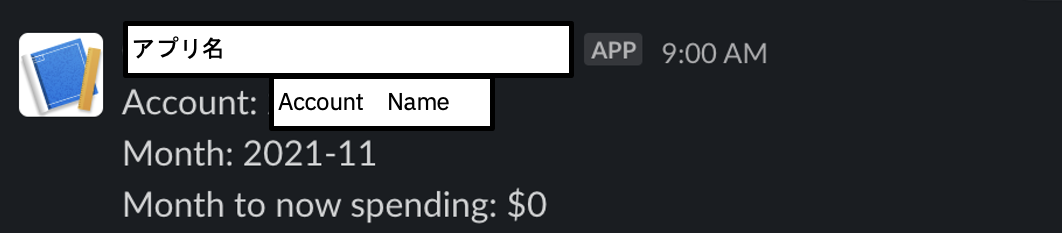
実行結果
以下のようにSlackに通知してきます。
気になっている点
セキュリティ観点
課金情報について一部のユーザーのみに公開することが多いと思いますので、IBM Cloud FunctionsのNamespaceへのアクセス権限をIAMで絞ってください。また通知先のSlackチャンネルも注意が必要です。
拡張観点
複数のアカウントを利用する場合に上記のものを全部一回やるわけではなく、Triggerをもう一個作成して、環境変数を置き換えればOKです。
カスタマイズ
毎日通知してもよくわからない場合があると思います。コードの内部で、金額が指定より大きくなったら通知するなどに変更することも可能かと考えています。
まとめ
IBM Cloudの課金情報をIBM Cloud Functionで通信する仕組みを作って見ました。比較的に簡単で、カスタマイズの余地もあります。コスト管理が完全手動ですと大変な場合もありますので、便利で安いクラウドの仕組みを利用して運用して行くのもありかと考えています。