Repositpory
Branch name:recycler_view
はじめに
xmlレイアウトにRecyclerViewを実装していた部分をJetpackComposeで書き換えました。
RecyclerViewを置き換えたってわけでもないので単にJetpackComposeでリストを作成したと思っていただければいいです。
xmlに組み込んだり内部でConstraintLayoutの制約を使ったりしています
環境
minSdk 26.
targetSdk 32.
Android Studio Chipmunk | 2021.2.1 Patch 1.
Kotlin 1.7.10.
Android Gradle Plugin Version : 7.2.1
Gradle Version : 7.3.3
初期設定
build.gradleに追加したものです
buildFeatures { // Enables Jetpack Compose for this module
    compose = true
}

composeOptions {
    kotlinCompilerExtensionVersion '1.3.0'
}

dependencies {
    implementation "androidx.compose.runtime:runtime:1.2.1"
    implementation "androidx.compose.ui:ui:1.2.1"
    implementation "androidx.compose.foundation:foundation:1.2.1"
    implementation "androidx.compose.foundation:foundation-layout:1.2.1"
    implementation "androidx.compose.material:material:1.2.1"
    implementation "androidx.compose.runtime:runtime-livedata:1.2.1"
    implementation "androidx.compose.ui:ui-tooling:1.2.1"
    implementation "androidx.compose.compiler:compiler:1.3.0"
    implementation "com.google.accompanist:accompanist-appcompat-theme:0.16.0"
    implementation "androidx.constraintlayout:constraintlayout-compose:1.1.0-alpha03"
}
自分の場合はKotlinのVersionで引っかかりましたが公式ドキュメントで現時点(2022/08/28)の最新安定版を導入しています。
実装
<?xml version="1.0" encoding="utf-8"?>
<layout xmlns:android="http://schemas.android.com/apk/res/android"
    xmlns:tools="http://schemas.android.com/tools">

    <data />

    <androidx.constraintlayout.widget.ConstraintLayout
        android:id="@+id/main"
        android:layout_width="match_parent"
        android:layout_height="match_parent"
        tools:context=".ui.main.MainFragment">

        <androidx.compose.ui.platform.ComposeView
            android:id="@+id/compose_view"
            android:layout_width="match_parent"
            android:layout_height="match_parent" />

    </androidx.constraintlayout.widget.ConstraintLayout>
</layout>
まず元々リストを表示していた部分を消してComposeViewに置き換えます。
今回表示するデータのクラスは以下のようなものです。
data class Item(
    var id: String,
    var name: String,
)
次にComposeで実装するViewですがリストとリスト1行分のレイアウトを自分は分けています。
@Composable
fun ItemContent() {
    val items = remember { createDummyDataList() }
    LazyColumn(
    ) {
        items(
            items = items,
            itemContent = {
                itemsList(item = it)
            })
    }
}

fun createDummyDataList(): MutableList<Item> {
    val itemList: MutableList<Item> = ArrayList()
    val item = Item("001", "test name")

    var i = 0
    while (i < 20) {
        i++
        itemList.add(item)
    }
    return itemList
}
createDummyDataList()はリストの中身作成しているダミーデータです。
面倒だったので全部同じで使いまわしていますがここは適当にobject作ってもなんでもいいです。
次に1行分のデータ
@Composable
fun itemsList(item: Item) {
    ConstraintLayout(Modifier.height(height = 100.dp)) {
        //テキストごとのid作成のようなものです。
        val (id, name) = createRefs()
        Text(
            text = item.id,
            //constrainAs内部で制約をつけられます。
            //parentにもstart,endが必要な点が注意です。
            modifier = Modifier.constrainAs(id) {
                top.linkTo(parent.top)
                bottom.linkTo(parent.bottom)
                start.linkTo(parent.start)
                end.linkTo(name.start)
            },
            fontSize = 20.sp
        )
        Text(
            text = item.name,
            modifier = Modifier.constrainAs(name) {
                top.linkTo(parent.top)
                bottom.linkTo(parent.bottom)
                start.linkTo(id.end)
                end.linkTo(parent.end)
            },
            fontSize = 20.sp
        )
        //Chainもつけることができます!
        createHorizontalChain(id, name, chainStyle = ChainStyle.Spread)
        //Deviderはリストごとの枠線です
        Divider(color = Color(0x44666666))
    }
}

@Preview
@Composable
fun PreviewGreeting() = itemsList(item = createDummyDataList()[0])
1行表示の分だけPreviewでLayoutをすぐに確認できるようにしています。
引数のある関数にはPreviewのアノテーションがつけられないことにご注意ください。
ここでConstraintLayoutを使っています。
説明は基本的にコメント通りです
(自分はコードにコメントを載せると分かってないコードでも分かった気で読んだり変なコードを書くことがあるのでコメント書かない派です。
なのでGitのコードには載っていません。こっちと見比べて確認してくれるとありがたいです)
ConstraintLayout(Modifier.height(height = 100.dp))
この1行ですがheightの部分をsizeで実装するとwidthを指定しない場合怒られるのでどっちかだけでいい時はご注意ください。
あとはFragmentの方でComposable関数を呼び出すだけです。
class MainFragment : Fragment() {

    private var _binding: FragmentMainBinding? = null
    private val binding get() = _binding!!

    override fun onCreateView(
        inflater: LayoutInflater, container: ViewGroup?,
        savedInstanceState: Bundle?): View? {
        val view = inflater.inflate(R.layout.fragment_main, container, false)
        activity?.title = "This is Compose layout"
        _binding = DataBindingUtil.bind(view)

        binding.composeView.apply {
            setViewCompositionStrategy(ViewCompositionStrategy.DisposeOnViewTreeLifecycleDestroyed)
            setContent {
                AppCompatTheme {
                    ItemContent()
                }
            }
        }
        return view
    }
}
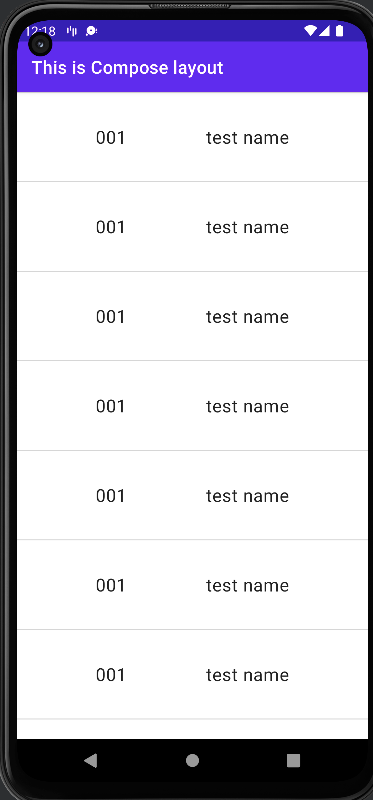
以下できたもの
最後に
まだまだドキュメントも多くないので調べるのに時間かかりましたが慣れればKotlinだけで完結すること、コード量が総合的に減ること、ファイルの行き来が減ることなどの観点で良いと感じました。
RecyclerViewを完全に置き換えたわけではないですがAdapterが必要でないのはそれだけでかなり魅力的に感じます。
次は状態管理や各イベント、テストなど実装ができれば更新しようと思います。