ミニゲームを作ってUnityを学ぶ![3Dマインスイーパー編]
第3回目: フィールドを作る
前回作成したブロックについてはまだプレイヤーの操作で実際に開けたりマーカーを付けたりすることができませんが、今回はそれらの機能を実装する前にブロックを並べたフィールドの作成に取り掛かります。
フィールドの規格
一口にマインスイーパーと言ってもフィールドを構成するマスの数や地雷の数、そもそものフィールド自体のレイアウトに色々種類があるようです。
今回は(おそらく)オーソドックスな以下の規格で作ることにしました。
| 難易度 | 横マス | 縦マス | 爆弾(地雷)の数 |
|---|---|---|---|
| EASY | 9 | 9 | 10コ |
| NORMAL | 16 | 16 | 40コ |
| HARD | 30 | 16 | 99コ |
ブロックを並べる
では早速、ブロックを並べてフィールドを作っていきましょう。
GameControllerに定数を追加
フィールドの規格は上で決めたように3種類の難易度によって決定しますので、まずはGameControllerにレベルを表す定数を追加します。
using System.Collections;
using System.Collections.Generic;
using UnityEngine;

    public class GameController : MonoBehaviour
    {

        // 初期化タイミングでインスタンスを生成(スレッドセーフ)
        private static readonly GameController mInstance = new GameController();

        // コンストラクタをprivateにすることによって他クラスからnewできないようにする
        private GameController() { }

        // 他クラスからこのインスタンスを参照する
        public static GameController Instance
        {
            get
            {
                return mInstance;
            }
        }

        public void Init()
        {
            // フレームレートの設定
            Application.targetFrameRate = 30;
        }

        //--------
        // 定数 //
        //----------------------------------------------------------------------------------------

        // ゲームレベル
追加    public const int LEVEL_EASY = 1, LEVEL_NORMAL = 2, LEVEL_HARD = 3;

    }
BlockManagerの作成
次に、BlockModelをまとめて管理するためのマネージャーを作成します。
- 空オブジェクト「BlockManager」をゼロポジションに配置
- スクリプト「BlockManager」を作成して上記の空オブジェクトにアタッチ
using System;
using System.Collections;
using System.Collections.Generic;
using System.Linq;
using UnityEngine;
using UnityEngine.EventSystems;

    public class BlockManager : MonoBehaviour
    {

        [SerializeField]
1:      private GameObject mPrefabBlock;

        // ブロックの辺のサイズ
        private readonly float BLOCK_SIZE = 1.0f;
        private readonly float BLOCK_SIZE_HALF = 0.5f;

        // ブロックをListで管理
        private List<BlockModel> mBlockList = new List<BlockModel>();

        void Start () {
            CreateField(GameController.LEVEL_EASY);
        }

        /// <summary>
        /// フィールドを生成する
        /// </summary>
        public void CreateField(int gameLevel)
        {
            // 前のブロックが存在する場合は全て破棄
            foreach(BlockModel model in mBlockList)
            {
                Destroy(model.gameObject);
            }
            mBlockList.Clear();

            // ゲームレベルによってサイズと爆弾の数を決定
            int xLength;
            int yLength;
            int bombCount;
            switch (gameLevel)
            {
                case GameController.LEVEL_EASY:
                    xLength = 9;
                    yLength = 9;
                    bombCount = 10;
                    break;
                case GameController.LEVEL_NORMAL:
                    xLength = 16;
                    yLength = 16;
                    bombCount = 40;
                    break;
                default:
                    xLength = 30;
                    yLength = 16;
                    bombCount = 99;
                    break;
            }

            // ブロックを並べる
            InstantiateBlocks(xLength, yLength);
        }

        /// <summary>
        /// ブロックを並べる
        /// 同時に生成されたBlockModelをListに格納する
        /// </summary>
        /// <param name="xLength"></param>
        /// <param name="yLength"></param>
        private void InstantiateBlocks(int xLength, int yLength)
        {
            for(int y=0; y<yLength; y++)
            {
                for(int x=0; x<xLength; x++)
                {
                    GameObject blockGo = Instantiate(mPrefabBlock, new Vector3(x * BLOCK_SIZE + BLOCK_SIZE_HALF, BLOCK_SIZE_HALF, y * BLOCK_SIZE + BLOCK_SIZE_HALF), Quaternion.identity, transform);
                    BlockModel blockModel = blockGo.GetComponent<BlockModel>();
                    blockModel.SetPosition(x, y);
                    mBlockList.Add(blockModel);
                }
            }
        }

    }
1: 前回作成したBlockのプレハブをインスペクタから設定
Start()で実行されるCreateField()ではゲームの難易度をイージーに設定してフィールドの作成を行っています。
またInstantiateBlocks()はゲームの難易度によって決まった規格に合わせてブロックを並べていき、同時に生成されたBlockModelをListに格納していきます。
この際に生成されたBlockModelには自分がフィールド内のどこに配置されたかという情報を持たせています。
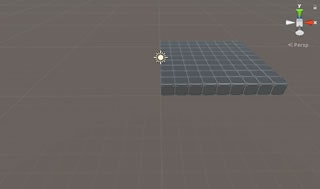
この時点でプロジェクトを実行すると、上の画像のようにタテヨコ9こずつのブロックが配置されます。
爆弾を設置する
ブロックを並べてフィールドを構築することができましたので、次は並べたブロックにたいしてランダムに爆弾を設置していきます。
- BlockManagerのCreateField()を修正し、爆弾を設置するメソッドを追加
        /// <summary>
        /// フィールドを生成する
        /// </summary>
        public void CreateField(int gameLevel)
        {
            // 前のブロックが存在する場合は全て破棄
            foreach(BlockModel model in mBlockList)
            {
                Destroy(model.gameObject);
            }
            mBlockList.Clear();

            // ゲームレベルによってサイズと爆弾の数を決定
            int xLength;
            int yLength;
            int bombCount;
            switch (gameLevel)
            {
                case GameController.LEVEL_EASY:
                    xLength = 9;
                    yLength = 9;
                    bombCount = 10;
                    break;
                case GameController.LEVEL_NORMAL:
                    xLength = 16;
                    yLength = 16;
                    bombCount = 40;
                    break;
                default:
                    xLength = 30;
                    yLength = 16;
                    bombCount = 99;
                    break;
            }

            // ブロックを並べる
            InstantiateBlocks(xLength, yLength);

            // ブロックに爆弾を設置
追加        SetBombs(bombCount);
        }

        /// <summary>
        /// ブロックに爆弾を設置する
        /// </summary>
        /// <param name="bombCount">配置する爆弾の数</param>
追加    private void SetBombs(int bombCount)
        {
            // Listをシャッフルして先頭から爆弾を設置していく
            int blockCount = mBlockList.Count;
            for (int i = 0; i < blockCount; i++)
            {
                BlockModel temp = mBlockList[i];
                int rand = UnityEngine.Random.Range(0, blockCount);
                mBlockList[i] = mBlockList[rand];
                mBlockList[rand] = temp;
            }
            for(int i=0; i<bombCount; i++)
            {
                mBlockList[i].HasBomb = true;
            }
        }
SetBombs()ではBlockModelを格納したListをランダムに並び替えた後、Listの先頭から決められた数までのBlockModelについてプロパティのHasBombをtrueにすることでブロックに爆弾を設置しています。
カメラ位置を調整する
これで爆弾と通常のブロックをランダムに並べたフィールドが完成しましたが、カメラ位置がフィールドからずれてしまっているのでそれを修正します。
追加    private readonly float CAMERA_OFFSET_Z = 6.5f;

        /// <summary>
        /// フィールドを生成する
        /// </summary>
        public void CreateField(int gameLevel)
        {
            // 前のブロックが存在する場合は全て破棄
            foreach(BlockModel model in mBlockList)
            {
                Destroy(model.gameObject);
            }
            mBlockList.Clear();

            // ゲームレベルによってサイズと爆弾の数を決定
            int xLength;
            int yLength;
            int bombCount;
            switch (gameLevel)
            {
                case GameController.LEVEL_EASY:
                    xLength = 9;
                    yLength = 9;
                    bombCount = 10;
                    break;
                case GameController.LEVEL_NORMAL:
                    xLength = 16;
                    yLength = 16;
                    bombCount = 40;
                    break;
                default:
                    xLength = 30;
                    yLength = 16;
                    bombCount = 99;
                    break;
            }

            // ブロックを並べる
            InstantiateBlocks(xLength, yLength);

            // ブロックに爆弾を設置
            SetBombs(bombCount);

追加        // カメラを中心に設定
            float cameraX = xLength * BLOCK_SIZE / 2.0f;
            float cameraZ = yLength * BLOCK_SIZE / 2.0f - CAMERA_OFFSET_Z;
            float cameraY = 6.5f;
            Transform cameraTrans = Camera.main.transform;
            cameraTrans.position = new Vector3(cameraX, cameraY, cameraZ);
            cameraTrans.rotation = Quaternion.Euler(new Vector3(50.0f, 0.0f, 0.0f));
        }
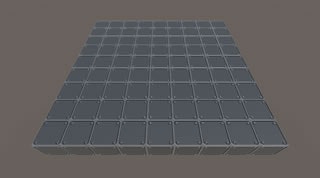
追加部分ではメインカメラのTransformを取得し、カメラがフィールドの中心を映すようにpositionとrotationの値を変更しています。
プロジェクトを実行すると、画像のようにカメラがフィールドの中心を映すようになりました。

