ミニゲームを作ってUnityを学ぶ![ひつじコレクション編]
第3回目: フォロワーを作成
ひつじコレクションでのプレイヤーの目的はステージ内に出現するひつじさんに接触し、追従を開始したひつじさんを無事にゴールのエリアまで連れ帰ることです。
このひつじさんのことを「追従する者」という意味でフォロワーと呼ぶことにし、今回はこのフォロワーがステージにポップアップするところまでを実装していきます。
アセットをインポート
まずはじめに、今回使用する2つのアセットをストアからインポートします。
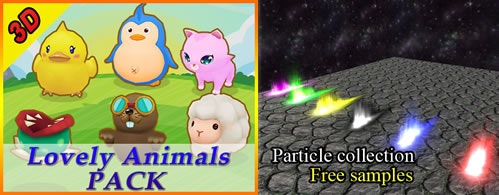
Lovely Animals Pack
Particle Collection SKJ 2016_Free samples
追記:
ひつじさんの含まれるアセット「Lovely Animals Pack」が少し前まで無料だったのですが、現在は有料になってしまったようです……
仕方ないのでこれからひつじコレクションを作ってみようとしている方は、本作で敵キャラクターとして登場させるスライムが含まれた下記アセットの中にウサギらしきクリーチャーのプレハブがありますので、そちらで代用してみてください。

フォロワーの作成
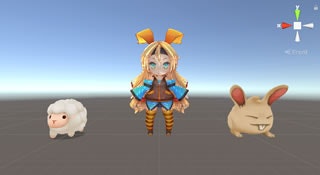
ひつじさん(もしくはウサギさん)をフォロワーとして利用できるよう準備していきます。
【ひつじさんの場合】
- JKT_Art/Animals/sheep/sheepをシーンに配置して名前を「Follower」に変更
- Transformを以下のように設定
Position: x=0, y=0, z=0
Rotation: x=0, y=0, z=0
Scale: x=0.05, y=0.05, z=0.05
- 新しくAnimatorControllerの「FollowerAnimController」を作成
- すでにアタッチされているAnimatorからcontrollerをFolowerAnimControllerに差し替える
- 同じくAnimatorのApplyRootMotionのチェックを外す
- CapsuleColliderをアタッチして以下のように設定
Is Trigger: チェックを入れる
Center: x=0.04, y=4.2, z=0.13
Radius: 4.2
Height: 9
Direction: Z-Axis
- 子のshadow(1)オブジェクトについて、アタッチされているMeshColliderを取り除く
- Followerオブジェクトをプレハブに書き出す
【ウサギさんの場合】
- Level_1_Monster_Pack/Prefabs/Rabbit/Rabbit_Redをシーンに配置して名前を「Follower」に変更
- Transformを以下のように設定
Position: x=0, y=0, z=0
Rotation: x=0, y=0, z=0
Scale: x=25, y=25, z=25
- 新しくAnimatorControllerの「FollowerAnimController」を作成
- すでにアタッチされているAnimatorからcontrollerにFolowerAnimControllerを設定
- 同じくAnimatorのApplyRootMotionのチェックを外す
- CapsuleColliderをアタッチして以下のように設定
Is Trigger: チェックを入れる
Center: x=0, y=0.01, z=0.001
Radius: 0.01
Height: 0.02
Direction Y-Axis
- Followerオブジェクトをプレハブに書き出す
アニメーションの設定
FollowerAnimControllerをダブルクリックしてAnimatorウインドウを開き、Followerオブジェクトのアニメーションを設定していきます。
- IdleとRunのステートを作成
- IdleからRun, RunからIdleにトランジション(矢印)を引く

- 各ステートに対応するクリップを設定
| Idle | Run | |
|---|---|---|
| ひつじさん | ~sheep/ani/idle | ~sheep/ani/walk |
| ウサギさん | ~Models/Rabbit_Level_1/rabbit_idle | ~Models/Rabbit_Level_1/rabbit_moveもしくはぴょんぴょん飛び跳ねるのが嫌な場合はIdle時のアニメーションと同じクリップ |
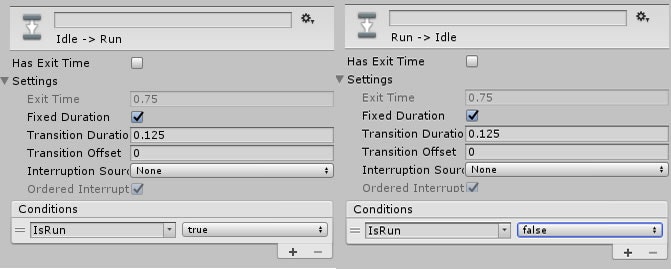
- parametersタグを選択し、Bool型のIsRunを作成
- それぞれの遷移条件を以下のように設定
フォロワーのスクリプトを作成
続いて、Followerオブジェクトを制御するためのスクリプトを作成します。
- 「FollowerModel」という名前のスクリプトを作成し、Followerオブジェクトにアタッチ
using System.Collections;
using System.Collections.Generic;
using UnityEngine;
using UnityEngine.AI;

    public class FollowerModel : MonoBehaviour
    {

        //--------
        // 状態 //
        //---------------------------------------------------------------------------------

        public enum STATE
        {
            DEFAULT = 0,
            POPUP,
            FOLLOW,
            BLOW_OFF,
            SLEEP
        }
        public STATE State { get; private set; }

        //-------------
        // アクション //
        //---------------------------------------------------------------------------------

        /// <summary>
        /// ポップアップ
        /// </summary>
        public void Popup()
        {
            State = STATE.POPUP;
            gameObject.SetActive(true);
        }

    }
Stateプロパティと1つのメソッドだけを持つ最小限の構成です。
Popup()によってStateをPOPUP状態に変更し、自身をActiveにすることで画面に描画されるようになります。
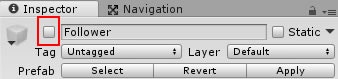
フォロワーはこのPopup()が実行されるまで画面に描画されないようにするため、オブジェクト名の横にあるチェックを外してデフォルトでは描画されない状態にしておきます。
ポップアップポイントの作成
フォロワーの準備ができましたので、次はフォロワーがポップアップするステージ内のポイントを作成していきます。
- 「PopupPoint」という名前のCubeをシーンに配置し、Transformを以下のように設定
Position: x=0, y=0, z=0
Rotation: x=0, y=0, z=0
Scale: x=0.8, y=0.8, z=0.8
- MeshRendererのチェックを外して透明な状態に変更
- BoxColliderのIsTriggerにチェックを入れる
- プレハブに書き出し
ポップアップ時のエフェクト
- PopupPointの子として「ParticleCollection~/Prefab/Magic_ring/magic_ring_03」を配置
- 上記のmagic_ring_03についてTransformを以下のように設定
Position: x=0, y=0.2, z=0
Rotation: x=-90, y=0, z=0
Scale: x=0.16, y=0.16, z=0.16
- magic_ring_03の子要素それぞれについて、インスペクタから以下の修正をしてサイズを調整
全ての子要素(01, 01_B, 02, 02_B, 03)について:

    Scaleing ModeをLocalからHierarchyに変更


02について:

    StartSizeを変更(min=0.1, max=2)
    Shape内のRadiusを変更(2.2)
    Renderer内のPivot.Yを変更(0.38)


02Bについて:

    Renderer内のPivot.Yを変更(0.42)
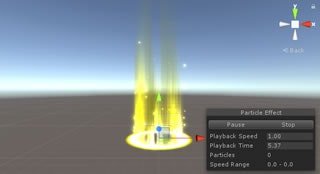
上のように表示されるようになったらmagic_ring_03のオブジェクト名の横にあるチェックを外し、エフェクトを非アクティブな状態に変更しておきます。
ポップアップポイントのスクリプトを作成
続いて、ポップアップポイントを制御するためのスクリプトを作成します。
- 「PopupPoint」という名前のスクリプトを作成し、PopupPointオブジェクトにアタッチ
using System.Collections;
using System.Collections.Generic;
using UnityEngine;

    public class PopupPoint : MonoBehaviour
    {

        [SerializeField]
        private GameObject mEffect; // 子オブジェクトのmagic_ring_03を指定
        [SerializeField]
        private GameObject prefabFollower; // フォロワーのプレハブを指定
        private FollowerModel mFollower;

        /// <summary>
        /// フォロワーがポップ中か判定
        /// </summary>
        /// <returns>ポップ中の場合はtrueを返す</returns>
        public bool IsExsistFollower()
        {
            if (mFollower != null)
            {
                if (mFollower.State == FollowerModel.STATE.POPUP) return true;
            }
            return false;
        }

        /// <summary>
        /// フォロワーをポップアップできる状態か判定
        ///
        /// フォロワーが一度もポップアップしていない or 関連するフォロワーが休眠状態
        /// の場合はポップアップが可能
        /// </summary>
        /// <returns>ポップアップ可能ならばtrueを返す</returns>
        public bool IsReadyPopupFollower()
        {
            if (mFollower == null) return true;
            if (mFollower.State == FollowerModel.STATE.SLEEP) return true;
            return false;
        }

        /// <summary>
        /// フォロワーをポップアップさせる
        /// 同時にエフェクトを発生させる
        /// </summary>
        public void PopupFollower()
        {
            if (mFollower == null)
            {
                GameObject model = Instantiate(prefabFollower, transform.position, Quaternion.identity);
                mFollower = model.GetComponent<FollowerModel>();
            }
            mFollower.Popup();
            mEffect.SetActive(true);
        }

    }
PopupPointは2つの判定を持ち、PopupFollower()を実行することでフォロワーをステージ内に出現させます。
StageConstructor, StageManagerの修正
フォロワーとポップアップポイントに対応するため、StageConstructorとStageManagerにコードを追加します。
    public void LoadStage(int stageId)
    {
        // 指定されたステージファイルを読み込んで1行ずつ処理
        string filePath = "stage_" + stageId;
        TextAsset textAsset = Resources.Load(filePath) as TextAsset;
        string text = textAsset.text;
        string line;
        using (TextReader reader = new StringReader(text)) // usingとは、処理終わりにstreamの解放を自動で行う構文(finally句でDisposeを実行するコードと同じ)
        {
            while ((line = reader.ReadLine()) != null)
            {
                // ステージサイズ
                if (line.StartsWith("@size"))
                {
                    line = REGEX_WHITE.Replace(line, "");
                    string[] mapSize = line.Split(DELIMITER, System.StringSplitOptions.RemoveEmptyEntries);
                    mStageX = int.Parse(mapSize[1]);
                    mStageY = int.Parse(mapSize[2]);
                    mStageMap = new int[mStageY, mStageX];
                    InstantiateFloor();
                    continue;
                }

                // ステージ構造(ブッシュ)
                if (line.StartsWith("@bush"))
                {
                    // ステージ構造は16進数表記の文字列なため、10進数のint配列に変換
                    StringBuilder sbStage = new StringBuilder();
                    for (int y = 0; y < mStageY; y++)
                    {
                        sbStage.Append(reader.ReadLine());
                    }
                    int start = 0;
                    for (int y = 0; y < mStageY; y++)
                    {
                        for (int x = 0; x < mStageX; x++)
                        {
                            mStageMap[y, x] = Convert.ToInt32(sbStage.ToString(start, 2), 16);
                            start += 2;
                        }
                    }
                    // ステージ構造を元にブッシュを生成
                    InstantiateBushs();
                    continue;
                }

                // プレイヤー初期位置
                if (line.StartsWith("@player"))
                {
                    line = REGEX_WHITE.Replace(line, "");
                    string[] strPlayerPos = line.Split(DELIMITER, System.StringSplitOptions.RemoveEmptyEntries);
                    InstantiatePlayer(int.Parse(strPlayerPos[1]), int.Parse(strPlayerPos[2]));
                    continue;
                }

ポップアップポイントを生成するコードを追加

                // ポップアップポイント
                if (line.StartsWith("@popup"))
                {
                    line = REGEX_WHITE.Replace(line, "");
                    string[] strPopupPos = line.Split(DELIMITER, System.StringSplitOptions.RemoveEmptyEntries);
                    InstantiatePopup(int.Parse(strPopupPos[1]), int.Parse(strPopupPos[2]));
                }

ここまで:ポップアップポイントを生成するコード

            }
        }
    }

        //----------------------
        // ポップアップポイント //
        //---------------------------------------------------------------------------------

        [SerializeField]
        private GameObject prefabPopupPoint; // ポップアップポイントのプレハブを指定
        private List<PopupPoint> mPopupList = new List<PopupPoint>();

        public List<PopupPoint> GetPopupList()
        {
            return mPopupList;
        }

        /// <summary>
        /// ポップアップポイントを指定されたステージ座標に生成
        /// PopupPointの参照を保持する
        /// </summary>
        /// <param name="x"></param>
        /// <param name="y"></param>
        private void InstantiatePopup(int x, int y)
        {
            Vector3 pos = new Vector3(x * BLOCK_SIZE + BLOCK_SIZE, 0, y * -BLOCK_SIZE - BLOCK_SIZE);
            GameObject obj = Instantiate(prefabPopupPoint, pos, Quaternion.identity);
            obj.transform.parent = mTrans;
            PopupPoint popupPoint = obj.GetComponent<PopupPoint>();
            mPopupList.Add(popupPoint);
        }
LoadStage()にステージファイルに記述された@popupによってポップアップポイントを生成するためのコードを追加しました。
また、その下には実際にポップアップポイントをインスタンス化するメソッドとそれらの参照を取得するメソッドを実装しています。
    void Start()
    {
        mConstructor = GetComponent<StageConstructor>();
        LoadStage(1);

追加    StartCoroutine("PopupFollower");
    }

    //-------------------
    // フォロワーの管理 //
    //---------------------------------------------------------------------------------

    private readonly float POPUP_DURATION = 5.0f;
    private readonly int MAX_FOLLOWER_COUNT = 4; // アクティブ状態のフォロワー最大数
    private int mFollowerCount; // アクティブ状態のフォロワー数

    /// <summary>
    /// ステージ内に存在するフォロワーの数が最大に達していない場合は
    /// ポップアップ可能なポイントからランダムに1つ選択してフォロワーをポップアップする
    /// </summary>
    /// <returns></returns>
    private IEnumerator PopupFollower()
    {
        while (true)
        {
            yield return new WaitForSeconds(POPUP_DURATION);
            if (mFollowerCount < MAX_FOLLOWER_COUNT)
            {
                var newList = mConstructor.GetPopupList().Where(i => i.IsReadyPopupFollower());
                if (newList.Any())
                {
                    var popupPoint = newList.OrderBy(i => Guid.NewGuid()).Take(1).ToList();
                    popupPoint[0].PopupFollower();
                    mFollowerCount++;
                }
            }
        }
    }
新しくPopupFollower()というコルーチンを実装し、ステージを生成した直後に開始しています。
これによってステージ内に出現しているフォロワーが4匹に満たない場合は5秒毎に1匹ずつフォロワーが出現します。
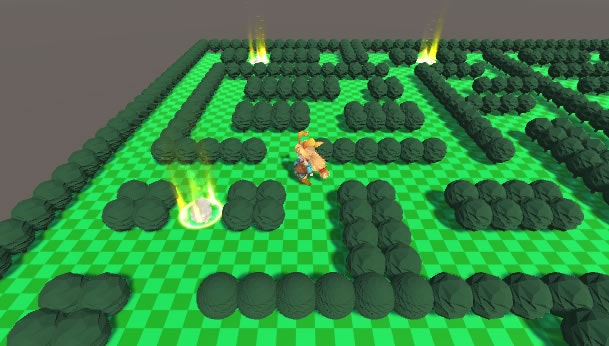
プロジェクトを実行してフォロワーがポップアップされることと、プレイヤーがポップアップポイントおよびフォロワーをすり抜けできることを確認してください。

この作品はユニティちゃんライセンス条項の元に提供されています