TL;DR
パワポなどで作成した図を自動で塗りつぶしたいときがあります(手書きのヒートマップを複数個自動で生成したいときとか)。今回の方法は輪郭が分かれている(互いに外枠を共有していない)図形であればどんな図形でも指定したRGB値で塗りつぶすことができます。
環境
Python 3.8.10
opencv-python 4.9.0.80
Pillow 9.5.0
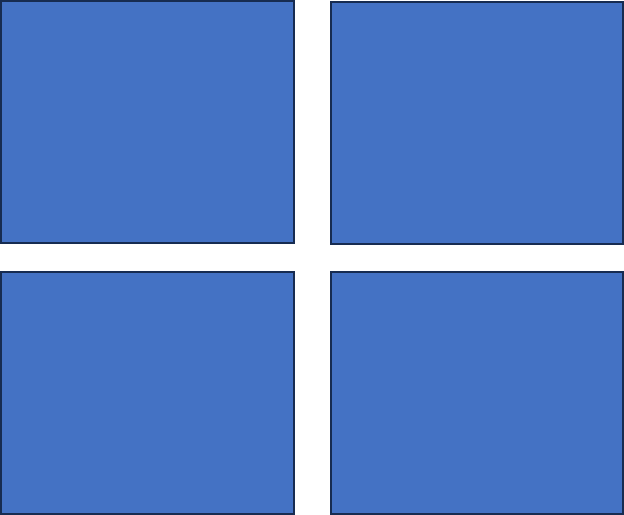
入力画像
例として四角形4つからなる画像を使います。
実装
cv2で画像を読み込み、thresholdでバイナリ画像に変換したのち、findContoursで輪郭(contours)を抽出します。
import cv2
from PIL import Image

image = cv2.imread('./image_orig.png')

# convert input to binary image to find contours
gray_image = cv2.cvtColor(image, cv2.COLOR_BGR2GRAY)
_, binary_image = cv2.threshold(gray_image, 0, 255, cv2.THRESH_BINARY)
contours, hierarchy = cv2.findContours(binary_image, cv2.RETR_LIST, cv2.CHAIN_APPROX_SIMPLE)
imreadで読み込んだ画像はデフォルトでBGR形式なので、RGB形式に変換し、drawContoursで図形を塗りつぶしていきます。thickness=-1にすることによって検出した輪郭の内部を塗りつぶしています。詳しくは公式ドキュメントを見てください。
重要な点として、検出した輪郭はy軸の値が小さい順(画像の下側)、y軸の値が同じ場合はx軸の値が大きい順(画像の右側)からcontoursに格納されます。今回の4つの四角形の例では、右下 → 左下 → 右上 → 左上の順に色が塗られていきます。
rgba_values = [(100,100,200),
               (100,200,100),
               (200,100,100),
               (0,100,200)]

# convert BGR style to RGB style
image_fill = cv2.cvtColor(image, cv2.COLOR_BGR2RGB)

# fill inside contours
for i in range(len(contours)):
    image_fill = cv2.drawContours(image=image_fill,
                                  contours=[contours[i]],
                                  contourIdx=0,
                                  color=rgba_values[i],
                                  thickness=-1)
# save image
fname = f'./image_filled.png'
Image.fromarray(image_fill).save(fname, format='PNG')
PIL.Imageで図形を保存して完了です。
保存した図形

あれまあ!完成してないですね。
この方法だと背景がどうしても黒く塗りつぶされてしまうようなので、背景を透過させておきます。
# load image
img = Image.open(fname).convert("RGBA")
data = img.getdata()
newData = []

# detect black (RGB = (0,0,0) ) and set alpha = 0
for item in data:
    if item[0] == 0 and item[1] == 0 and item[2] == 0:
        newData.append((255, 255, 255, 0))
    else:
        newData.append(item)

# save image
img.putdata(newData)
img.save(fname, format='PNG')
この方法では黒 (0,0,0) の領域を検出しalphaチャネル (透明度) を0にしています。背景以外に黒い箇所があるとそこも透明になってしまうので注意してください。
完成

実装まとめ
python fill_image.py
import cv2
from PIL import Image

image = cv2.imread('./image_orig.png')

# convert input to binary image to find contours
gray_image = cv2.cvtColor(image, cv2.COLOR_BGR2GRAY)
_, binary_image = cv2.threshold(gray_image, 0, 255, cv2.THRESH_BINARY)
contours, hierarchy = cv2.findContours(binary_image, cv2.RETR_LIST, cv2.CHAIN_APPROX_SIMPLE)

rgba_values = [(100,100,200),
               (100,200,100),
               (200,100,100),
               (0,100,200)]

# convert BGR style to RGB style
image_fill = cv2.cvtColor(image, cv2.COLOR_BGR2RGB)

# fill inside contours
for i in range(len(contours)):
    image_fill = cv2.drawContours(image=image_fill,
                                  contours=[contours[i]],
                                  contourIdx=0,
                                  color=rgba_values[i],
                                  thickness=-1)
# save image (black background)
fname = f'./image_filled.png'
Image.fromarray(image_fill).save(fname, format='PNG')

# load the above image again
img = Image.open(fname).convert("RGBA")
data = img.getdata()
newData = []

# detect black (RGB = (0,0,0) ) and set alpha = 0
for item in data:
    if item[0] == 0 and item[1] == 0 and item[2] == 0:
        newData.append((255, 255, 255, 0))
    else:
        newData.append(item)

# save image
img.putdata(newData)
img.save(fname, format='PNG')
おわりに
imreadのデフォルトがBGRなのには、PCの歴史が関係しているみたいですね。面白いですね