まえおき
動的に影を出したかったということがあり
手段としてNormalPainterがあげられますが
テクスチャベースでブレンドできないかと考えShadingGradeMapを動的に変更したいと思いました。
UTS側をいじらずにやりたかったため、CustomRenderTextureを使用したわけです。
本題
Unity2017.1から搭載されたCustomRenderTextureを利用して
テクスチャを動的に変更します
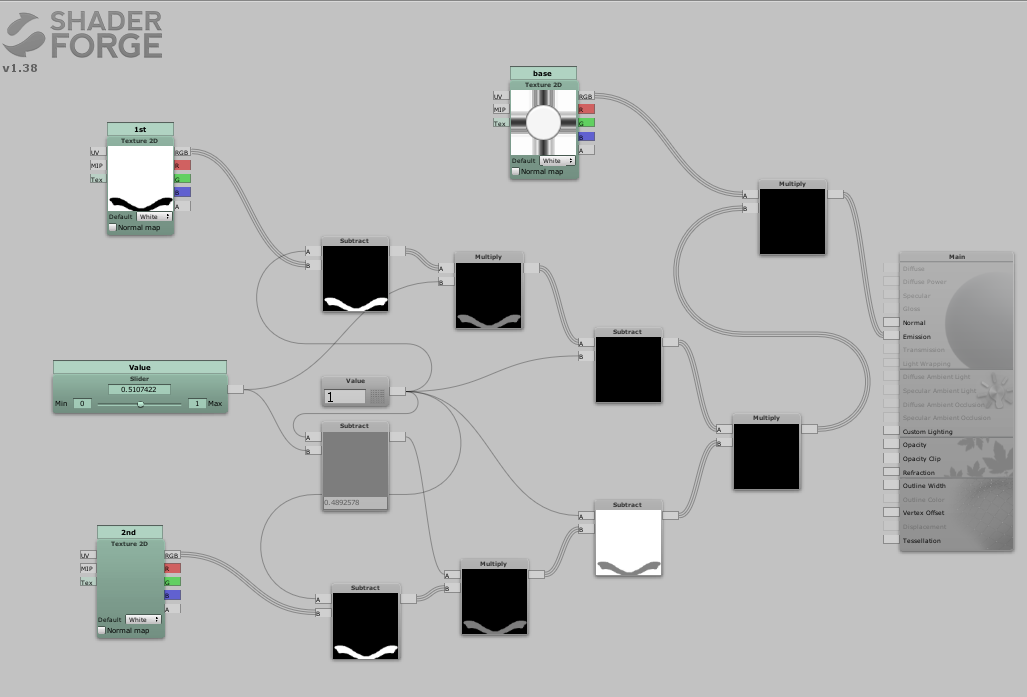
今回はShaderForgeを利用します。
Unlitでシェーダーを作成後
好きなようにテクスチャを作成します!
時間入れたりなんでも!
※Emission以外には入れないでね

コンパイル後
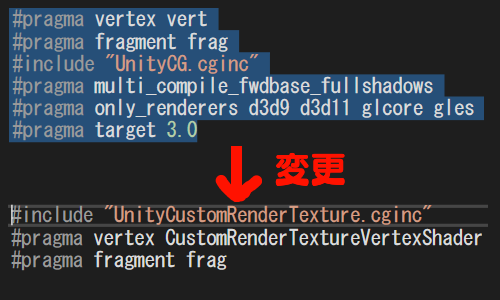
シェーダーのコードを開き
CGPROGRAM以下のこの部分を置き換えます!!
(簡単)

これでCustomRenderTexture用のシェーダーが完成しました。
マテリアルを作成しそのシェーダーを割り当てましょう
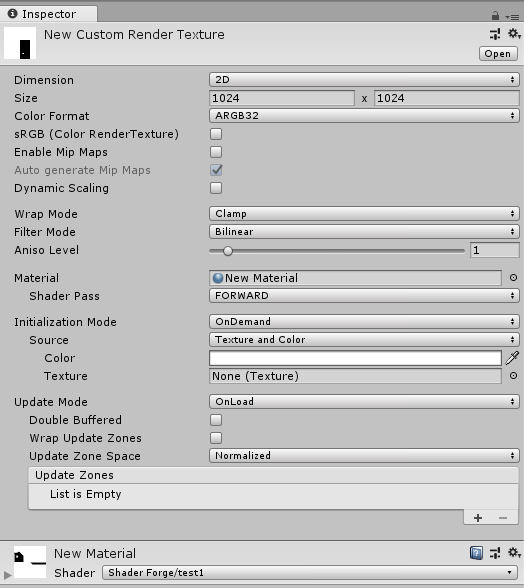
次にCustomRenderTextureを作成します。
Create→CustomRenderTexture

解像度等、パラメータはお好みで…
Materialに先程作成したマテリアルを適用すると完了です!!
シェーダーで動的に変更できるテクスチャが完成!!!
UTSのShadingGradeMapに割り当ててみます。
CustomRanderTextureを用いて
— ゆず@c95 日 東 タ 17a (@Yuzu_Unity) 2018年12月14日
UTSのShadingGaradeMapをブレンドする…
Timeline拡張につなげる予定…
これで動的なテクスチャベースの影ブレンドができるはず…https://t.co/N4NIDZkeUP#UnityChan #unity3d pic.twitter.com/ywxJRl4iAl
思った通りにできた!!!
まとめ
この方法は
VRChat(主にシェーダーかけないけどShaderForgeなら扱える人、UVスクロールとかいろいろ簡単にできるね!)
VFXGraphにも使えるのかな?(いずれShaderGraphと統合されるので必要なくなりますが…)
Unityでの映像制作に関しては
Timelineを拡張することによりTimelineで動的に変更できるようにもなります。(作成中)
これは無限の可能性を感じる…
板ポリ×カメラ×RanderTextureでも出来ますが
これが一番いい感じがする