はじめに
GCPで作成したWordpressにSSLの設定を行った際の手順を記します。
前提
- MarketPlace(Click-to-Deploy)を使用していること
- 海外の記事(click-to-deployでSSL設定を行う)を参考にしています
手順
VMインスタンスのHTTPSトラフィックを許可する
まず、VMインスタンスに対してファイアウォールの設定を行います。
ComputeEngine - VMインスタンス から対象のインスタンスを選択し、編集をクリックします。
ファイアウォールから HTTPSトラフィックを許可する をチェックして保存します。
SSH接続
続いて、SSH接続を行います。
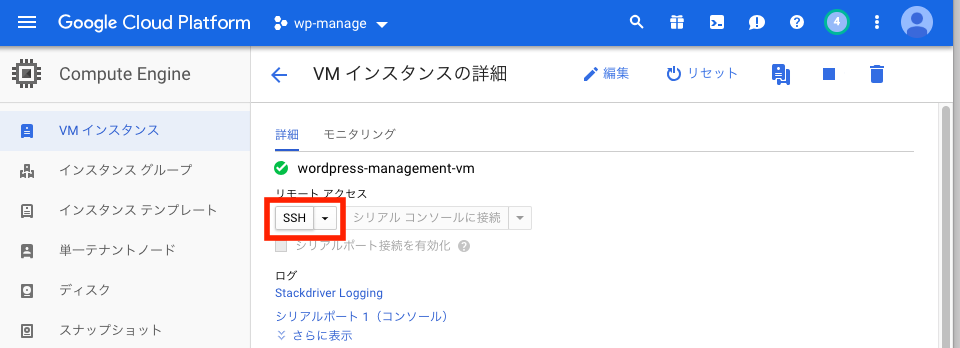
VMインスタンスの「SSH」をクリックして、別ウィンドウでSSH画面が起動するのを待ちます。
CertBotのインストール
wget https://dl.eff.org/certbot-auto && chmod a+x certbot-auto
certbotをインストールします。
証明書の作成
./certbot-auto certonly --webroot -w /var/www/html/ -d yourdomain.com
証明書を作成します。
yourdomain.com のところは適宜変更してください。
証明書の設定
証明書の設定を行います。
まず、default-ssl.conf ファイルを開きます。
sudo vim /etc/apache2/sites-available/default-ssl.conf
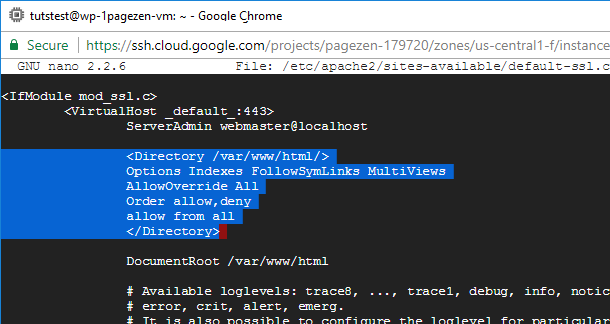
default-ssl.confファイルの先頭に、ネットワークトラフィックをHTTPSポート443に転送するようにサーバーに指示するために、次のコード行を貼り付けます。
<Directory /var/www/html/>
Options Indexes FollowSymLinks MultiViews
AllowOverride All
Order allow,deny
allow from all
</Directory>
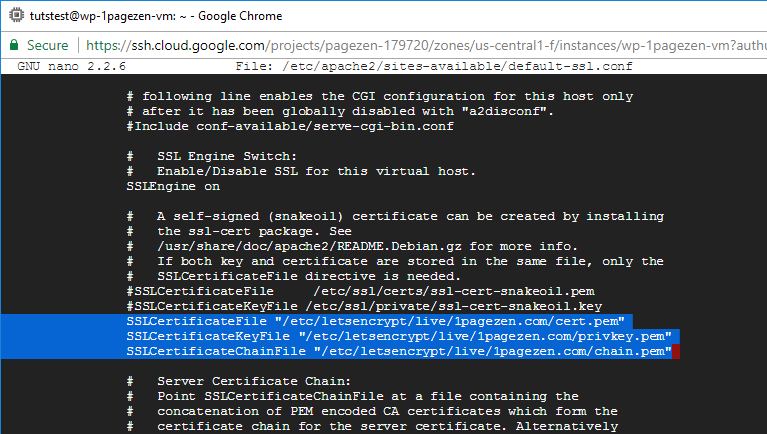
次は、default-ssl.confファイルをスクロールして、既存のSnakeoil証明書の横に#記号を配置し、以下のコマンドに示すように3つのSSL証明書ファイルへのパスを貼り付けます。
必ず、yourdomain.comを自分のドメイン名に置き換えてください。
SSLCertificateFile "/etc/letsencrypt/live/yourdomain.com/cert.pem"
SSLCertificateKeyFile "/etc/letsencrypt/live/yourdomain.com/privkey.pem"
SSLCertificateChainFile "/etc/letsencrypt/live/yourdomain.com/chain.pem"
リダイレクトを有効化する
まず、wordpress.conf を開きます。
sudo vim /etc/apache2/sites-available/wordpress.conf
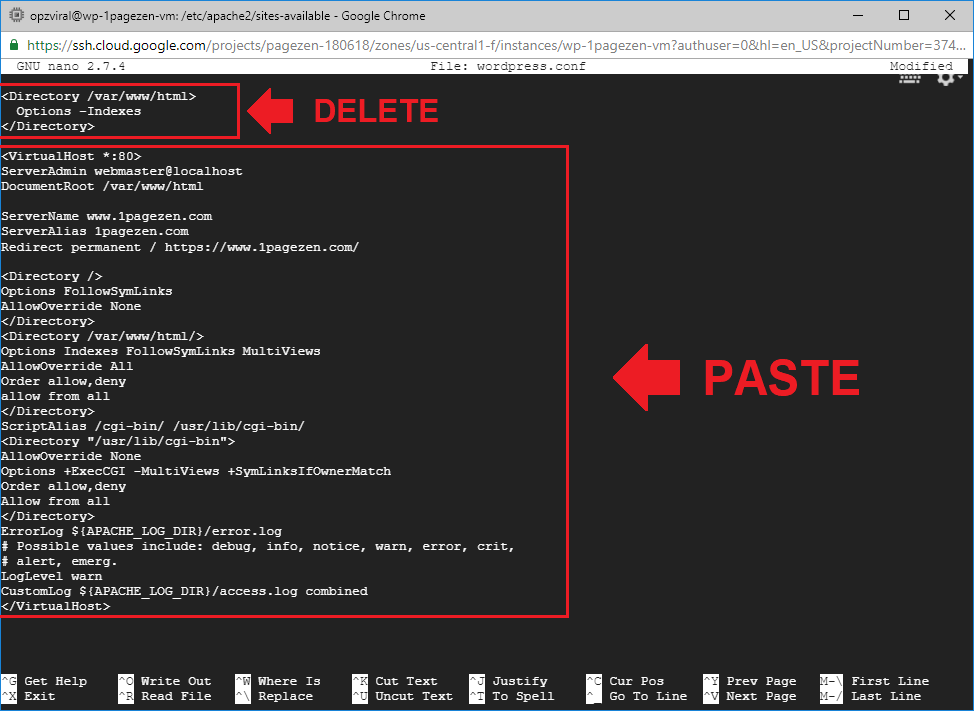
wordpress.confファイル内で、ファイルの先頭にある既存の3行のコードを削除します。次に、以下のコードをコピーしてファイルに貼り付けます。yourdomain.comは自分のドメイン名に置き換えてください。
<VirtualHost *:80>
ServerAdmin webmaster@localhost
DocumentRoot /var/www/html

ServerName yourdomain.com
Redirect permanent / https://yourdomain.com/

<Directory />
Options FollowSymLinks
AllowOverride None
</Directory>
<Directory /var/www/html/>
Options Indexes FollowSymLinks MultiViews
AllowOverride All
Order allow,deny
allow from all
</Directory>
ScriptAlias /cgi-bin/ /usr/lib/cgi-bin/
<Directory "/usr/lib/cgi-bin">
AllowOverride None
Options +ExecCGI -MultiViews +SymLinksIfOwnerMatch
Order allow,deny
Allow from all
</Directory>
ErrorLog ${APACHE_LOG_DIR}/error.log
# Possible values include: debug, info, notice, warn, error, crit,
# alert, emerg.
LogLevel warn
CustomLog ${APACHE_LOG_DIR}/access.log combined
</VirtualHost>
Apacheサーバーの再起動
sudo a2ensite default-ssl
sudo a2enmod ssl
sudo service apache2 restart
Apacheサーバーを更新/再起動して、証明書の変更を有効にします。
確認
ss -lnt
State       Recv-Q Send-Q                            Local Address:Port                                           Peer Address:Port
LISTEN      0      80                                    127.0.0.1:3306                                                      *:*
LISTEN      0      128                                           *:22                                                        *:*
LISTEN      0      128                                          :::80                                                       :::*
LISTEN      0      128                                          :::22                                                       :::*
LISTEN      0      128                                          :::443                                                      :::*
443ポートが空いていればSSLが有効化されています。
Wordpress URLの更新
httpsのアドレスでアクセスしたとき、ページが表示されています。

管理画面から、WordPressアドレスとサイトアドレスをhttpsに変更します。
SSLの自動更新の設定
SSL証明書を自動的に更新しますか?次の手順では、SSL証明書の自動更新を設定する方法を学びます。それでは始めましょう。
自動更新を設定する最初のステップは、mvコマンドを使用してcertbotパッケージをletsencryptディレクトリに移動することです。
sudo mv certbot-auto /etc/letsencrypt/
cronの設定
certbot-Autoパッケージを/etc/letsencrypt/ディレクトリに移動したので、次のステップはcrontabファイルを開くことです。 crontabファイルを開くには、次のコマンドを実行します。
sudo crontab -e
crontabファイルの一番下に、証明書の更新を週に1回チェックし、期限切れになると自動的に証明書を更新するようにサーバーに指示するスクリプトを入力します。
45 2 * * 6 cd /etc/letsencrypt/ && ./certbot-auto renew && /etc/init.d/apache2 restart
参考
GoogleクラウドでのWordPress用の無料SSL証明書の設定
Webブラウザに「このサイトにアクセスできない」というエラーが表示されます


