Unityで強化学習する準備:導入~サンプルの学習・検証
強化学習を実際に自分のロボットで行う際に,様々なプラットフォームが考えられるが,
今回は,UnityのML-Agentsを試していきたい.理由は,Unityも使えるようになりたいということも挙げられるが,ほかには以下のようなものが挙げられる.
- ROS, ROS2も後に導入可能であること
- Unityの物理エンジンは今はNvidiaが開発しているPhysX
- 摩擦などの細かな設定ができる(より現実世界を模擬することができる)
- そこそこのスペックでも十分動くこと
- Multi Agentsの実現が非常に簡単であること
環境
コンピュータ
| デバイス | MSI |
| プロセッサ | Intel(R) Core(TM) i5-7300HQ CPU @ 2.50GHz 2.50GHz |
| 実装RAM | 16.00 GB (15.9 GB 使用可能) |
| OS | Windows (Windows 10 Home, バージョン:21H2) |
| GPU | GEFORCE MX 150 |
Unity
| Unity | 2022.1.5f1 |
| Unity Hub | 3.3.0 |
Unity, ML-Agentsの環境構築
環境は以下を参考に作成した.
python環境の準備
Anacondaで仮想環境作成
conda create -n mlagents python=3.7.11
conda activate mlagents
PyTorchを使えるように
conda install pytorch==1.11.0 torchvision==0.12.0 torchaudio==0.11.0 cudatoolkit=11.3 -c pytorch
mlagentsをセットアップ
cd <ml-agents-release_19のディレクトリ>
pip install -e ./ml-agents-envs
pip install -e ./ml-agents
ML-Agents Unity packageの追加
- 3Dプロジェクトを作成
- 今回の名前は”RollerBall”としておく
- プロジェクトにML-Agents Unity packageを追加する
- UnityのWindowタブからPackage Managerを開く
- Package Managerの左上にある+を押して,Add package from disk...を選択
- ml-agents-release19のcom.unity.ml-agents内にあるpackage.jsonを指定
- 以下のようになれば,インストール完了
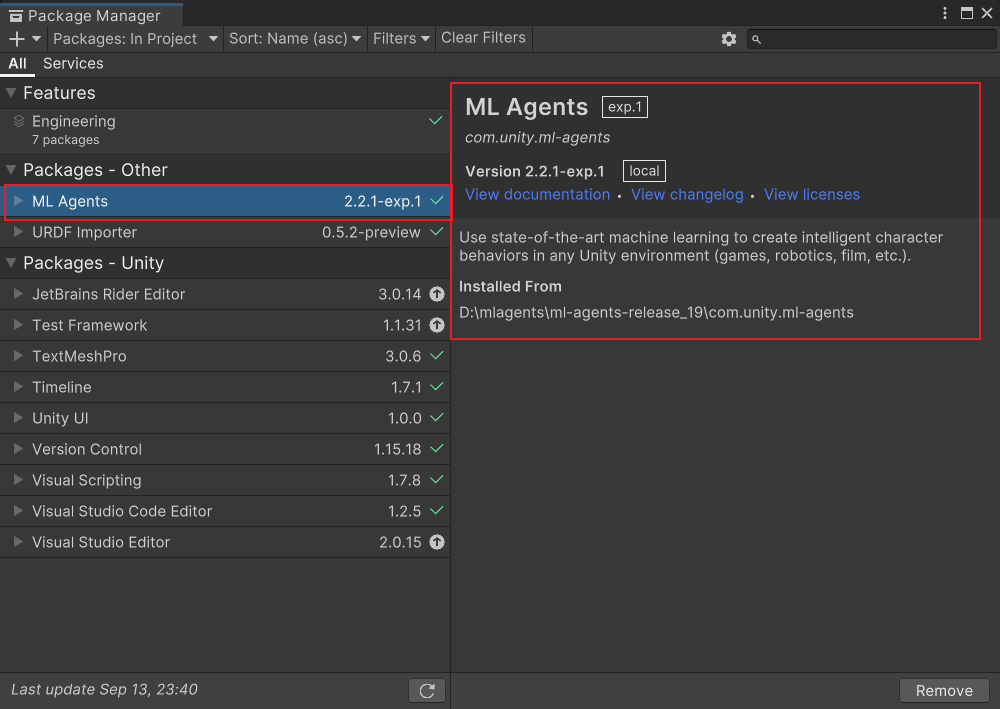
ここまでで,ML-Agentsが使える準備が整った
ML-Agentsのサンプル
Unityプロジェクトのセットアップ
先ほどの環境構築ですでに完了.
環境の作成
地面
-
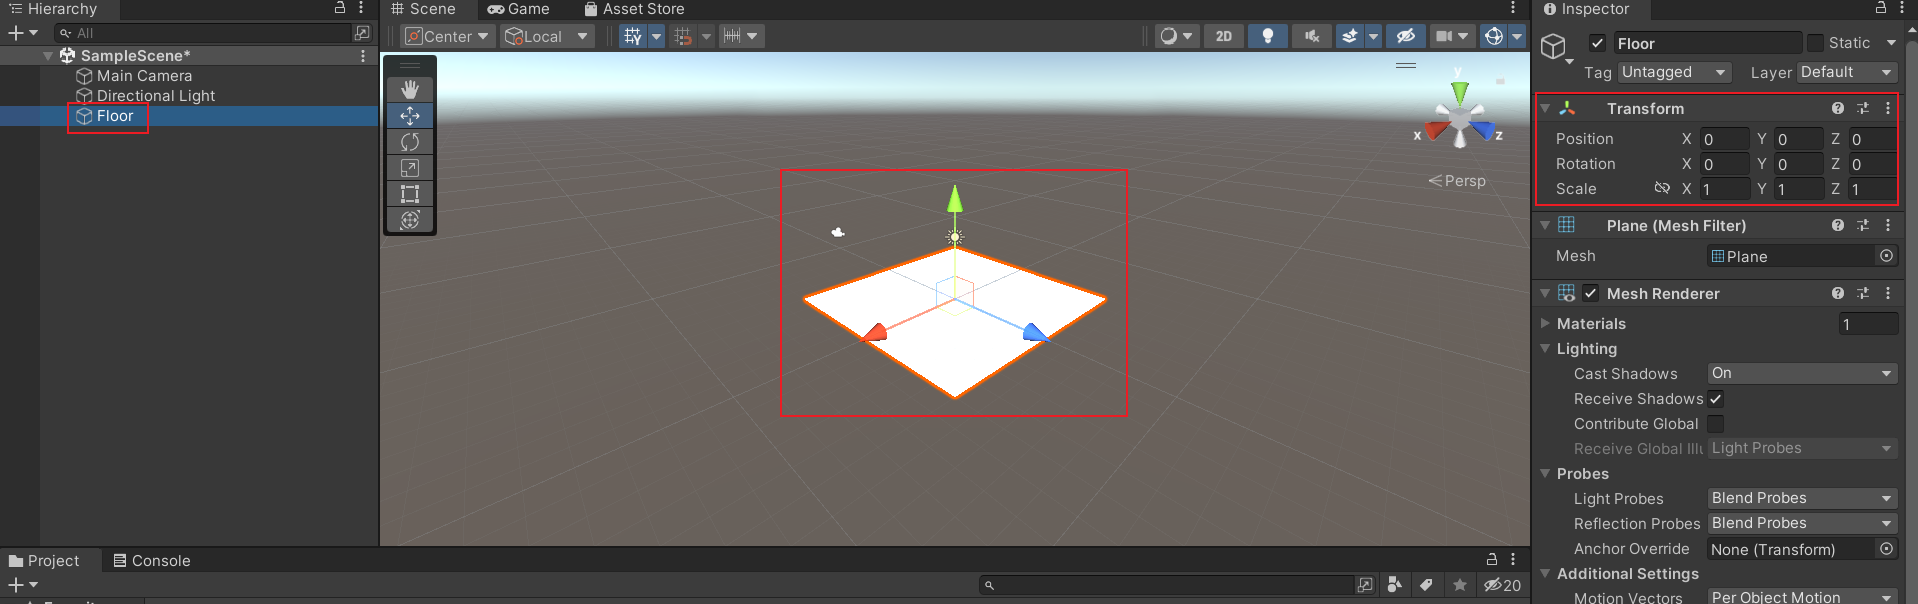
ヒエラルキー内で右クリックして3D Object > Planeを選択
-
“Floor”という名前にしておく
-
Floor Planeを選択
-
以下のようにTransformを設定
Transformに設定Position = (0,0,0) Rotation = (0,0,0) Scale = (1,1,1)
以下の図のようになれば大丈夫.
ターゲットキューブ
-
ヒエラルキー内で右クリックして3D Object > Cubeを選択
-
“Target”という名前にしておく
-
“Target”を選択してInspector windowを開く
-
Transformを以下のように設定する
Transformに設定Position = (3, 0.5, 3) Rotation = (0, 0, 0) Scale = (1, 1, 1)
以下の図のようになれば大丈夫.

エージェントボール
-
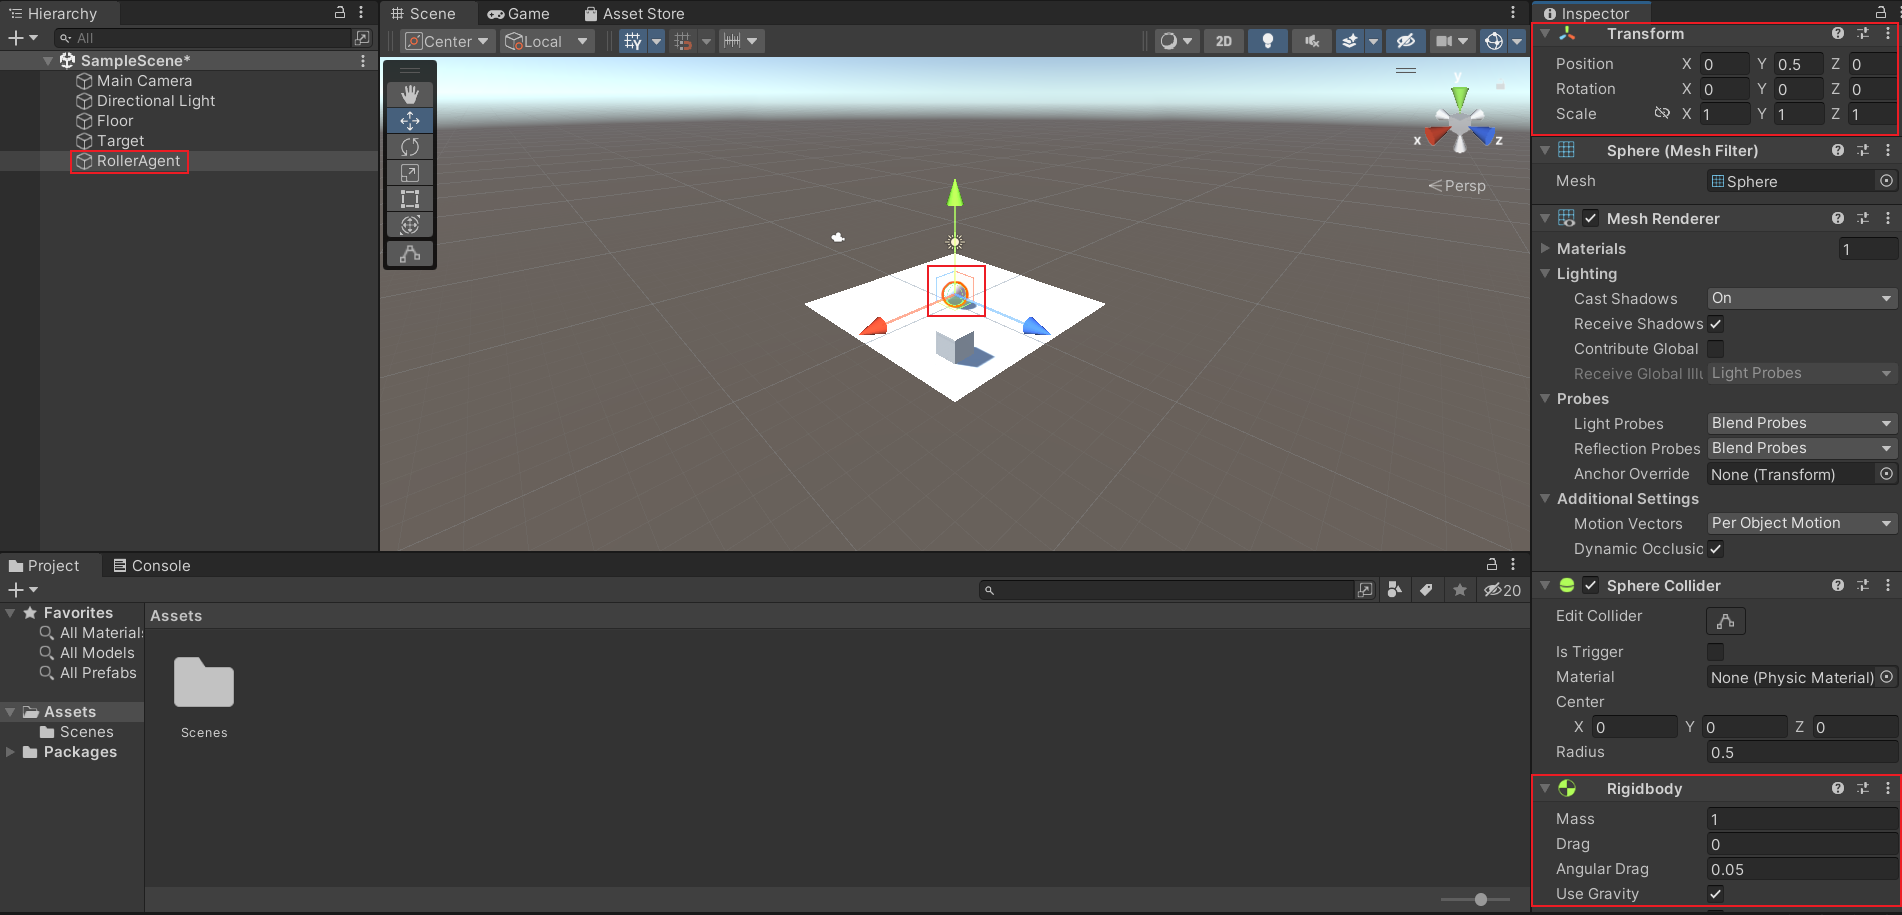
ヒエラルキー内で右クリックして3D Object > Sphere
-
“RollerAgent”という名前にしておく
-
RollerAgentを選択してInspector window
-
Transformを以下のように設定する
Transformに設定Position = (0, 0.5, 0) Rotation = (0, 0, 0) Scale = (1, 1, 1) -
Add Componentをクリック
-
Rigidbody componentをSphereに追加
a. Add Componentをクリック後にRigidと検索すれば出てくる
以下の図のようになれば大丈夫.
色付けしてみる
-
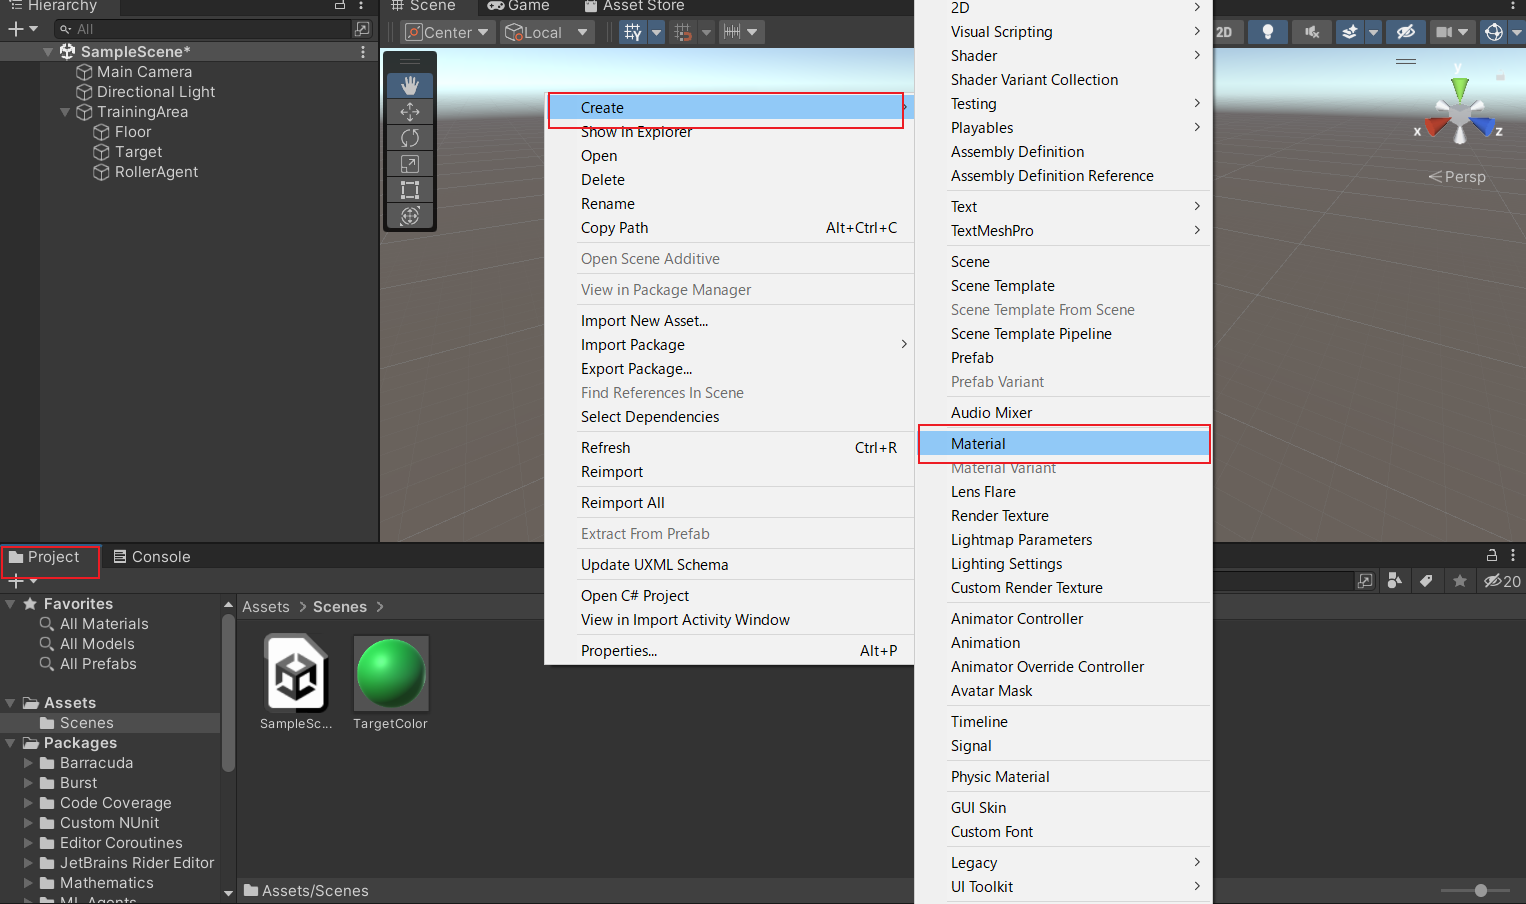
project内で右クリックして,create > Materialを選択
-
それぞれのオブジェクトに対してのMaterialファイルを作成
-
Materialファイルを選択してInspector windowを開く
-
Inspector window内のAlbedo項目で変更
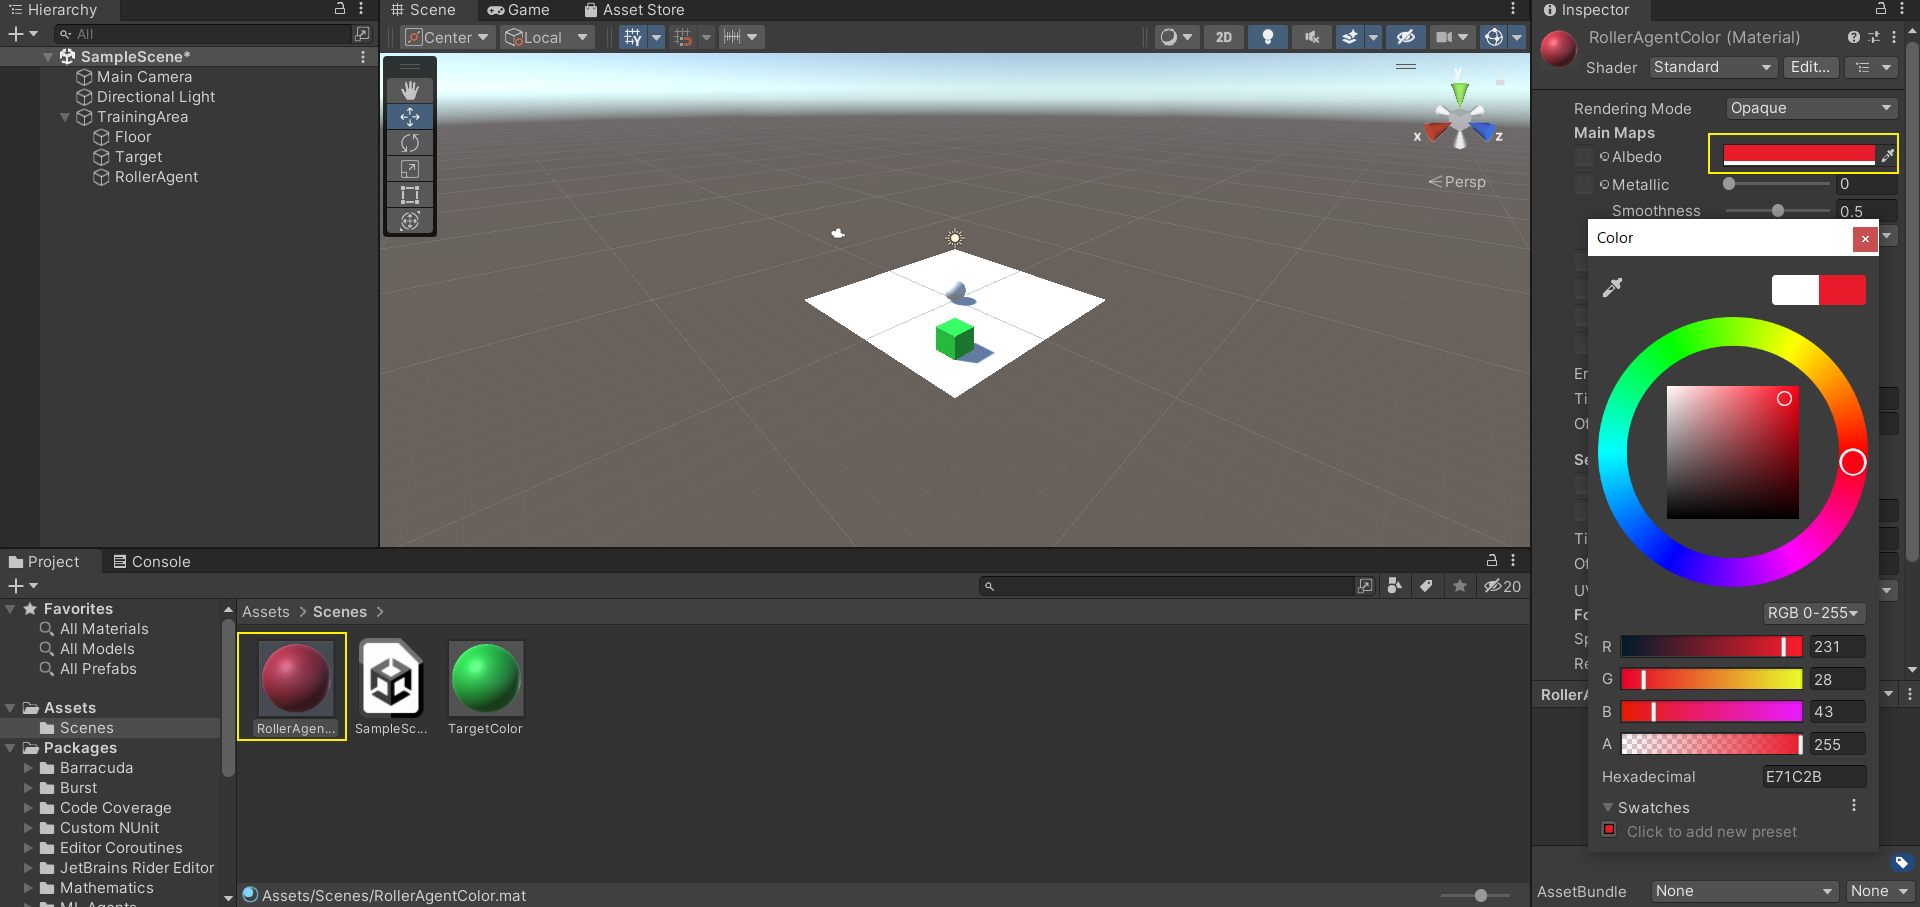
-
作成したMaterialファイルを対象のオブジェクトにドラッグする
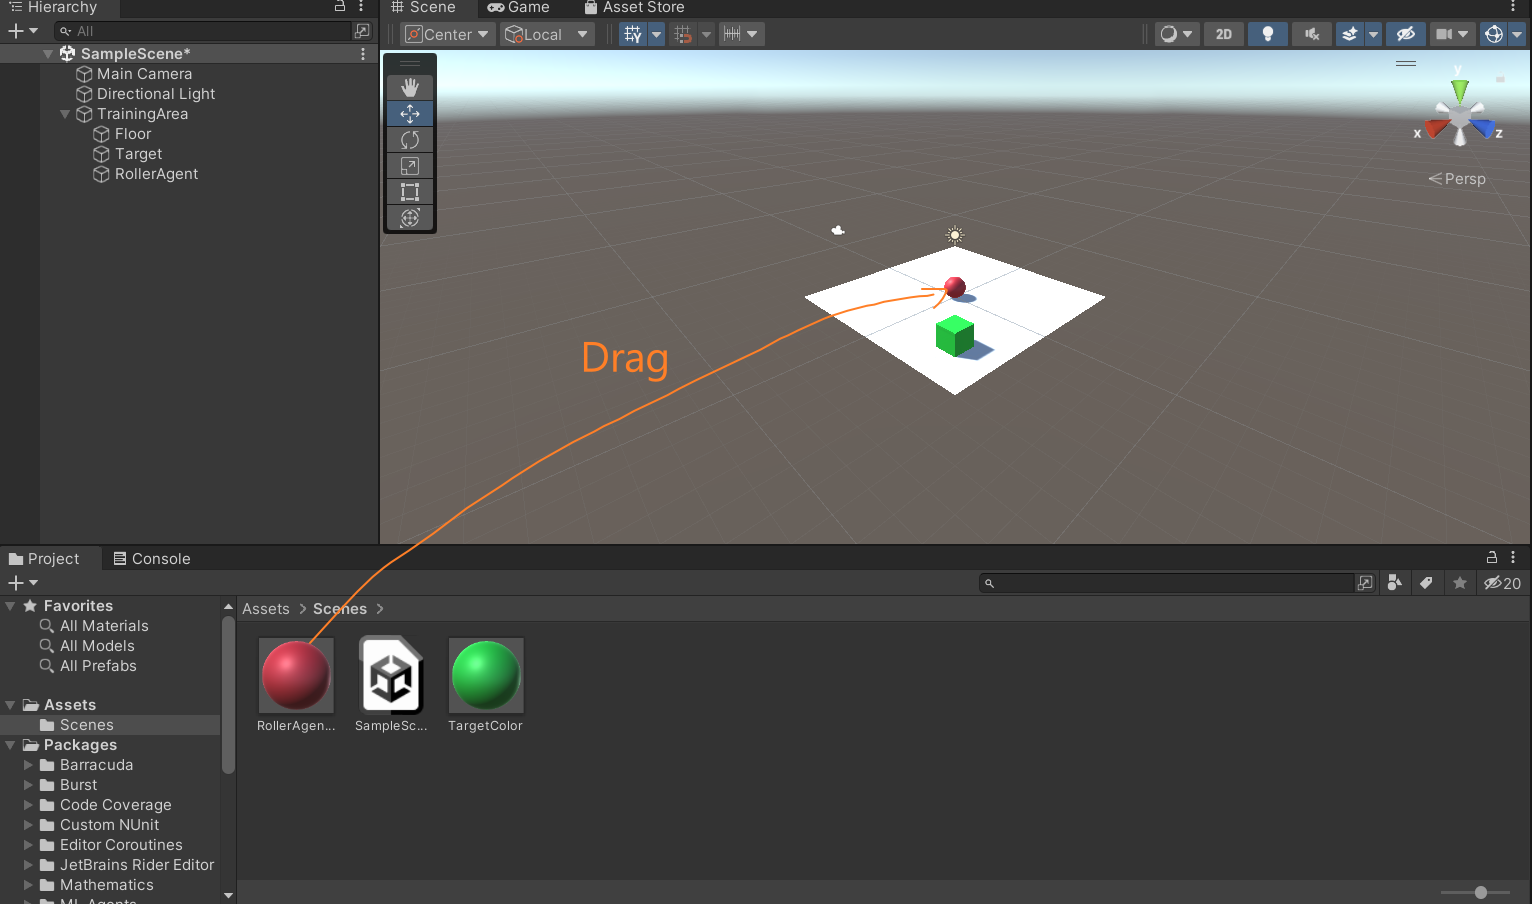
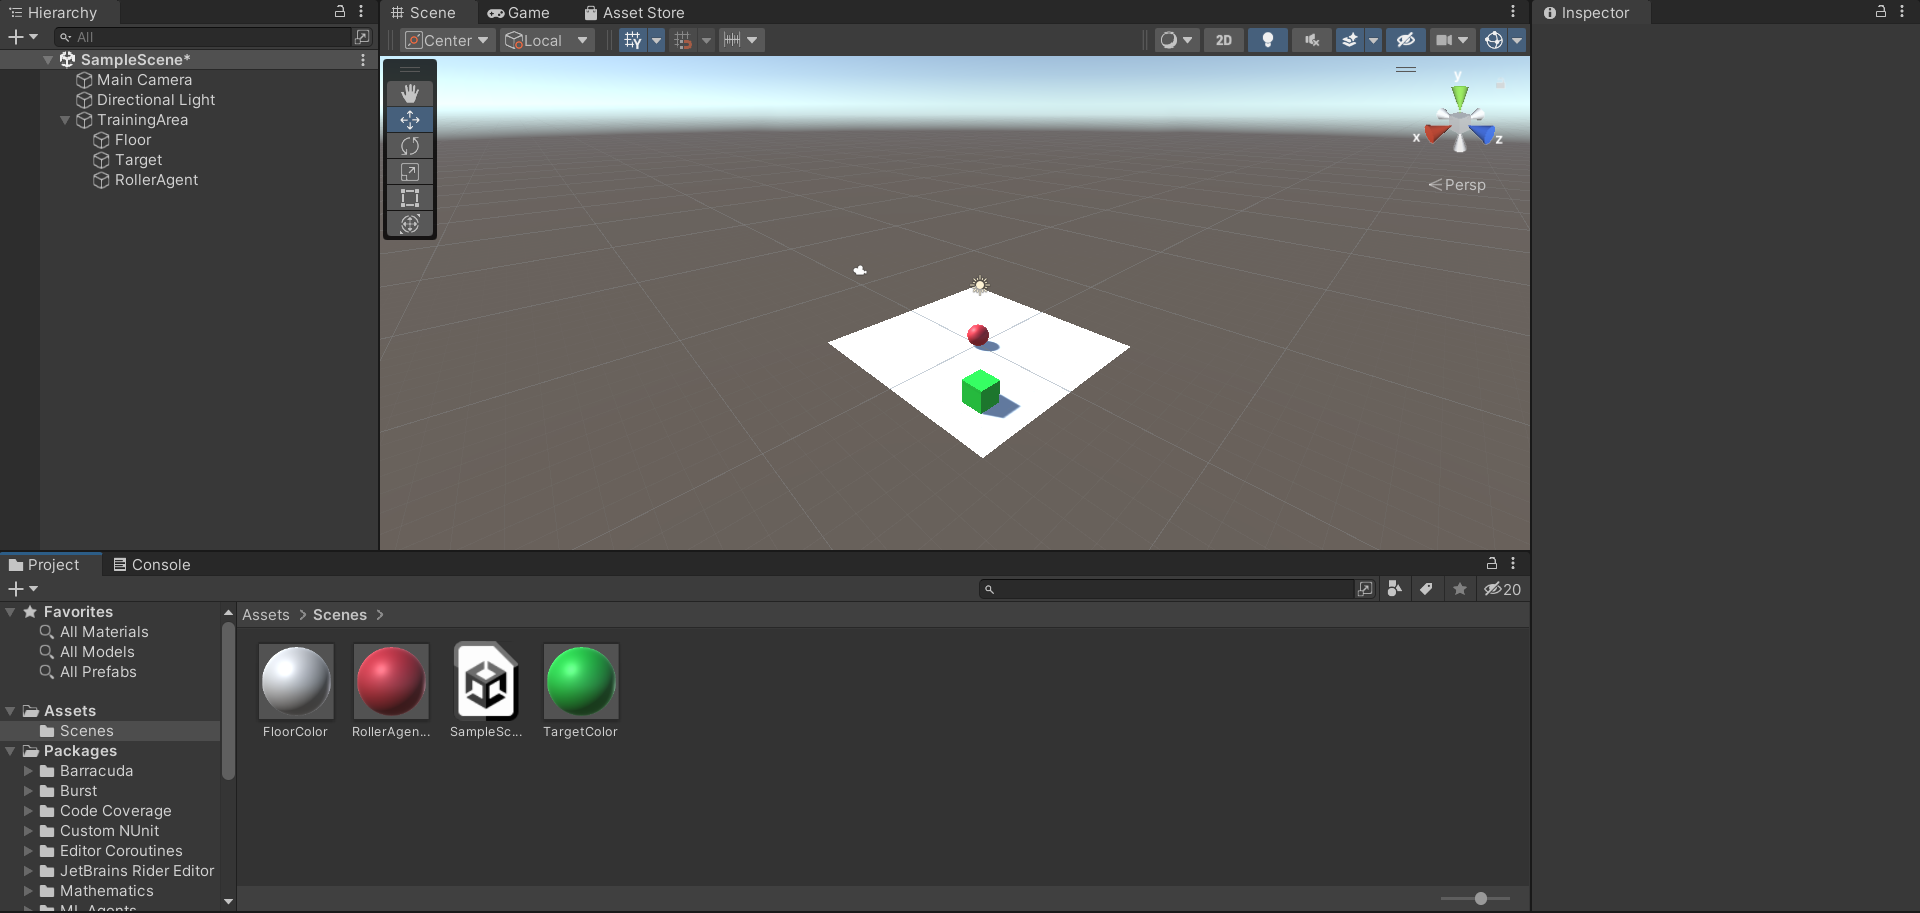
以下の図のようになれば大丈夫.
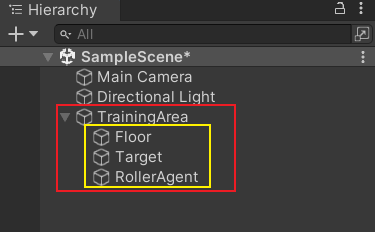
グルーピング
-
ヒエラルキー内で右クリックして,Create Emptyを選択して,新規のempty GameObjectを作成.(名前はTrainingAreaとでもしておく)
-
TrainingAreaのTransformを以下のようにリセットしておく
Transformに設定Position = (0, 0, 0) Rotation = (0, 0, 0) Scale = (1, 1, 1)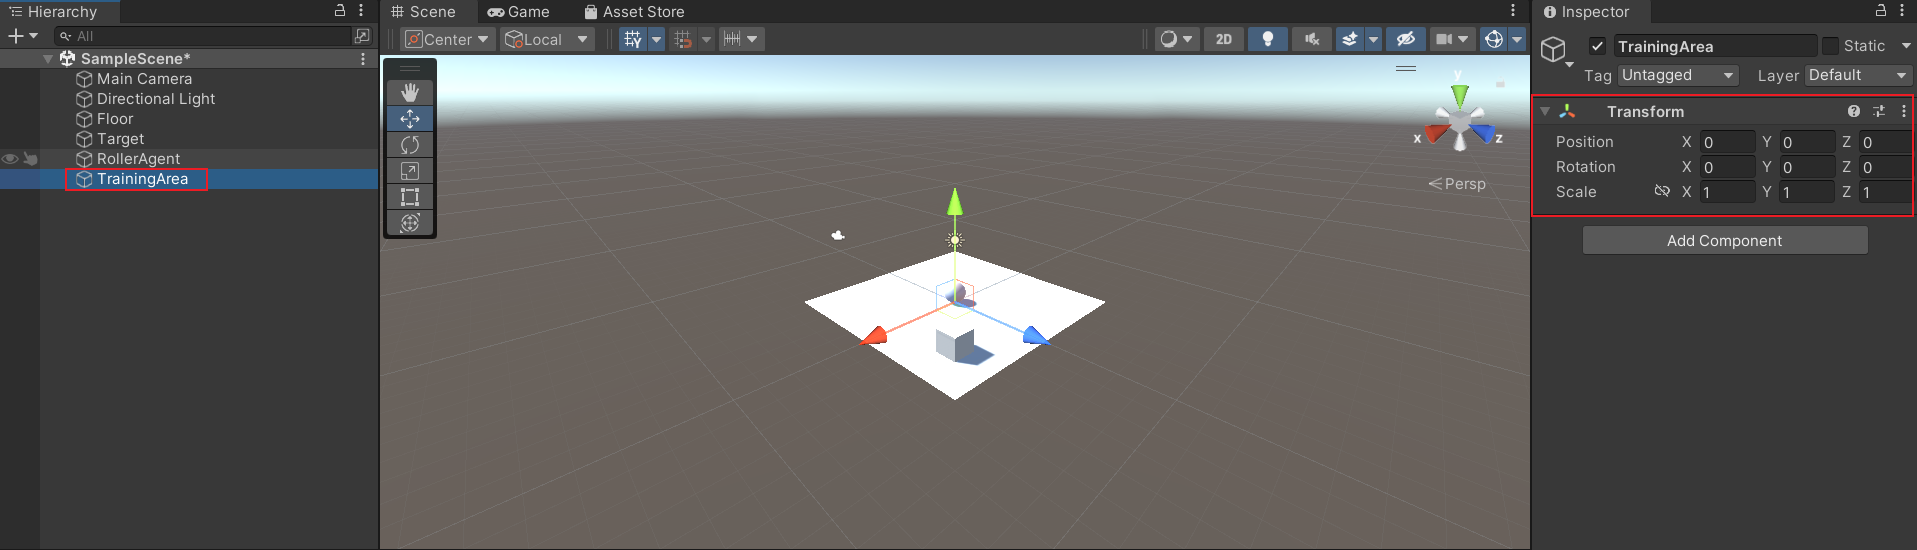
-
ヒエラルキー内でFloorとTargetとRollerAgentをドラッグしてTrainingAreaへもっていく
以下の図のようになれば大丈夫.
エージェントの実行
スクリプトの準備
- エージェントのGameObjectを選択
a. inspector windowが開く - Add Componentをクリック
- New Scriptをクリック
- スクリプトの名前を
RollerAgentとする - Create and Addをクリック
スクリプト
RollerAgent: ソースコード
using System.Collections.Generic;
using UnityEngine;
using Unity.MLAgents;
using Unity.MLAgents.Sensors;
using Unity.MLAgents.Actuators;

public class RollerAgent : Agent
{
    Rigidbody rBody;
    void Start () {
        rBody = GetComponent<Rigidbody>();
    }

    public Transform Target;
    public override void OnEpisodeBegin()
    {
       // If the Agent fell, zero its momentum
        if (this.transform.localPosition.y < 0)
        {
            this.rBody.angularVelocity = Vector3.zero;
            this.rBody.velocity = Vector3.zero;
            this.transform.localPosition = new Vector3( 0, 0.5f, 0);
        }

        // Move the target to a new spot
        Target.localPosition = new Vector3(Random.value * 8 - 4,
                                           0.5f,
                                           Random.value * 8 - 4);
    }

		public override void CollectObservations(VectorSensor sensor)
		{
		    // Target and Agent positions
		    sensor.AddObservation(Target.localPosition);
		    sensor.AddObservation(this.transform.localPosition);

		    // Agent velocity
		    sensor.AddObservation(rBody.velocity.x);
		    sensor.AddObservation(rBody.velocity.z);
		}


		public float forceMultiplier = 10;
		public override void OnActionReceived(ActionBuffers actionBuffers)
		{
		    // Actions, size = 2
		    Vector3 controlSignal = Vector3.zero;
		    controlSignal.x = actionBuffers.ContinuousActions[0];
		    controlSignal.z = actionBuffers.ContinuousActions[1];
		    rBody.AddForce(controlSignal * forceMultiplier);

		    // Rewards
		    float distanceToTarget = Vector3.Distance(this.transform.localPosition, Target.localPosition);

		    // Reached target
		    if (distanceToTarget < 1.42f)
		    {
		        SetReward(1.0f);
		        EndEpisode();
		    }

		    // Fell off platform
		    else if (this.transform.localPosition.y < 0)
		    {
		        EndEpisode();
		    }
		}

}
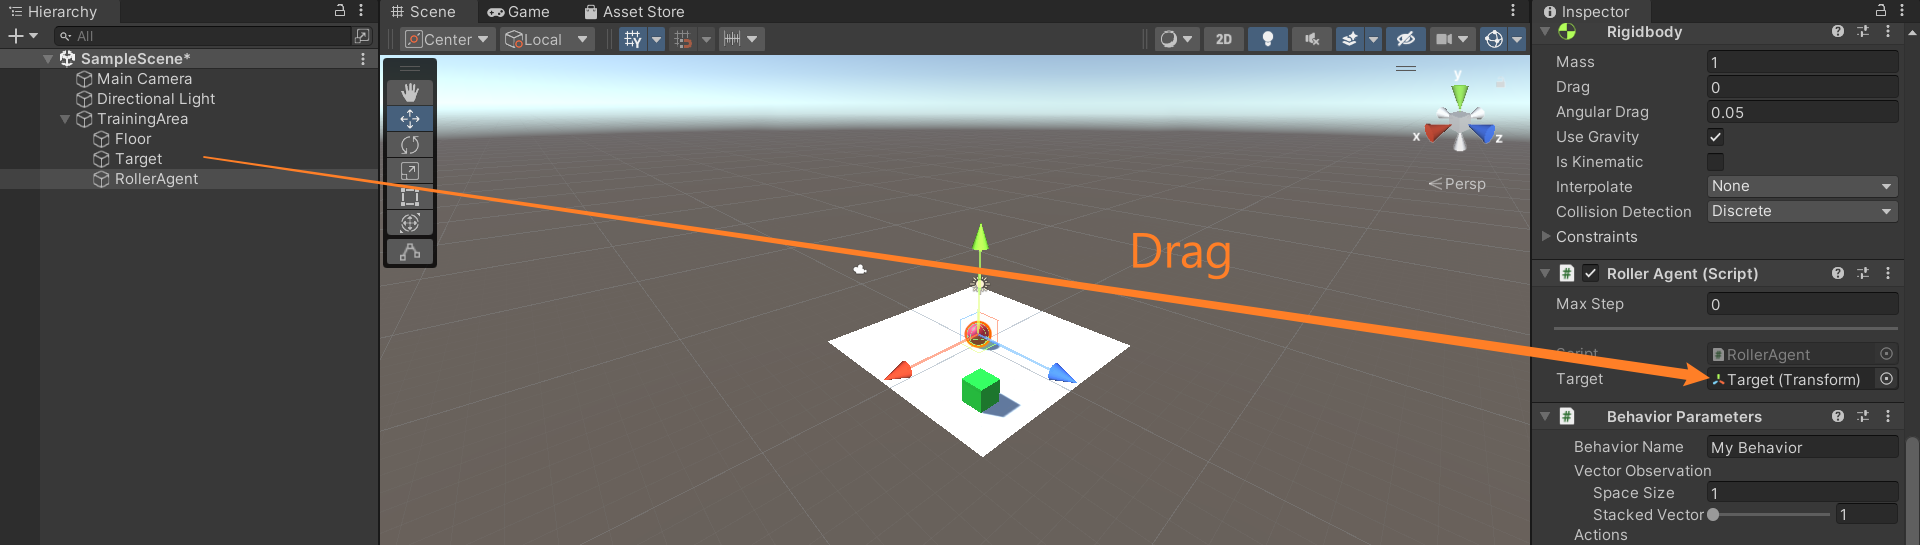
コード内の変数を反映
-
RollerAgentを選択してInspector windowを開く
-
ヒエラルキー内のTargetをInspector内のRollerAgent Script内のTargetにドラッグ
-
Add ComponentボタンからDecision Requester scriptを追加
-
Decision Periodを10に設定
-
Add ComponentボタンからBehavior Parameters scriptを追加
-
Behavior Parametersを以下のように設定
Behavior Parametersに設定Behavior Name: RollerBall Vector Observation > Space Size = 8 Actions > Continuous Actions = 2
学習
学習設定(yamlファイル)
学習設定(yamlファイル)
behaviors:
  RollerBall:
    trainer_type: ppo
    hyperparameters:
      batch_size: 10
      buffer_size: 100
      learning_rate: 3.0e-4
      beta: 5.0e-4
      epsilon: 0.2
      lambd: 0.99
      num_epoch: 3
      learning_rate_schedule: linear
    network_settings:
      normalize: false
      hidden_units: 128
      num_layers: 2
    reward_signals:
      extrinsic:
        gamma: 0.99
        strength: 1.0
    max_steps: 500000
    time_horizon: 64
    summary_freq: 10000
rollerball_config.yamlファイルをml-agents-release_19のconfigフォルダ内に置く.
実行コマンド
mlagents-learn config/rollerball_config.yaml --run-id=RollerBall
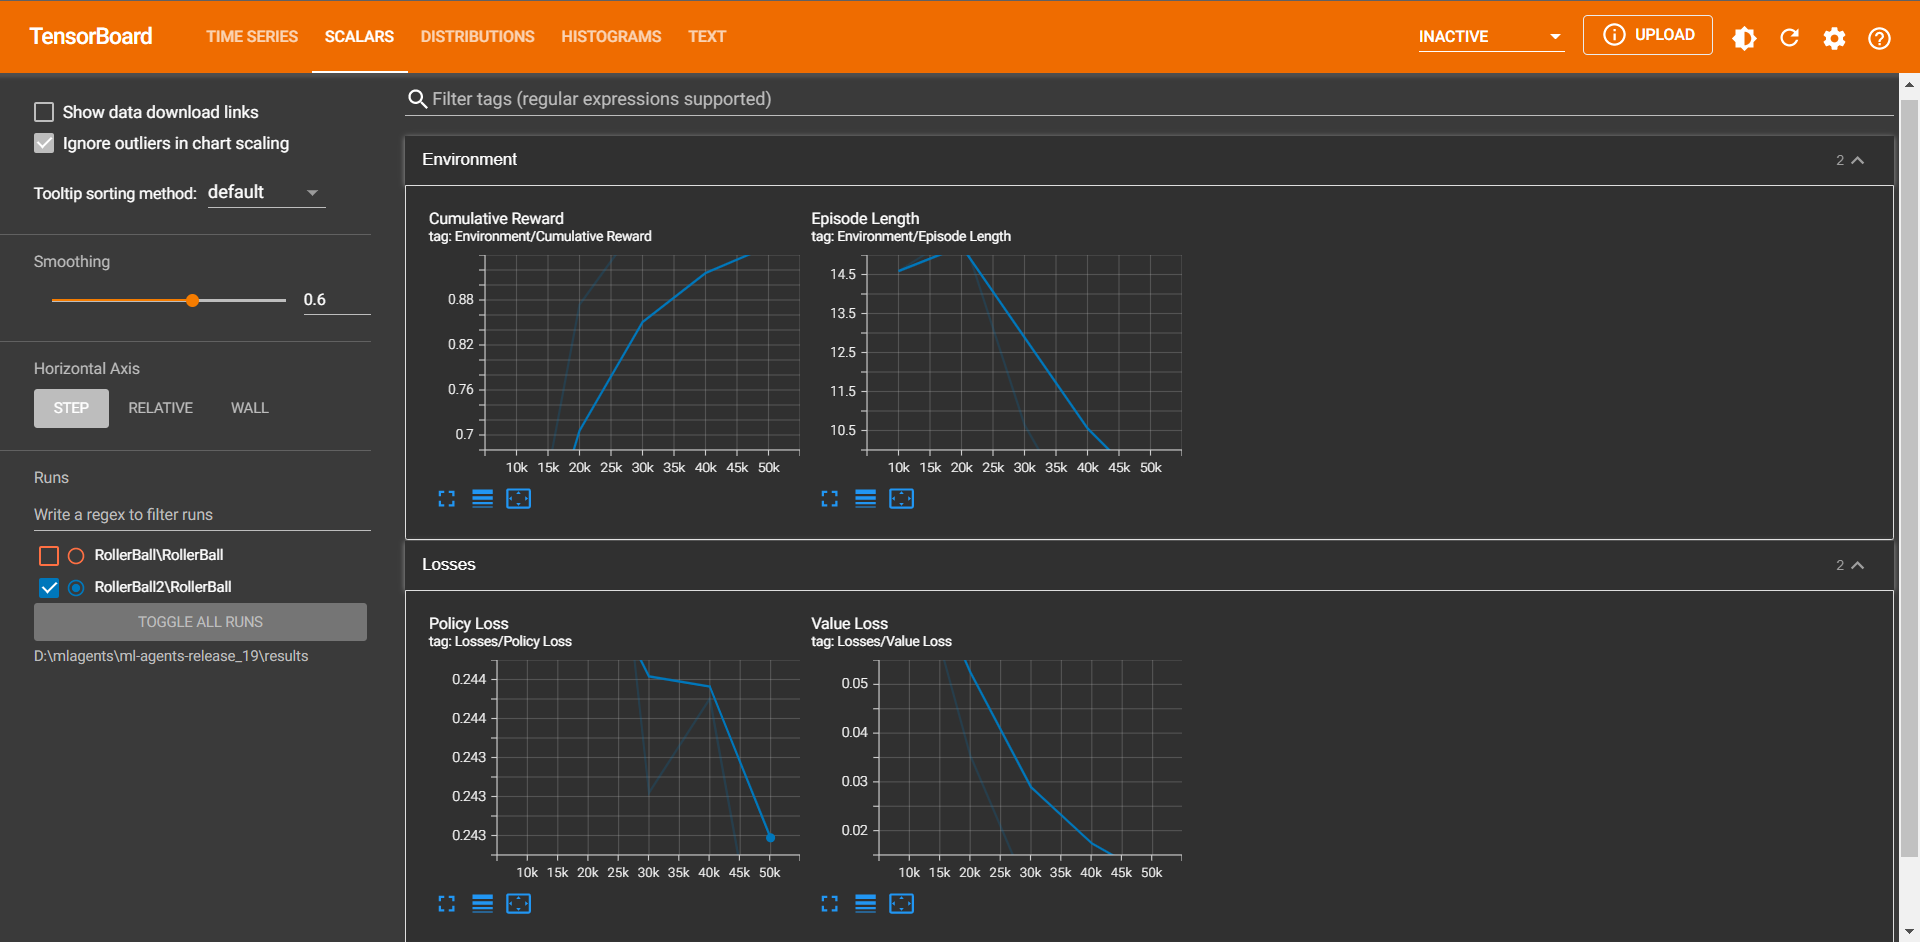
学習の様子:Single Agent
TensorBoard
tensorboard --logdir=<mlagentsのresultsフォルダ>
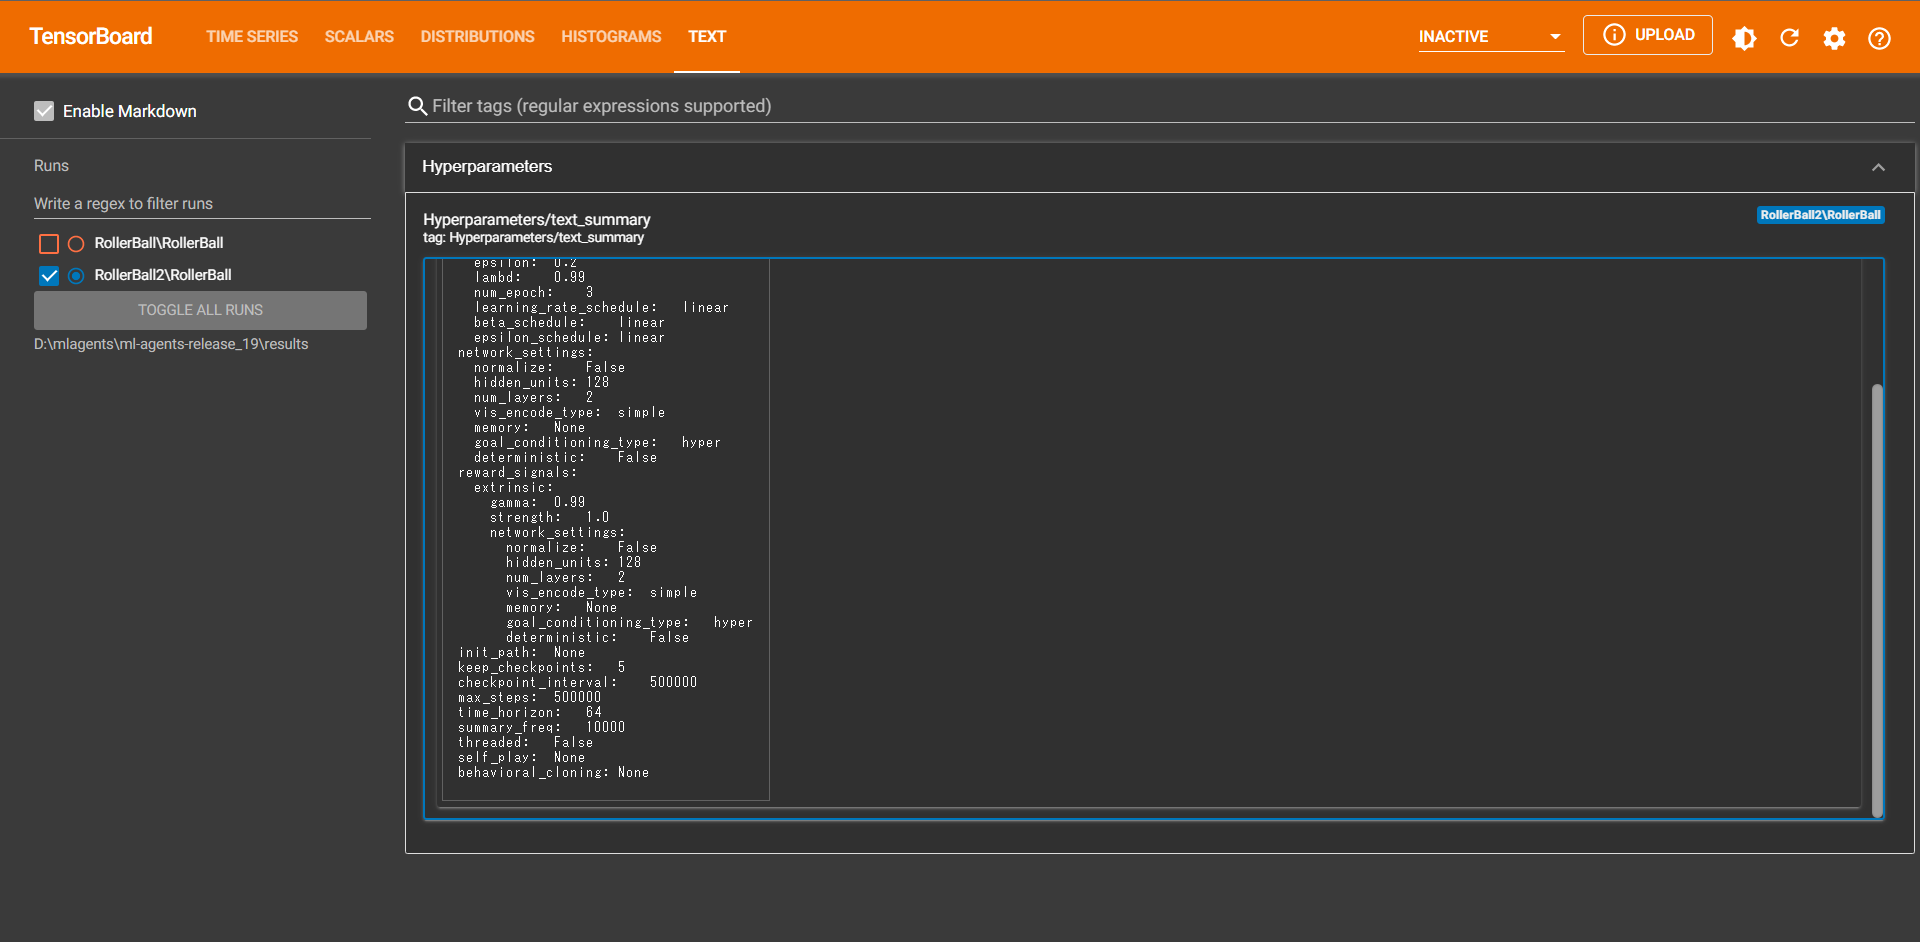
学習結果が出始めると他にも情報が現れてくる
オプション
オプション1:複数のraining Areaを同じシーンに置く
-
TrainginAreaをAssets browerにドラッグ
prefab生成 -
prefabをシーンに欲しいだけドラッグするだけ
互いに重ならないように注意
学習の様子:Multiple Agent
オプション2:同時Unityインスタンスを使った学習
以下のコマンドにより実現可能
mlagents-learn config/rollerball_config.yaml --run-id=RollerBall --num-envs=2
テスト
学習済みのモデルファイルonnxをAssetsに入れておいて,
それをエージェントのBehavior Parametersにドラッグ.
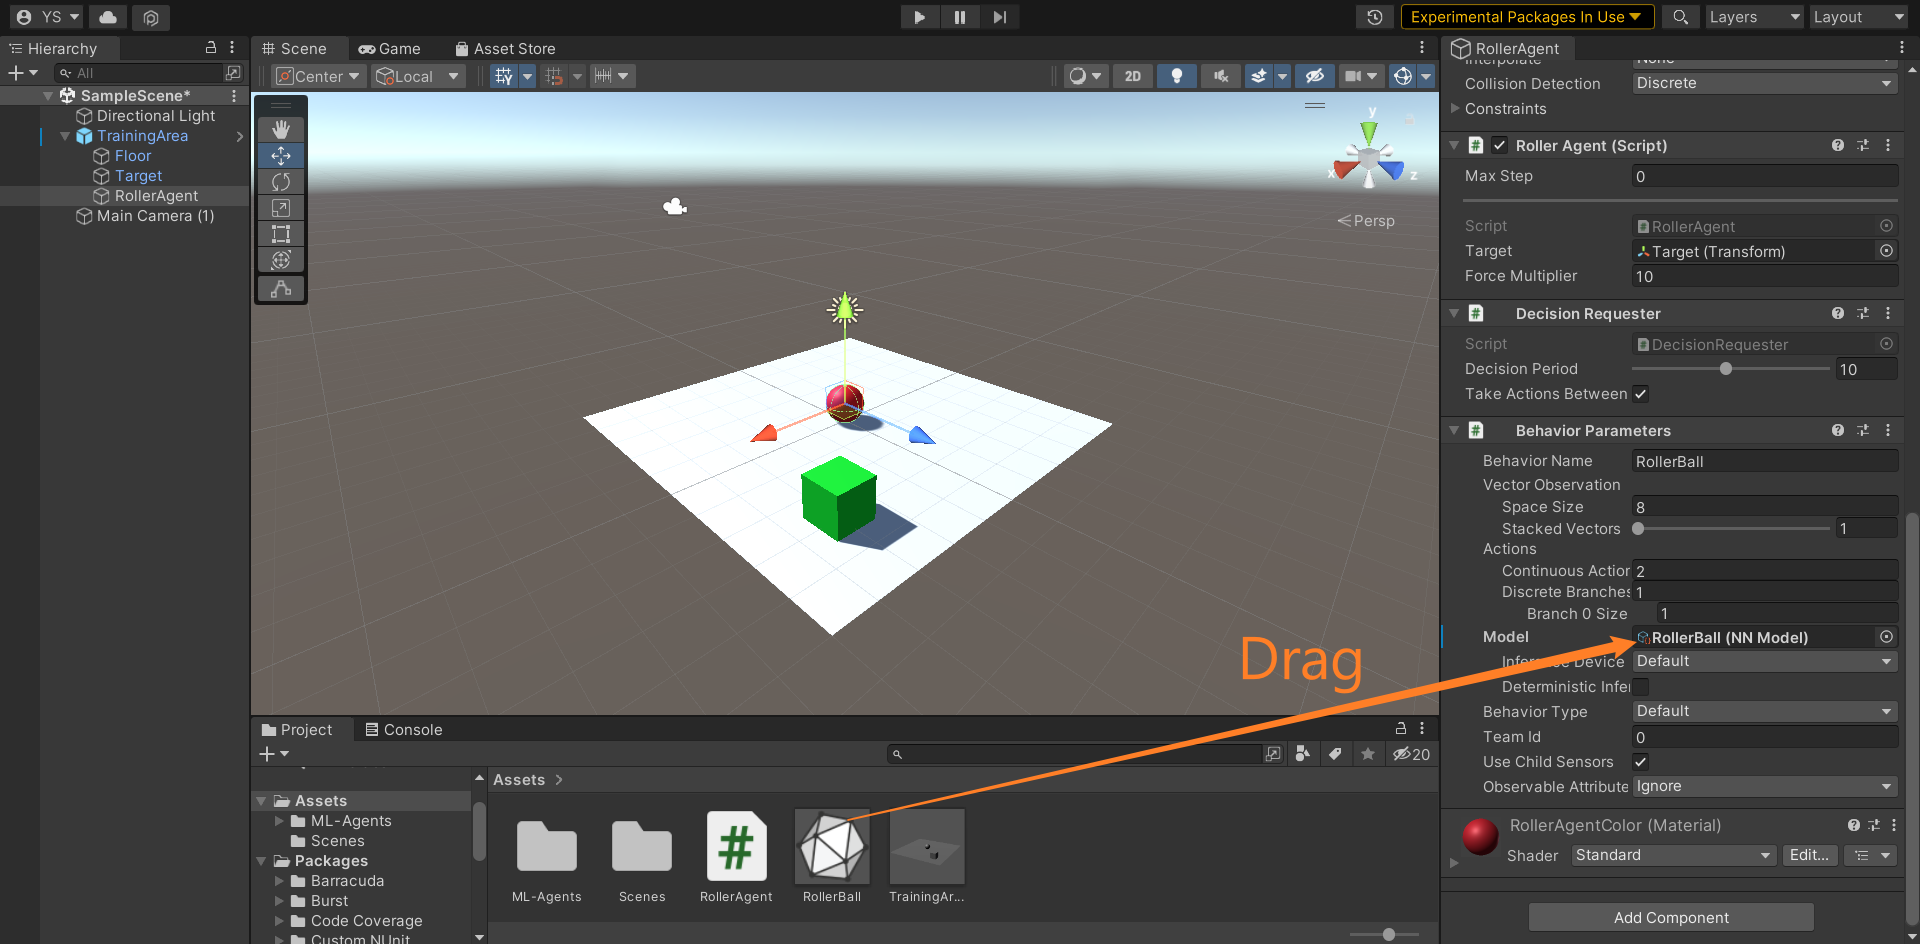
後は実行ボタンを押すだけ.
検証の様子:Multiple Agent
学び:シーンを分けると良い
手作業で毎回テスト用のもの以外を削除するのは大変
↓
test sceneとtrain sceneを作っておけばよい
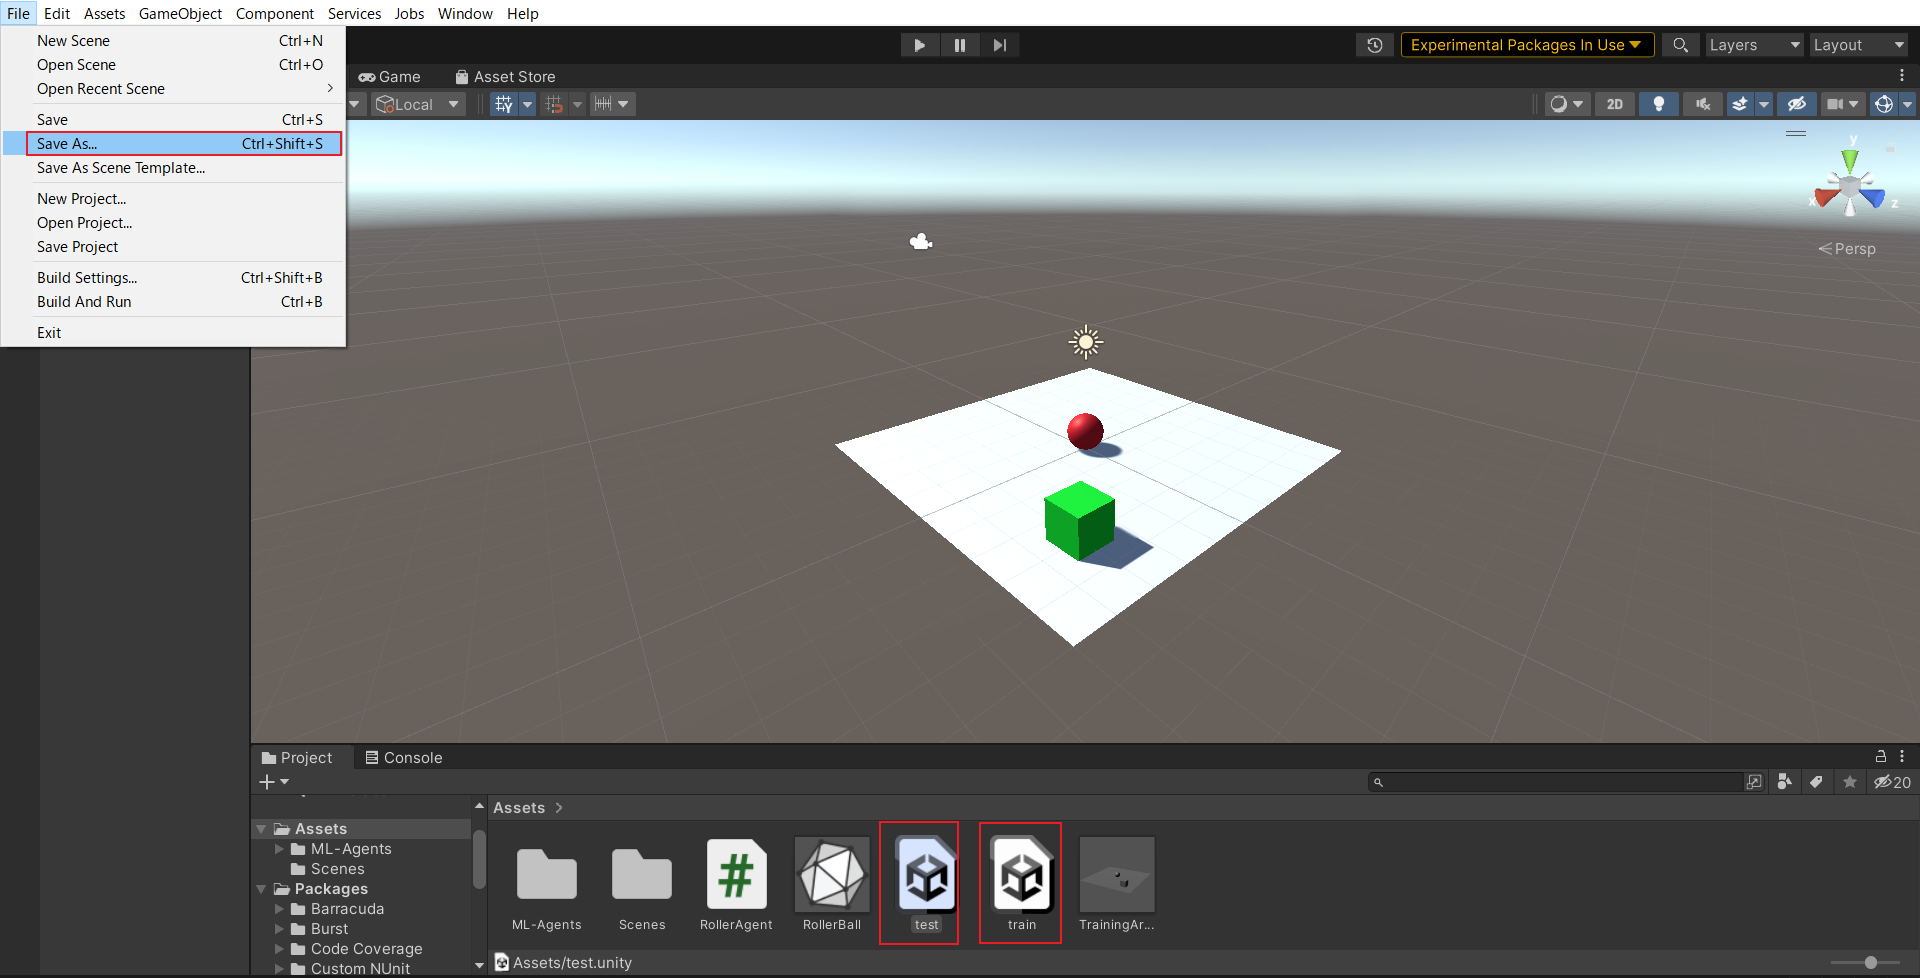
Assetsにあるsceneファイルをダブルクリックするだけでtestとtrainを切り替えられる
感想
いい感じに,複数のエージェントにより学習をおこなうことができた.
前々から,Unityでの強化学習に興味があった.今までは,別の物理シミュレータで実験をしていたが,細かな設定で難があったり,ライセンス等で使いづらいところもあった.今回は,Unityを使っての環境ということで,Unityについての理解も少し深まり,非常に道が広がった感じで,得した気分である.まだ,サンプルを再現しての理解しかしていないため,ここから実際に自分のロボットを学習できるように,シーンの作成とプログラムを作っていきたい.
参考文献