はじめに
WiFiもBluetoothも使えて比較的安価なESP32のプログラムを書き変えることはよくある.
特に機械に組み込んでからUSBをつないで書き込んだり,デバッグ中にも毎回USBをつないで
変更することも大変だと感じていた.そこで,無線でプログラムを変更する製品があることを思い出して,ESP32でもあるのか検索してみるとOTAが引っかかった.OTA(Over the Air)はWiFiさえ接続されていたら,プログラムを変更できるということで,まさにやりたかったことである.特にROS2への活用を考えているものについては,WiFiにつなぐことは前提にするため,好都合である.
ここでは,OTAをESP32で扱う手順の整理と,詰まったことを記述する.
VSCodeでOTAアップロードができない
色々と総合的に開発を進めるにあたって,VSCodeで統一したい気持ちがある.
そのため,ArduinoもVSCodeを利用している.
非常に便利であるが,OTAを使うにあたって問題が生じた.
問題
OTAという技術でプログラムを書き込みたいが,
Arduino IDEの拡張機能だけではVSCode上でOTAを介してプログラムを書き込めない
(OTAのパスワードをなしにしても解決しない)
Arduino IDEであれば書き込みはできるが,VSCodeで開発を統一したい.
解決
どうも,PlatformIOの拡張機能を活用することでアップロードできるらしい.
PlatformIOは使ったことがなかったが,Arduinoの開発環境では有名である.
これを機会にPlatformIOを使ってみることとする.
プロジェクトを作成後,platformio.iniを編集する.
PlatformIOでプログラムをアップロードするまで
事前に必要なもの
- Pythonの環境
- VSCodeの環境
これだけでよいらしい.PlatformIO IDEは拡張機能で追加される.
PlatformIOのインストール
VSCodeの拡張機能で以下のものをインストールするだけ
- platformio ide
- PlatformIO IDE本体
- Serial Monitor
- シリアル通信をモニタリングできる
- teleplot
- データのグラフ化などができる
プロジェクトでプログラムをアップロードするまで
ここでは,VSCode上での作業となる.
1. PlatformIOをクリック
PLATFORMIO QUICK ACCESSを表示させる
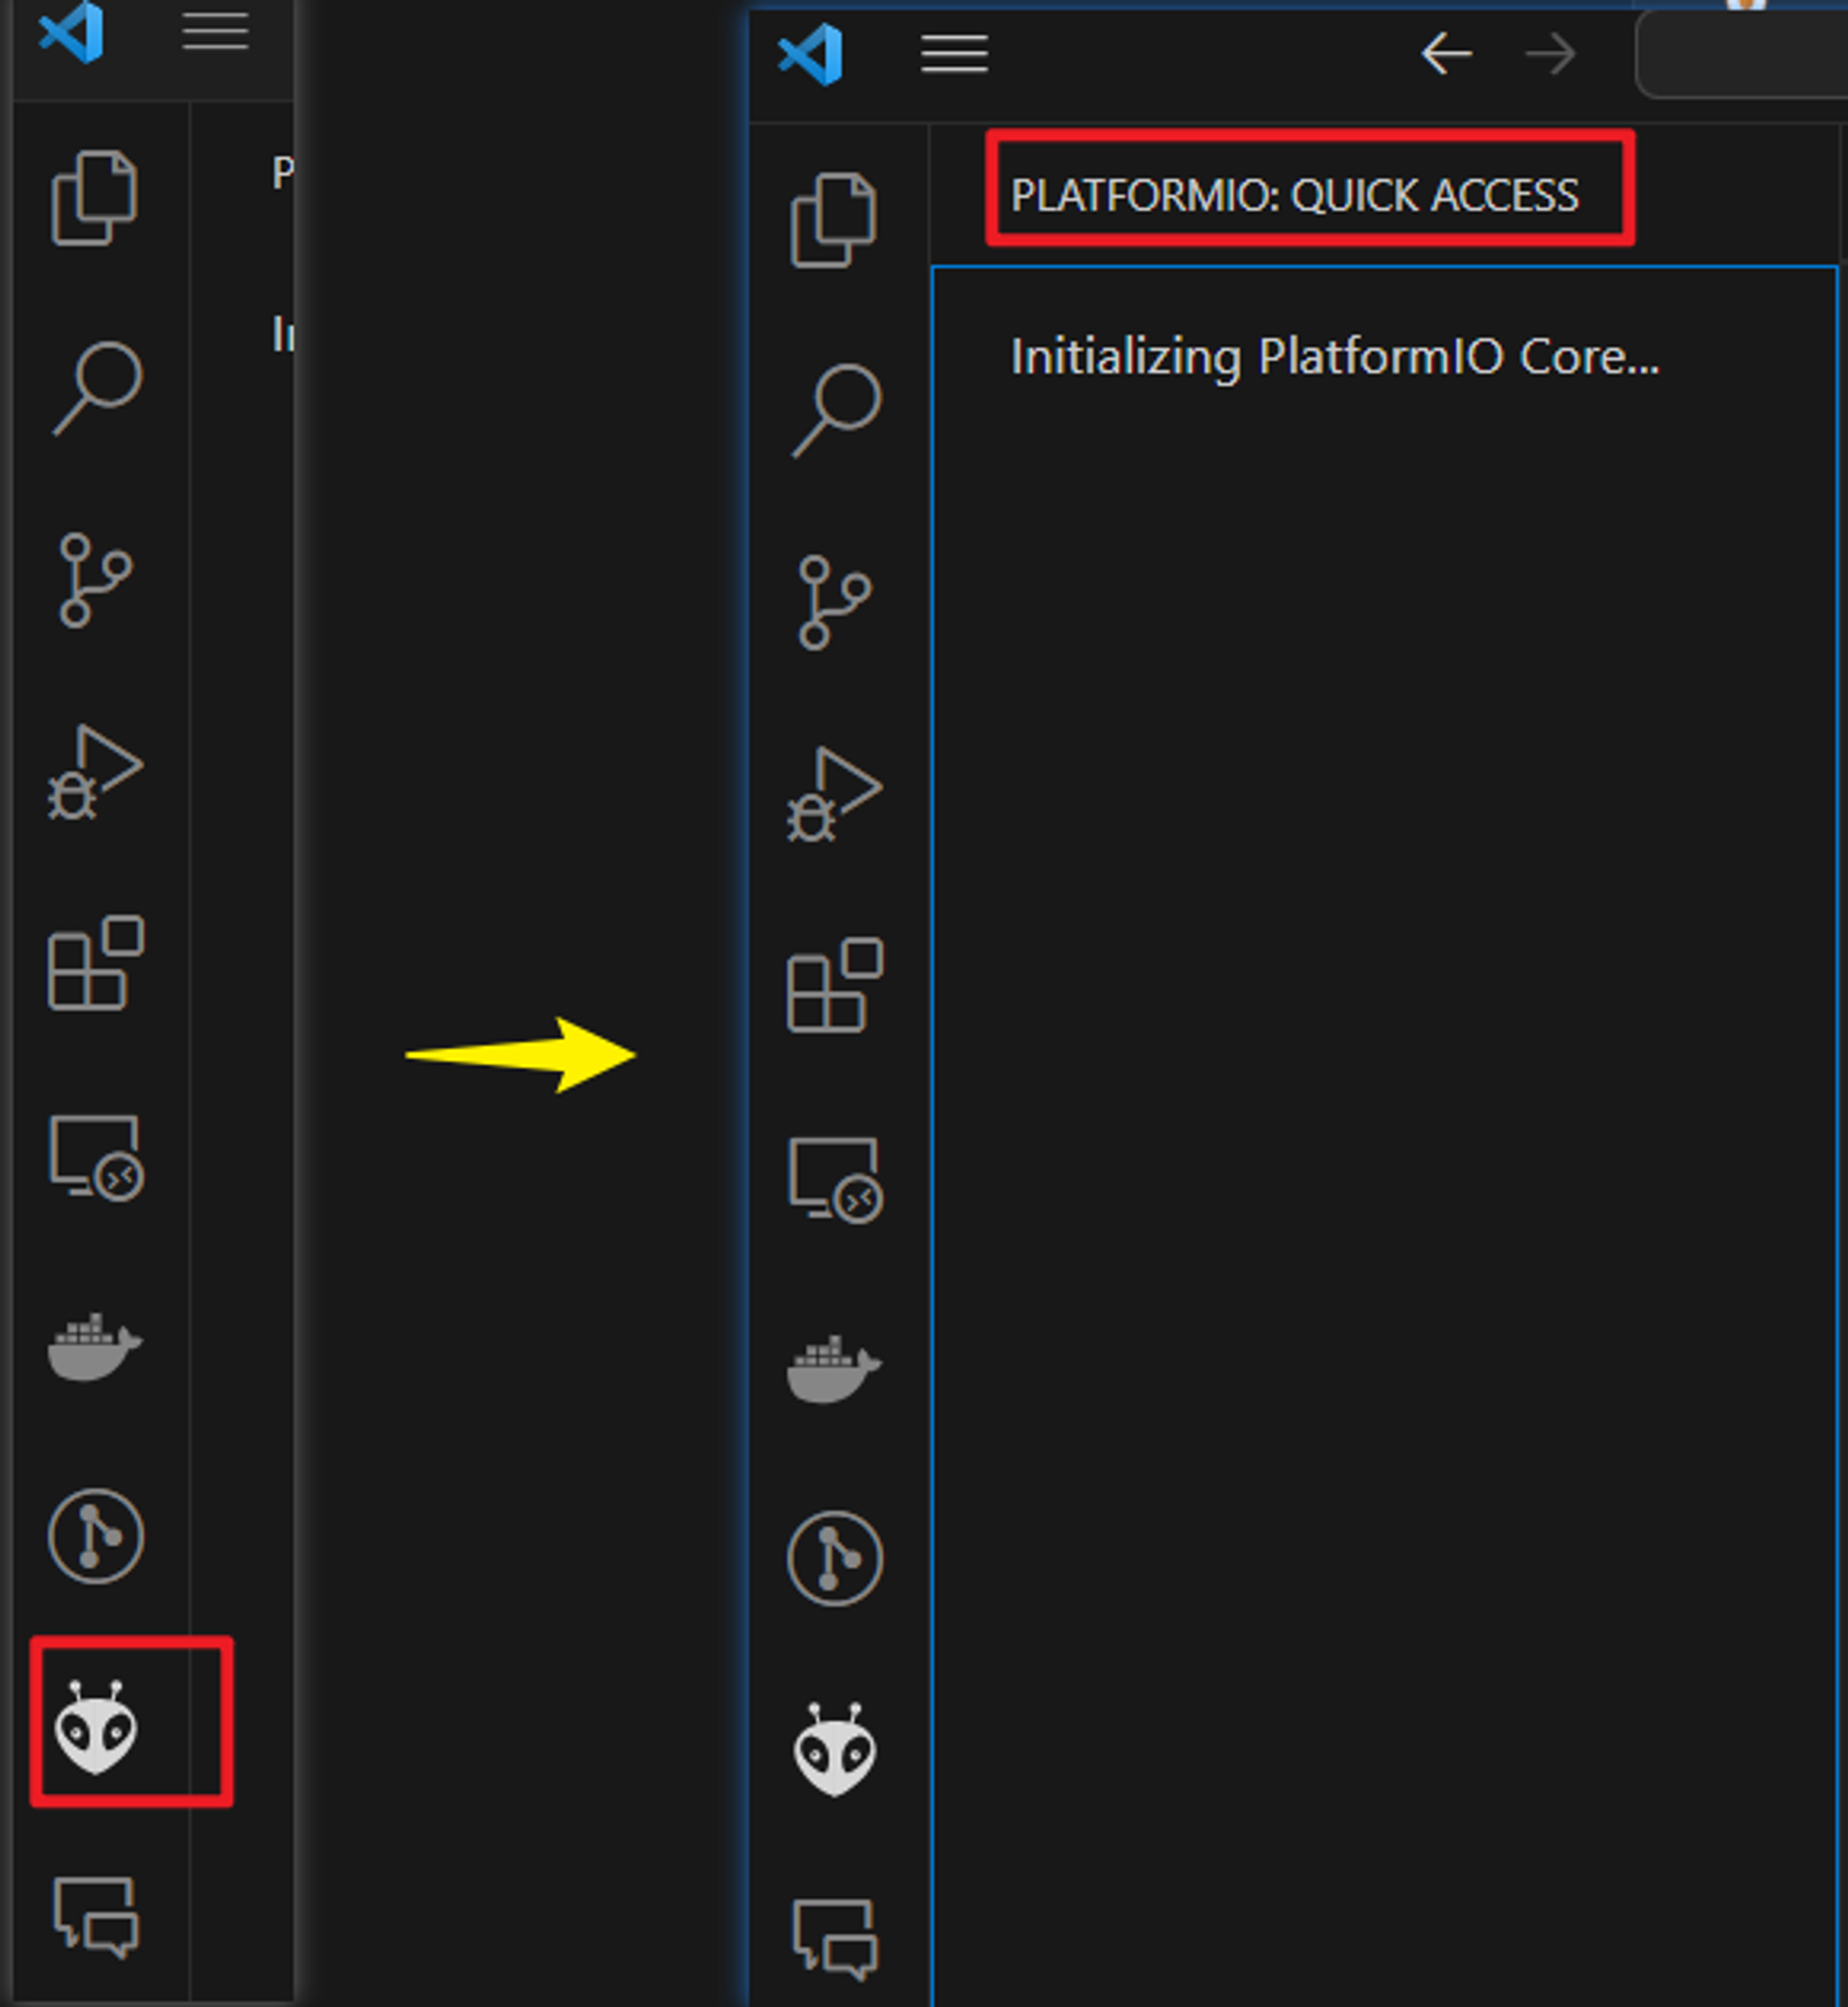
2. PIO Home/OpenでPlatformIOのホームへ
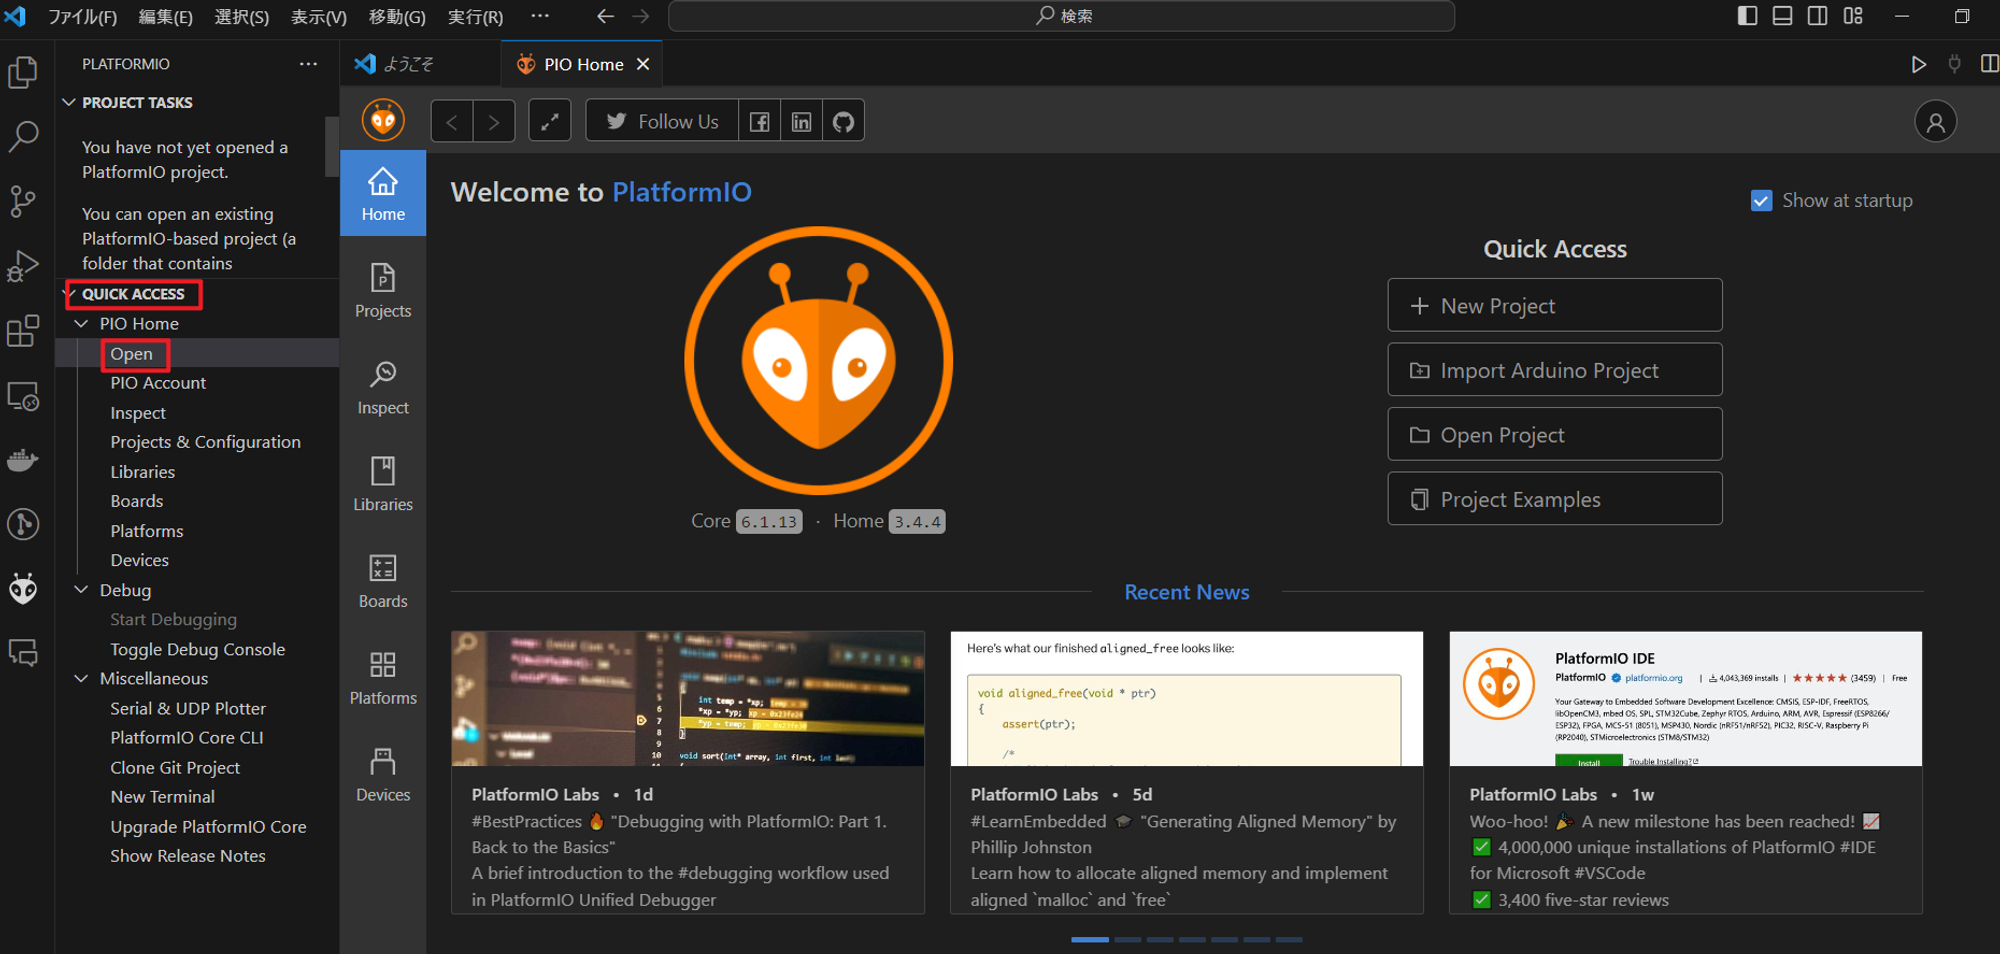
3. プロジェクト作成
プロジェクト単位で開発を進められるワークスペースが自動で生成されることは非常に好印象である.
整理されて管理がしやすそうである.

プロジェクト名,ボード,フレームワーク,保存場所を設定

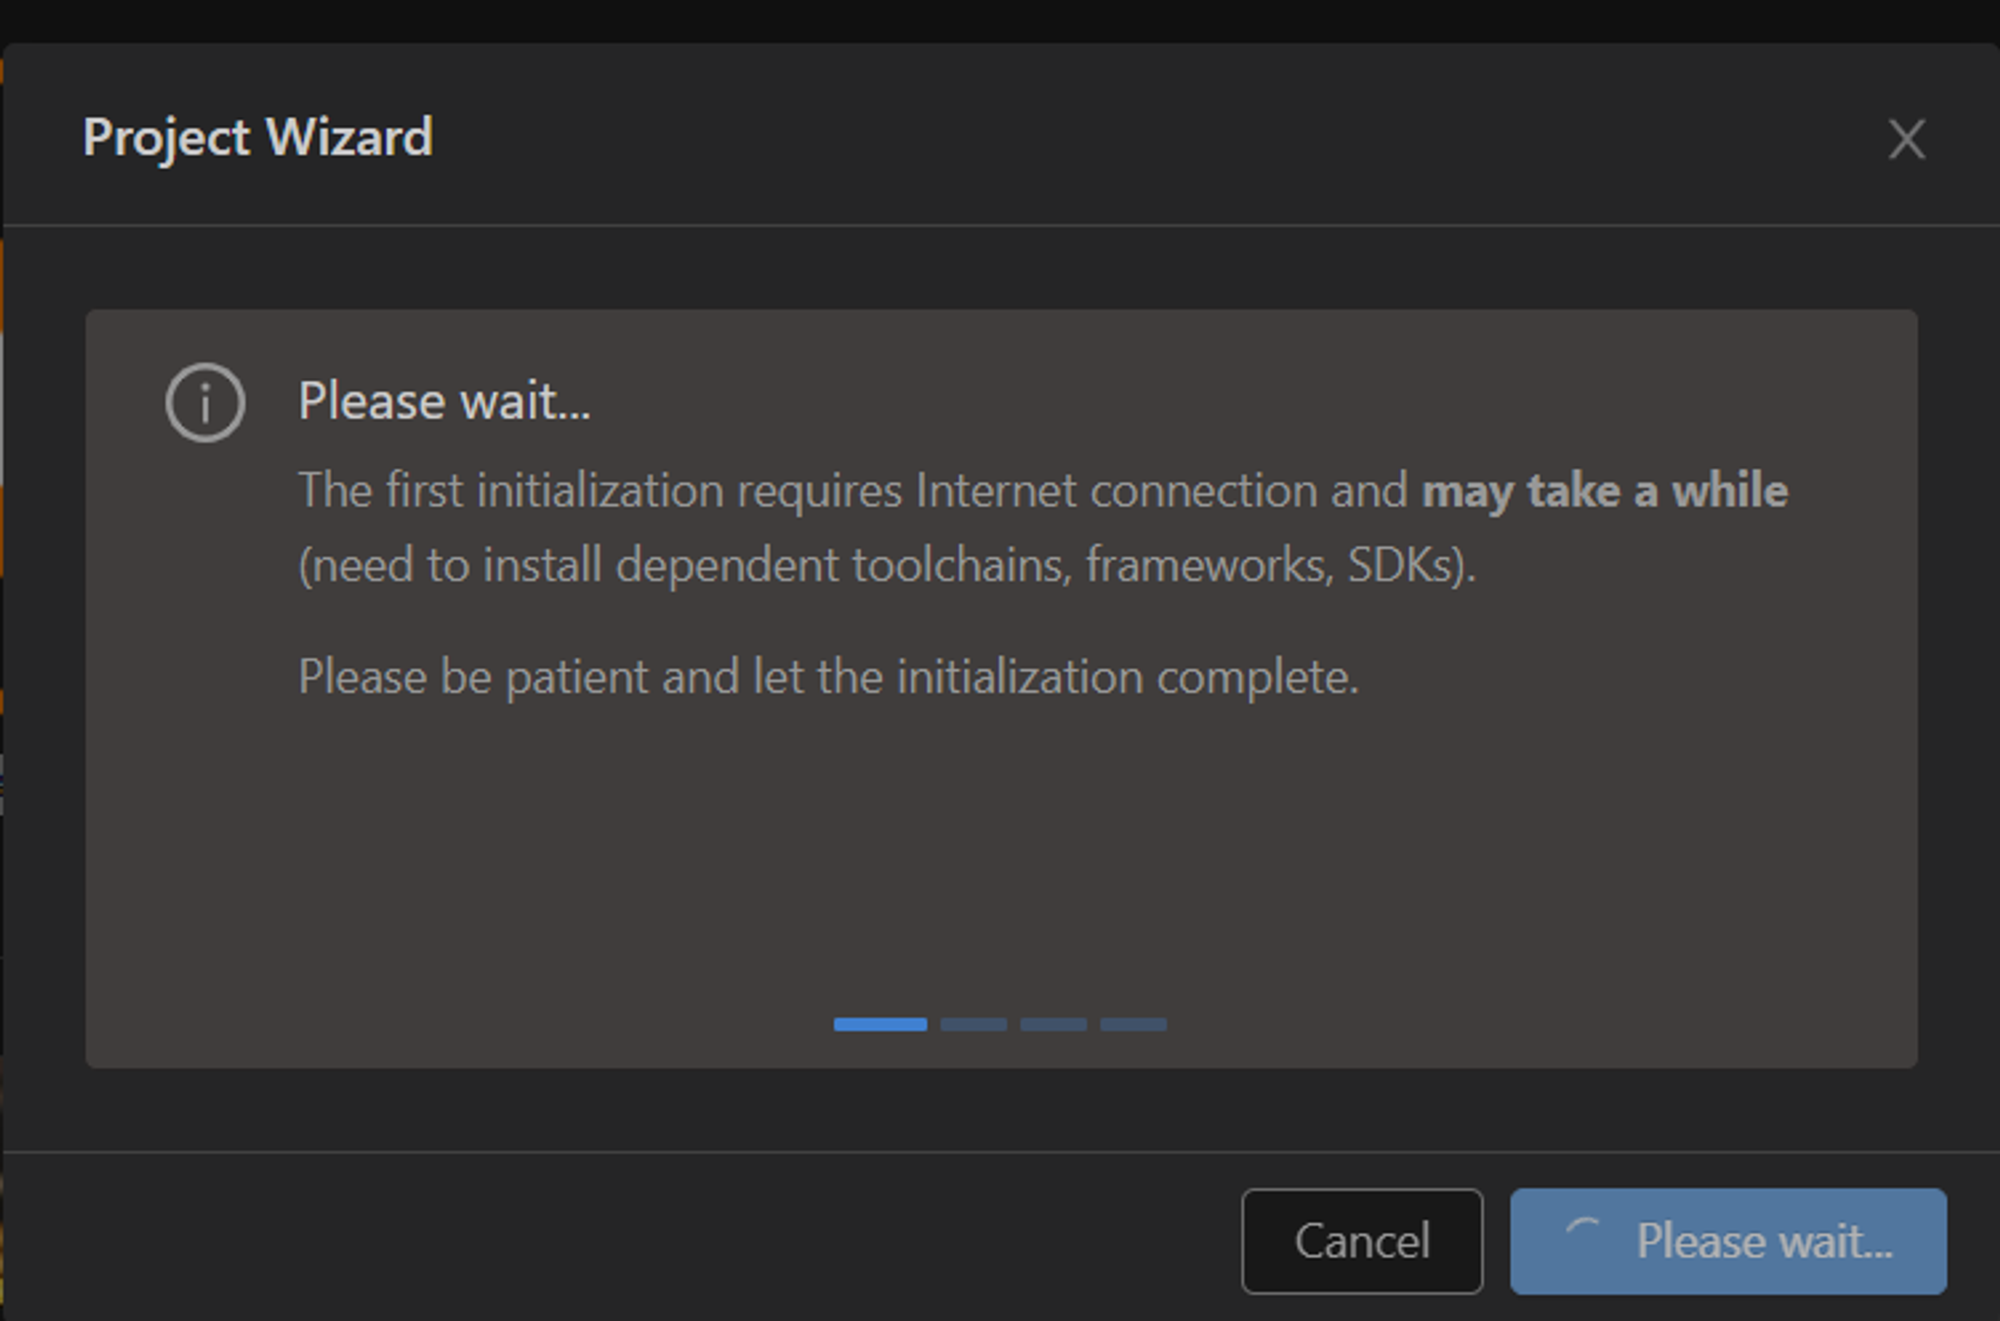
プロジェクトが作成されるまで少し待つ(初回のみちょっと時間かかる)
この初回というのは,PlatformIO環境を構築してからはじめて作成するプロジェクトという意味である.
4. platformio.iniに設定を定義(必要に応じて追加)
ポート番号,シリアル通信のボーレートを設定しておく
[env:node32s]
platform = espressif32
board = node32s
framework = arduino
これに以下を追加
monitor_port = COM6
monitor_speed = 115200
ただし,ESP32の場合,COMを自動検出するため,ポートについてはコメントアウトしておく.
[env:node32s]
platform = espressif32
board = node32s
framework = arduino

; monitor_port = COM6
monitor_speed = 115200
5. サンプルプログラムを用意
#include <Arduino.h>

void setup() {
  Serial.begin(115200);
  delay(10);
}

void loop(){
  Serial.println("Hello World");
  delay(1000);
}
注意 !!!! PlatformIOでは,C++にすべて従う(実はArduino言語と少し違う)
- Arduino.hをインクルード
- Arduinoでは自動でインクルードされていた
- 関数定義は呼び出す前に(or プロトタイプ宣言)
OTAでアップロード
PlatformIOでの設定変更
プロジェクト作成後,platformio.iniを編集する.
[env:node32s]
platform = espressif32
board = node32s
framework = arduino

upload_protocol = espota
upload_port = 192.168.xxx.xxx
monitor_speed = 115200
当たり前だが,OTAのプログラムをアップロードするまではWiFi経由で通信ができないため,
初回はUSBで直接書き込む必要がある.
OTAのサンプルプログラム
ESP32のボードマネージャをインストールすると,ArduinoOTAの中に,BasicOTAとOTAWebUpdaterのサンプルが参照できる.
- BasicOTA
- Arduino IDEのシリアルの代わりにWiFiで接続してプログラムをダウンロードする方式
- OTAWebUpdater
- ES32をwebサーバにして、そこに接続してバイナリをアップロードする方式
ここでは,WiFi経由であるBasicOTAを進める.
basic_ota.cpp
#include <WiFi.h>
#include <ESPmDNS.h>
#include <WiFiUdp.h>
#include <ArduinoOTA.h>
const char* ssid = "..........";
const char* password = "..........";

void setup() {
  Serial.begin(115200);
  Serial.println("Booting");
  WiFi.mode(WIFI_STA);
  WiFi.begin(ssid, password);
  while (WiFi.waitForConnectResult() != WL_CONNECTED) {
    Serial.println("Connection Failed! Rebooting...");
    delay(5000);
    ESP.restart();
  }
  ArduinoOTA
  .onStart([]() {
    String type;
    if (ArduinoOTA.getCommand() == U_FLASH) type = "sketch";
    else // U_SPIFFS
      type = "filesystem";
    Serial.println("Start updating " + type);
  })
  .onEnd([]() {
    Serial.println("\nEnd");
  })
  .onProgress([](unsigned int progress, unsigned int total) {
    Serial.printf("Progress: %u%%\r", (progress / (total / 100)));
  })
  .onError([](ota_error_t error) {
    Serial.printf("Error[%u]: ", error);
    if (error == OTA_AUTH_ERROR) Serial.println("Auth Failed");
    else if (error == OTA_BEGIN_ERROR) Serial.println("Begin Failed");
    else if (error == OTA_CONNECT_ERROR) Serial.println("Connect Failed");
    else if (error == OTA_RECEIVE_ERROR) Serial.println("Receive Failed");
    else if (error == OTA_END_ERROR) Serial.println("End Failed");
  });
  ArduinoOTA.begin();
  Serial.println("Ready");
  Serial.print("IP address: ");
  Serial.println(WiFi.localIP());
}

void loop() {
  ArduinoOTA.handle();
}
ちょっと複雑なので,もっと簡単にしたものが紹介されていた.
方法はいたってシンプルである.
- 設定の部分を別のヘッダファイルにして、本体プログラムから隠し
- freeRTOSの機能を使って、OTAをloop()からではなく、OSスケジューラから呼ぶ
その結果以下のように短くシンプルになる.
#define ESP32_RTOS
#include "OTA.h"

void setup() {
  Serial.begin(115200);
  Serial.println("Booting");
  setupOTA("TemplateSketch", "mySSID", "myPASSWORD");
  // Your setup code
}

void loop() {
  // Your code here
}
OTA.hは以下のとおりである.
OTA.h
#ifdef ESP32
#include <WiFi.h>
#include <ESPmDNS.h>
#else
#include <ESP8266WiFi.h>
#include <ESP8266mDNS.h>
#endif

#include <WiFiUdp.h>
#include <ArduinoOTA.h>

#if defined(ESP32_RTOS) && defined(ESP32)
void ota_handle( void * parameter ) {
  for (;;) {
    ArduinoOTA.handle();
    delay(3500);
  }
}
#endif

void setupOTA(const char* nameprefix, const char* ssid, const char* password) {
  // Configure the hostname
  uint16_t maxlen = strlen(nameprefix) + 7;
  char *fullhostname = new char[maxlen];
  uint8_t mac[6];
  WiFi.macAddress(mac);
  snprintf(fullhostname, maxlen, "%s-%02x%02x%02x", nameprefix, mac[3], mac[4], mac[5]);
  ArduinoOTA.setHostname(fullhostname);
  delete[] fullhostname;

  // Configure and start the WiFi station
  WiFi.mode(WIFI_STA);
  WiFi.begin(ssid, password);

  // Wait for connection
  while (WiFi.waitForConnectResult() != WL_CONNECTED) {
    Serial.println("Connection Failed! Rebooting...");
    delay(5000);
    ESP.restart();
  }

  ArduinoOTA.onStart([]() {
	//NOTE: make .detach() here for all functions called by Ticker.h library - not to interrupt transfer process in any way.
    String type;
    if (ArduinoOTA.getCommand() == U_FLASH)
      type = "sketch";
    else // U_SPIFFS
      type = "filesystem";

    // NOTE: if updating SPIFFS this would be the place to unmount SPIFFS using SPIFFS.end()
    Serial.println("Start updating " + type);
  });

  ArduinoOTA.onEnd([]() {
    Serial.println("\nEnd");
  });

  ArduinoOTA.onProgress([](unsigned int progress, unsigned int total) {
    Serial.printf("Progress: %u%%\r", (progress / (total / 100)));
  });

  ArduinoOTA.onError([](ota_error_t error) {
    Serial.printf("Error[%u]: ", error);
    if (error == OTA_AUTH_ERROR) Serial.println("\nAuth Failed");
    else if (error == OTA_BEGIN_ERROR) Serial.println("\nBegin Failed");
    else if (error == OTA_CONNECT_ERROR) Serial.println("\nConnect Failed");
    else if (error == OTA_RECEIVE_ERROR) Serial.println("\nReceive Failed");
    else if (error == OTA_END_ERROR) Serial.println("\nEnd Failed");
  });

  ArduinoOTA.begin();

  Serial.println("OTA Initialized");
  Serial.print("IP address: ");
  Serial.println(WiFi.localIP());

#if defined(ESP32_RTOS) && defined(ESP32)
  xTaskCreate(
    ota_handle,          /* Task function. */
    "OTA_HANDLE",        /* String with name of task. */
    10000,            /* Stack size in bytes. */
    NULL,             /* Parameter passed as input of the task */
    1,                /* Priority of the task. */
    NULL);            /* Task handle. */
#endif
}
ここまでシンプルであれば,気軽に使うこともできる.
TemplateSketchは単なる名前であるため,任意なもので良い.
アップロード
ポートはAutoにしておけば,plaformio.iniに記述しているIPアドレスをポートとして
プログラムを更新してくれる.IPアドレスは固定になるようにするか,シリアル通信でチェックする.
なお,スマホのテザリング等であれば,スマホから接続されているIPアドレスを確認することができる.
感想
実に久しぶりの投稿である.
無線でプログラムを更新できることは,聞いたことはあったものの,実際に使ったことも調べたこともなかった.無線でプログラムを更新できることには感動した.併せて,PlatformIOを使う良い機会となった.個人的に気に入った.これから,また開発が捗りそうである.OTAはROS2とあわせて使っていきたい考えがある.3月中には,それを実現したい.
参考文献