何番煎じか分かりませんが、TextViewに表示するテキストの一部に下線や色を付けたり、リンクを追加したりする方法を紹介します。
以下で紹介する方法は、文字列リソースの定義時に使用できる<annotation>タグを用いると、<annotation>タグで囲った部分をKotlinのコードから参照できる仕組み1に着目したものです。
準備
適当なパッケージを作成し、以下のような拡張関数を定義してください。
package com.example.textviewdecorationsample

import android.text.Annotation
import android.text.Spannable
import android.text.SpannableString
import android.text.SpannedString
import android.text.method.LinkMovementMethod
import android.text.style.CharacterStyle
import android.text.style.ClickableSpan
import android.widget.TextView
import androidx.annotation.StringRes
import androidx.core.text.getSpans

fun TextView.decorate(
    @StringRes resId: Int,
    map: Map<String, CharacterStyle>,
) {
    val text = this.context.getText(resId) as SpannedString
    val spannableString = SpannableString(text)
    text.getSpans<Annotation>(0, text.length).forEach { annotation ->
        if (annotation.key == "decoration-tag") {
            map[annotation.value]?.let { characterStyle ->
                spannableString.setSpan(
                    characterStyle,
                    text.getSpanStart(annotation),
                    text.getSpanEnd(annotation),
                    Spannable.SPAN_EXCLUSIVE_EXCLUSIVE
                )
                if (characterStyle is ClickableSpan) {
                    this.isClickable = true
                    this.movementMethod = LinkMovementMethod.getInstance()
                }
            }
        }
    }
    this.text = spannableString
}
使ってみる
Android Viewで作られた適当な画面からTextView#decorateを呼び出してみましょう。
package com.example.textviewdecorationsample

import android.content.Intent
import android.graphics.Color
import android.net.Uri
import android.os.Bundle
import android.text.TextPaint
import android.text.style.ClickableSpan
import android.view.View
import androidx.appcompat.app.AppCompatActivity
import com.example.textviewdecorationsample.databinding.ActivityMainBinding

class MainActivity : AppCompatActivity() {
    private lateinit var binding: ActivityMainBinding

    override fun onCreate(savedInstanceState: Bundle?) {
        super.onCreate(savedInstanceState)
        binding = ActivityMainBinding.inflate(layoutInflater)
        setContentView(binding.root)

        binding.privacyPolicyAndTermsOfService.decorate(
            R.string.privacy_policy_and_terms_of_service,
            mapOf(
                "privacy_policy" to object : ClickableSpan() {
                    override fun onClick(widget: View) {
                        val intent = Intent(
                            Intent.ACTION_VIEW,
                            Uri.parse("https://example.com/privacy_policy.html")
                        )
                        startActivity(intent)
                    }

                    override fun updateDrawState(ds: TextPaint) {
                        ds.color = Color.BLUE
                        ds.isUnderlineText = true
                    }
                },
                "terms_of_service" to object : ClickableSpan() {
                    override fun onClick(widget: View) {
                        val intent = Intent(
                            Intent.ACTION_VIEW,
                            Uri.parse("https://example.com/terms_of_service.html")
                        )
                        startActivity(intent)
                    }

                    override fun updateDrawState(ds: TextPaint) {
                        ds.color = Color.MAGENTA
                        ds.isUnderlineText = true
                    }
                }
            )
        )
    }
}
<?xml version="1.0" encoding="utf-8"?>
<LinearLayout xmlns:android="http://schemas.android.com/apk/res/android"
    xmlns:tools="http://schemas.android.com/tools"
    android:layout_width="match_parent"
    android:layout_height="match_parent"
    android:gravity="center"
    android:orientation="vertical"
    tools:context=".MainActivity">

    <androidx.appcompat.widget.AppCompatTextView
        android:id="@+id/privacy_policy_and_terms_of_service"
        android:layout_width="wrap_content"
        android:layout_height="wrap_content"
        android:textSize="20sp"
        tools:text="@string/privacy_policy_and_terms_of_service" />

    <androidx.appcompat.widget.AppCompatButton
        android:id="@+id/member_registration"
        android:layout_width="wrap_content"
        android:layout_height="wrap_content"
        android:layout_marginTop="16dp"
        android:text="@string/member_registration"
        android:textSize="20sp" />

</LinearLayout>
<resources>
    <string name="privacy_policy_and_terms_of_service"><annotation decoration-tag="privacy_policy">プライバシーポリシー</annotation>と<annotation decoration-tag="terms_of_service">利用規約</annotation>に同意して</string>
    <string name="member_registration">会員登録する</string>
</resources>
やりたいことができましたね!
解説
前節の使用例において、string.xmlに以下のような文字列を定義していました。
<string name="privacy_policy_and_terms_of_service"><annotation decoration-tag="privacy_policy">プライバシーポリシー</annotation>と<annotation decoration-tag="terms_of_service">利用規約</annotation>に同意して</string>
<annotation>タグでは、開発者が任意の属性(key)と値(value)を設定することができます。ここではカスタム属性decoration-tagを設定し、「プライバシーポリシー」には値privacy_policyを、「利用規約」には値terms_of_serviceを設定しています。
こうしておくことで、Kotlinのコードからタグを付けた部分を参照することができるようになります。
さらにSpannedString#getSpanStartおよびSpannedString#getSpanEndを使用すると、文字列全体の中での<annotation>を付けた部分の位置を取得することができます。
これを使ってSpannableString#setSpanをしてあげると、<annotation>で囲った部分に対して独自の設定をすることができる、という仕組みです。
val text = this.context.getText(resId) as SpannedString
val annotations = text.getSpans<Annotation>(0, text.length)
for (annotation in annotations) {
    // `decoration-tag`が設定されているアノテーションを探す
    if (annotation.key == "decoration-tag") {
        // さらに`decoration-tag`に`privacy_policy`という値が設定されているものを探す
        if (annotation.value == "privacy_policy") {
            // テキスト全体の中でどの位置にあるのか計算する
            val start = text.getSpanStart(annotation)
            val end = text.getSpanEnd(annotation)
            // TODO: 位置がわかったのでそこに独自の設定を適用する
        }
    }
}
もちろん、<annotation>タグを使わず、装飾を付けたい部分を正規表現等で検索して、その位置を計算することでも同じことはできます。
でも例えば、すもももももももものうちの桃の部分にだけhttps://en.wikipedia.org/wiki/Peachに対するリンクを張りたいというケースを考えるとどうでしょうか?
<annotation>タグを使うと、装飾を施したい箇所に簡単かつ確実にアクセスできますね。
レシピ集
TextView#decorateの使用例をいくつか紹介します。
文字列の一部だけに背景色を設定する
android.text.style.BackgroundColorSpanを使用します。
binding.privacyPolicyAndTermsOfService.decorate(
    R.string.privacy_policy_and_terms_of_service,
    mapOf(
        "terms_of_service" to BackgroundColorSpan(Color.RED)
    )
)
文字列の一部を太字にしたり斜体にしたりする
android.text.style.StyleSpanを使用します。

binding.privacyPolicyAndTermsOfService.decorate(
    R.string.privacy_policy_and_terms_of_service,
    mapOf(
        "privacy_policy" to StyleSpan(Typeface.BOLD),
        "terms_of_service" to StyleSpan(Typeface.ITALIC),
    )
)
ClickableSpanと組み合わせたい場合は(Android9以降限定になってしまいますが)以下のようにすると良いでしょう。
binding.privacyPolicyAndTermsOfService.decorate(
    mapOf(
        "privacy_policy" to object : ClickableSpan() {
            override fun onClick(widget: View) {
                // TODO
            }

            override fun updateDrawState(ds: TextPaint) {
                ds.typeface = Typeface.create(Typeface.DEFAULT, 700, false)
            }
        },
        "terms_of_service" to object : ClickableSpan() {
            override fun onClick(widget: View) {
                // TODO
            }

            override fun updateDrawState(ds: TextPaint) {
                ds.typeface = Typeface.create(Typeface.DEFAULT, 400, true)
            }
        }
    )
)
文字列の一部だけ文字サイズを変更する
android.text.style.AbsoluteSizeSpanを使用します。
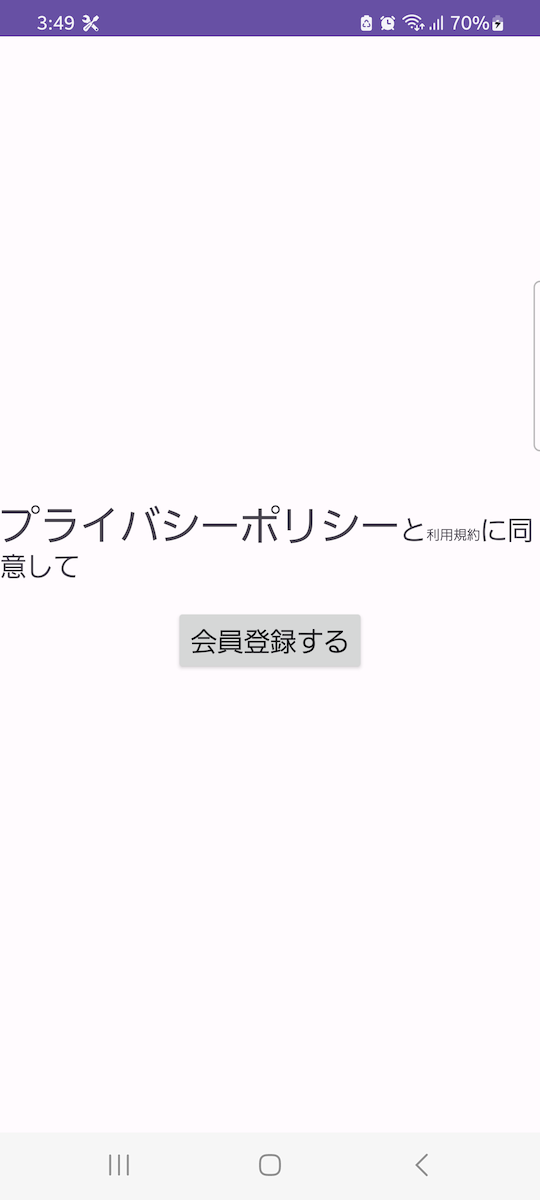
binding.privacyPolicyAndTermsOfService.decorate(
    R.string.privacy_policy_and_terms_of_service,
    mapOf(
        "privacy_policy" to AbsoluteSizeSpan(30, true),
        "terms_of_service" to AbsoluteSizeSpan(10, true),
    )
)
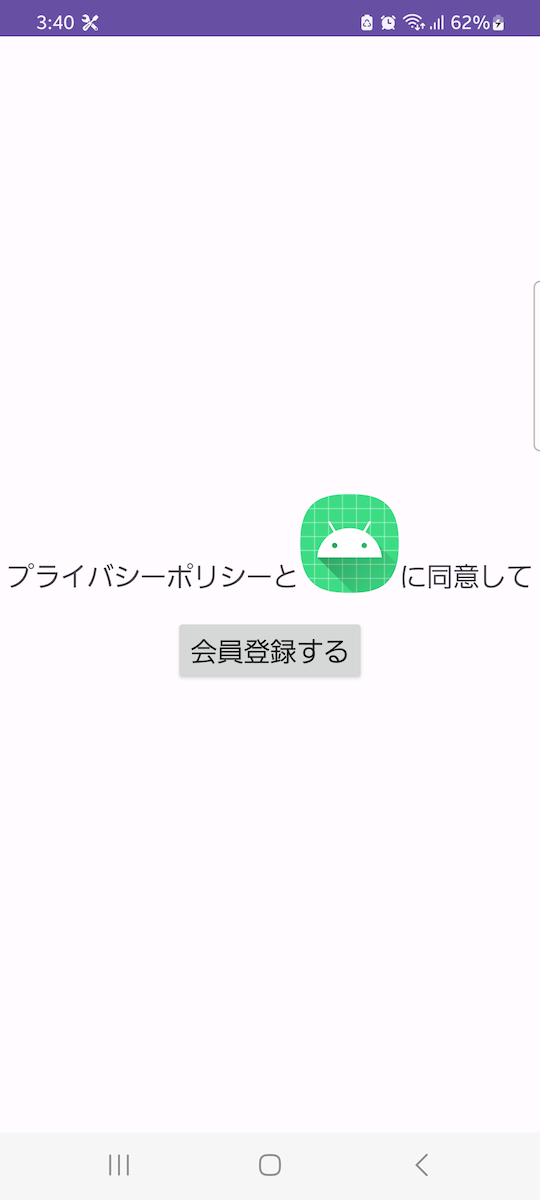
文字列の一部を画像に置き換える
android.text.style.ImageSpanを使用します。
binding.privacyPolicyAndTermsOfService.decorate(
    R.string.privacy_policy_and_terms_of_service,
    mapOf(
        "terms_of_service" to ImageSpan(this, R.mipmap.ic_launcher)
    )
)
文字列の一部を上付きにしたり下付きにしたりする
android.text.style.SuperscriptSpanおよびandroid.text.style.SubscriptSpanを使用します。
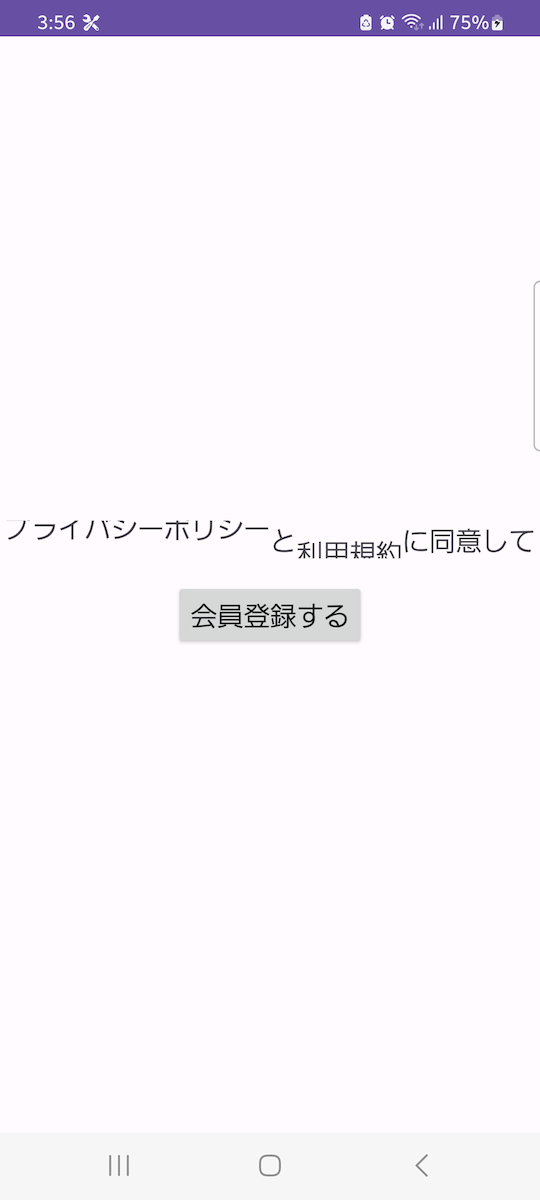
(文字サイズやTextViewの高さによっては見切れてしまうことがあるので要調整です)
binding.privacyPolicyAndTermsOfService.decorate(
    R.string.privacy_policy_and_terms_of_service,
    mapOf(
        "privacy_policy" to SuperscriptSpan(),
        "terms_of_service" to SubscriptSpan(),
    )
)
文字列の一部にリンクを付けたい場合(細かい設定は不要な場合)
android.text.style.URLSpanを使用します。
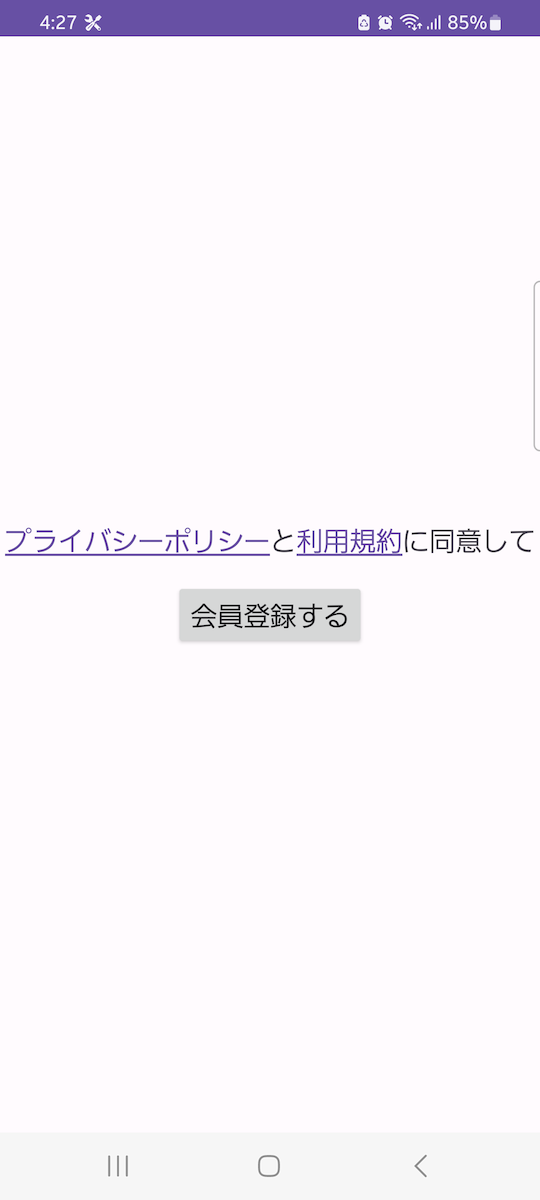
binding.privacyPolicyAndTermsOfService.decorate(
    R.string.privacy_policy_and_terms_of_service,
    mapOf(
        "privacy_policy" to URLSpan("https://example.com/privacy_policy.html"),
        "terms_of_service" to URLSpan("https://example.com/terms_of_service"),
    )
)
その他
他にも打ち消し線を引いたり、下線を引いたり、ブラーをかけたりすることができます。
android.text.style.CharacterStyleのサブクラスであれば何でも使えるので、詳しくはドキュメント2を見てみてください。さらにもう少し込み入ったことをしたい場合は、CharacterStyleのサブクラスを自前で実装するとよいでしょう。
先行研究一覧
- https://qiita.com/sudo5in5k/items/c0479968a25bf3bd78df
- https://qiita.com/suzukihr/items/19a2ec4b9a163b151164
- https://qiita.com/amay077/items/7e5f33f28ac672b75b05
- https://qiita.com/tomoya-hiraiwa/items/fd75876194399848903c
- https://y-anz-m.blogspot.com/2011/08/androidspannable.html
- https://reon777.com/2021/03/17/android-text-hyperlink/
- https://qiita.com/orimomo/items/c6cd3fe71f299ef94323
- https://androidprogram.hatenadiary.org/entry/20100529/1275086958
- https://qiita.com/noranuk0/items/f4d09930517a7d209ce3
- https://qiita.com/wasabeef_jp/items/044bfa827be2f8bcba1f
