Hi, my name is Yuto Kawabata, GBB Technical Specialist at Microsoft.
In this hands-on I will go through how we can automate and make our processes efficient by utilizing Power Automate Cloud Flow and Desktop Flow in an approval scenario.
Let me pick up a use case for how to automate approval seeking from manager and invoice processing as shown a slide image below.
1.Premises
-
Click the link below and log in with your user id/email address.
https://flow.microsoft.com/
-
The screen will look like this.
2.Create an Approval Process by Cloud Flow
Go to https://flow.microsoft.com/
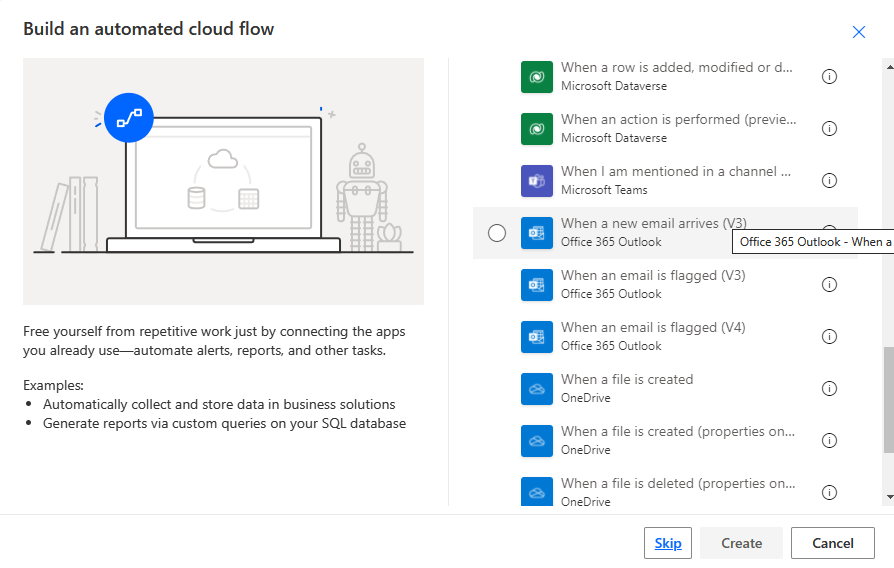
Select "Automated cloud flow" as below.
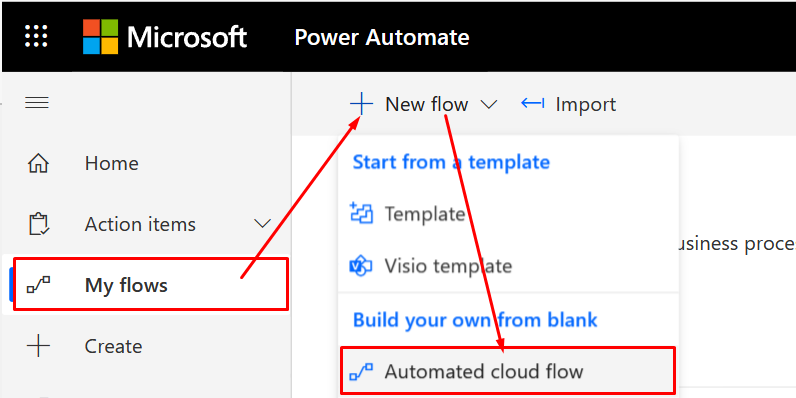
Then a new pop-up window will appear.
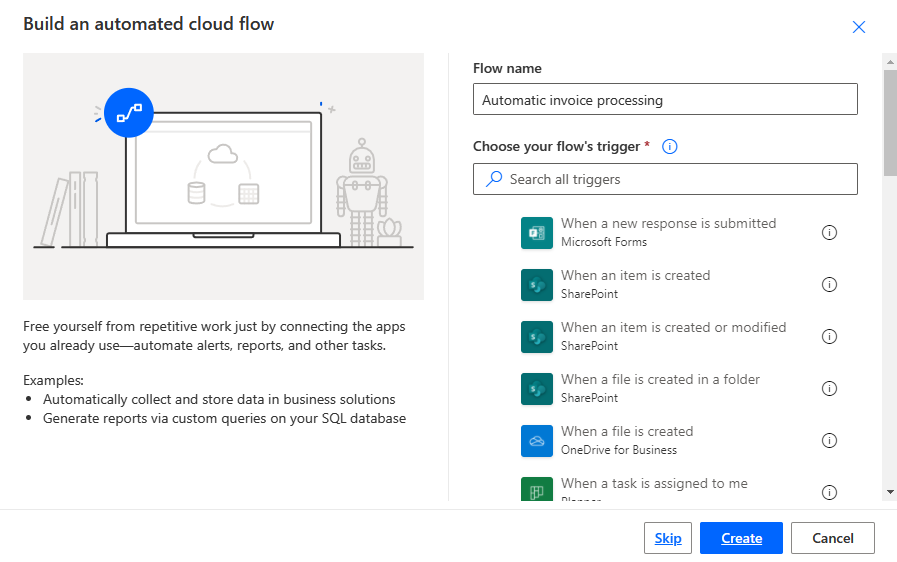
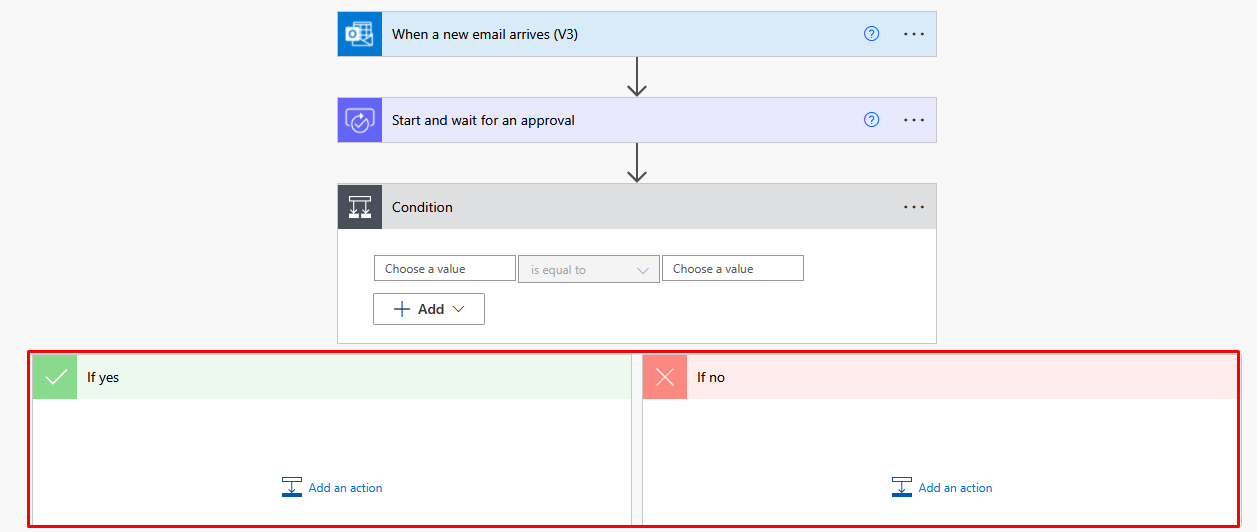
Select "When a new email arrives(V3)". You can set the name of the Flow to whatever you like, e.g. Automatic invoice processing.
Then click on "Create".
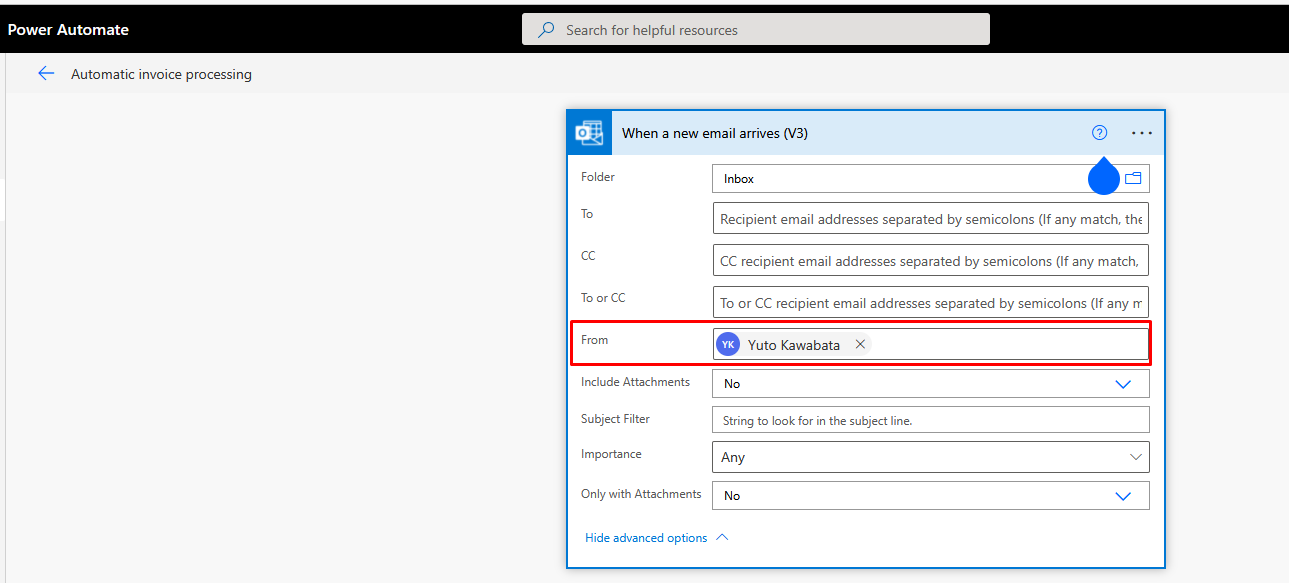
*If you are new to the operation described above, you would need to make sure that you have authentication setting for Outlook connector first.
*If you get any popups/instruction tips for first time users appear, you can dismiss them or proceed upon your preference.
For convenience, in this scenario please set your email address in "From" setting.
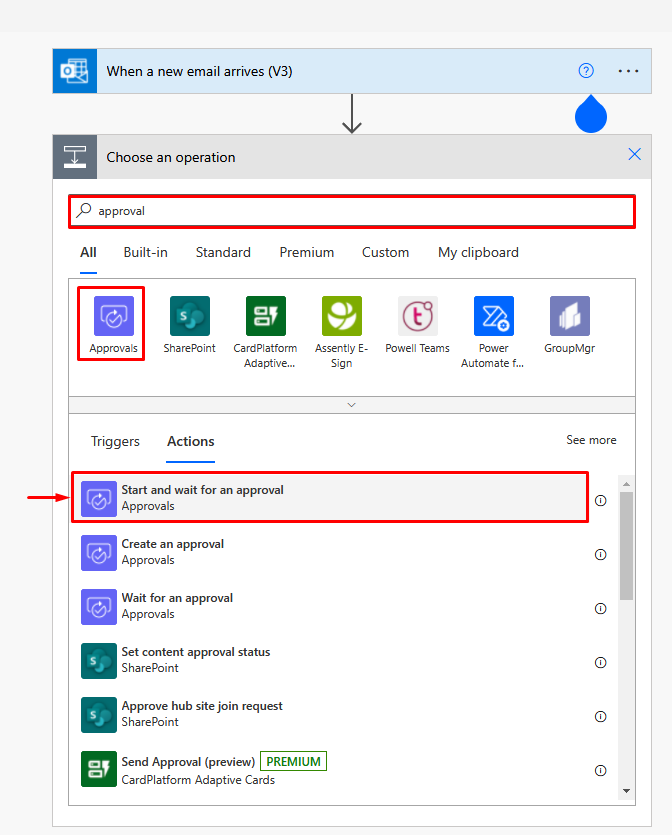
Click on "+ New step" to add to the process.
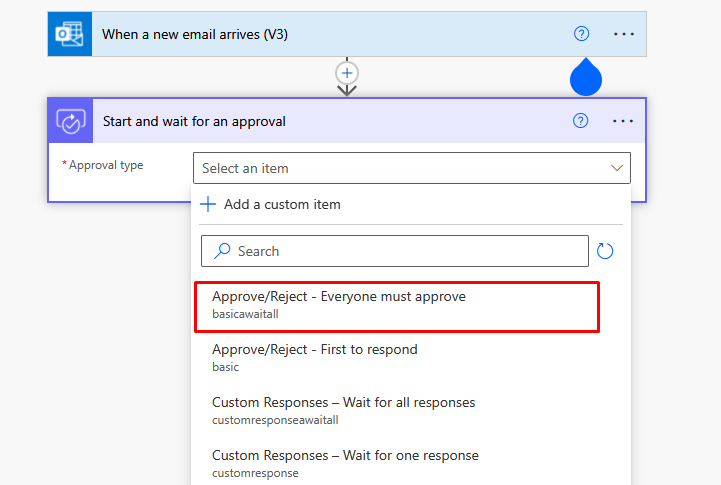
You can search by "approval" and select "Start and wait for approval"
Then you can select the approval type option. Select "Approve/Reject - Everyone must approve"
You can set the title to anything you like, for example "Approval Request". Add "Assigned to" by selecting Dynamic content you can specify contents from previous trigger/actions.
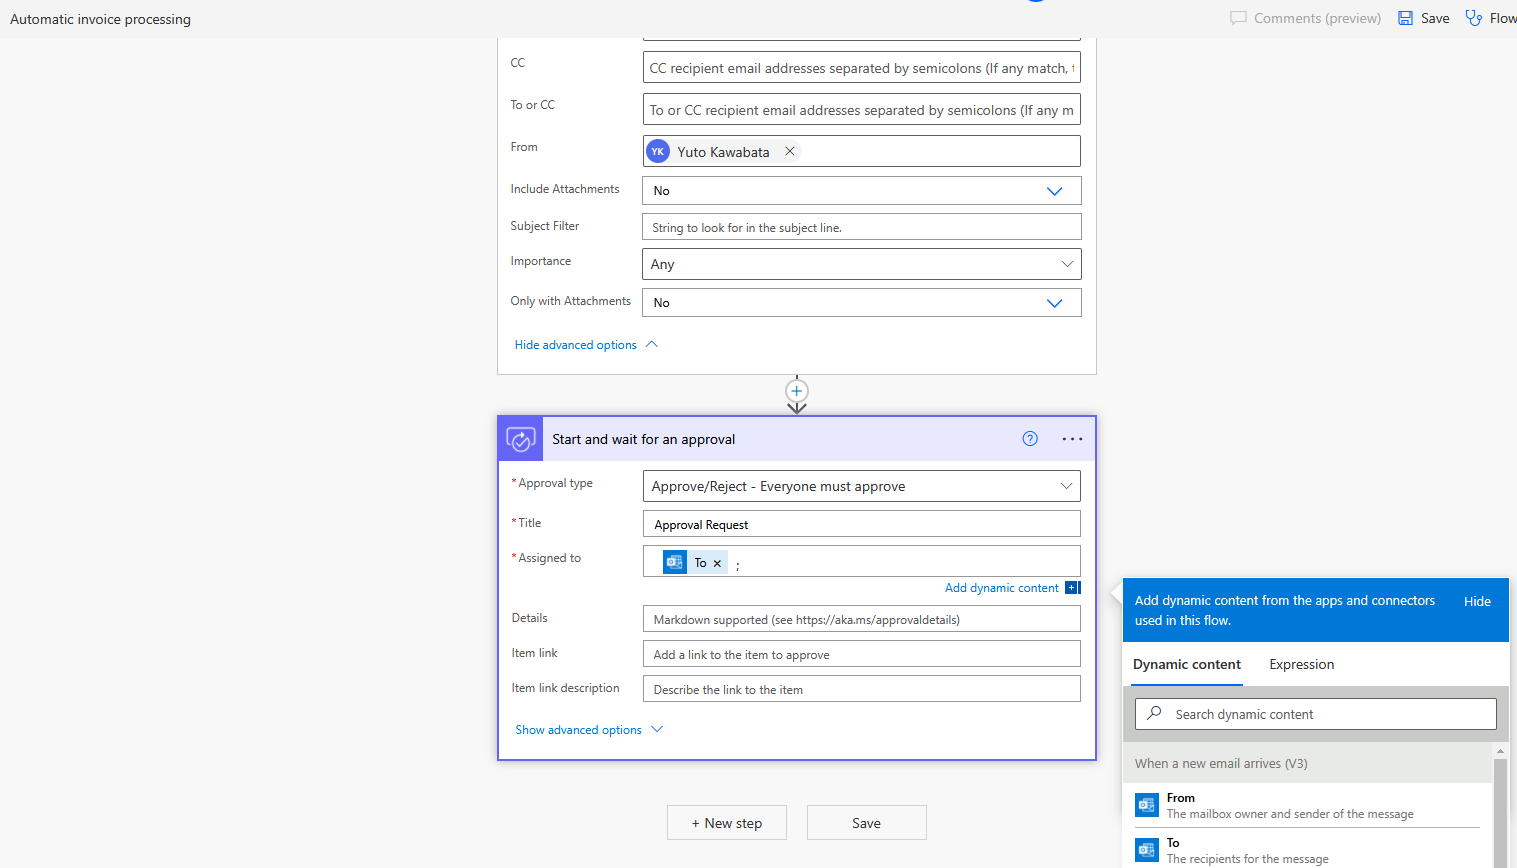
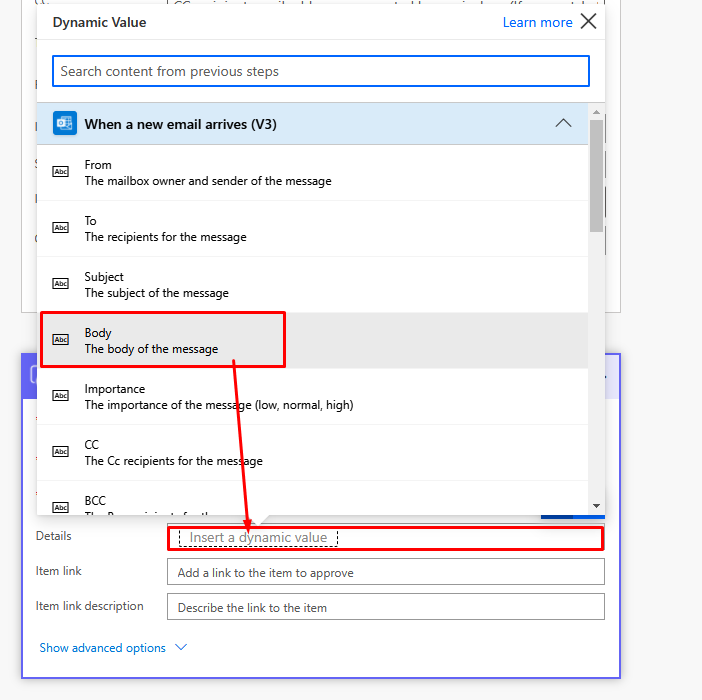
In Details section you can specify "Body" from the Dynamic content selection.
The "Approvals" action takes around 5 minutes to prepare its database when it comes to run only for the first time creation in Power Automate. Try to run a prompt flow including this action tentatively.
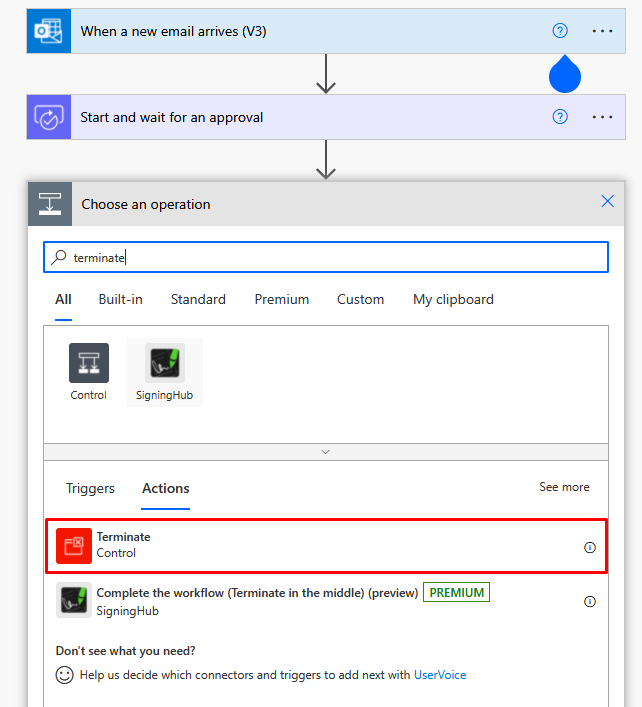
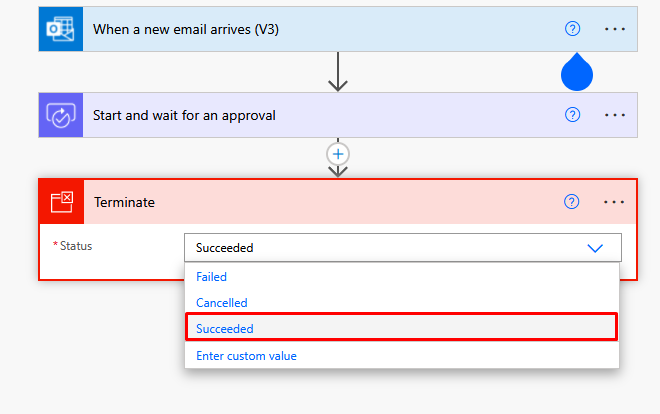
For utilizing "Approval" action first, you can add "Terminate" Control and specify "Succeeded" in the Status option.
Please try to send an email with a body text below for instance. You can utilize below by copy & paste in your Outlook email body (the body should be in a format of Text, not HTML in Outlook email).
2021/10/12 9:46:14
〇〇 Corporation
marumaru@corporate.com
$100,000
Unclaimed
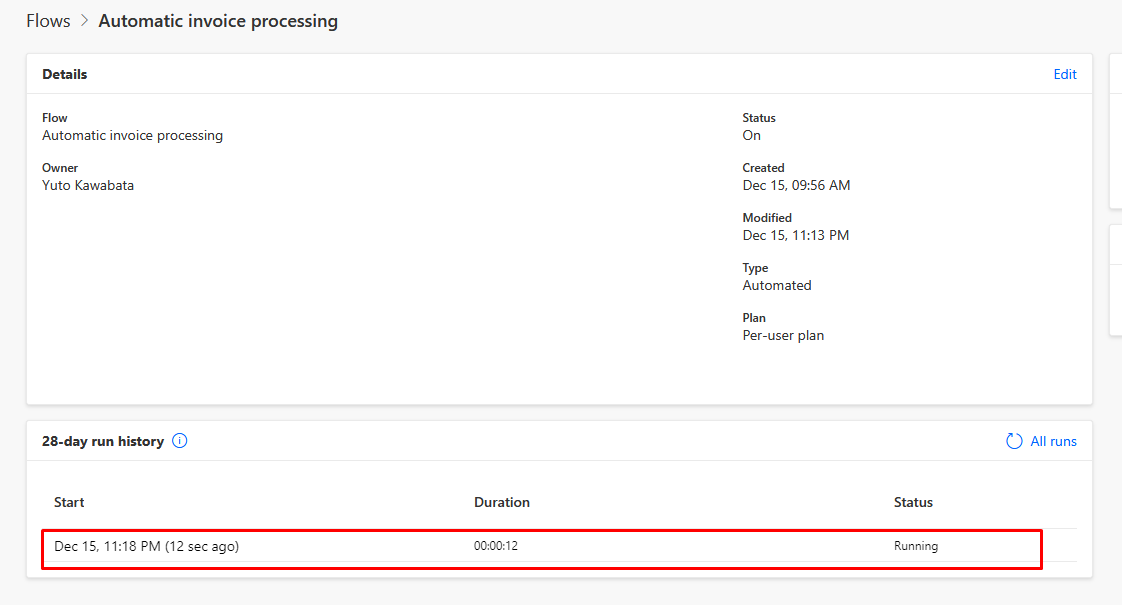
Now you can see the running status successfully in a history log (it would take some minutes to get reflected until when you create the first approval trigger) and you get notification like below to get your approval (Please feel free to try Approve or Reject here).

I hope it works now in your environment!
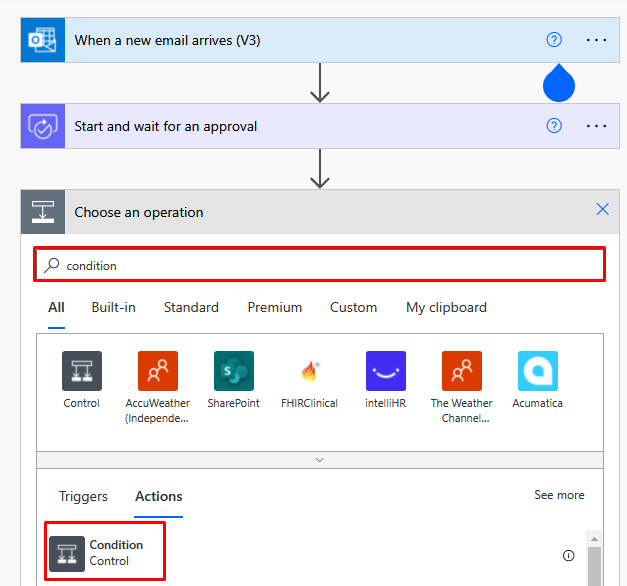
Add Condition in Control in between the "Approval" and "Terminate" actions.
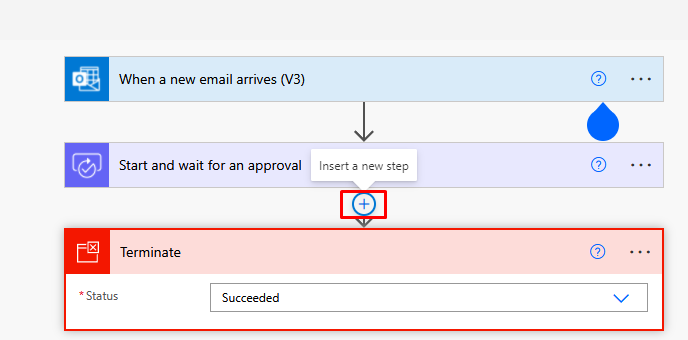
Specify Condition in Control action.
Now you can see 2 condition branches, "If yes" and "If no".
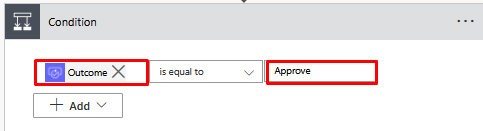
Populate "Outcome" in a dynamic value and "Approve" as a direct inputted text in a condition of "is equal to".
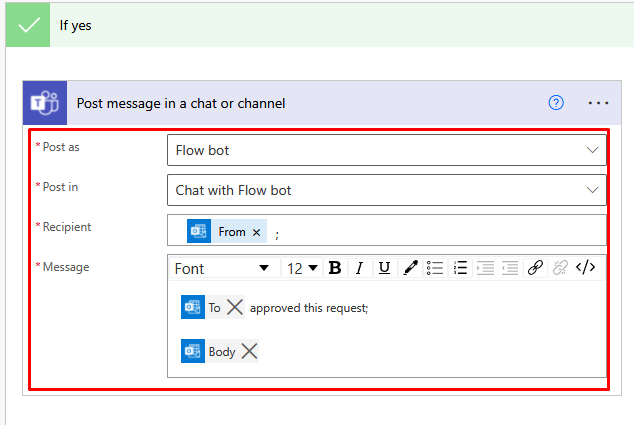
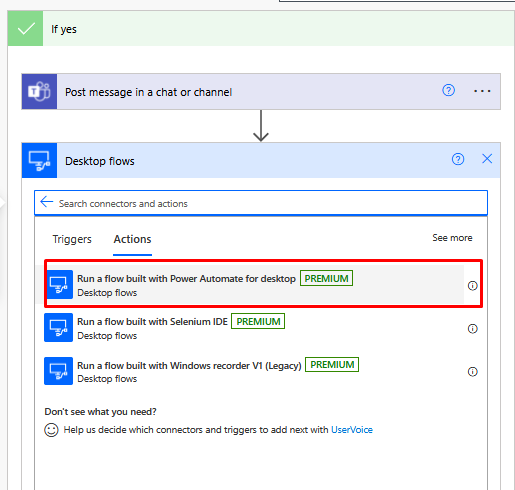
Add a Teams action
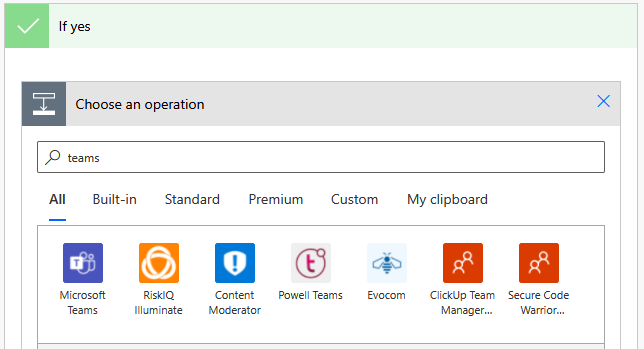
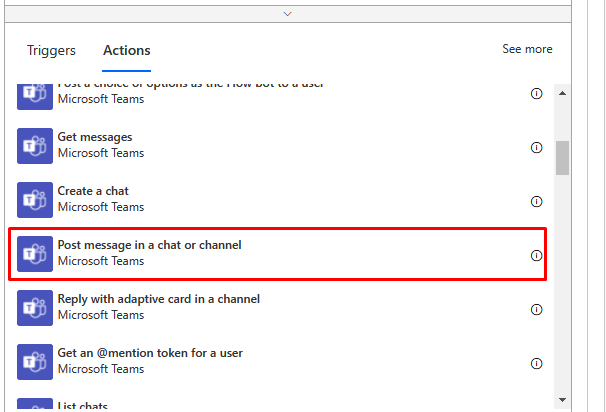
Select "Post message in a chat or channel".
Populate items like below.
Post as:Flow bot
Post in:Chat with Flow bot
Recipient: From (a dynamic content)
Message: To (a dynamic content) approved this request; Body (a dynamic content)
Similarly you can set a condition branch of "If no", let you select "Copy to my clipboard" and duplicate the content from one branch to another.
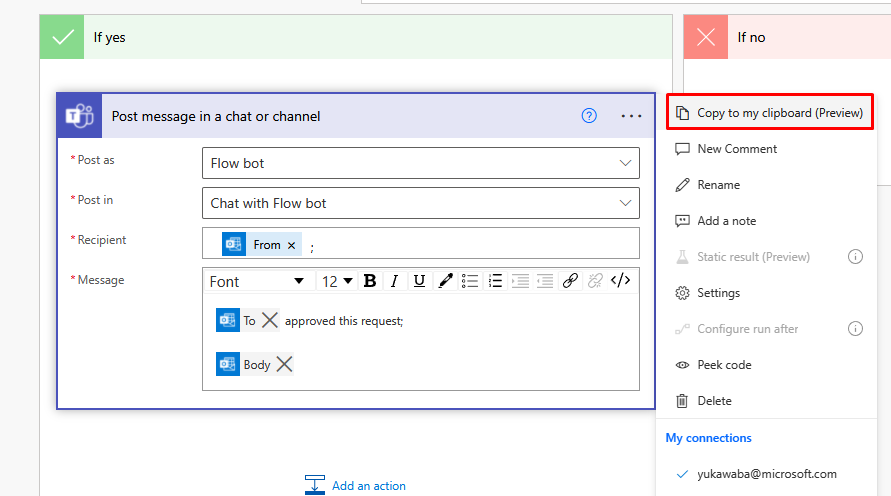
In order to copy the condition of Teams please select "My clipboard" and the copied action content as below.

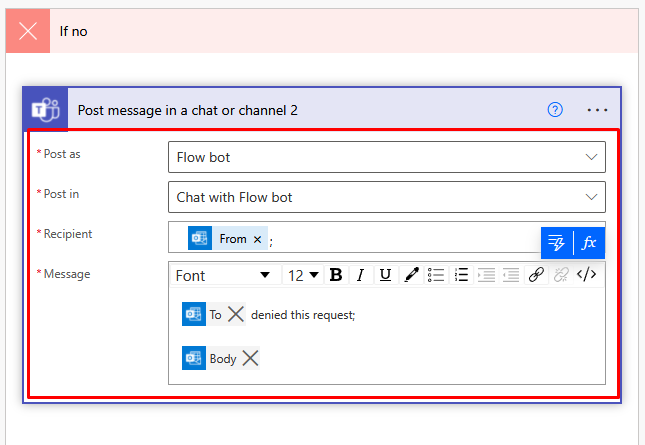
Edit items similar to the copied part like below.
Post as:Flow bot
Post in:Chat with Flow bot
Recipient: From (a dynamic content)
Message: To (a dynamic content) denied this request; Body (a dynamic content)
Let's check how it works when your manager (now you can make yourself as an approval for the testing convenience).
The overall settings now should be like below.

3.Create a Desktop Flow to input data to legacy application automatically ※RPA license for Power Automate for desktop needed
Premises for Desktop Flow; Applications to set up
- Latest version of Power Automate for desktop:
- Contoso invoicing app (an "official" legacy application provided by Microsoft)
- Provided in a RPAinaDayPackage here: https://powerautomate.microsoft.com/en-us/blog/announcing-microsoft-rpa-in-a-day-version-2/
- Or you can download from my GitHub link below.
Create a Desktop Flow
Create a new desktop in your client PC env. I will name the cloud flow "Invoicing data input from cloud flow".
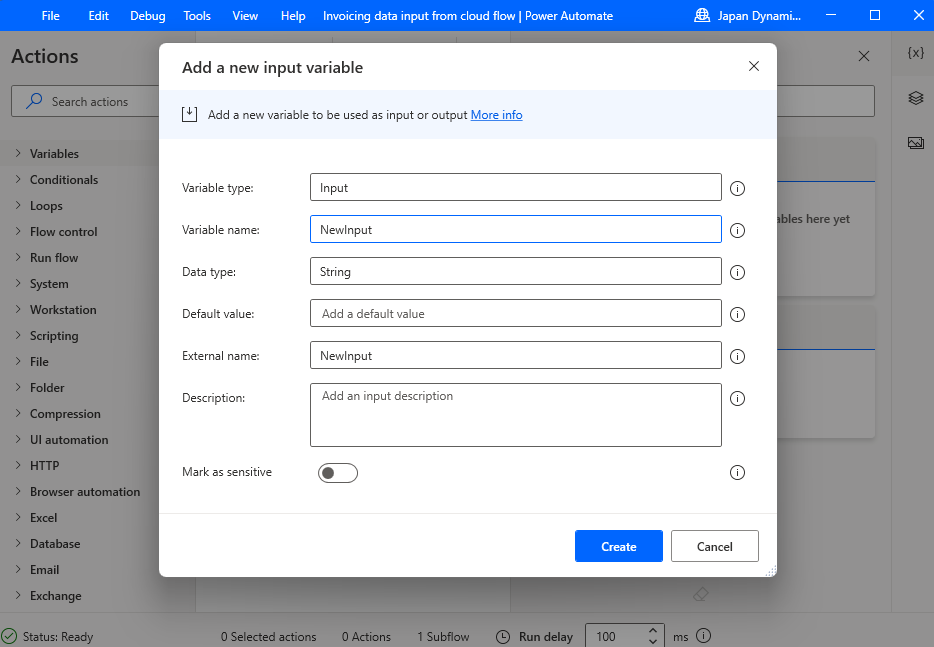
Add Input/output variables in + button on the right menu.
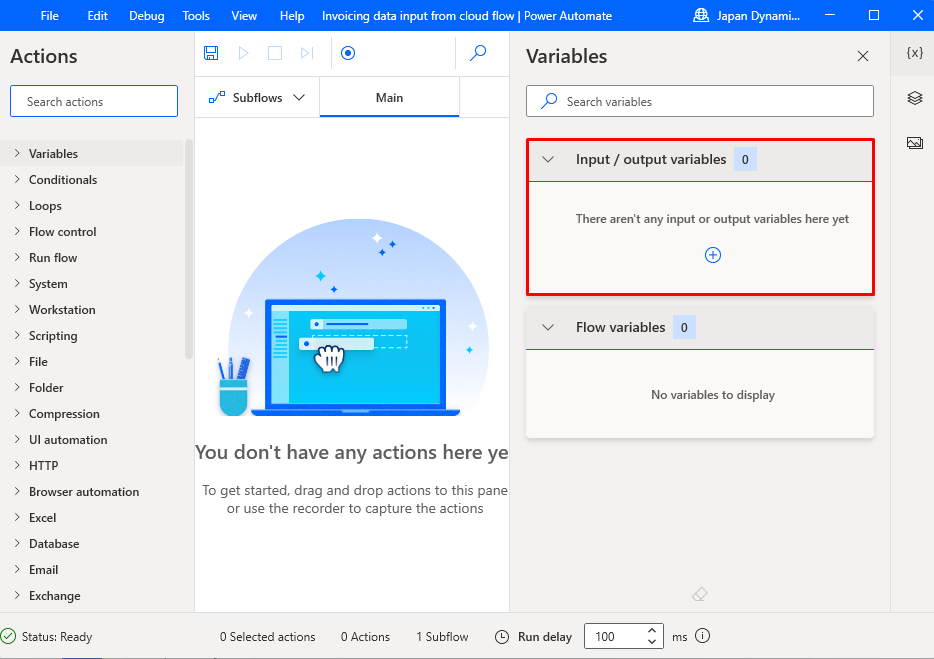
Proceed it in default setting for Input variable from the cloud flow.
Add "Split text" action first.
- Text to split:%NewInput%
- You can specify this from {x} button set by Input variable.
- Standard delimiter: New line
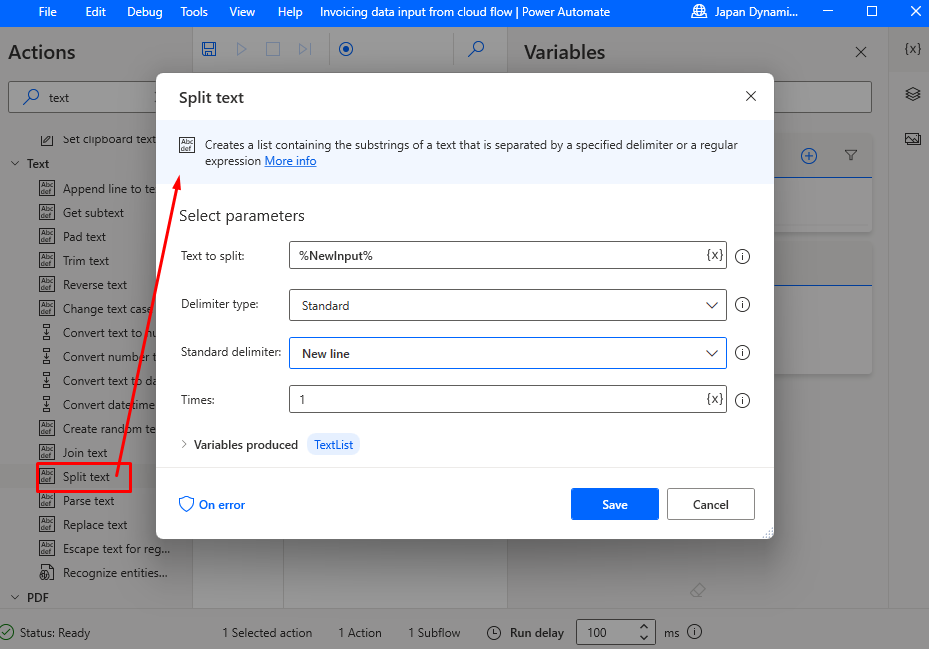
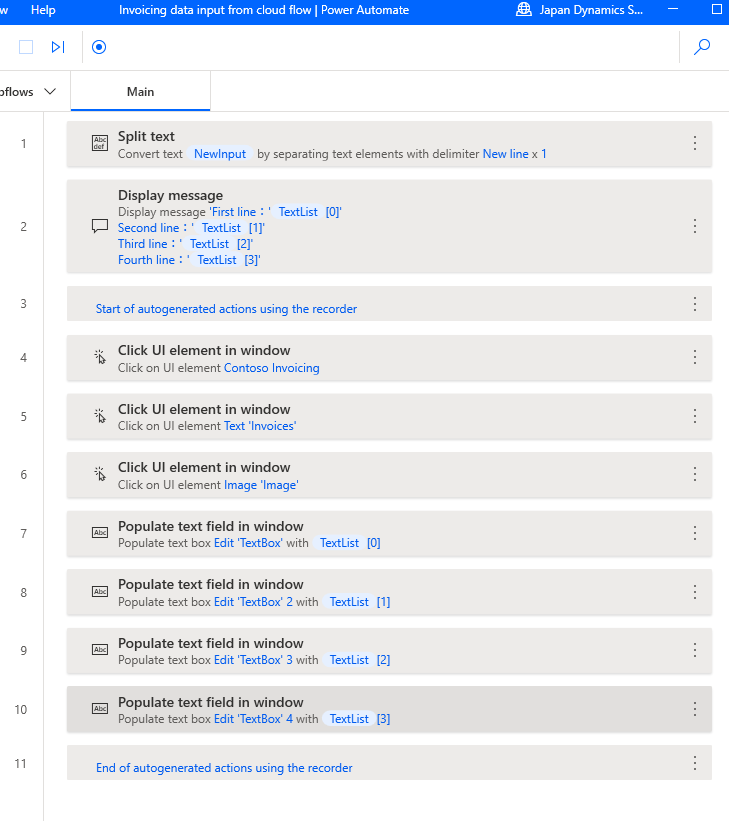
Now you could split the lines of below by new lines.
2021/10/12 9:46:14
〇〇 Corporation
marumaru@corporate.com
$100,000
Unclaimed
- TextList[0]
- Populate first item of the list, such as "2021/10/12 9:46:14".
- TextList[1]
- Populate second item of the list, such as "〇〇 Corporation".
- TextList[2]
- Populate third item of the list, such as "marumaru@corporate.com".
- TextList[3]
- Populate fourth item of the list, such as "$100".
- TextList[4]
- Populate fifth item of the list, such as "Unclaimed".
You can set the desktop flow as you like, here is one of examples.
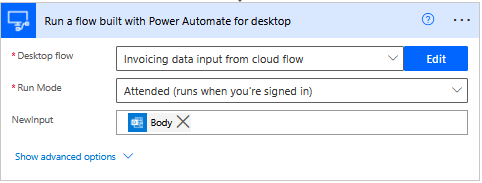
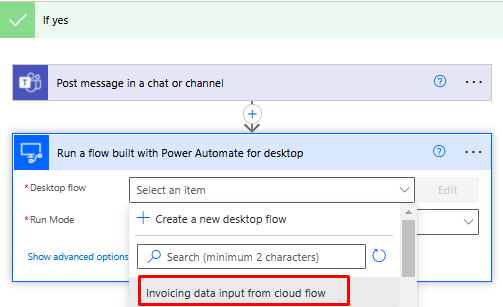
Add an action of Desktop Flow in Cloud Flow
In order to communicate from Cloud Flow to Desktop flow, please add an action of desktop flow which you created in the previous section.
Select the desktop flow which you created just now.
Populate items as below
- Desktop flow: Specify the created flow name.
- Run Mode: Attended
- NewInput: Body (a dynamic content)