androidで動的なFormを作成しようとした際に、
"追加削除ができてユーザーが入力した情報を取得する"
という一連の流れの実装方法が見当たらなかったので、今回私が実装した方法を紹介します。
android初心者なので、改善できる箇所があったらコメントで教えていただけると嬉しいです。
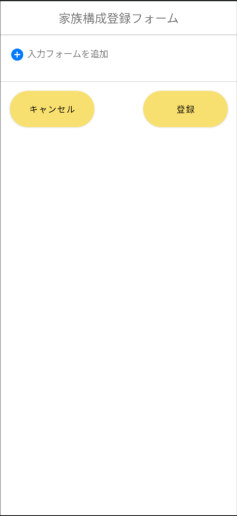
完成イメージ
その1:layoutの作成
fragment_family_form.
<LinearLayout
    android:layout_width="match_parent"
    android:layout_height="match_parent"
    android:orientation="vertical"
    >
    <LinearLayout
        android:layout_width="match_parent"
        android:layout_height="wrap_content"
        android:background="@color/white"
        android:orientation="vertical"
        app:layout_constraintStart_toStartOf="parent"
        app:layout_constraintTop_toTopOf="parent">

        <FrameLayout
            android:layout_width="match_parent"
            android:layout_height="wrap_content"
            android:paddingVertical="@dimen/title_vertical_padding">

            <TextView
                android:id="@+id/title"
                android:layout_width="wrap_content"
                android:layout_height="wrap_content"
                android:layout_gravity="center"
                android:text="家族構成登録フォーム"
                android:layout_margin="8dp"
                android:textAlignment="center"
                android:textSize="20dp" />
        </FrameLayout>

        <LinearLayout
            android:layout_width="match_parent"
            android:layout_height="1dp"
            android:background="#C3C2C1"
            android:orientation="vertical" />

        <ScrollView
            android:layout_width="match_parent"
            android:layout_height="0dp"
            android:layout_weight="1">
            <LinearLayout
                android:layout_width="match_parent"
                android:layout_height="wrap_content"
                android:orientation="vertical"
                android:layout_margin="16dp">


                <LinearLayout
                    android:layout_width="match_parent"
                    android:layout_height="wrap_content"
                    android:orientation="vertical"
                    style="@style/management_birth_layout">

                    <!-- このLinerLayoutの中にFormを追加していく -->
                    <LinearLayout
                        android:id="@+id/familyFormArea"
                        android:layout_width="match_parent"
                        android:layout_height="wrap_content"
                        android:orientation="vertical"/>

                    <TextView
                        android:layout_width="wrap_content"
                        android:layout_height="wrap_content"
                        android:textSize="15dp"
                        android:drawableLeft="@drawable/ic_baseline_add_circle_24"
                        android:drawablePadding="5dp"
                        android:text="入力フォームを追加"

                        android:onClick="@{ () -> fragment.addInseminationForm() }"
                        />

                </LinearLayout>


            </LinearLayout>
        </ScrollView>

        <LinearLayout
            android:layout_width="match_parent"
            android:layout_height="wrap_content"
            android:orientation="horizontal"
            android:background="@drawable/bg_border_top"
            android:layout_gravity="bottom">
            <Button
                style="@style/management_bottom_button"
                android:text="@string/management_pedigree_cancel"
                app:backgroundTint="@color/light_yellow"
                android:onClick="@{ () -> fragment.onCancelClick() }"/>
            <TextView
                android:layout_width="wrap_content"
                android:layout_height="wrap_content"
                android:layout_weight="1"/>
            <Button
                android:id="@+id/buttonPositive"
                style="@style/management_bottom_button"
                android:text="登録"
                app:backgroundTint="@color/light_yellow"
                android:onClick="@{ () -> fragment.onAddClick() }"/>
        </LinearLayout>
    </LinearLayout>

</LinearLayout>
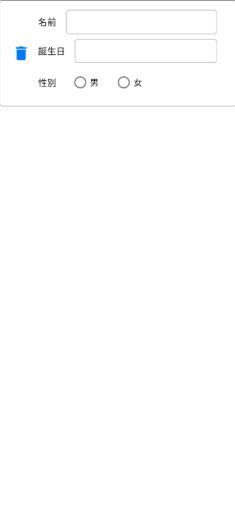
その2:挿入するFormの作成
row_family_form.xml
<?xml version="1.0" encoding="utf-8"?>
<LinearLayout
    xmlns:android="http://schemas.android.com/apk/res/android"
    android:layout_width="match_parent"
    android:layout_height="wrap_content"
    android:orientation="horizontal"
    android:gravity="center|left"
    android:padding="16dp"
    android:background="@drawable/gray_border" >
    <ImageView
        android:id="@+id/deleteIc"
        android:layout_width="wrap_content"
        android:layout_height="wrap_content"
        android:src="@drawable/ic_baseline_delete_24"
        android:padding="5dp"/>

    <LinearLayout
        android:layout_width="match_parent"
        android:layout_height="wrap_content"
        android:orientation="vertical"
        android:layout_marginStart="8dp" >
        <LinearLayout
            android:layout_width="match_parent"
            android:layout_height="wrap_content"
            android:orientation="horizontal">
            <TextView
                android:layout_width="wrap_content"
                android:layout_height="wrap_content"
                android:textSize="15dp"
                android:textColor="@color/black"
                android:text="名前" />

            <EditText
                android:id="@+id/name"
                android:layout_width="match_parent"
                android:layout_height="40dp"
                android:textSize="15dp"
                android:textColor="@color/black"
                android:layout_marginHorizontal="16dp"
                android:gravity="center"
                android:background="@drawable/gray_border" />

        </LinearLayout>
        <LinearLayout
            android:layout_width="match_parent"
            android:layout_height="wrap_content"
            android:orientation="horizontal"
            android:layout_marginTop="8dp"
            >
            <TextView
                android:layout_width="wrap_content"
                android:layout_height="wrap_content"
                android:textSize="15dp"
                android:textColor="@color/black"
                android:text="誕生日" />

            <TextView
                android:id="@+id/birthDate"
                android:layout_width="match_parent"
                android:layout_height="40dp"
                android:textSize="15dp"
                android:textColor="@color/black"
                android:layout_marginHorizontal="16dp"
                android:gravity="center"
                android:background="@drawable/gray_border"/>
        </LinearLayout>

        <LinearLayout
            android:layout_width="match_parent"
            android:layout_height="wrap_content"
            android:orientation="horizontal"
            android:gravity="center"
            android:layout_marginTop="8dp">
            <TextView
                android:layout_width="wrap_content"
                android:layout_height="wrap_content"
                android:textSize="15dp"
                android:textColor="@color/black"

                android:text="性別" />
            <RadioGroup
                android:id="@+id/radioSex"
                android:layout_width="match_parent"
                android:layout_height="wrap_content"
                android:layout_marginStart="24dp"
                android:orientation="horizontal" >
                <RadioButton
                    android:layout_width="wrap_content"
                    android:layout_height="wrap_content"
                    android:text="男" />
                <RadioButton
                    android:layout_width="wrap_content"
                    android:layout_height="wrap_content"
                    android:text="女"
                    android:layout_marginStart="24dp" />

            </RadioGroup>
        </LinearLayout>

    </LinearLayout>
</LinearLayout>
その3:追加をクリックした際に走らせる関数を記述
FamilyFormFragment.kt
    private var familyForms: MutableList<View> = mutableListOf()

    fun addInseminationForm() {
        // その2で作成したFormを取得
        val newForm: View = layoutInflater.inflate(R.layout.row_family_form, null)

        // 登録ボタンを押した際にloop処理でFormのデータを取得できるように、配列に新しく作成したViewを追加
        familyForms.add(newForm)

        // form内のViewにclicklistnerをセット
        val deleteIc = newForm.findViewById<ImageView>(R.id.deleteIc)
        val dateForm = newForm.findViewById<TextView>(R.id.birthDate)
        // 削除ICが押された場合は、familyFormArea内にあるViewを削除
        // また、Formを管理している配列からも削除
        deleteIc.setOnClickListener {
            binding.familyFormArea.removeView(newForm)
            familyForms.remove(newForm)
        };
        dateForm.setOnClickListener {
            displayDatePicker(dateForm)
        }

        // 最後にfamilyFormAreaに追加してあげる
        binding.familyFormArea.addView(newForm)
    }

    // カレンダーを表示するための関数
    private fun displayDatePicker(dateForm: TextView) {
        MaterialDatePicker.Builder.datePicker().build().apply {
            addOnPositiveButtonClickListener { date: Long ->
                dateForm.text = SimpleDateFormat("yyyy/MM/dd", Locale.JAPAN).format(date)
            }
        }.show(parentFragmentManager, "MATERIAL_DATE_PICKER")
    }
point
-
Layout.addView(削除したいLayout) -
Layout.remove(追加したいLayout)
ViewGroupに属しているLayoutなら使える関数使えるらしい。 -
clickListnerを設けたい時は、Layoutをinflateしてからセットする。
その4:登録ボタンが押された際の処理
FamilyFormFragment.kt
    /**
     * 入力フォームの情報取得
     */
    fun onAddClick() {
        val result: MutableList<Map<String, String>> = mutableListOf()
        familyForms.forEach { view ->
            val name = view.findViewById<TextView>(R.id.name).text.toString()
            val birthDate = view.findViewById<EditText>(R.id.birthDate).text.toString()
            val radioGroupCheckedId = view.findViewById<RadioGroup>(R.id.radioSex).checkedRadioButtonId
            var sex = ""
            if (radioGroupCheckedId != -1) {
                sex = view.findViewById<RadioButton>(radioGroupCheckedId).text.toString()
            }
            result.add(mapOf<String,String>(
                "name" to name, "birthDate" to birthDate, "sex" to sex
            ))
        }
        // DBに保存する、APIを叩くなどの処理
        onDestroy()
    }