0
0

Delete article

Deleted articles cannot be recovered.

Draft of this article would be also deleted.

Are you sure you want to delete this article?

Visual Studio Code 拡張機能を新しいパソコンに移行する方法

Posted at

ごきげんよう、百合宮桜です。
会社のパソコンが新しくなった時にうっかり忘れがちな、VSコードの拡張機能の移行(´・ω・`)
同期しておけばモーマンタイ!ということに気が付いたので、同期の方法をメモしておきます。面倒くさがらずにさっさとやろうね! 同期しないほうがよほど面倒だもの……💦

古いパソコンでの処理

  1. 古いパソコンで Visual Studio Code を開きます

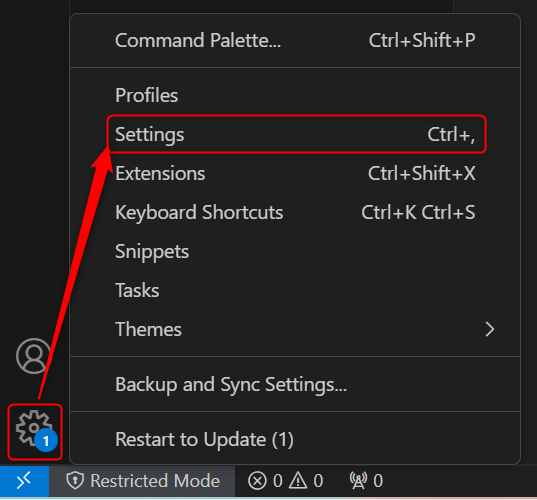
  2. 設定 > サインインして設定を同期する をクリックします

    image.png

  3. 画面右下に「GitHub.com にサインインしています」という通知が出て、ブラウザで GitHub のサインイン画面が立ち上がります

    image.png

    image.png

    GitHub か Microsoft アカウントのどちらかを選ぶことができます。
    選択せずに一定時間が経過すると、GitHub でつなごうとします。

  4. ユーザー名やパスワードを入力し、サインインします

    image.png

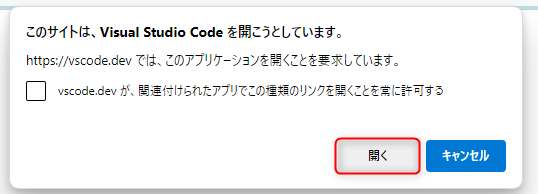
  5. ブラウザ上部に「このサイトは Visual Studio Code を開こうとしています」という通知が出るので、「開く」をクリックします

    image.png

  6. ブラウザがこの画面に切り替わればサインイン完了です

    image.png

    Visual Studio Code 側では「設定同期がオン」にチェックが入ります!

    image.png

新しいパソコンでの処理

  1. 新しいパソコンでVisual Studio Code を開きます

  2. 設定を開きます

    image.png

  3. サインインをクリックします

    image.png

  4. 古いパソコンでサインインしたアカウントの種類を選択します

    image.png

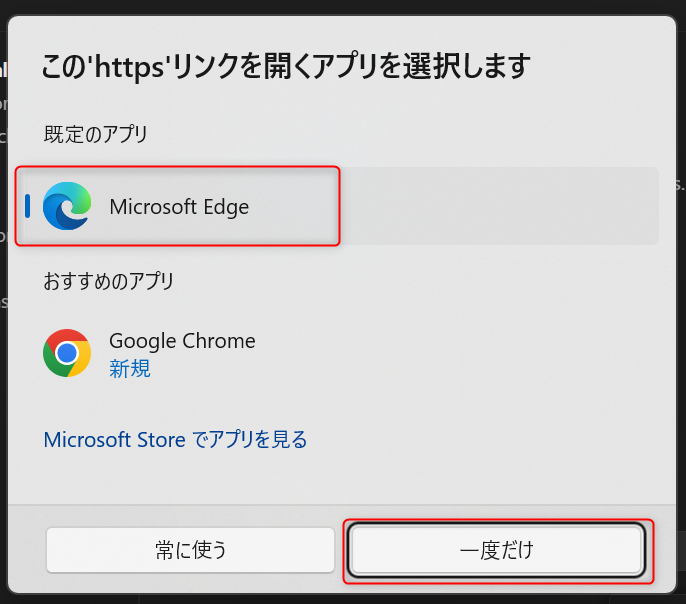
    ※このホップアップが出てきたら、好きなブラウザを選んで「一度だけ」をクリックします

    image.png

  5. ブラウザが開いて、GitHub のサインイン画面が立ち上がります

    image.png

  6. ユーザーネームとパスワードを入力し、「Sign in」をクリックします

    image.png

  7. この画面になったら、Continue をクリックします

    image.png

  8. ブラウザ上部に「このサイトは~」のホップアップが出てきたら、「開く」をクリックします

    image.png

  9. これで拡張機能のインストールが完了しました!
    拡張機能をクリックすると、今まで使っていたものがインストールされているのがわかります

    image.png

    Visual Studio Code の表示言語を変更する拡張機能が含まれていると、右下に以下のような通知が出ます。

    image.png

    Change Language and Restart をクリックして、VSコードを再起動してください。

    :

0
0
0

Register as a new user and use Qiita more conveniently

  1. You get articles that match your needs
  2. You can efficiently read back useful information
  3. You can use dark theme
What you can do with signing up
0
0

Delete article

Deleted articles cannot be recovered.

Draft of this article would be also deleted.

Are you sure you want to delete this article?