はじめに
MicrosoftによるGithubの買収が完了して、MS製品とGithubの連携が強化されてきました。また、VSTSがAzure DevOps Serviceに衣替えしました。アドベントカレンダーというせっかくの機会なので、前から試してみたかったAzure PipelinesでGithubにホストしているソースコードのCI/CDを回してみたいと思います。
Azure PipelinesでCI/CDを回す大きなメリットは、並列処理数です。OSSとしてホストしているソースコードでであれば、10個の並列処理を時間無制限で使用できます。私が使ったことのあるCircleCI(無償枠だと、1並列)と比較すると、大幅な並列数アップが図れます。
なお、今回は以下の環境とコードでユニットテストを実行します。
環境
| カテゴリ | 製品 |
|---|---|
| CI/CD | Azure Pipelines |
| Repository | Github |
| traget OS | Windows Server, Ubuntu |
| Runtime | Node.js 10, 11 |
| Test Framework | Mocha, mocha-junit-reporter, chai |
テスト対象コード
const fs = require("fs");

const readTxt = () => {
    // このコード、突っ込までないでください。。。。
	const txt = fs.readFileSync(__dirname + "\\hello.txt", "utf8");
	return txt;
};

module.exports = readTxt;
テストコード
const assert = require("chai").assert;
const readTxt = require("../index");

describe("index.js", function () {
    it("should recieve Hello, World!", function () {
        const txt = readTxt();;
        assert.equal(txt, "Hello, World!");
    });
});
Azure pipelinesの設定
Step by StepでAzureのpiplinesを設定していきます。私は認証など一部の操作が完了していて画面ショットが取れていない箇所があるので、全て確認したいという方は公式サイトも確認してください。
プロジェクトの作成
Azure Pipelinesのページからサインインしたら、最初にプロジェクトを作成します。
OSSの無償枠で使用する場合、Githubのリポジトリはpublicになっているはずです。そのため、プロジェクトのVisibilityもpublicにします(有償のプライベートリポジトリと連携させるなら、privateにします)。その後、唯一の必須項目であるのプロジェクト名を入力して、Create projectボタンをクリックするだけです。今回はプロジェクト名をtest-projectとしました。
パイプラインの設定
新しいパイプラインを作ります。PipelinesペインからNew pipelineを選びます。
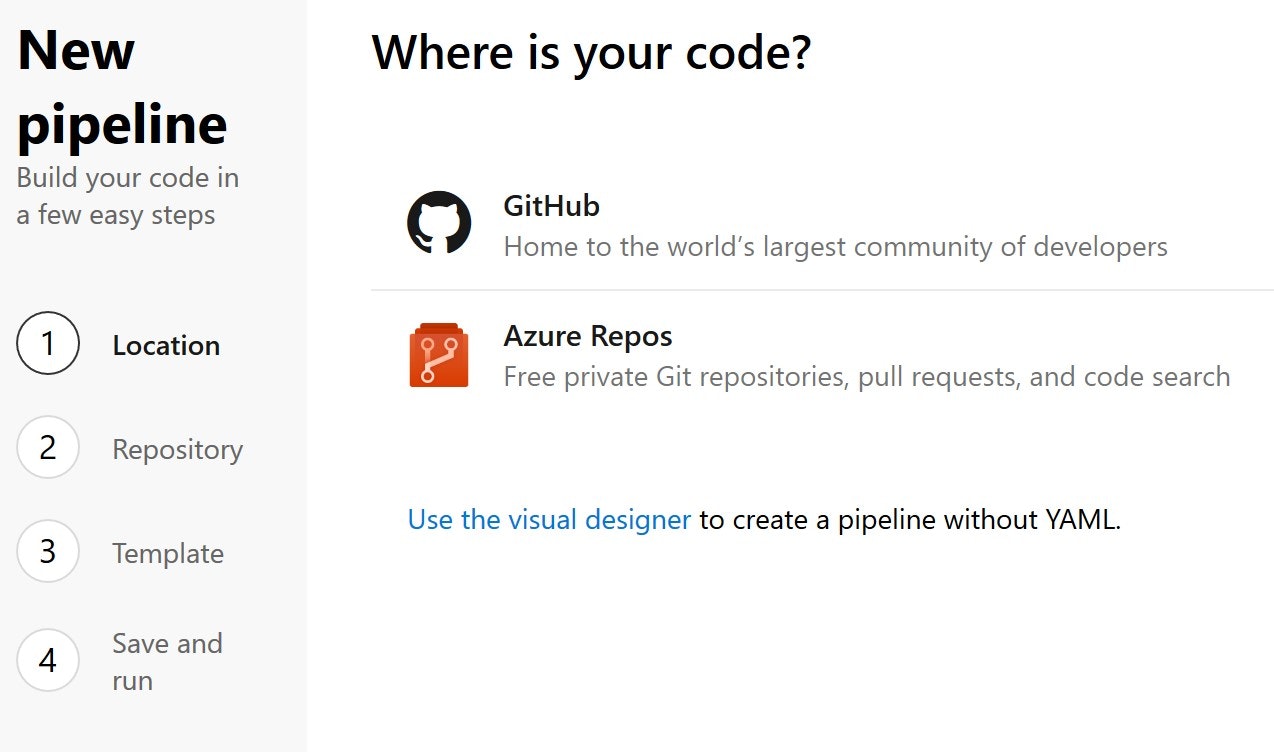
新しいパイプラインは、①Location、②Repository、③Template、④Save and runの4ステップで作成します。
①Location
もちろん、Githubを選びます。
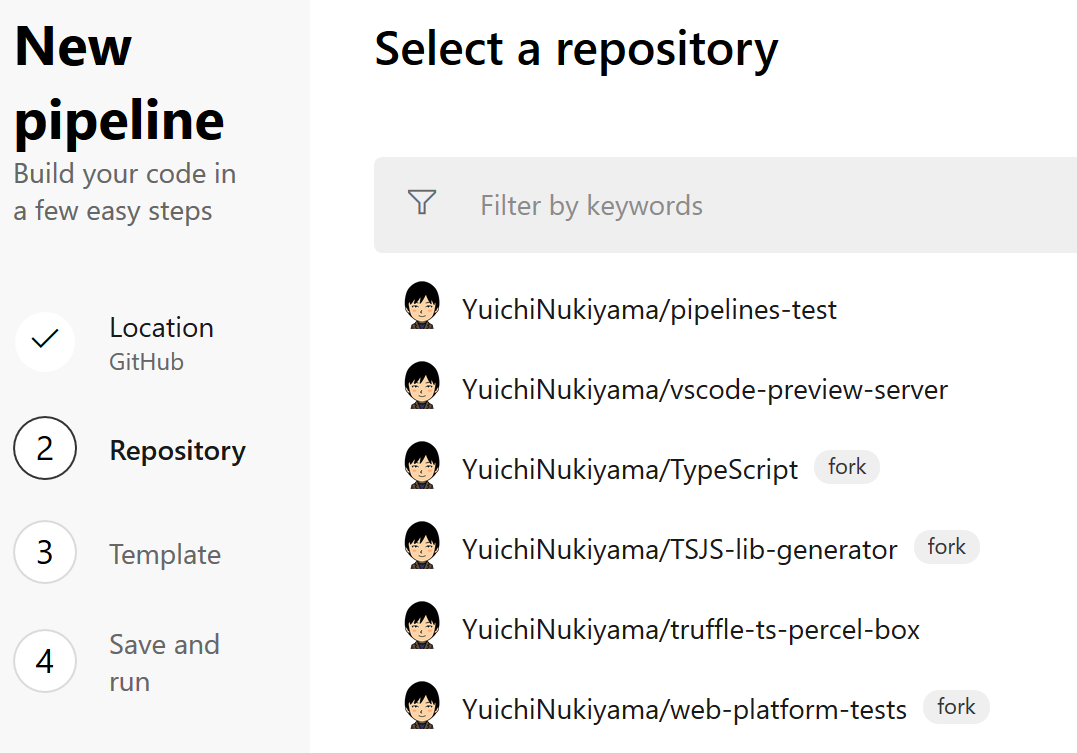
②Repository
Githubのリポジトリとつなげます。そのためには、GithubとAzureの認証を行う必要があります。そこで、Athorizeボタンをクリックして、自分が管理しているGithubと連携させます。
つづいて、Github内のリポジトリを選択します。私はpipelines-testというリポジトリを事前に準備しておきました。
④Template
Templateを選びます。テンプレートは、Azure Piplesで実行するステップを記述するためのazure-pipelines.ymlのひな形になります。今回はNode.jsを選びます。レポジトリに既にazure-pipelines.ymlがある場合、この手順は飛ばされます。
④Save and run
選んだテンプレート内の処理を変更できます(変更内容は次節で紹介します)。Save and runボタンをクリックすると、連携しているレポジトリにPRを送って、azure-pilelines.ymlを保存できます。これ以降、Githubのリポジトリが更新されるたびに、パイプラインが実行されることになります。
azure-pilelines.ymlの編集
パイプラインで実行する処理は、ビジュアルデザイナーとYAMLの2つの方法で記述できます。公式サイトではYAMLがお勧めされているので、私はYAMLを使用しています。
先述した通り、Win ServerおよびUbuntu上のNode.js v10とv11でMochaのユニットテストを実行します。
YAMLファイルは以下のようになります。この中から、ポイントとなる部分をピックアップして解説します。
# Node.js
# Build a general Node.js project with npm.
# Add steps that analyze code, save build artifacts, deploy, and more:
# https://docs.microsoft.com/azure/devops/pipelines/languages/javascript

jobs:
- job: Linux

  pool:
    vmImage: 'Ubuntu 16.04'

  strategy:
    matrix:
      node_10_x:
        node_version: 10.x
      node_11_x:
        node_version: 11.x

  steps:
  - script: |
      npm install
    displayName: 'npm install'

  - script: |
      npm test
    displayName: 'exec test'

  - task: PublishTestResults@2
    inputs:
      testRunner: JUnit
      testResultsFiles: ./test-results.xml
      testRunTitle: 'test result'

- job: Windows

  pool:
    vmImage: 'vs2017-win2016'

  strategy:
    matrix:
      node_10_x:
        node_version: 10.x
      node_11_x:
        node_version: 11.x

  steps:
  - script: |
      npm install
    displayName: 'npm install'

  - script: |
      npm test
    displayName: 'exec test'

  - task: PublishTestResults@2
    inputs:
      testRunner: JUnit
      testResultsFiles: ./test-results.xml
      testRunTitle: 'test result'
vmimage
vmimageでテスト環境を選択します。VMイメージはセルフホストエージェントとマイクロソフトホストエージェントの2種類があります。
セルフホストエージェントは自分でホストした環境を使用できます。セルフホストは、OSごとにドキュメントが用意されているので、そちらをご覧ください(たとえば、Linuxなら、このページ)。
一方、マイクロソフトホストエージェントは、文字通りマイクロソフトが準備してくれている環境のため、手軽に始められます。現在のところ、環境は以下の5つです。
- Ubuntu 16.04 (ubuntu-16.04)
- Visual Studio 2017 on Windows Server 2016 (vs2017-win2016)
- macOS 10.13 (macOS-10.13)
- Windows Server 1803 (win1803) - for running Windows containers
- Visual Studio 2015 on Windows Server 2012R2 (vs2015-win2012r2)
strategy
strategyのmatrixを指定すると、複数バージョンのNode.jsを指定できます。テスト対象のNode.jsが1バージョンのみの場合、stirategyの箇所を以下のように置き換えられます。
- task: NodeTool@0
  inputs:
    versionSpec: '11.x' # 実際に使用するバージョンを指定する
script
スクリプトを実行できます。私は、package.jsonのパッケージのインストールとscriptsに記述したtestコマンドを呼び出しています。ちなみに、testコマンドは以下のようになっています。
{
  "scripts": {
    "test": "mocha test --reporter mocha-junit-reporter --reporter-options toConsole=true"
  }
}
task
タスクはパイプラインのビルディングブロックです。細かくパイプラインの処理を書かなくて済むため、適用できるものがあれば使った方が楽をできます。タスクの一覧はカタログにあるので、参照してください。
タスクのPublishTestResults@2は、jUnit XMLフォーマットの結果を出力するタスクです。
MochaのテストでjUnit XMLフォーマットの出力をするには、mocha-junit-reporterを使用します。mocha-junit-reporterは--reporter-options toConsole=trueオプションを付けるとAzure Pipelineでも実行結果が見れるので便利です。
実行結果
YAMLの解説も終わったので、先ほどのパイプラインの実行結果を見てみましょう。
Linuxだと失敗してる!!!!ということで、index.jsを以下のように修正してGithubにアップします。再テストは自動で回ります。
const fs = require("fs");
const path = require("path"); // 修正

const readTxt = () => {
	const txt =  fs.readFileSync(path.join(__dirname, "hello.txt"), "utf8"); // 修正
	return txt;
};

module.exports = readTxt;
今度は、無事成功!!!! Windows OSで作っていたので、パス問題に気付いてなかったので助かりました(白々しい)。
このように、Azure Pipelinesを使えば簡単にユニットテストを自動化できます。ぜひ使ってみてください。


