はじめに
スライドのトランジションの中に、本をめくるような形で次に進めるような奴ありますよね?
今回はunityでそれを表現するためにコルーチンとシェーダーをいじっていきます。
流れとしては
- めくる動作ができるようシェーダーを調節したimageを用意する。
- 移動前のシーンのスクリーンをReadPicxelsで取得する。
- imageに取得したものを入れる。
- imageは残したまま、シーンを移動させる。
- imageをめくる!
という形で進めていきます。
開発
シェーダーをいじる
こちらの記事のシェーダーコードを使わせていただいています。
http://esprog.hatenablog.com/entry/2016/03/13/130506
CreatでShaderを作り、中身を以下に差し替えます。
Shader "MBL/NextPage"
{
	Properties
	{
		_MainTex("Texture", 2D) = "white" {}
		_PageTex("PageTexture", 2D) = "white" {}
		_AlphaMask("AlphaMask", Range(0, 1)) = 0.1
		_Flip("Flip",Range(-1, 1)) = 0
	}
	SubShader
	{
		Tags { "RenderType" = "Transparent" }
		Blend SrcAlpha OneMinusSrcAlpha

		Pass
		{
			CGPROGRAM
			#pragma vertex vert
			#pragma fragment frag

			#include "UnityCG.cginc"

			struct appdata
			{
				float4 vertex : POSITION;
				float2 uv : TEXCOORD0;
			};

			struct v2f
			{
				float2 uv : TEXCOORD0;
				float2 puv : TEXCOORD1;
				float4 vertex : SV_POSITION;
			};

			sampler2D _MainTex;
			float4 _MainTex_ST;
			sampler2D _PageTex;
			float4 _PageTex_ST;
			float _AlphaMask;
			float _Flip;

			float l2(float x)
			{
				return 1 - _Flip + 0.1 * cos(x * 2);
			}

			float l1(float y)
			{
				return _Flip + 0.1 * sin(y * 3);
			}

			float l0(float x)
			{
				return x - _Flip;
			}

			v2f vert(appdata v)
			{
				v2f o;
				o.vertex = mul(UNITY_MATRIX_MVP, v.vertex);
				o.uv = TRANSFORM_TEX(v.uv, _MainTex);
				o.puv = TRANSFORM_TEX(v.uv, _PageTex);
				return o;
			}

			fixed4 frag(v2f i) : SV_Target
			{
				//コンテンツとページテクスチャ色取得
				float4 content_col = tex2D(_MainTex, i.uv);
				float4 page_col = tex2D(_PageTex, i.puv);

				//L0より右の描画を無視
				float l0_y = l0(i.uv.x);
				clip(i.uv.y - l0_y);

				//範囲内ならば暗い色に
				if (i.uv.x > l1(i.uv.y) && i.uv.y < l2(i.uv.x))
					content_col = float4(0.5, 0.5, 0.5, 1);

				//ページ内容のうち一定の値より透明なものはページの色にすり替える
				if (content_col.a < _AlphaMask)
					return page_col;

				return content_col * page_col;
			}
			ENDCG
		}
	}
}
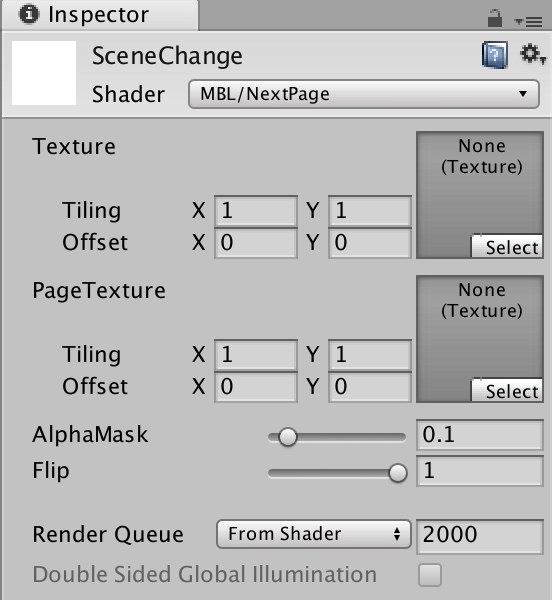
新しいマテリアルを作り、その中に作ったShaderを入れます。


めくれるようになりました!!!!!
Shaderの中のFlipのスライダーをずらすとよくわかります。
これで画像を入れる土台は整いました。
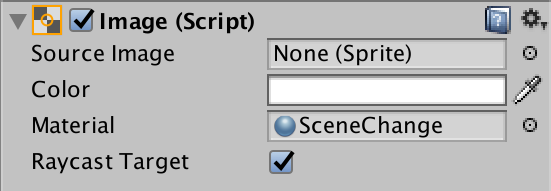
imageは非アクティブにしておきしょう!。
スクリーンを取得してimageに入れる
スクリーンを取得するためにはReadPicxelsというメソッドを使っていきます。
はじめに、imageつけるスクリプトをかきます。(今回はButtonでシーン移動させます)
UIに関するスクリプトを動かすので以下を追記します。
using UnityEngine.UI;
using UnityEngine.SceneManagement;
public Image m_DrawTex;

public void Botton(){
		StartCoroutine ("Capture");
	}

IEnumerator Capture()
	{
		//ReadPicxelsがこの後でないと使えないので必ず書く
		yield return new WaitForEndOfFrame();

		//スクリーンの大きさのSpriteを作る
		var texture = new Texture2D(Screen.width, Screen.height);

		//スクリーンを取得する
		texture.ReadPixels(new Rect(0, 0, Screen.width, Screen.height), 0, 0);
		//適応する
		texture.Apply();

		//取得した画像をSpriteに入るように変換する
		byte[] pngdata = texture.EncodeToPNG();
		texture.LoadImage(pngdata);

		//先ほど作ったSpriteに画像をいれる
		Sprite sprite = Sprite.Create(texture, new Rect(0, 0, texture.width, texture.height), new Vector2(0.5f, 0.5f));
		Debug.Log ("c");

		//Spriteを使用するオブジェクトに指定する
		//     今回はUIのImage
		m_DrawTex.GetComponent<Image>().sprite = sprite;

		// サイズ変更
		m_DrawTex.GetComponent<RectTransform>().sizeDelta = new Vector2(texture.width, texture.height);

		//imageをアクティブにする
		image.SetActive (true);
	}
ボタンを押したときにメソッドが呼ばれるように設定しましょう

これで、シーン移動の直前画面をimageで写すことができるようになりました。
次にこのimageを消さないままシーン移動する方法を説明します。
imageを残したままシーン移動
imageが消えないようにするにはDontDestroyOnLoadを使います。
bool値の宣言とstart()の中に以下を追記してください。
public bool DontDestroyEnabled = true;

	void Start () {
		if (DontDestroyEnabled) {
			// Sceneを遷移してもオブジェクトが消えないようにする
			DontDestroyOnLoad (this);
		}
	}
更に別のメソッドを作りシーン移動ができるようにする。
public void nextScene(){
	//任意のシーンへ移動する
	SceneManager.LoadScene ("シーンの名前");

	//destroyできるようにする
	DontDestroyEnabled = false;
}
最後にCapture()の最後に以下を追記して移動できるようになります!
nextScene();
imageをめくる
imageにそのままつけて実行すると自動でめくるモーションが再生される
サンプルを貼っておきます。参考までに!!
using System.Collections;
using System.Collections.Generic;
using UnityEngine;
using UnityEngine.UI;

public class flipTest : MonoBehaviour
{

	// Start is called before the first frame update
	void Start()
	{
		this.GetComponent<Image>().material.SetFloat("_Flip", 1.0f);
	}

	// Update is called once per frame
	void Update()
	{
		float flipValue = this.GetComponent<Image>().material.GetFloat("_Flip");

		if (flipValue > -1.0f)
		{
			flipValue -= 1f * Time.deltaTime;
			this.GetComponent<Image>().material.SetFloat("_Flip", flipValue);
		}
	}
}
参考サイト
紙をめくるアニメーションをするシェーダー作ってみた
【Unity】画面キャプチャ
Unityで画面のスクリーンショットを撮る(Application.CaptureScreenshotじゃない方法)

