サクっとAPIのモックを作りたいアナタに
AWS環境でサクっとモックAPI作りたいとき、ありませんか?
API Gatewayを使えばモックAPIを簡単に実装することができます。
今回、さらにDockerとAWS CDKを利用し、
Dockerが利用できる環境であれば、だれでも5分でAWSにモックAPIをデプロイできる
Githubリポジトリを作成してみました。
https://github.com/yowayuki/apigateway-mock-template
使い方
前提
・お使いのローカルマシーンで Docker/Docker Compose が使用できること
※筆者がメインで使用しているWindowsでしか動作を確認できていません
・初期設定済みAWSアカウントがあること
・AWS CLI をお使いのローカルマシンにインストール済みであること
手順1
ローカルにクローン
$ git clone https://github.com/yowayuki/apigateway-mock-template.git
手順2
ルートディレクトリ(apigateway-mock-template)直下のdocker-compose.yml内の
「AWS のプロファイル名」「ローカルユーザディレクトリ」を各自の情報に書き換える
services:
  cdk-ts:
    build:
      context: .
      dockerfile: Dockerfile
      # ビルド変数として作業ディレクトリ名を渡す
      args:
        - APP_DIR=cdk
    # コンテナ継続起動
    tty: true
    environment:
-      - AWS_PROFILE={AWSのプロファイル名}
+      - AWS_PROFILE=default
    volumes:
      - ./cdk:/cdk
-     - /{ローカルユーザディレクトリ}/.aws/:/root/.aws:ro
+     - C:\Users\hoge/.aws/:/root/.aws:ro
手順3
ルートディレクトリ(apigateway-mock-template)直下でdockerコンテナを起動し、コンテナに入る
# ビルド
$ docker-compose build
# コンテナ起動
$ docker-compose up -d
# コンテナに入る
$ docker-compose exec cdk-ts bash
手順4
パッケージインストール
$ pwd
/cdk
$ npm install
手順5
※利用するAWSアカウントでAWS CDKの実行が初回の場合のみ実施
CDKToolkit作成
$ pwd
/cdk
$ cdk bootstrap
手順6
モックAPIデプロイ
$ pwd
/cdk
$ cdk deploy MockApiStack
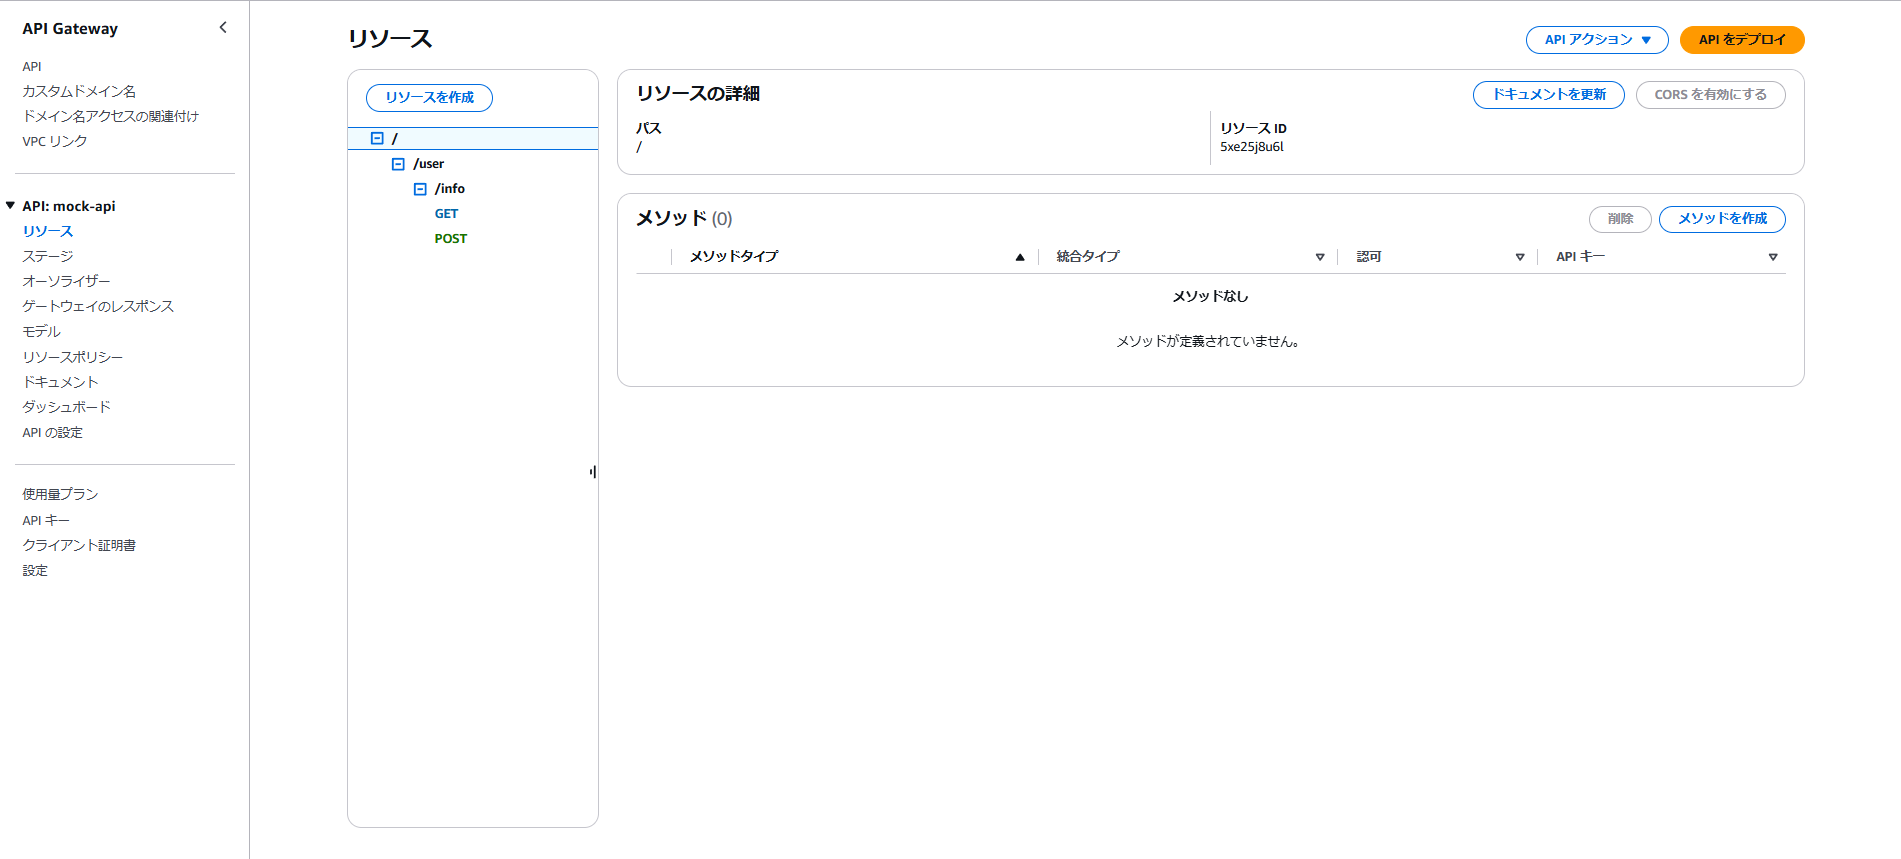
これで終わり!
コンソールで確認すると、API Gatewayにリソースがデプロイされている

ステージも作成される

デプロイされたAPIの使い方
デフォルトでは「GET」「POST」でそれぞれモック API を用意しています。
あるあるAPIとしてユーザ登録API、ユーザ情報取得APIのようなユースケースで設計しています。
コンテナ内に curl インストールされているので以下リクエストを試せます。
200 系のレスポンスになるリクエスト例
GET リクエスト
$ curl -H "Cookie:userNumber=123" "https://{デプロイされたステージドメイン}/v1/user/info"
{
    common: {
        statusCode: 200,
        message: "",
    },
    result: {
        userNumber: "123",
        userName: "テスト太郎"
    }
}
$ curl "https://{デプロイされたステージドメイン}/v1/user/info?userNumber=123"
{
    common: {
        statusCode: 200,
        message: "",
    },
    result: {
        userNumber: "123",
        userName: "テスト太郎"
    }
}
POST リクエスト
$ curl -X POST -H "Content-Type: application/json" -H "Cookie:userNumber=123" -d '{"userName" : "テスト太郎"}' "https://{デプロイされたステージドメイン}/v1/user/info"
{
    common: {
        statusCode: 200,
        message: "",
    },
    result: {
        userNumber: 123,
        userName: テスト太郎,
    }
}

$curl -X POST -H "Content-Type: application/json" -H "Cookie:userNumber=456" -d '{"userName" : "テスト次郎"}' "https://{デプロイされたステージドメイン}/v1/user/info"
{
    common: {
        statusCode: 200,
        message: "",
    },
    result: {
        userNumber: 456,
        userName: テスト次郎,
    }
}
※POST のレスポンスは、リクエストの Cookie、ボディのパラメータによって動的に返却されます
400 系のレスポンスになるリクエスト例
GET リクエスト
$ curl "https://{デプロイされたステージドメイン}/v1/user/info"
{
    common: {
        statusCode: 400,
        message: "ユーザ情報取得に失敗しました。",
    },
    result: {}
}
※cookie とパラメータ両方無しでエラー
POST リクエスト
$ curl -X POST -H "Content-Type: application/json" -d '{"userName" : "テスト太郎"}' "https://{デプロイされたステージドメイン}/v1/user/info"
{
    common: {
        statusCode: 400,
        message: "ユーザ情報登録に失敗しました。",
    },
    result: {}
}
※cookie かパラメータ片方無しでエラー
解説
このテンプレートをカスタマイズして、目的のモックAPIを作成するために、
必要な部分を掻い摘んで解説します。
APIの設定部分は、ルートディレクトリ/cdk/lib/mock-api-stack.ts MockApiStackクラスで実装しています。
パス設定
    // /user/infoに対応するリクエストパスを作成
    const user = this.apiGw.root.addResource("user");
    const info = user.addResource("info");
/userを作る場合は、
this.apiGw.root.addResource("user");
/user/infoを作る場合は、↑のuserにさらにaddResourceをする。
const info = user.addResource("info");
マッピングテンプレート設定
    // リクエストテンプレート
    // クッキーの値やリクエストパラメータを使用してどの統合レスポンスに渡すかを決める事ができる
    const getUserInfoRequestTemplate = dedent`
    #set($cookieUserNumber = $input.params().header.get('Cookie').replaceAll("userNumber=", ""))
    #set($paramUserNumber= $input.params('userNumber'))
    #if(($cookieUserNumber ==  "123") || ($paramUserNumber == 123) )
    {
        "statusCode": 200
    }
    #else
    {
        "statusCode": 400
    }
    #end
    `;

    // 成功時レスポンステンプレート
    // クッキーの値やリクエストパラメータの値をレスポンスボディに使用することができる
    const getUserInfoSuccessResponseTemplate = dedent`
    #set($cookieUserNumber = $input.params().header.get('Cookie').replaceAll("userNumber=", ""))
    #set($paramUserNumber = $input.params('userNumber'))
    #if($paramUserNumber ==  123)
    {
        common: {
            statusCode: 200,
            message: "",
        },
        result: {
            userNumber: $paramUserNumber,
            userName: "テスト太郎",
        }
    }
    #else
    {
        common: {
            statusCode: 200,
            message: "",
        },
        result: {
            userNumber: "123",
            userName: "テスト太郎"
        }
    }
    #end
    `;

    // 失敗時レスポンステンプレート
    const getUserInfoErrorResponseTemplate = dedent`
    {
        common: {
            statusCode: 400,
            message: "ユーザ情報取得に失敗しました。",
        },
        result: {}
    }
    `;
API Gatewayコンソールでの「統合リクエスト」のマッピングテンプレート、「統合レスポンス」のマッピングテンプレートに当たる部分。
Apache VTLで記述する。
リクエストパラメータやリクエストボディ、Cookieの値でリクエスト結果の振り分けを行ったり、
レスポンスボディへの設定を動的に行うことができる。
API設定
    // /user/infoに対してGETメソッドのAPIを設定
    info.addMethod(
      "GET",
      new apigateway.MockIntegration({
        // 統合リクエストの設定値
        requestTemplates: {
          "application/json": getUserInfoRequestTemplate,
        },

        // 統合レスポンスの設定値
        integrationResponses: [
          {
            statusCode: "200",
            responseParameters: {
              "method.response.header.Set-Cookie":
                "integration.response.header.Set-Cookie",
            },
            responseTemplates: {
              "application/json": getUserInfoSuccessResponseTemplate,
            },
          },
          {
            selectionPattern: "400",
            statusCode: "400",
            responseParameters: {
              "method.response.header.Set-Cookie":
                "integration.response.header.Set-Cookie",
            },
            responseTemplates: {
              "application/json": getUserInfoErrorResponseTemplate,
            },
          },
        ],
      }),
      // メソッドレスポンスの設定値
      {
        methodResponses: [
          {
            statusCode: "200",
            responseParameters: {
              "method.response.header.Set-Cookie": true,
            },
          },
          {
            statusCode: "400",
            responseParameters: {
              "method.response.header.Set-Cookie": true,
            },
          },
        ],
      }
    );
パス設定で作成したパスに対して、addMethod()を行い、APIのメソッド、統合リクエスト、統合レスポンス、メソッドレスポンスの設定を行う。
cookieを使用する場合、以下部分の設定が必要になる。
            // ... 略
            responseParameters: {
              "method.response.header.Set-Cookie":
                "integration.response.header.Set-Cookie",
            },
            // ... 略
            responseParameters: {
              "method.response.header.Set-Cookie":
                "integration.response.header.Set-Cookie",
            },
            // ... 略
            responseParameters: {
              "method.response.header.Set-Cookie": true,
            },
            // ... 略
            responseParameters: {
              "method.response.header.Set-Cookie": true,
            },
このテンプレートを作ろうと思った背景
私が業務の中でスマホアプリのサーバ開発を実施していた際、
サーバAPIの実装よりアプリの実装が先に進み、結合試験を行っていました。
アプリのコードに手を入れてモックデータを入れ込む方法もありましたが、
結合試験の方法としてはできれば避けたいなと思っていました。
また、システム上発生させずらい異常系の試験の実施方法も懸念になっていました。
その際、API Gatewayで簡単にモックAPIが作れるというQiitaの記事をどこかで見た記憶が蘇り、
実際に試してみようということで、導入してみました。
このときは、 調べながらコンソール上で作っただけでしたが、
結果としてサーバの開発を待たずにアプリの試験を進めることができました。
(Apache VTLが初見だったこともあり、リクエストパラメータやCookieを使用した処理の記述に割と詰まりました苦笑)
このとき学習したAPI Gatewayの知識を無駄にしたくないという気持ちと、
これまで 逃げてきた ほとんど触っていなかったDockerをそろそろ勉強しなければという気持ち、
AWS SDKってどんな感じなんだろうという好奇心が合わさり、今回作成してみました。
このリポジトリを作成したことが、
その後のプロジェクトの環境構築手順をDockerコンテナ化して省略させたり、
CloudFormationを利用したAWS構築を行ったりと、とても業務に活かすことができたので、
個人的にとてもよかったです。