オリィ研究所( http://orylab.com/ ) の 椎葉です。
前回 ( http://qiita.com/YoshifumiShiiba/items/4c32dbbd8f8bb38be6ad ) の続きで、より実用的にブラッシュアップする上でのbleno部分の改造と解説をやってみます。
blenoとはなんぞや
前回も軽くは触れましたが、bleno( https://github.com/sandeepmistry/bleno ) はMac、Win、LinuxのマルチプラットフォームでBluetoothペリフェラル(操作される側)の実装が行えるNode.jsのライブラリです。
同作者によるnobel ( https://github.com/sandeepmistry/noble ) と言うライブラリもあり、こちらはBLE Central(操作する側)の実装を行うライブラリです。ちなみに、今回のプロジェクトはこっちのほうがよかったんじゃないか説が浮上しております。

iOSはペリフェラルとしてもセントラルとして振る舞える。Macをペリフェラルにするよりは、iOSを探す側のセントラルである方が自然だし実装もクールに済んだはず。
実行環境がとてもシビアなので、エンジニア以外にはアプリケーションとしてプロダクションにはしづらいです。うちの会社もそうですが、デバイスとしてOSや環境ごと提供するような領域のプロジェクトではうまく活用できると思います。
1 Keyboardもどきの現状の課題
前回の記事でMacのコマンドラインからBLE経由でiOSに入力を行うことのできるSwift製のCustom Keyboardのプロトタイプを作りましたが、幾つかの課題を放置したままになっていました。
- バックスペースを入力することができない
- 改行を入力することができない
- できたらカーソル移動も実装したい
今回は解説を交えながらこれらの課題を解決したいと思います。
準備する
すでに済んでいる人はスキップして問題ありません。
前回 (http://qiita.com/YoshifumiShiiba/items/4c32dbbd8f8bb38be6ad) の記事を参考にNodejs側のプロジェクトを準備します。
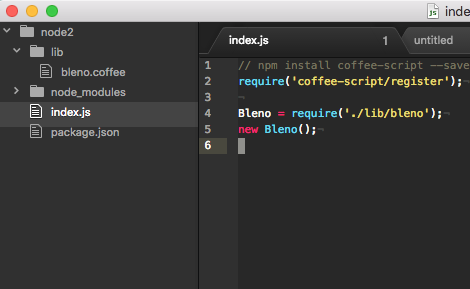
また、package.json, index.js, lib/bleno.coffeeを同様に前回のコードを参考に設置します。
コマンドラインでバックスペースやアローキーの入力を受ける
前回はNodejs標準のreadLineモジュールを使って、こんなコードでprocess.stdinからテキスト入力を拾っていました。
  # コマンドライン入力を受け付けて送信するメソッド
  # blenoからコールバック関数を引数として受け取る
  startInput: (valueCallback)->
    @readLine = readline.createInterface
      input: process.stdin
      output: process.stdout

    # 入力受ける
    @readLine.question ">", (answer)=>
      if answer isnt ""
        data = Buffer.from answer, 'utf8'
        # 送信!
        valueCallback data
      @readLine.close()

      # stopフラグが立っていたら再帰せずに終了
      if @stop then return
      @startInput valueCallback
keypressモジュール
このアプローチでテキストを取得している限り、どう頑張っても修飾キーの入力をとることができないので、keypress(https://www.npmjs.com/package/keypress) モジュールを使って、キーを押されたイベントを取得します。
# プロジェクトルートで
npm install keypress --save
上記のコマンドでインストールし、下記の実装でkeypressを初期化します。
  # keypress初期化
  initKeyPress: ()->
    keypress(process.stdin)
    process.stdin.on 'keypress', (ch, key)=>
      # どんなオブジェクトがくるか確認したい時
      # console.log('got "keypress"', ch)
      # console.log('got "keypress"', key)

      # Ctrl+Cで終了(書いておかないと困る)
      if key and key.ctrl and key.name is 'c'
        console.log 'pause!'
        @quitByInput()
        return

      # STR作成メソッドコール
      str = @makeStrByKey ch, key
      # 送信メソッドコール
      if str then @send str

    # process.stdin起動
    process.stdin.setRawMode true
    process.stdin.resume()
stdinをkeypressに食わせることでstdinにイベントを追加するスタイルのようです。その後stdin.setRawMode(true)とresume()を叩いて生のキーボードイベントを取得します。
上記コードの補助メソッド群が下記です。結局コールバック関数は引き回さずプロパティにしました。
  # chとkeyに応じて返すSTRを決める
  makeStrByKey: (ch, key)->
    str = ""
    if key and key.name is 'backspace'
      # backspaceやrightみたいなメタ文字は加工して投げる。
      str = "{{{backspace}}}"
    else if key and key.name is "return"
      str = "\n"
    else if key and key.name is "right"
      str = "{{{right}}}"
    else if key and key.name is "left"
      str = "{{{left}}}"
    else if ch
      str = ch
    console.log str
    return str

  # 文字をiOSに送信する
  send: (str)->
    if not @updateCallback then return
    data = Buffer.from str, 'utf8'
    # 送信!
    @updateCallback data

  # 正常な終了
  quitByInput: ()->
    process.stdin.setRawMode false
    process.stdin.pause()
    process.exit(1)
これでほぼほぼキー入力は正常に取得できそうです。
bleno
ここでbleno側の実装について解説していきたいと思います。
下記が、Blenoクラスのコンストラクタです。
bleno = null
class Bleno

  constructor: ()->
    try
      # blenoはrequireが例外を吐く
      bleno = require 'bleno'
    catch error
      # blenoが例外を吐いたら終了
      bleno = null
      console.log "This mac cannot use me, good bye."
      process.exit(0)
      return
    # 初期化メソッドコール
    @init()
コメントの通りなのですが、Blenoは現状プロセスにrequireした段階で環境が要求を満たしていない場合などに例外を吐いてしまいます。回避するためにrequireをtryで囲み、成功した場合にのみそれをつかって処理を続行するように実装します。
下記がデバイス名とサービスの定義部分です。
  init: ()->
    # デバイス名定義
    name = 'BlenoKeyboard'
    serviceUuids = [ '1192d150-e46d-11e6-bf01-fe55135034f3' ]

    # Serviceの定義
    primaryService = new bleno.PrimaryService
      uuid: serviceUuids[0]
      characteristics: [

        # Characteristicの定義
        new bleno.Characteristic
          uuid: '1192d57e-e46d-11e6-bf01-fe55135034f3'
          properties: [
            'notify'
          ]

          # Notifyに登録された時
          onSubscribe: (maxValueSize, updateValueCallback)=>
            console.log 'start input'
            @updateCallback = updateValueCallback

          # Notifyが解除された時
          onUnsubscribe: ()=>
            console.log 'stop input'
            @updateCallback = null
      ]
ここの実装内容がセントラル側の実装にも大きく関わります、というかこれを叩きます。
前回はすぐに動かしたくて16bitのUUIDで定義しましたが、今回は真面目にジェネレータ(https://www.uuidgenerator.net )などを使ってオリジナルのUUIDを作成します。
Characteristic
このCharacteristicがBLEのサービスを実行する本体になります。
今回はペリフェラル側のデータをペリフェラル側からのイベントに応じてセントラルが受け取るパターンなのでNofityを使用しています。
他にも、'read', 'write', 'indicate'などのタイプを利用できます。オフィシャルのReadme( https://github.com/sandeepmistry/bleno#characteristic )。
bleno.coffee
というわけで、下記が出来上がったファイル本体になります。
bleno = null
keypress = require 'keypress'

class Bleno

  updateCallback: null

  constructor: ()->
    try
      # blenoはrequireが例外を吐く
      bleno = require 'bleno'
    catch error
      # blenoが例外を吐いたら終了
      bleno = null
      console.log "This mac cannot use me, good bye."
      process.exit(0)
      return
    # 初期化メソッドコール
    @init()

  init: ()->
    # デバイス名定義
    name = 'BlenoKeyboard'
    serviceUuids = [ '1192d150-e46d-11e6-bf01-fe55135034f3' ]

    # Serviceの定義
    primaryService = new bleno.PrimaryService
      uuid: serviceUuids[0]
      characteristics: [

        # Characteristicの定義
        new bleno.Characteristic
          uuid: '1192d57e-e46d-11e6-bf01-fe55135034f3'
          properties: [
            'notify'
          ]

          # Notifyに登録された時
          onSubscribe: (maxValueSize, updateValueCallback)=>
            console.log 'start input'
            @updateCallback = updateValueCallback

          # Notifyが解除された時
          onUnsubscribe: ()=>
            console.log 'stop input'
            @updateCallback = null
      ]

    # bluetoothデバイスの状態変化イベント
    bleno.on 'stateChange', (state) ->
      console.log 'stateChange: ' + state
      if state == 'poweredOn'
        bleno.startAdvertising name, serviceUuids, (error) ->
          if error
            console.error error
          return
      else
        # startする
        bleno.stopAdvertising()
      return

    # advertising startイベント
    bleno.on 'advertisingStart', (error) ->
      if !error
        console.log 'start advertising...'
        # Service設置
        bleno.setServices [ primaryService ]
      else
        console.error error
      return

    @initKeyPress()


  # keypress初期化
  initKeyPress: ()->
    keypress(process.stdin)
    process.stdin.on 'keypress', (ch, key)=>
      # どんなオブジェクトがくるか確認したい時
      # console.log('got "keypress"', ch)
      # console.log('got "keypress"', key)

      # Ctrl+Cで終了(書いておかないと困る)
      if key and key.ctrl and key.name is 'c'
        console.log 'pause!'
        @quitByInput()
        return

      # STR作成メソッドコール
      str = @makeStrByKey ch, key
      # 送信メソッドコール
      if str then @send str

    # process.stdin起動
    process.stdin.setRawMode true
    process.stdin.resume()

  # chとkeyに応じて返すSTRを決める
  makeStrByKey: (ch, key)->
    str = ""
    if key and key.name is 'backspace'
      # backspaceやrightみたいなメタ文字は加工して投げる。
      str = "{{{backspace}}}"
    else if key and key.name is "return"
      str = "\n"
    else if key and key.name is "right"
      str = "{{{right}}}"
    else if key and key.name is "left"
      str = "{{{left}}}"
    # tabやShift-tabを投げられれば便利だと思ったけど、iOS側が対応していないらしい。
    # else if key and key.name is "tab" and key.shift
    #   str = "{{{tab}}}"
    #   console.log 'shift-tab'
    # else if key and key.name is "tab" and not key.shift
    #   str = "{{{shift-tab}}}"
    #   console.log 'tab'
    else if ch
      str = ch
    console.log str
    return str

  # 文字をiOSに送信する
  send: (str)->
    if not @updateCallback then return
    data = Buffer.from str, 'utf8'
    # 送信!
    @updateCallback data

  # 正常な終了
  quitByInput: ()->
    process.stdin.setRawMode false
    process.stdin.pause()
    process.exit(1)


module.exports = Bleno
動作確認
UUIDを変えたので前回のiOSアプリでは動作しません。
このようにBletoothのペリフェラルをテストする、動作を確認する際には、よくLightBlue Explorer( https://itunes.apple.com/us/app/lightblue-explorer-bluetooth/id557428110?mt=8 )のような汎用のBLE制御アプリを使います。
Mac側でNodejsアプリケーションを走らせます。
node index.js
次に、Light Blueでデバイスとサービスをたどり、作成したCharacteristicへ接続します。
データ形式を文字列にして、'Listen on notification'をタップして。。
動いた!
特殊文字もちゃんと制御できています。素晴らしい。さすが。
まとめ
bleno超たのしい。
次はiOS側をこれに適応した形に調整しないといけません。それもまた解説していきたいと思います。


